The Hammer & Anvil: Crash Ball Play with Decoy Runners
Master the art of defensive line manipulation using a hard-running crash ball carrier supported by deceptive decoy lines to create overlaps and front-foot ball.

Equipment Needed
1. Overview
The 'Hammer & Anvil' is a fundamental yet highly effective attacking set play designed to get your team over the gain line and disrupt the opposition's defensive structure. By committing multiple defenders to a powerful ball carrier (the Hammer) while simultaneously offering credible threats through decoy runners, you force the defense to make split-second decisions under pressure. This play is best utilized off first-phase possession (scrums or lineouts) near the center of the pitch or just outside the opponent's 22-meter line, where establishing forward momentum is critical.
2. Setup
Pitch Location: Best executed between the 10m and 22m lines, ideally from a central position to allow attacking options on both sides of the ruck.
Player Roles:
- #9 (Scrum-half): The distributor, must deliver a fast, flat pass.
- #10 (Fly-half): First receiver (optional depending on variation) or secondary playmaker.
- #8 (Number Eight) or #12 (Inside Center): The primary crash ball carrier (the Hammer). Must be a strong, dynamic runner capable of breaking the first tackle.
- #12 (Inside Center) or #13 (Outside Center): The primary decoy runner, running a hard, flat line to freeze the defense.
- #6 and #7 (Flankers): Primary support players, tasked with securing the ensuing ruck within 2 seconds of the tackle.

3. Step-by-Step Instructions
- The Call: The #9 calls the play as the forwards set the platform (e.g., at a scrum or lineout).
- Alignment: The backline aligns relatively flat to reduce the reaction time for the defense. The #8 positions themselves slightly deeper to build momentum.
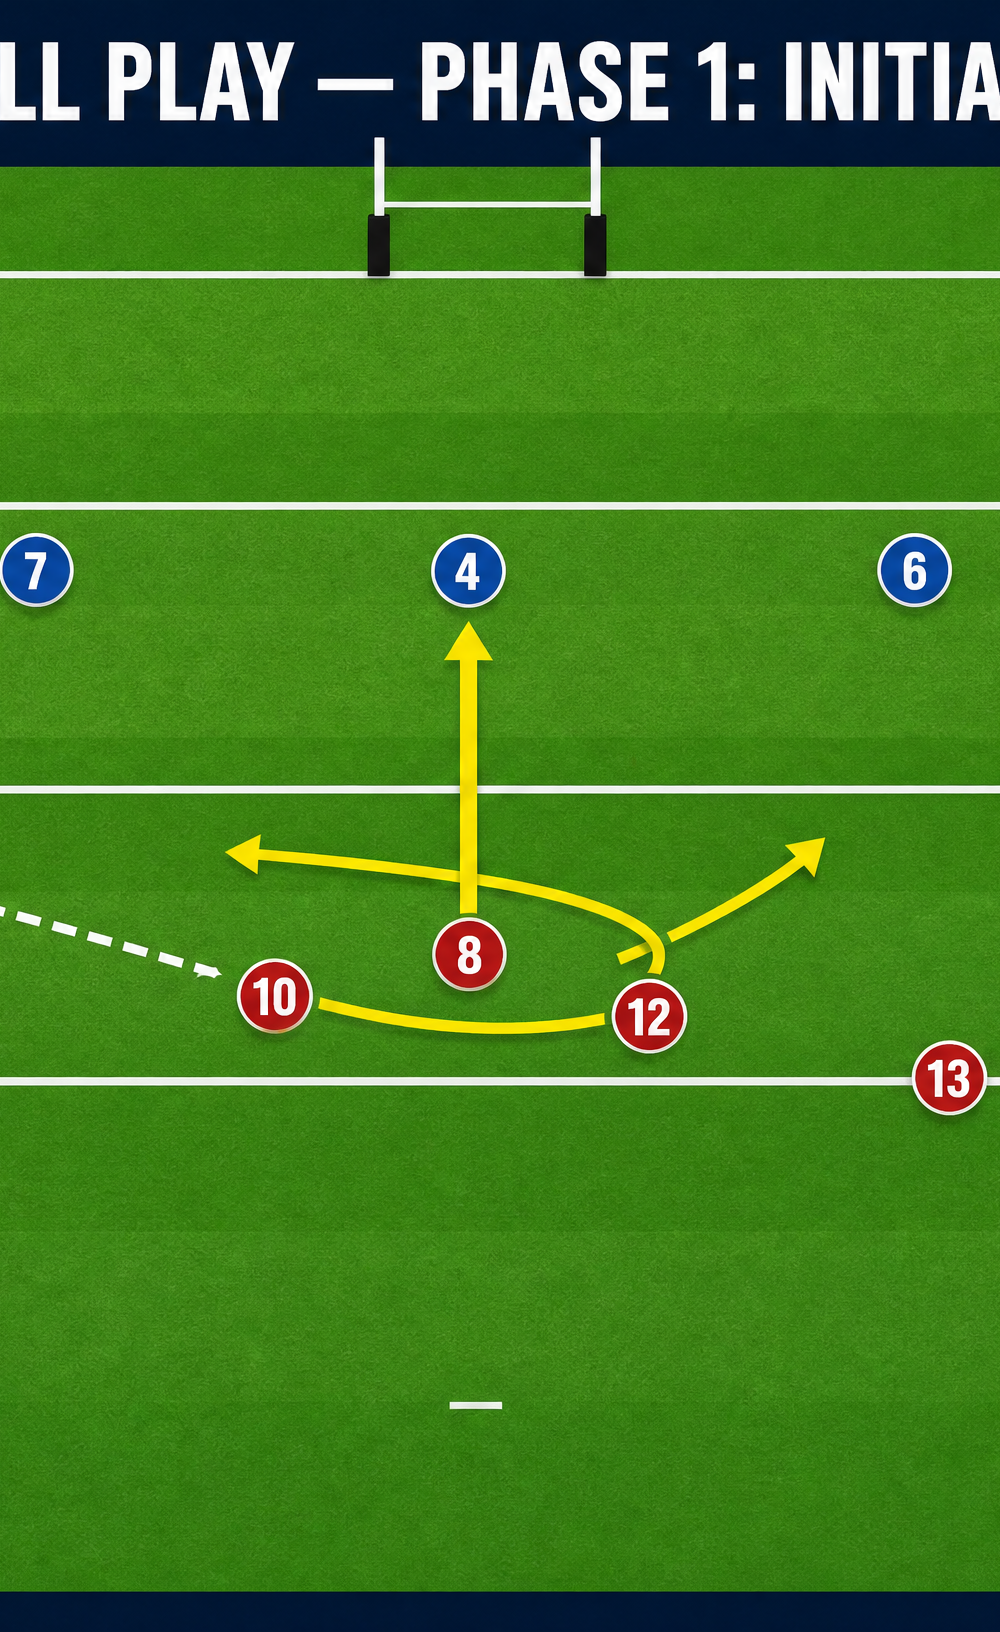
- The Decoy: As the #9 clears the ball, the #12 runs a hard, convincing line directly at the gap between the opposition's fly-half and inside center. They must call for the ball and expect to receive it.
- The Pass: The #9 bypasses the #10 (or the #10 takes the ball and pops it short) with a crisp, flat pass directly to the #8, who is running a slight unders line (cutting slightly inward) off the shoulder of the decoy runner.
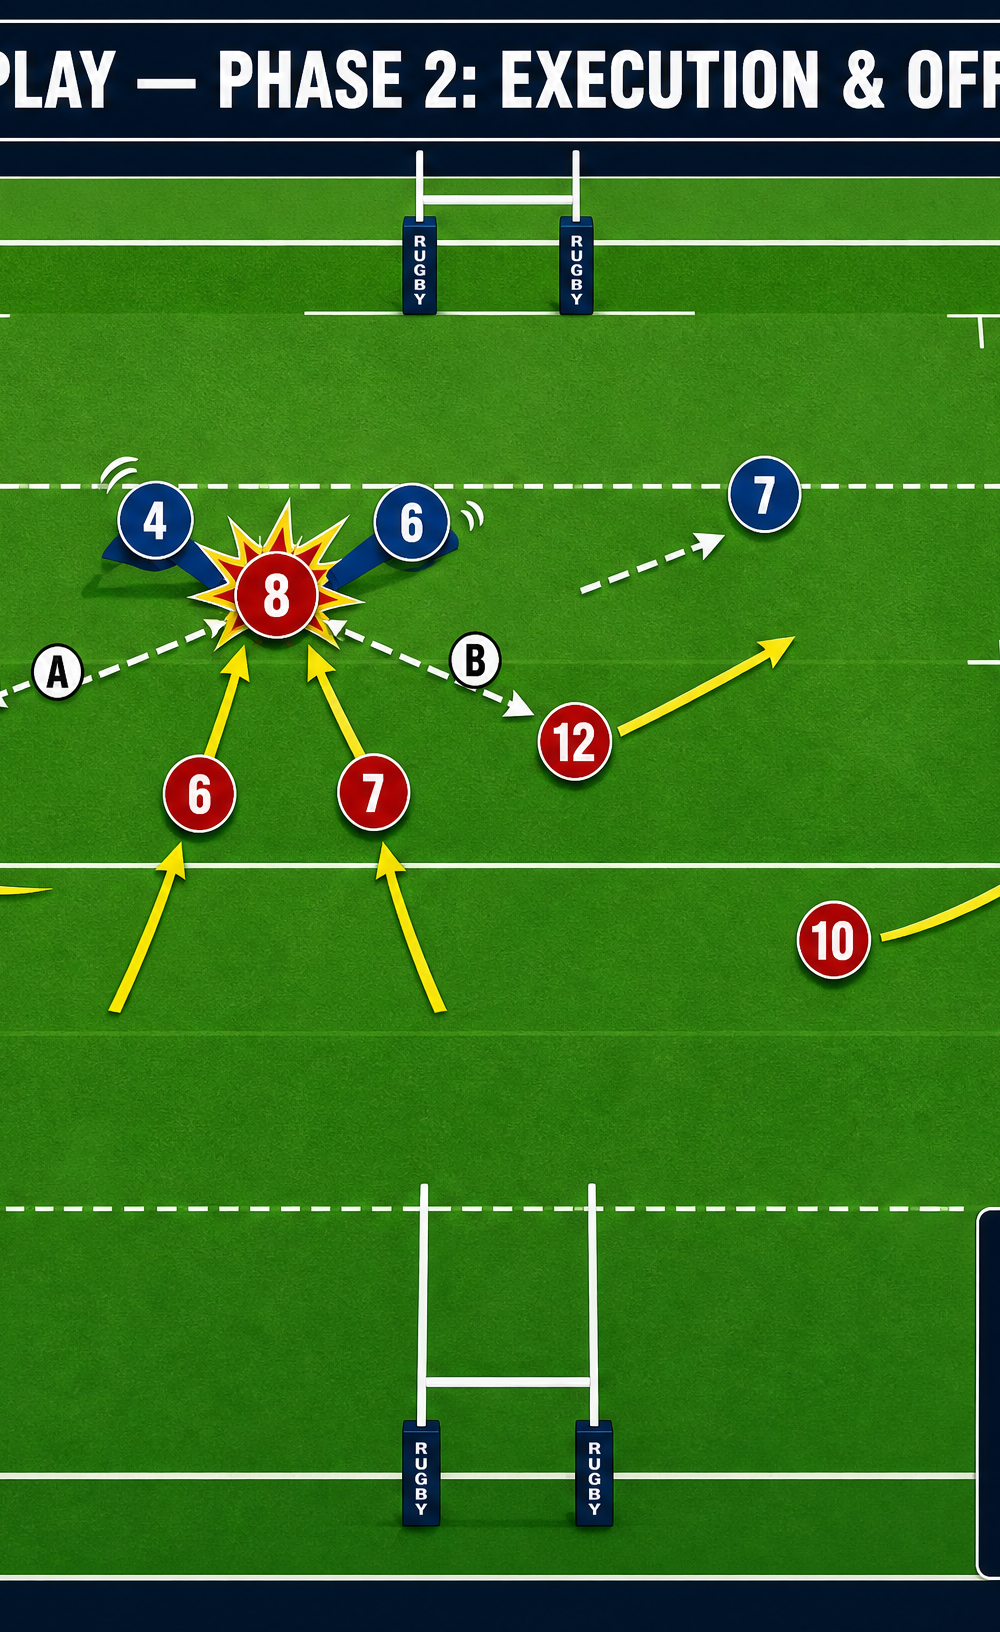
- The Contact: The #8 receives the ball at pace, targeting the inside shoulder of a specific defender to guarantee they cross the gain line. They must fight to stay on their feet and drive forward.
- The Support: The #6 and #7 must arrive at the contact area immediately. Their job is to clear out any threats and secure lightning-quick ball for the next phase.
4. Key Coaching Points
- Pace onto the Ball: The ball carrier must be at top speed when receiving the pass. A static crash ball is easily defended and often results in a turnover.
- Convincing Decoys: The decoy runner must genuinely believe they are getting the ball. Their body language, eye contact, and vocal calls are what freeze the defense.
- Targeting Weak Shoulders: The ball carrier should aim for the inside shoulder of the defender to make the tackle more difficult and facilitate an easier offload if the opportunity arises.
- Ruthless Rucking: The success of this play relies entirely on the speed of the recycle. Support players must be aggressive and precise in their clear-outs.
5. Common Mistakes
- Telegraphing the Play: The #9 or #10 looking directly at the crash ball carrier before passing, alerting the defense to the intended target.
- Lazy Decoy Lines: Decoy runners jogging or running rounded lines that don't threaten the defense, allowing defenders to drift off them and tackle the ball carrier.
- Isolation: The ball carrier outrunning their support, leading to a penalty for holding on or a turnover at the breakdown.
6. Variations & Progressions
- The Tip-On: If the defense commits heavily to the crash ball carrier, the #8 can catch and immediately tip the ball on to a support runner (e.g., a prop or lock) running a tight line off their outside shoulder.
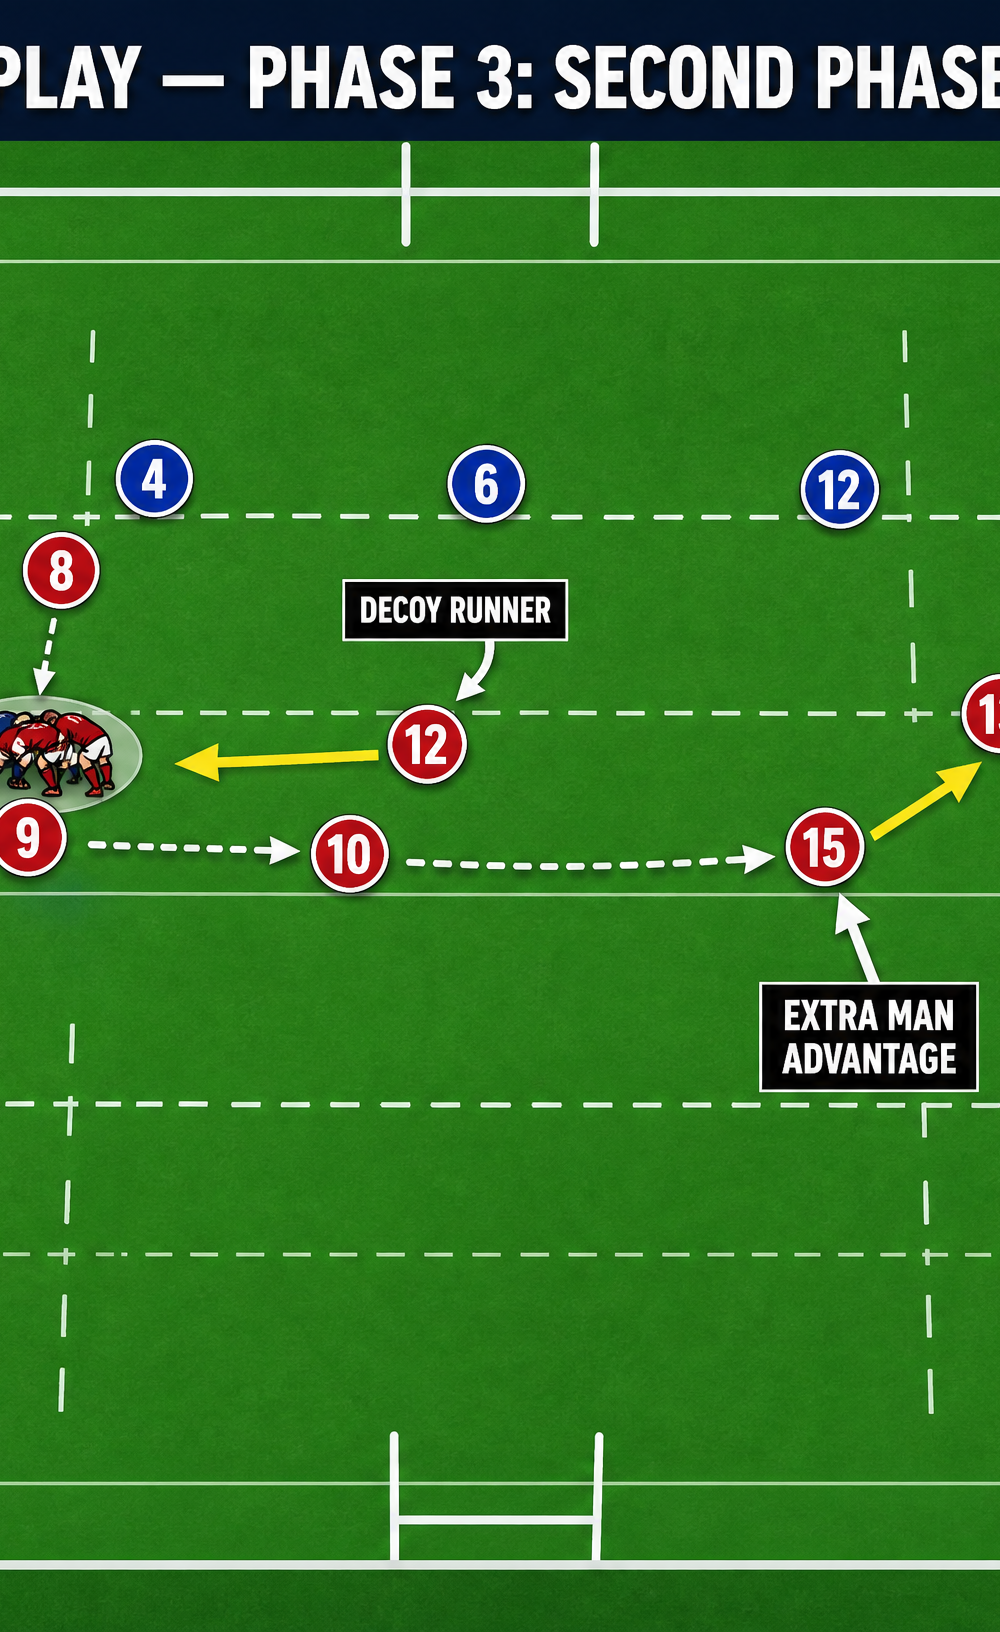
- The Pull-Back: The #9 passes to the #12 (running the decoy line), who then pulls the ball back behind the #8 to the #10 or #15 wrapping around, exploiting the space created out wide.
7. Age Adaptations
- Under 10s/12s: Focus purely on the timing of the pass and the ball carrier running straight and hard. Introduce one simple decoy runner.
- Under 14s/16s: Emphasize the importance of the support players arriving quickly and the ball carrier fighting to stay on their feet. Introduce the tip-on variation.
- Open/Seniors: Execute the play with maximum speed and precision. Utilize complex pull-back variations and read the defense to choose the best option dynamically.