Mastering Possession: The 6v2 Rondo Progression Series
Develop your players' passing speed, decision-making, and spatial awareness with this comprehensive 6v2 Rondo progression series.

Equipment Needed
1. Overview
The Rondo is the foundational building block of possession-based football. Far more than a simple warm-up game, a well-structured Rondo develops cognitive speed, technical precision under pressure, and the fundamental tactical concepts of third-man runs and positional play. This resource provides a comprehensive progression starting from a basic 6v2 overload, moving into a positional grid, and culminating in a directional possession game. By implementing this series, coaches can effectively teach players how to recognize pressing triggers, manipulate defensive blocks, and exploit space through quick ball circulation.
2. Setup
Pitch Dimensions: The drill utilizes a flexible setup depending on the progression, starting at 10m x 10m and expanding to 20m x 12m.
Equipment: 12-16 cones (preferably in two different colors to mark zones), adequate supply of footballs, and training bibs in three distinct colors (e.g., Red for attackers, Yellow for defenders, Blue for neutral/target players).
Players Required: 8 to 12 players.
Player Positions
- Attackers (Possession Team): Positioned on the perimeter or in designated zones, tasked with maintaining possession.
- Defenders (Pressing Team): Positioned internally, tasked with disrupting passing lanes and winning the ball.
- Floaters/Neutrals (Optional): Positioned centrally or on edges to provide numerical superiority for the team in possession.
3. Step-by-Step Instructions
Phase 1: Basic 6v2 Rondo
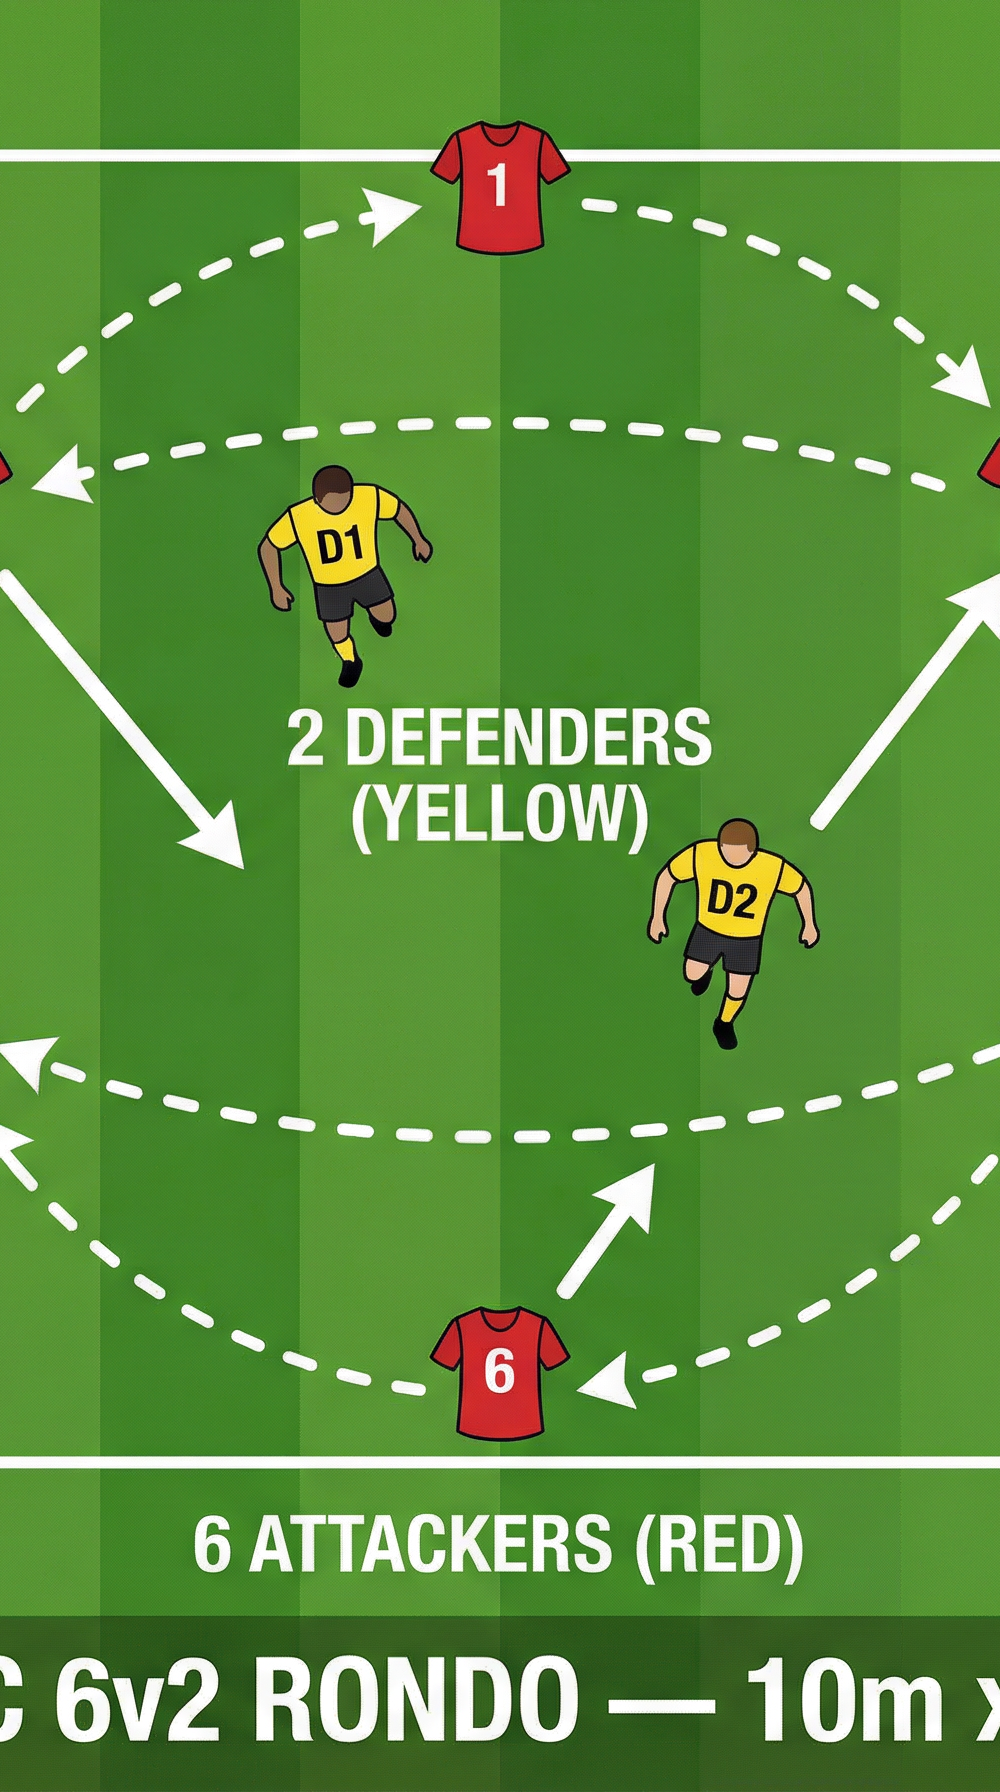
- Create a 10m x 10m square using four cones.
- Position six attacking players (Red) on the outside edges of the square.
- Place two defending players (Yellow) inside the square.
- The objective for the attacking team is to maintain possession using one or two touches.
- The defenders must work together to press the ball carrier and intercept passes.
- If a defender wins the ball or forces it out of play, they swap places with the attacker who made the mistake (or play for a set time, e.g., 2 minutes, before rotating).
Phase 2: Positional Rondo with Third-Man Combinations
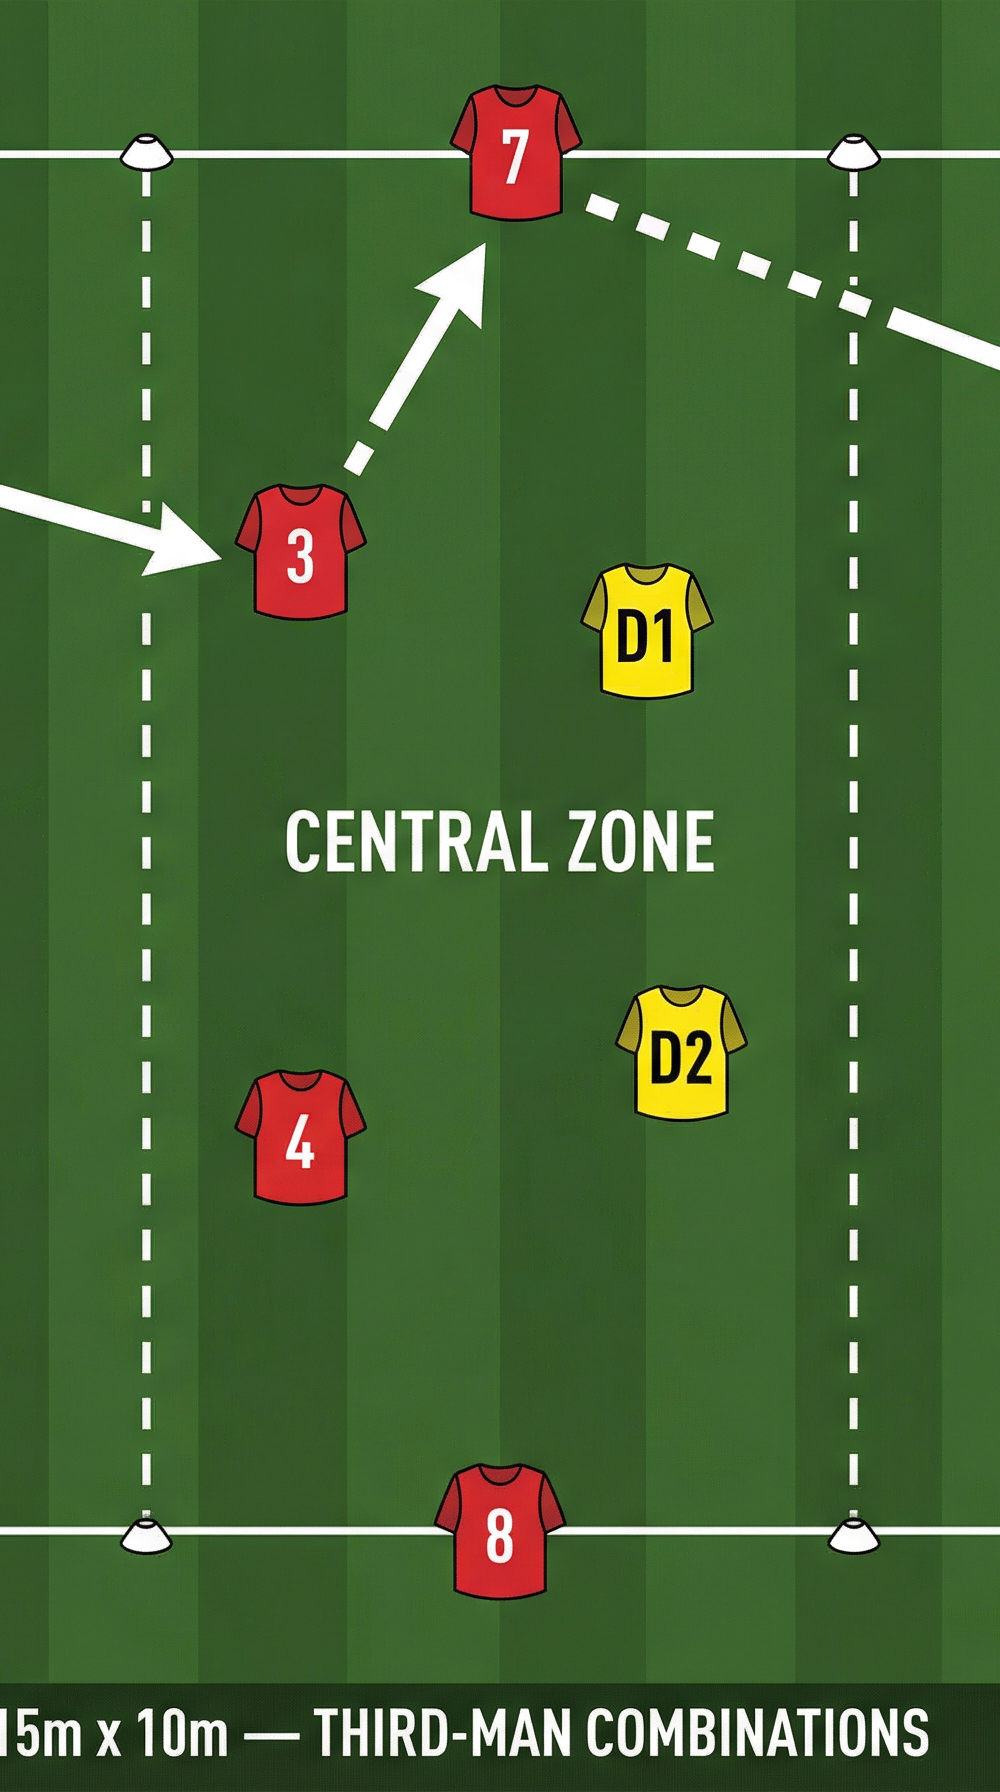
- Expand the area to a 15m x 10m grid, divided into three equal 5m vertical zones (Left, Central, Right).
- Position two attackers in the Left Zone, two in the Central Zone, and two in the Right Zone. Add two 'Floater' players on the top and bottom edges of the grid.
- Place two defenders in the Central Zone.
- The attacking team must circulate the ball across the zones. The defenders attempt to intercept.
- Emphasize "third-man" combinations: Player A passes to Player B, who immediately lays it off to Player C (often a Floater) in a better position to switch the play.
- Defenders can only press in the Central Zone initially, then progress to allowing one defender to press into the wide zones upon a trigger (e.g., a poor touch).
Phase 3: Directional Rondo with End Zones
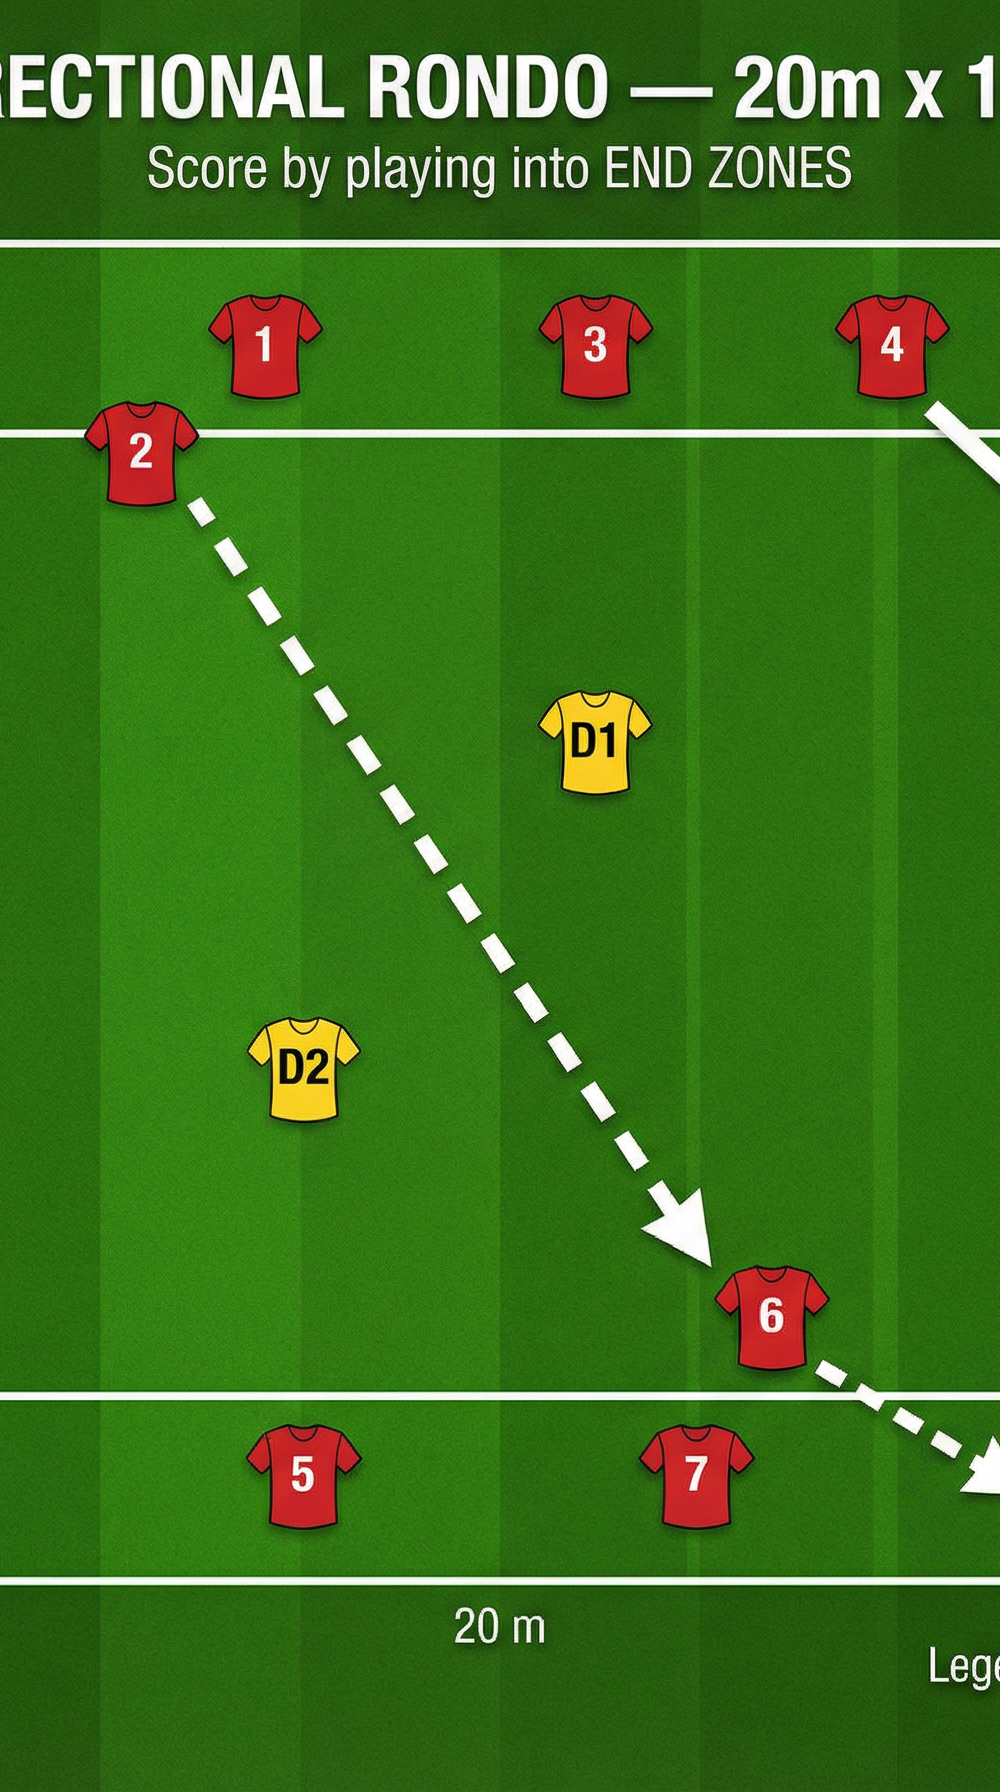
- Create a 20m x 12m playing area. Mark a 3m deep 'End Zone' at both ends of the grid.
- Position players around the central area, with one target player in each End Zone.
- Two defenders operate in the central area.
- The attacking team must maintain possession and attempt to play a penetrating pass to a target player in one of the End Zones.
- Once the ball reaches an End Zone, the team must transition and attempt to score in the opposite End Zone.
- This phase introduces directional play and transition, simulating playing out from the back or breaking through a midfield line.
4. Key Coaching Points
- Body Shape and First Touch: Players must receive the ball with an open body shape, allowing them to see the entire pitch and take their first touch away from pressure.
- Pacing and Weight of Pass: Passes must be firm and accurate to the recipient's safe foot (the foot furthest from the defender).
- Angles of Support: Adjacent players must constantly adjust their positioning to provide clear, unblocked passing lanes for the ball carrier.
- Anticipation and Scanning: Players should scan the field before receiving the ball to identify their next pass, enabling quick, one-touch play.
- Defensive Coordination: The two defenders must work in tandem—one pressing the ball carrier (first defender) while the other covers the most dangerous passing lanes (second defender).
5. Common Mistakes
- Standing Static: Attackers remaining stationary on the lines rather than adjusting their feet to create better passing angles.
- Forcing the Pass: Attempting risky, penetrating passes when the defensive block is compact, rather than circulating the ball to shift the defenders.
- Poor Defensive Shape: Defenders chasing the ball individually rather than pressing as a cohesive unit, leaving gaps in the middle.
- Taking Too Many Touches: Slowing down the play, allowing the defenders time to recover and press effectively.
6. Variations & Progressions
- Touch Restrictions: Limit attackers to one touch to increase the speed of play and force quicker decision-making.
- Split Passes Count Double: Award extra points for successfully playing a pass that splits the two defenders, encouraging penetrating vision.
- Defensive Overload: Progress to a 6v3 or 5v3 to increase the pressure on the attacking team and demand higher technical execution.
7. Age Adaptations
- Under 8 - Under 10: Increase the grid size (e.g., 12m x 12m or 15m x 15m) to give players more time and space. Focus primarily on the basic 6v2 setup and basic passing technique.
- Under 12 - Under 14: Introduce the touch restrictions and the positional grid (Phase 2). Emphasize scanning and body shape.
- Under 16 - Open: Utilize the full directional progression (Phase 3) with strict one or two-touch limits. Demand high intensity in both possession and pressing phases.