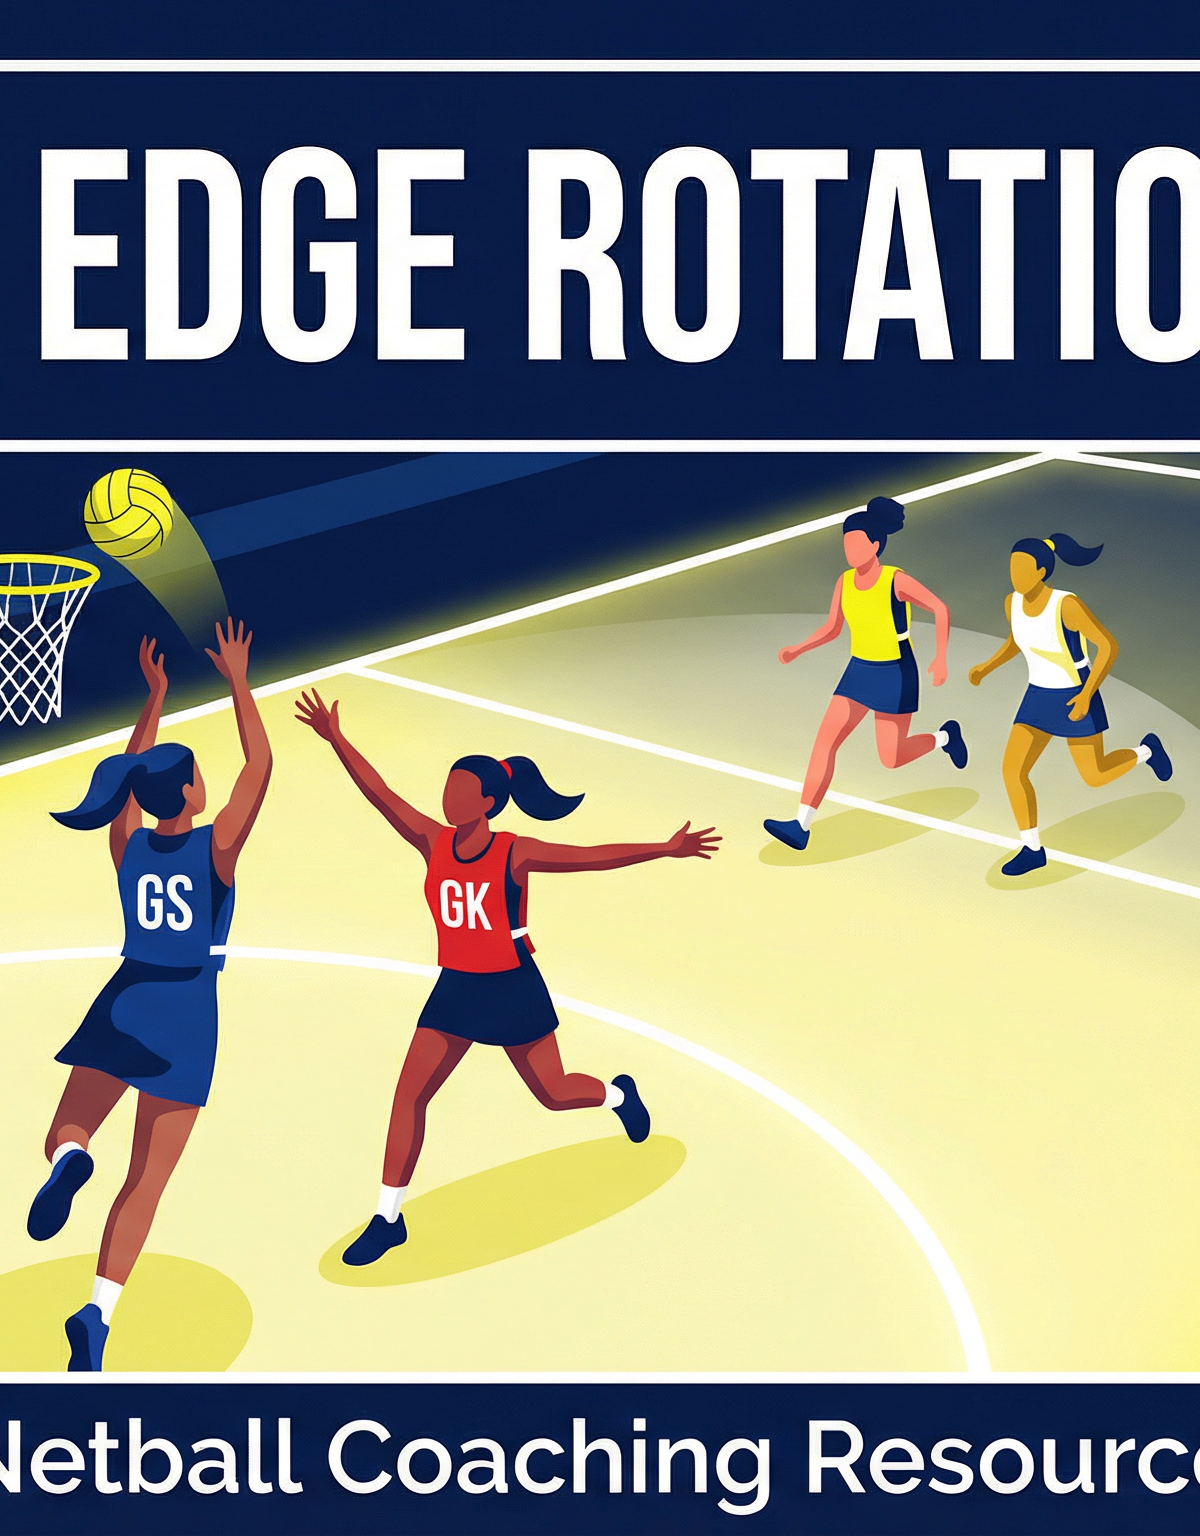
Circle Edge Rotation Play: Creating Space and Scoring Opportunities in the Attacking Third
Master the Circle Edge Rotation Play to systematically dismantle structured defences, create clean leads to the circle edge, and deliver high-percentage shooting opportunities for your Goal Shooter.
Equipment Needed
Overview
The Circle Edge Rotation Play is a structured attacking set play designed to overload the defensive circle edge by coordinating simultaneous movement from the Goal Shooter (GS), Goal Attack (GA), and Wing Attack (WA). The play exploits the natural tension defenders face when two attacking players rotate in opposite directions around the shooting circle — one player must be left momentarily free, and that is your scoring window.
This play is most effective when your team has possession in the attacking third and the defence is set and stationary. It works particularly well from a held ball situation, a penalty pass near the circle edge, or a restart after a goal. At its core, the play is about timing, communication, and decisive leading — three skills that improve rapidly with deliberate practice.
When to use it: Deploy this play when the defensive unit is organised and man-marking tightly. The simultaneous rotation creates a crossing action that forces defenders to make split-second decisions, and disciplined attackers will punish any hesitation.
Setup
Equipment
- 1 netball (match ball or training ball)
- Cones or markers to define the attacking third boundary (optional)
- Bibs in two contrasting colours for attackers and defenders
- Full court or minimum attacking-third space (15.25m wide × 10.25m deep)
Court Setup
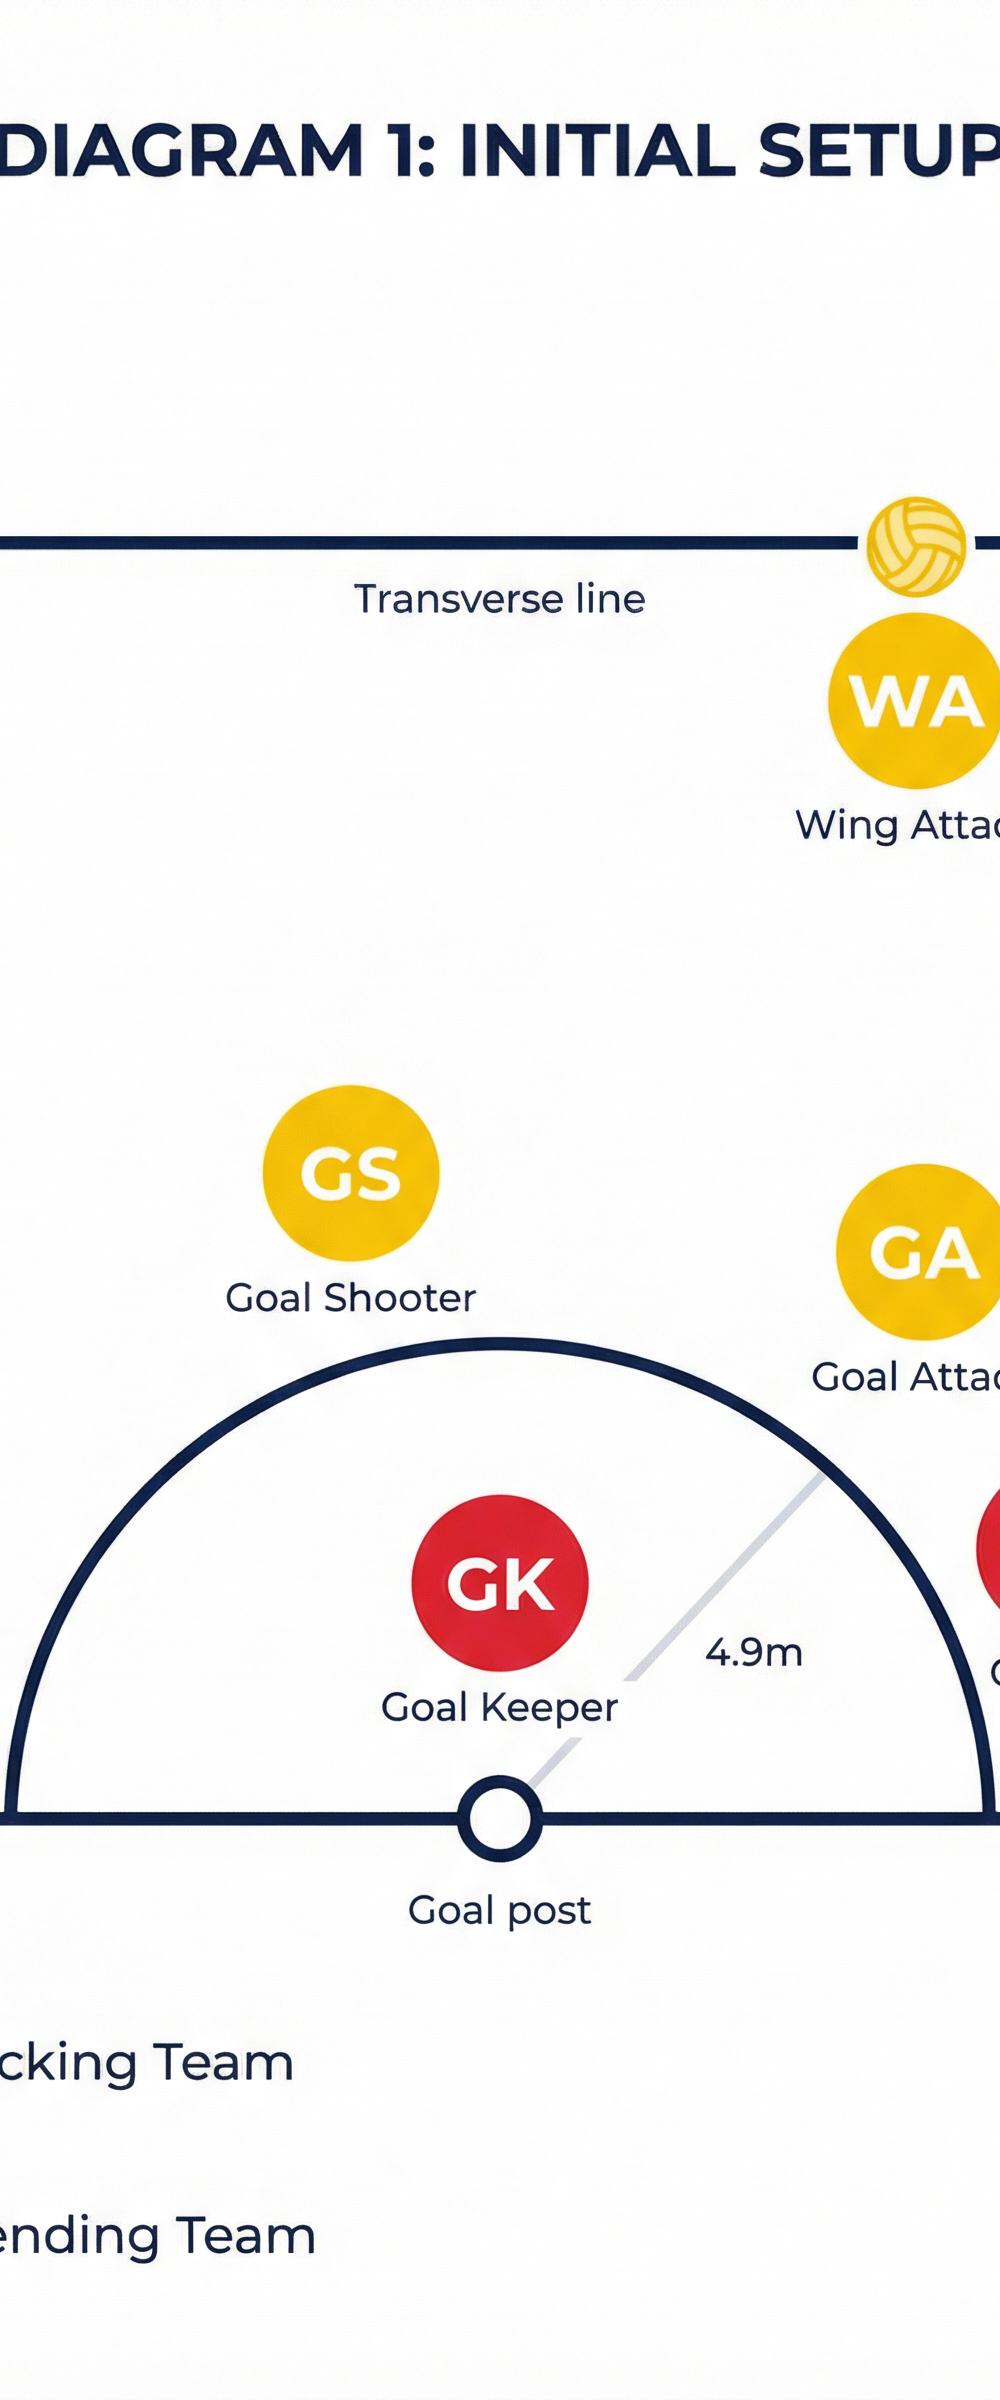
This play is run entirely within the attacking third of the court. The shooting circle has a radius of 4.9m. Players should be familiar with the circle edge as a reference line — it is the boundary that separates shooting-eligible positions (GS and GA) from the rest of the court.
Starting Player Positions
| Position | Abbreviation | Starting Location |
|---|---|---|
| Goal Shooter | GS | Inside the circle, left of centre, approximately 2–3m from the post |
| Goal Attack | GA | On the circle edge at the right-hand side (3 o'clock position) |
| Wing Attack | WA | Just outside the circle edge, top-right, near the transverse line |
| Goal Keeper | GK | Inside the circle, marking GS |
| Goal Defence | GD | On the circle edge, marking GA |
The WA holds the ball as the play initiates. GS and GA are in their starting positions as described above. The play is triggered by a pre-agreed signal — either a verbal call (e.g. "rotate") or a visual cue such as the WA raising their non-dominant hand.
Step-by-Step Instructions

Step 1 — Set the defence (2–3 seconds)
Before initiating, GS and GA hold their starting positions for 2–3 seconds. This allows the defending GK and GD to settle into a marking stance and commit to their positions. Patience here is critical — rushing the initiation before defenders are set reduces the effectiveness of the rotation.
Step 2 — GS drives across the circle (on the signal)
On the agreed signal, GS makes a strong, purposeful drive from the left side of the circle to the right side, cutting across the front of the post. This movement must be explosive — a minimum of 3–4 metres in 2 seconds. The GS is not looking for the ball on this drive; the purpose is to drag the GK across the circle and open up space on the left side.
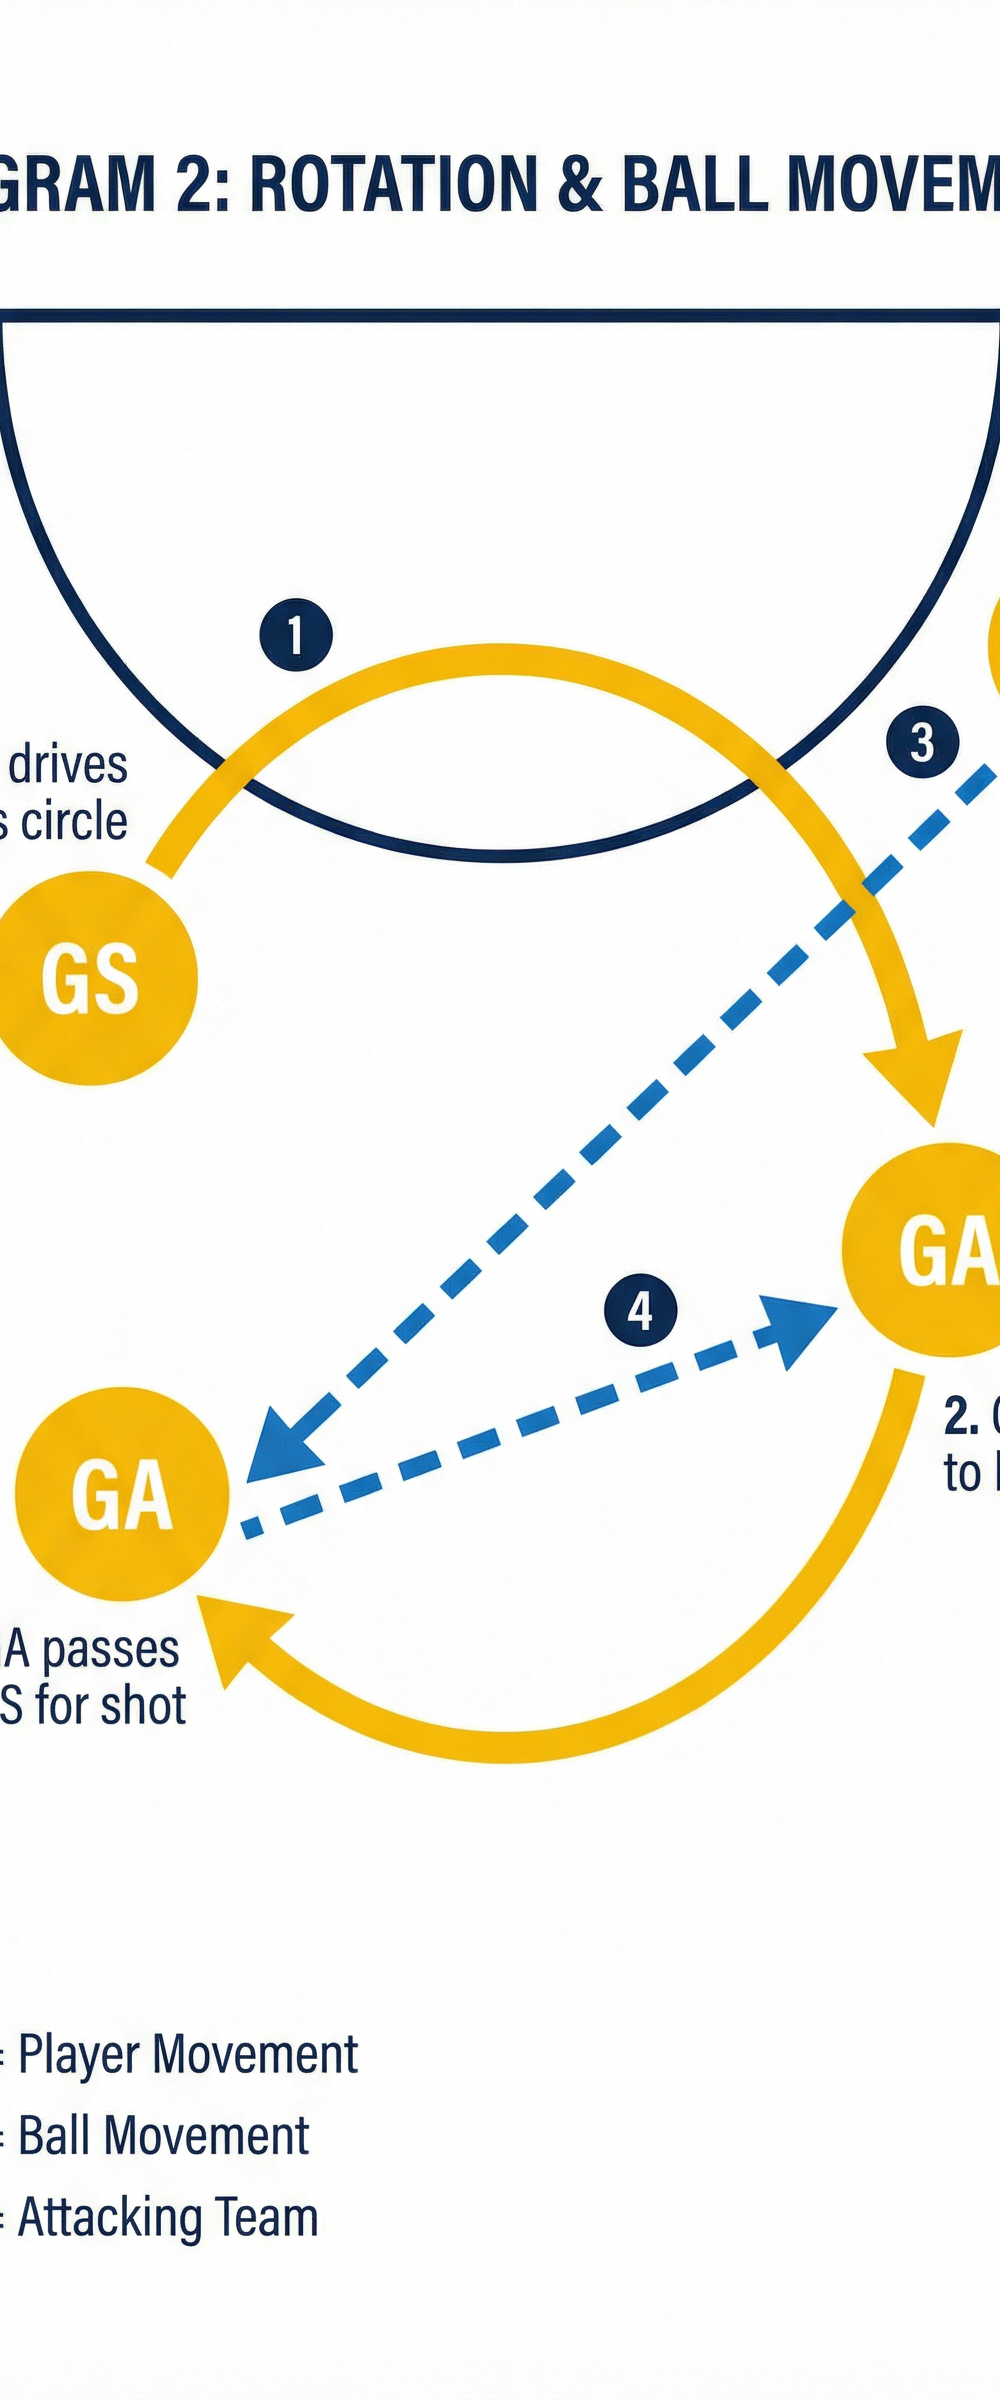
Step 3 — GA leads off the circle edge to the left
Simultaneously with the GS drive, GA pushes off their right foot and leads sharply to the left side of the circle edge — the space vacated by GS's movement. This lead should be a direct, linear movement of approximately 3–4 metres. GA must time their arrival at the left circle edge to coincide with the WA's release of the ball.
Step 4 — WA delivers the feed to GA
As GA arrives at the left circle edge, WA executes a flat, fast pass — ideally a chest pass or a short bounce pass — directly into GA's leading hands. The pass should be delivered to the front of the lead, not behind. WA must read GA's body position and release the ball early enough that GA does not have to slow down to receive it.
Step 5 — GA catches and immediately looks for GS
On receiving the ball, GA has a maximum of 3 seconds. Their first look is immediately to the right side of the circle where GS has completed the rotation. If GS has created separation from GK — even half a metre — GA delivers a quick pass into GS's hands for the shot. The pass should be above waist height to allow GS to move directly into their shooting action.
Step 6 — GS receives and shoots
GS receives the ball on the right side of the circle, ideally within 2–3 metres of the post. GS should be balanced and ready to shoot in one fluid motion. If GS is not free, GA holds possession and the team resets to a secondary option.
Key Coaching Points

1. The signal must be clear and consistent. Every player in the attacking unit must know the trigger. Spend time in training establishing a reliable cue — verbal or visual — and rehearse it until it is automatic. A hesitant or missed signal breaks the timing of the entire play.
2. GS drives with purpose, not just movement. The GS rotation is a decoy, but it must be convincing. If GS jogs across the circle, GK will simply track them without committing. Coach GS to accelerate hard, as if they genuinely expect the ball, so GK is forced to follow.
3. GA's lead is a straight line, not a curve. A curved lead telegraphs the destination to the defender. GA should push off hard and drive directly to the target space. The first two steps are the most important — they must be explosive and decisive.
4. WA must pass to the space, not to the player. The most common error from the feeder is waiting until GA has stopped moving before releasing the ball. Coach WA to read the lead and deliver the ball to where GA is going, not where they are. A well-timed pass into the lead is almost impossible to intercept.
5. GA's decision must be immediate. Once GA receives the ball, there is no time for hesitation. Coach GA to have their head up before they catch the ball, already scanning for GS's position. The pass to GS should be released within one second of receiving.
6. Timing is everything — the play lives and dies on synchronisation. Run the play without defenders first, counting aloud the seconds at each step. Once players can execute the timing consistently without opposition, introduce passive defenders, then active defenders.
Common Mistakes

Mistake 1 — GS and GA moving at the same time but in the same direction. This is the most fundamental error and usually occurs when players have not clearly understood their roles. If both players move to the same side of the circle, they crowd the space and make the defender's job easy. Reinforce the concept of opposite rotations repeatedly in early sessions.
Mistake 2 — WA holding the ball too long. When WA waits for GA to be completely free before passing, the window of opportunity closes. The defending GD has time to recover. Drill WA to commit to the pass as GA makes the first step of the lead, not after GA has arrived.
Mistake 3 — GA catching and holding instead of passing. Some players instinctively hold the ball and look around once they receive it. In this play, GA's role is to be a link player, not a decision-maker. The pass to GS should be a reflex action. Use repetition drills where GA is penalised in training for holding longer than 1.5 seconds.
Mistake 4 — GS stopping their drive before reaching the right side of the circle. If GS slows down or stops mid-circle, GK can recover and still mark the final position. GS must complete the full rotation to the right side before looking for the ball, even if it feels like the ball is not coming.
Mistake 5 — Poor footwork on the catch. Players who catch the ball off-balance or with incorrect footwork cannot shoot or pass efficiently. Emphasise landing on the outside foot when receiving on the move, and ensure GS practises catching on the right side of the circle from a moving lead.
Variations & Progressions

Variation 1 — Reverse Rotation (Mirror Play)
Run the same play but with GS starting on the right side of the circle and driving to the left, while GA leads from the left circle edge to the right. This mirror version keeps defences guessing and prevents GK and GD from anticipating the direction of rotation. Introduce this variation once the base play is consistent, and alternate between the two versions during a game.
Variation 2 — Double Feed Option
Add a second feed option by positioning the Centre (C) at the top of the circle edge as a secondary receiver. If GD successfully denies GA's lead, WA pivots and feeds C, who has stepped into the circle edge from the centre third. C then looks for GS or GA from a central position. This variation requires the Centre to read the play and time their entry into the attacking third precisely.
Progression 1 — Add a Passive Defender on WA
Once the play is running cleanly without opposition, add a passive defender on WA to force WA to create space before feeding. This develops WA's ability to use a dodge or a change of direction to get free before delivering the pass, making the play more game-realistic.
Progression 2 — Full Opposition with Intercept Bonus
Run the play against a full defensive unit (GK, GD, and a defender on WA). Award the defending team a point for every interception and the attacking team a point for every successful shot. This game-based pressure environment accelerates learning and builds the mental resilience required to execute the play under match conditions.
Age Adaptations

Under 10 / Under 12 — Simplified Two-Player Version
Remove the WA and run a simplified version with just GS and GA. GA starts with the ball outside the circle, GS drives across the circle, and GA feeds GS on the right side for a shot. Focus on the concept of creating space through movement rather than the full three-player rotation. Use a larger circle or reduce the distance of the drive to suit younger players' physical capabilities.
Under 14 — Introduce the Full Play with Reduced Defender Pressure
Under 14 players can handle the full three-player version. Begin with the play run against no defenders (shadow play), then introduce one passive defender on GA only. Emphasise the timing and communication aspects. Allow players to self-coach by pausing the drill and asking them to identify what worked and what did not.
Under 16 / Open — Full Opposition with Tactical Variations
At this level, introduce both the base play and the reverse rotation in the same session, and challenge players to read the defensive setup and choose which version to run. Add the double feed option and encourage players to develop their own read-and-react decision-making within the framework of the play. Discuss the play in the context of match situations — when to use it, when to abandon it, and how to reset if it breaks down.