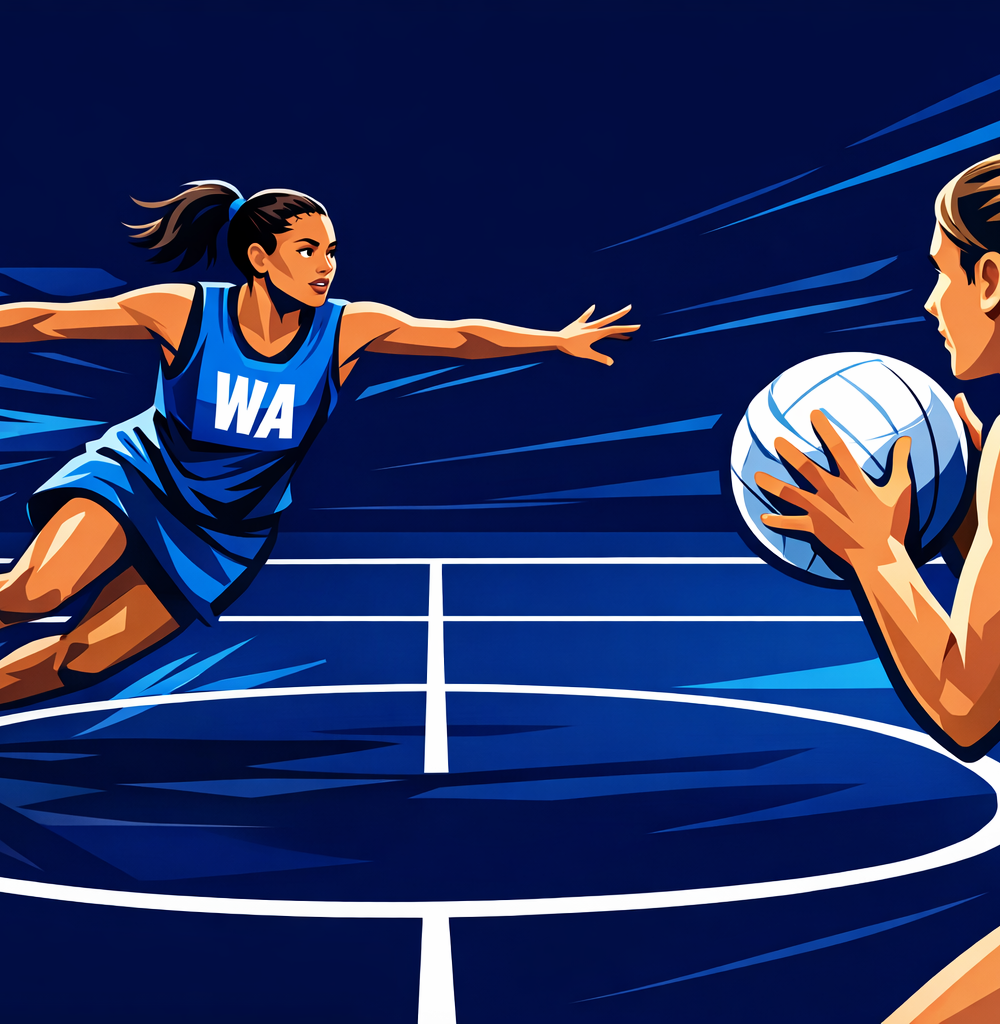
Mastering the Dodge and Lead: Creating Space Under Pressure
Teach your attackers how to execute sharp, explosive dodges to lose their defender and drive into open space for the perfect pass.

Equipment Needed
1. Overview
The ability to effectively dodge and lead is one of the most critical attacking skills in Netball. When defenders are tightly marking (often referred to as 'man-on-man' defense), attackers must create their own space to receive the ball safely. This drill focuses on teaching players how to use a deceptive initial movement (the fake) to commit the defender, followed by an explosive, sharp change of direction (the cut) into open space. It builds from a basic 1v1 setup into a full 3v3 attacking sequence that mimics match-play scenarios.
2. Setup

- Equipment: 1 Netball, 6 cones (optional, to mark starting zones or boundaries), bibs (Attacking and Defending colors).
- Court Setup: Use the Centre Third and one Attacking Third of a standard 30.5m x 15.25m Netball court.
- Player Positions:
- 1 Feeder (C)
- 3 Attackers (WA, GA, GS)
- 3 Defenders (WD, GD, GK)
3. Step-by-Step Instructions

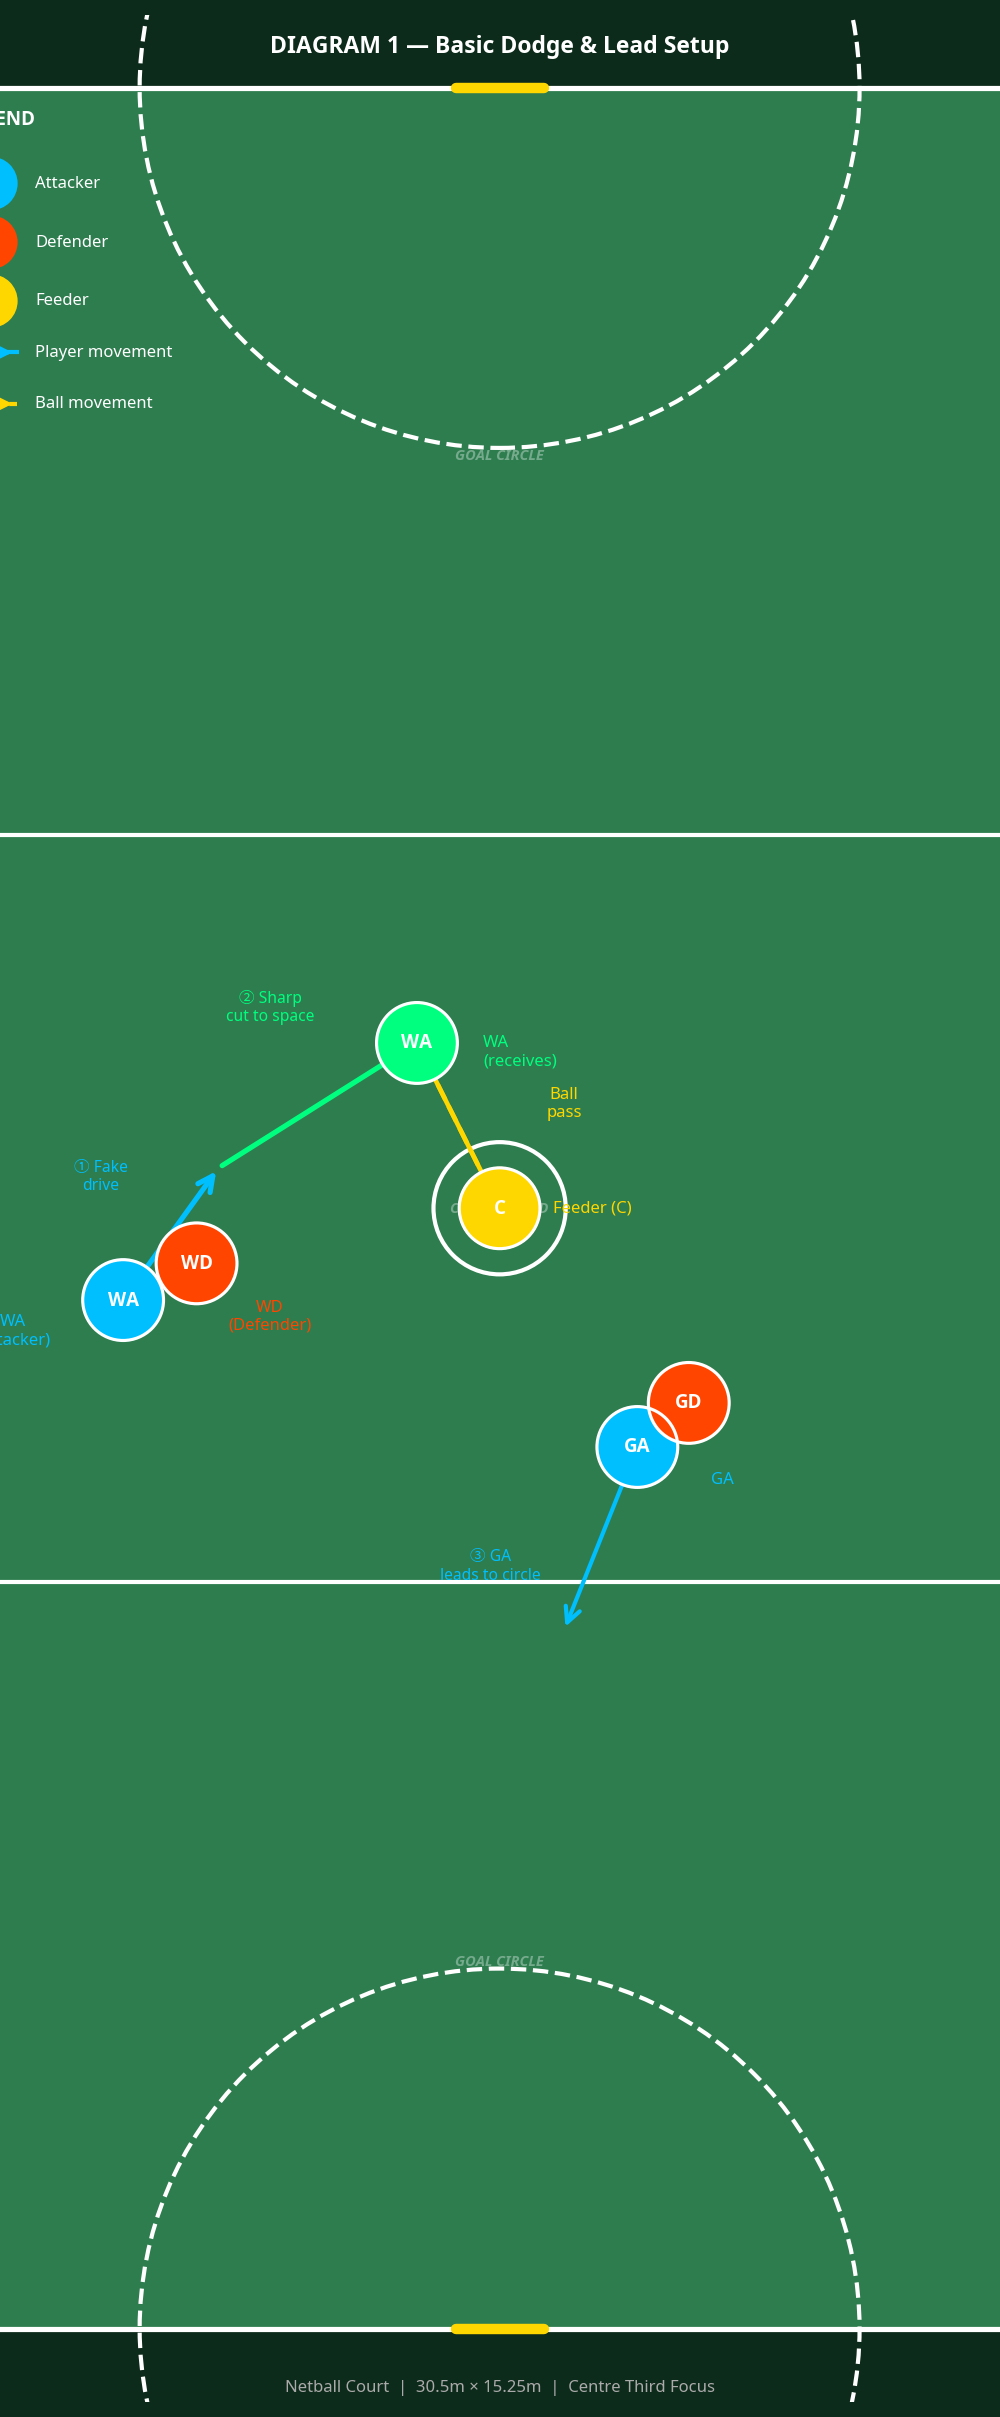
Phase 1: Basic Dodge and Lead (Centre Third)
This initial phase focuses on the fundamental mechanics of the dodge.
- Starting Position: The Feeder (C) stands in the centre circle with the ball. The Attacker (WA) starts wide near the sideline in the centre third, tightly marked by the Defender (WD).
- The Fake: The WA initiates the movement by driving hard for 1-2 steps directly toward the defender or the sideline to draw the WD's momentum in that direction.
- The Cut: Planting their outside foot firmly, the WA pushes off explosively, changing direction sharply to cut into the open space toward the middle of the court.
- The Pass: As the WA cuts into the open space, the C delivers a flat, hard chest pass out in front of the WA.
- The Catch: The WA receives the ball on the run, landing in a balanced 1-2 step or jump stop, ready to make the next pass.
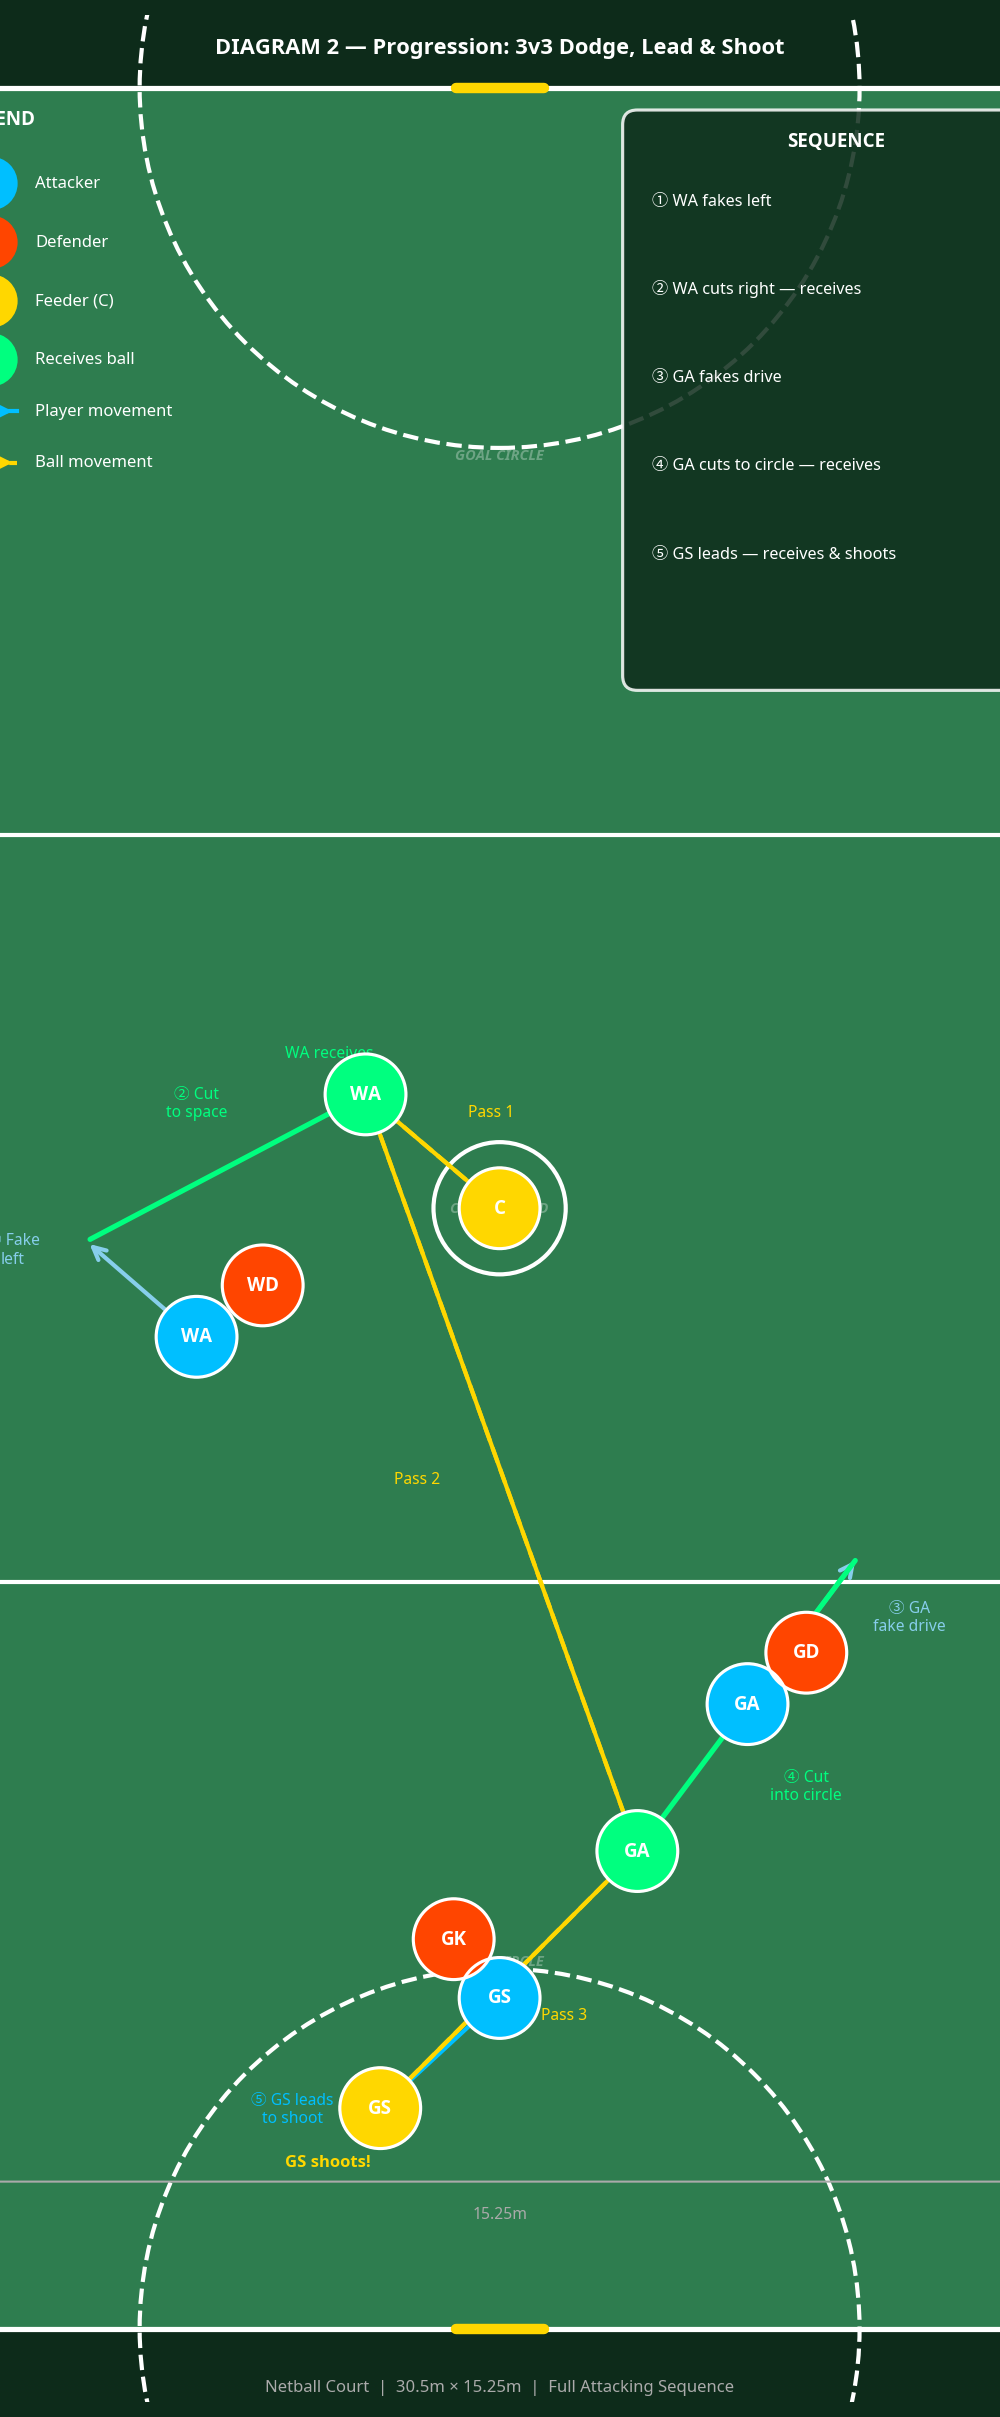
Phase 2: Progression to 3v3 Attacking Sequence
Once the basic movement is mastered, progress to a linked attacking sequence.

- First Phase (WA): As in Phase 1, the WA fakes left and cuts right to receive the initial pass from the C.
- Second Phase (GA): As the WA receives the ball, the GA (starting near the transverse line) fakes a drive down the court, then cuts sharply back toward the top of the goal circle.
- Second Pass: The WA turns and delivers a swift pass to the leading GA.
- Third Phase (GS): Anticipating the pass to the GA, the GS holds their position against the GK, then makes a strong lead toward the post or open space within the circle.
- The Finish: The GA feeds the GS, who receives the ball in a balanced shooting position and takes the shot.
4. Key Coaching Points
- Sell the Fake: The initial movement must be convincing. Players should use their head, shoulders, and eyes to make the defender believe they are driving in that direction.
- Explosive Push-Off: The change of direction must be sharp. Emphasize planting the outside foot hard and pushing off powerfully to create immediate separation.
- Angle of the Cut: The cut should be at a sharp angle (ideally V-cut), not a rounded curve, which allows the defender to recover easily.
- Timing is Everything: The attacker should initiate their dodge just as the feeder is ready to release the ball. Moving too early closes the space; moving too late results in a held ball.
- Pass into Space: Feeders must pass to where the attacker is going, not where they are. The ball should lead the attacker into the open space.
5. Common Mistakes
- Rounding the Cut: Attackers run in an arc instead of planting and pushing off, allowing the defender to stay on their hip.
- Weak Fakes: The initial movement is too slow or unconvincing, so the defender doesn't shift their balance.
- Looking Away: The attacker turns their head away from the feeder during the dodge, missing the optimal passing window.
- Passing Too Late: The feeder waits for the attacker to be completely open and stationary before passing, allowing the defender time to recover and intercept.
6. Variations & Progressions

- Add a Second Dodge: If the defender recovers well on the first cut, teach attackers to immediately execute a second dodge (a double dodge) to shake them off.
- Constrained Space: Use cones to narrow the working area, forcing attackers to be more precise and explosive with their movements.
- Continuous Flow: Have players rotate positions continuously (Attacker -> Defender -> Feeder -> Line) to keep the drill moving at a high intensity.
7. Age Adaptations

- Under 8 / Under 10: Focus purely on the footwork of the dodge without defenders first. Use cones as static 'defenders' to practice planting and pushing off.
- Under 12 / Under 14: Introduce passive defenders (arms down, only shadowing movement) before moving to full 1v1 pressure.
- Under 16 / Open: Run the full 3v3 progression at match intensity. Emphasize the timing and connection between the three attacking phases.