Penalty Corner Attack Play: The 'Blindside Strike'
A high-percentage attacking set play designed to manipulate the defensive line from a 5-metre penalty, creating overlaps on the blindside or a direct strike channel for your backline.

Equipment Needed
1. Overview
The 'Blindside Strike' is a precision set play designed for attacking penalties awarded within 10 metres of the opposition's try line, particularly near the touchline. This play achieves two primary objectives: first, it forces the defense to commit heavily to a perceived forward drive (maul or pick-and-go), and second, it rapidly shifts the point of attack to exploit the resulting space.
Use this play when you need a guaranteed try-scoring opportunity and the defense is anticipating a traditional forward-dominated attack. It is highly effective in the final quarter of the match when defensive fatigue sets in and decision-making becomes sluggish.
2. Setup
Pitch Setup:
- Location: 5 to 10 metres from the opposition try line, within 5 metres of the touchline.
- Pitch Dimensions: Standard 100m x 70m.
Player Positions:
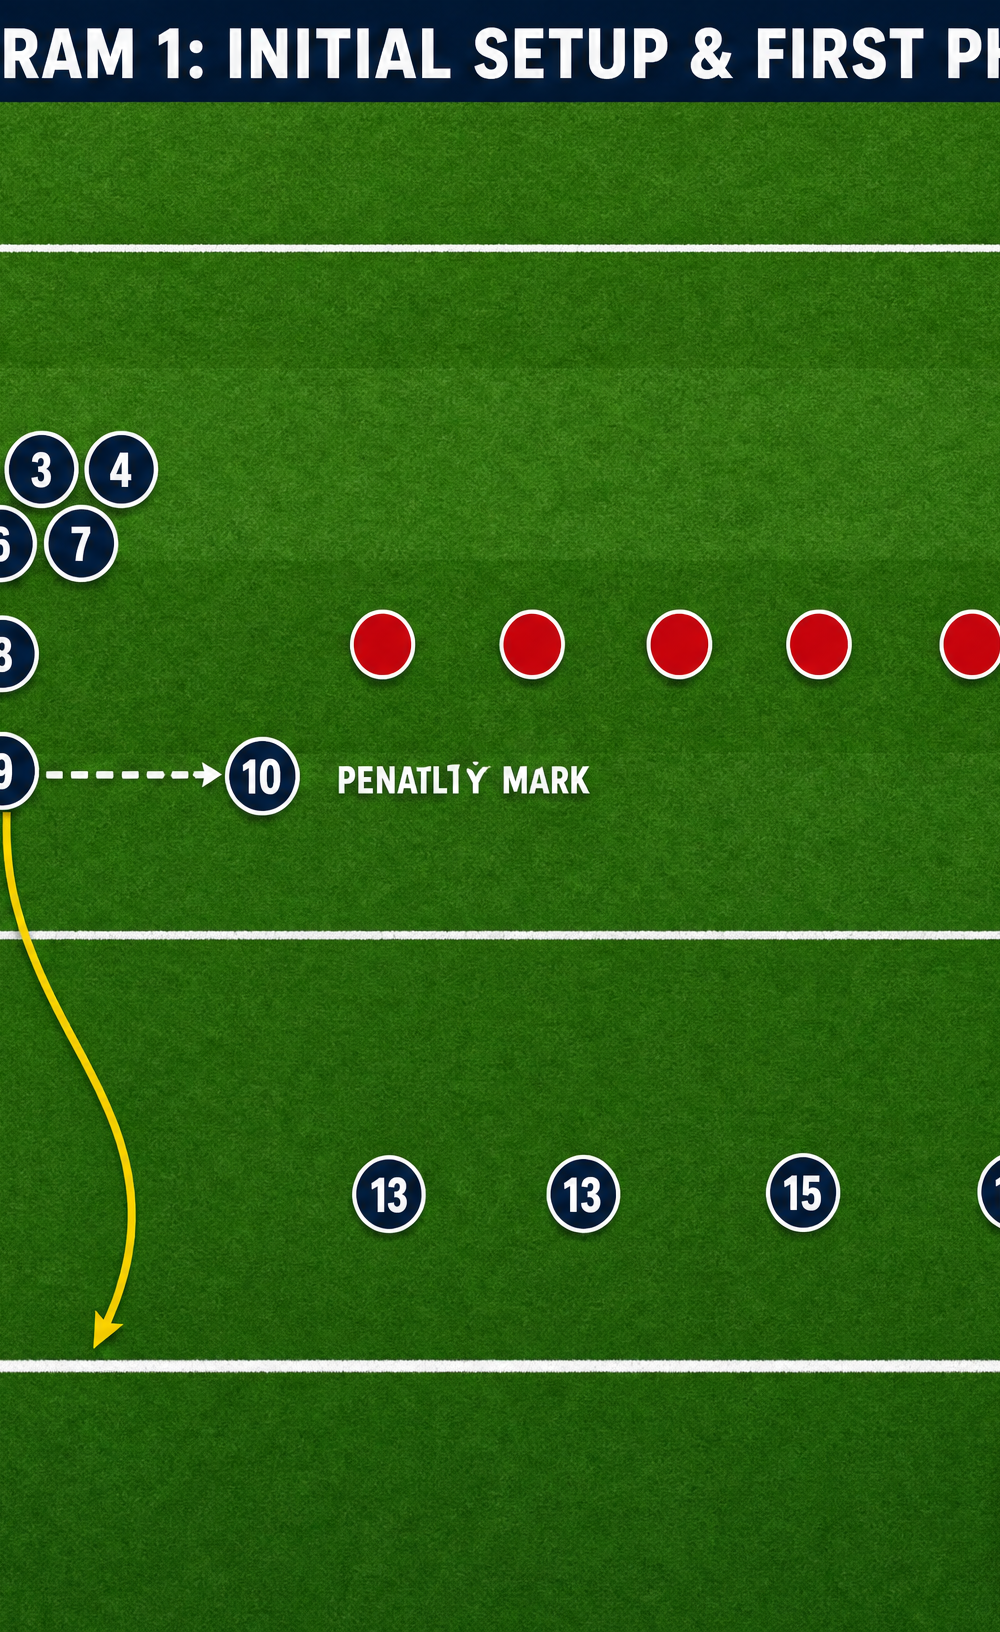
- 9 (Scrum Half): Positioned at the penalty mark, ready to tap and pass.
- 10 (Fly Half): Standing 5 metres infield from the 9, at the same depth.
- 8 (Number 8): Positioned 1 metre directly behind the 9, acting as a primary decoy.
- 1, 2, 3, 4, 5, 6, 7 (Forwards): Formed in a tight, compact pod 3 metres behind the 9, simulating a driving maul setup.
- 11, 12, 13, 14, 15 (Backs): Fanned out across the pitch at a depth of 15 metres, holding their width to stretch the defense.
3. Step-by-Step Instructions
- The Tap and Decoy: The 9 taps the ball to initiate the play. Simultaneously, the 8 accelerates on a hard, aggressive line directly toward the touchline corner, shouting for the ball to draw the attention of the blindside defenders.
- The Forward Surge: The forward pod (1-7) immediately surges forward, binding tightly and driving straight toward the try line, creating a massive visual distraction and forcing the inside defenders to brace for contact.
- The Pivot and Pass: Instead of hitting the 8 or the forward pod, the 9 pivots sharply and delivers a fast, flat pass to the 10, who is running onto the ball at pace.
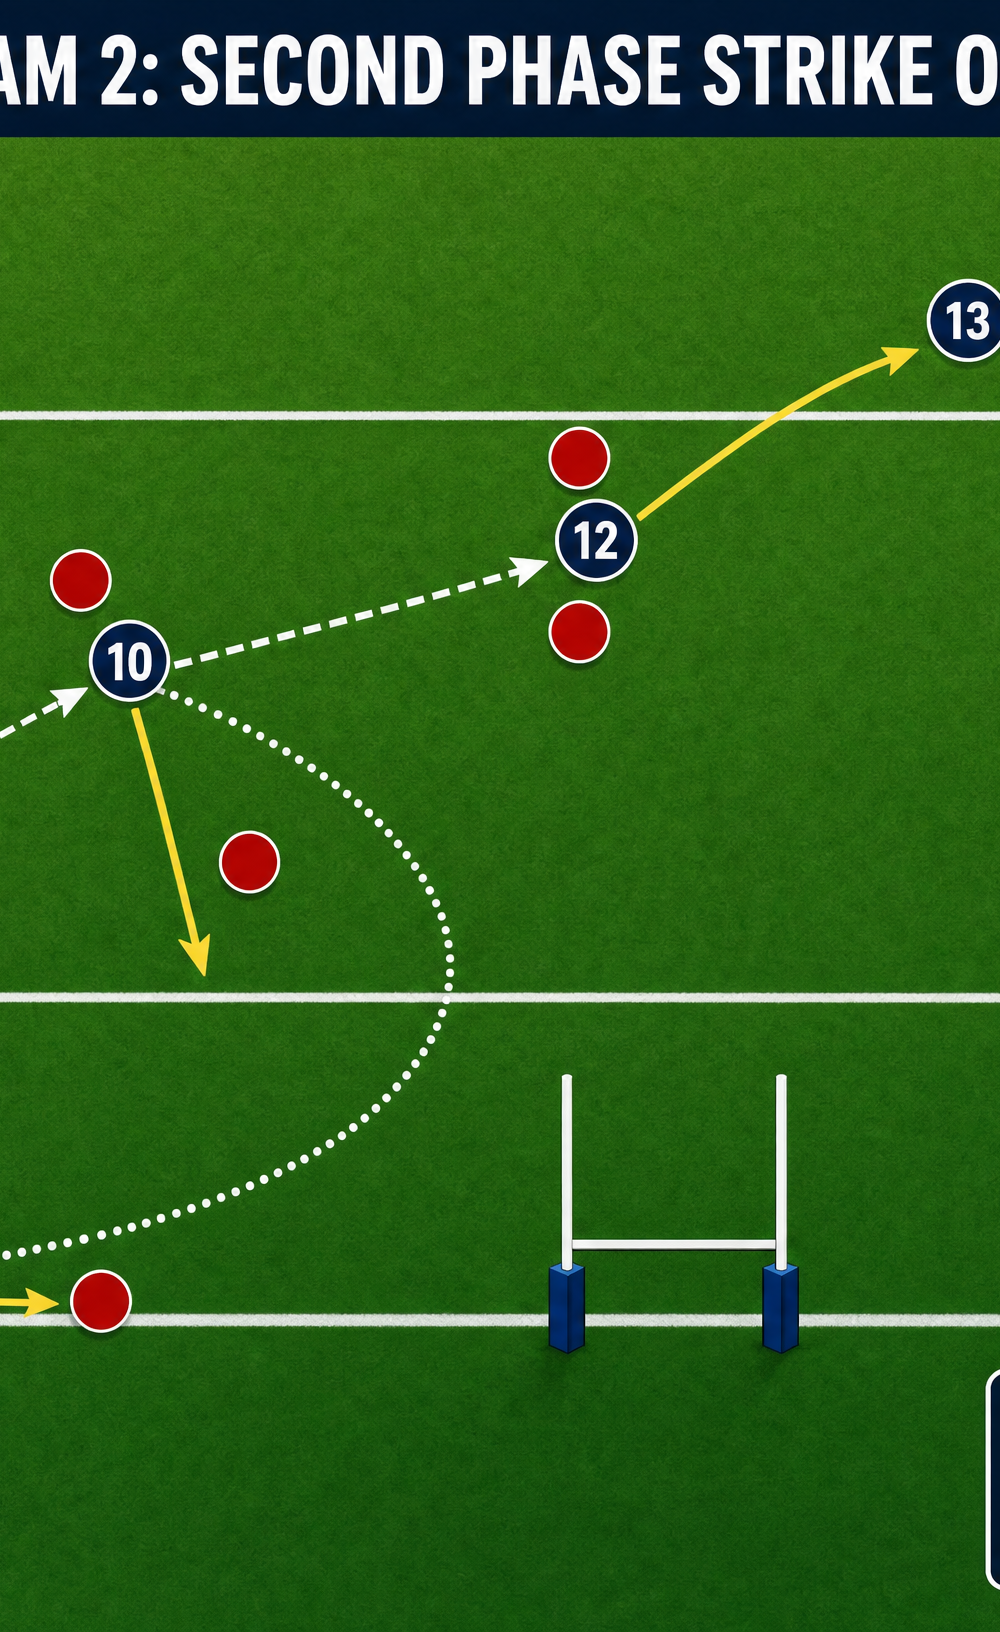
- The Strike Options (Phase 2):
- Option A (The Hard Line): The 10 engages the defensive line and hits the 12, who is running a hard, angled line at 45 degrees toward the posts, aiming for the gap between the defending fly half and inside centre.
- Option B (The Wide Arc): If the defense bites hard on the 12, the 10 throws a miss pass to the 13, who is running a wide, sweeping arc toward the far corner flag.
- Option C (The Cross-field Kick): If the defense rushes up flat, the 10 executes a precision cross-field kick (grubber or chip) toward the 11, who has held their position on the try line near the opposite touchline.
4. Key Coaching Points
- Selling the Decoy: The success of this play hinges entirely on the 8 and the forward pod. They must run their lines with 100% conviction, demanding the ball and forcing the defense to react to them.
- Speed of Service: The 9 must execute the tap and pass in one fluid motion. Any hesitation will allow the defense to read the play and drift off the forwards.
- Depth and Pace: The 10 and the strike runners (12, 13) must start deep enough to hit the line at maximum velocity. Catching the ball while stationary kills the momentum.
- Communication: The 10 must call the variation (Option A, B, or C) early based on their read of the defensive alignment as they receive the ball.
5. Common Mistakes
- Telegraphing the Pass: The 9 looks at the 10 before tapping the ball, giving the defense an early read.
- Flat Runners: The 12 or 13 start too flat and are forced to slow down to receive the pass, losing their dynamic advantage.
- Weak Decoy Lines: The 8 or the forward pod jog their lines, failing to draw any defenders and leaving the backline heavily outnumbered.
6. Variations & Progressions
- Progression 1: The Inside Pop: Instead of passing to the 12, the 10 steps outward and pops an inside pass back to the 11 or 15, who has looped around from the blindside.
- Progression 2: The Forward Screen: The forward pod runs a slightly wider line, acting as a legal screen for the 10 to run behind before initiating the pass.
- Variation 1: The Quick Tap: Execute the play immediately after the penalty is awarded, before the defense has time to set their line.
7. Age Adaptations
- Under 10/12: Simplify the options. Focus only on the tap, the decoy run by the 8, and a simple pass to the 10 to run or pass to the 12. Remove the kicking option.
- Under 14/16: Introduce the wide arc option for the 13. Emphasize the timing and depth of the runners. Ensure the forward pod is executing their decoy run safely and effectively.
- Open/Senior: Implement all options, including the cross-field kick. Focus on the 10's ability to read the defense and make split-second decisions.