Hawk: Middle-Pod Lineout Steal on Opposition Throw
Teach a legal, repeatable middle-pod lineout steal that wins opposition ball and immediately converts it into organised attacking possession.

Equipment Needed
Overview
Hawk is a middle-pod defensive lineout call designed to put your best aerial lock directly on the opposition’s most likely four-to-six channel. The objective is not merely to disrupt their throw; it is to win a clean catch at height, land safely, and give No. 9 a calm first pass before the opposition can turn the contest into a maul. Use it against a predictable middle throw, particularly when the opposition’s front lifter shows early or their hooker has a flat release. It is a pressure call, not a gambling call: if the cue is unclear, remain square and defend the drive.
The laws give the non-throwing side a real contest, but coaches must keep the picture legal. Each line forms between the 5 m and 15 m lines, parallel to and half a metre from the mark of touch; the gap must be retained until the ball is thrown. Players may pre-grip a jumper within the permitted body areas, but they cannot jump, lift, or make opposition contact before the throw leaves the hooker’s hands.1

Setup
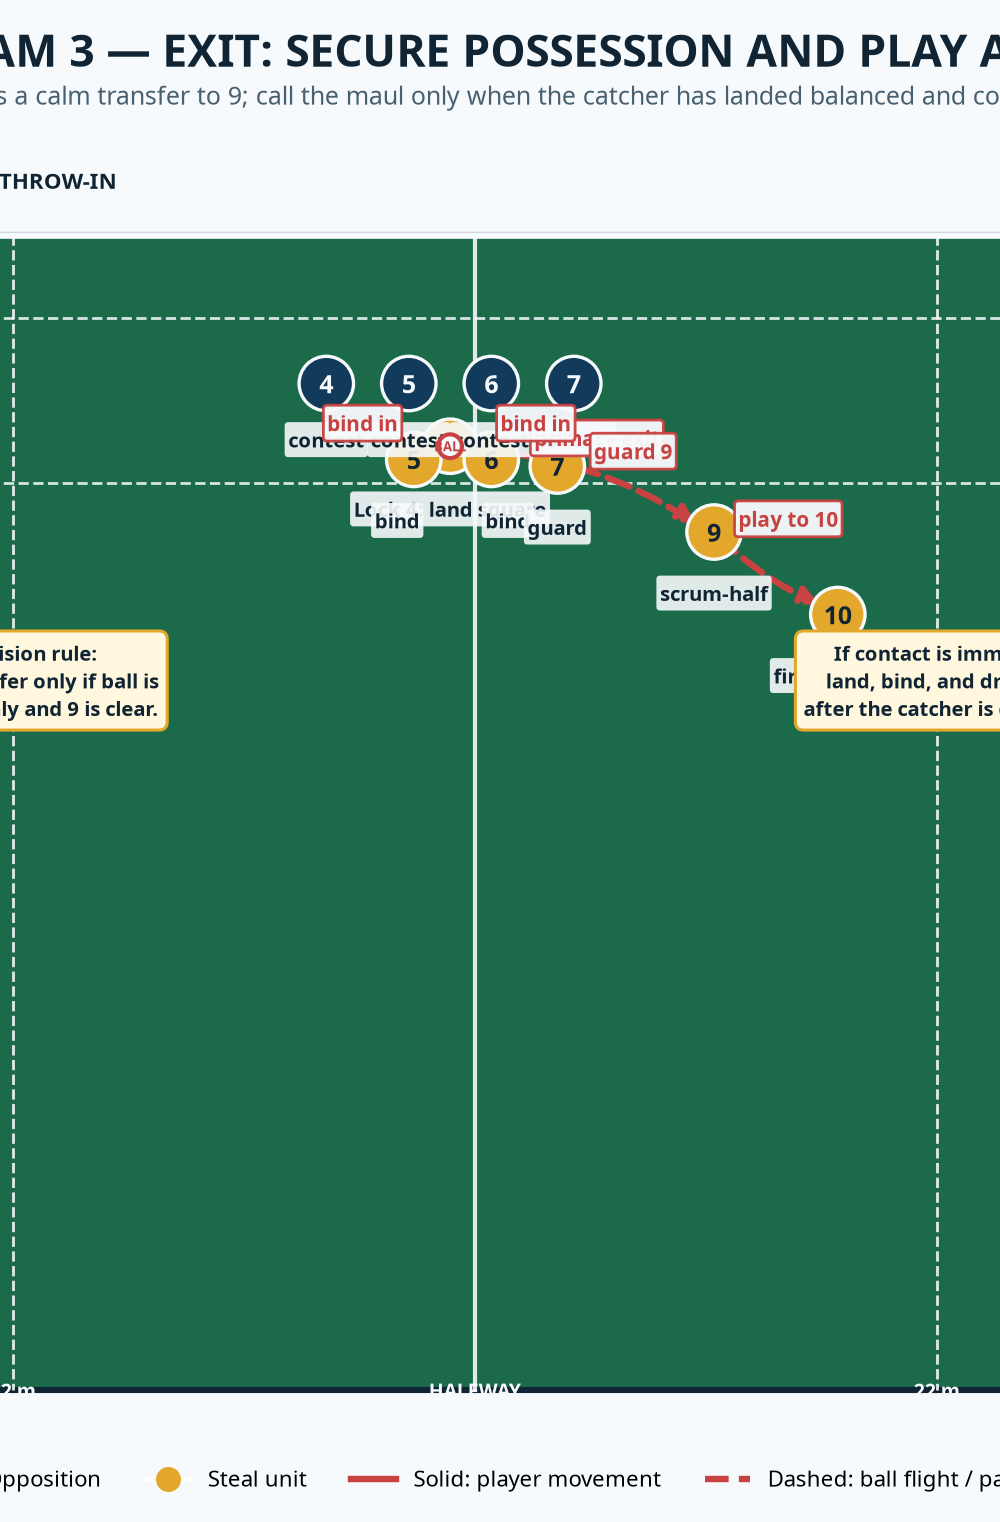
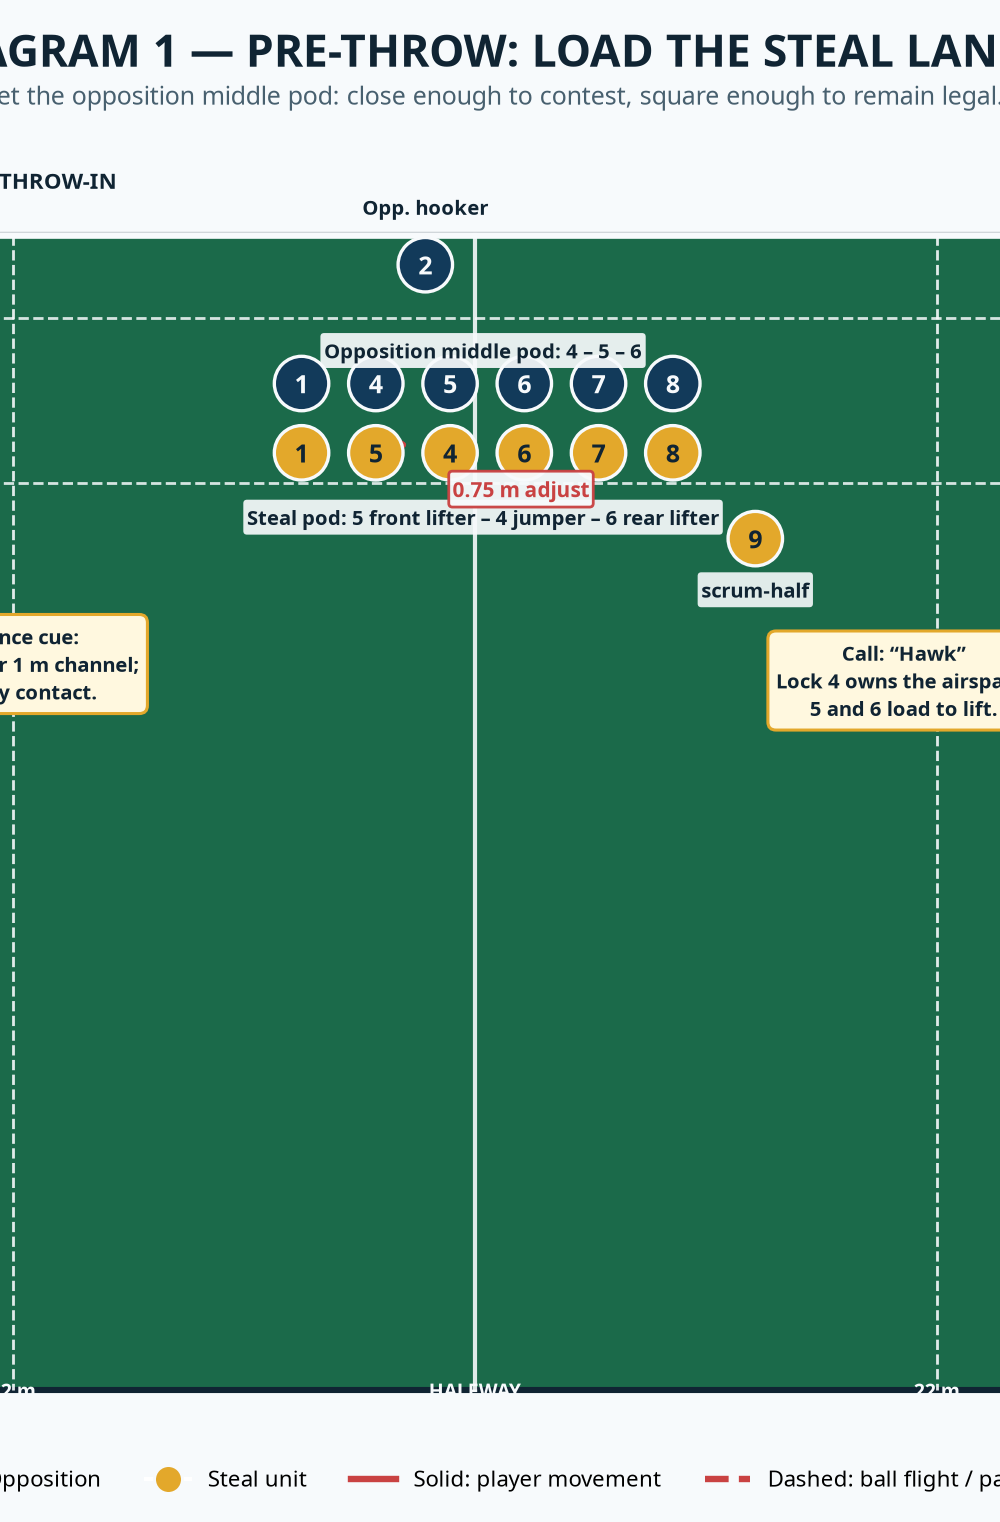
Use a 100 m x 70 m rugby pitch, or mark a 20 m x 18 m working rectangle against one touchline. The full-size field reference matters: the lineout is played between the 5 m and 15 m lines, and the 5 m, 15 m, 22 m and halfway markings should remain visible in your wider tactical rehearsal.2 Set 12 cones on the two lineout channels and place a second ball with the coach. Start with 16 players: six opposition lineout players plus their hooker and receiver, against six defensive lineout players, No. 9, and a first receiver. Bib the stealing team in gold and the throwing team in navy.
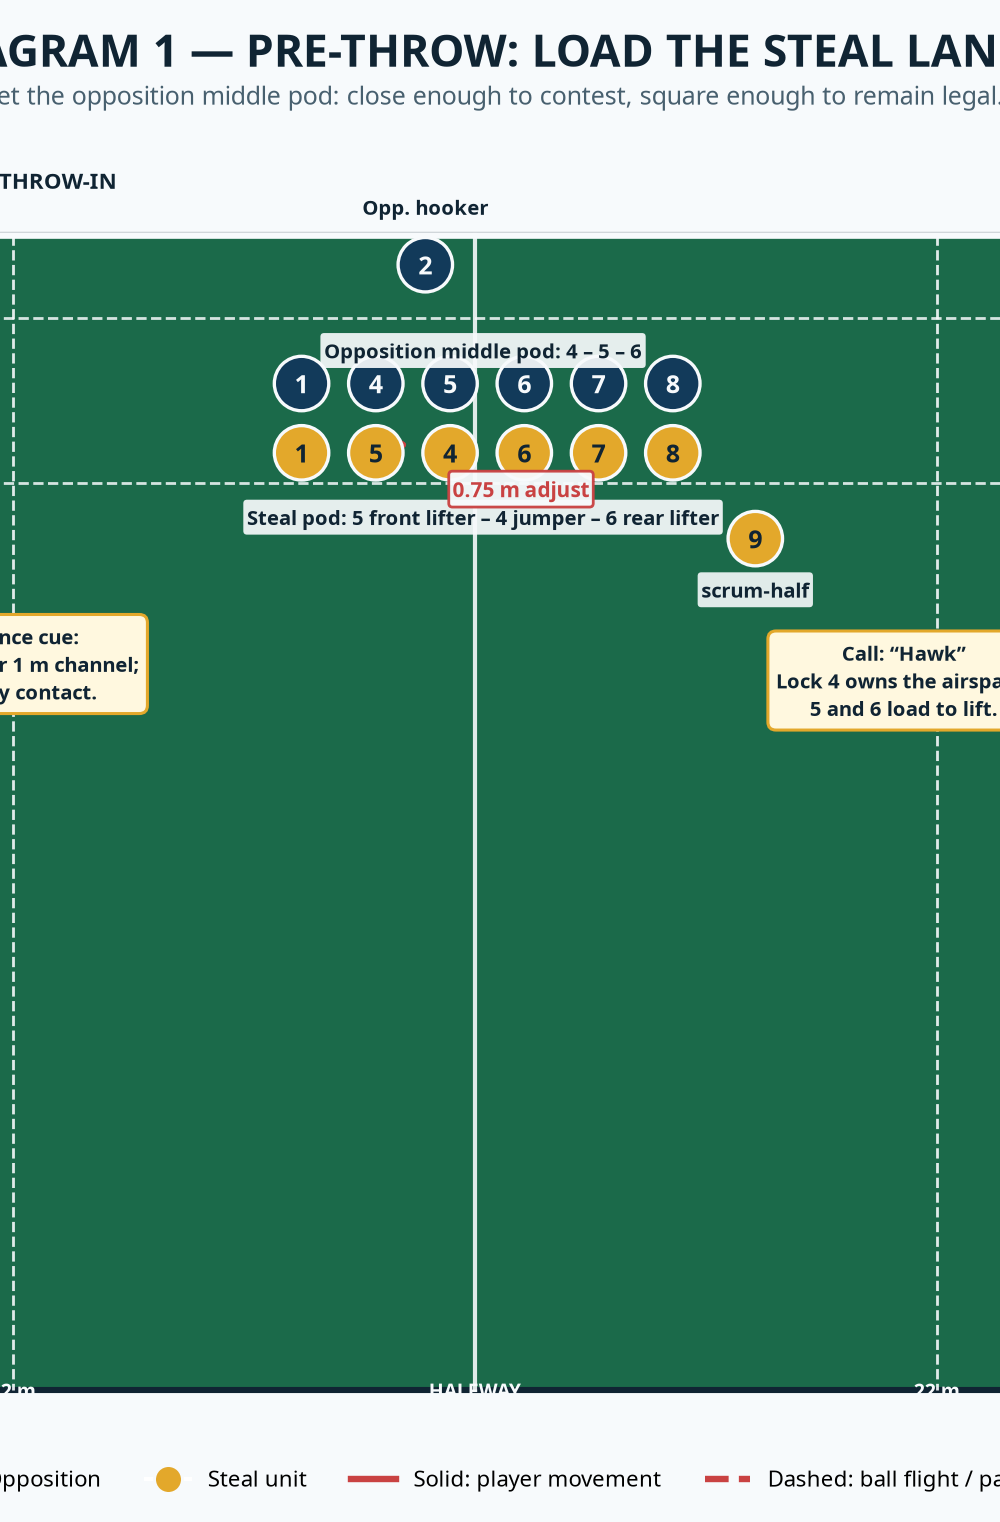
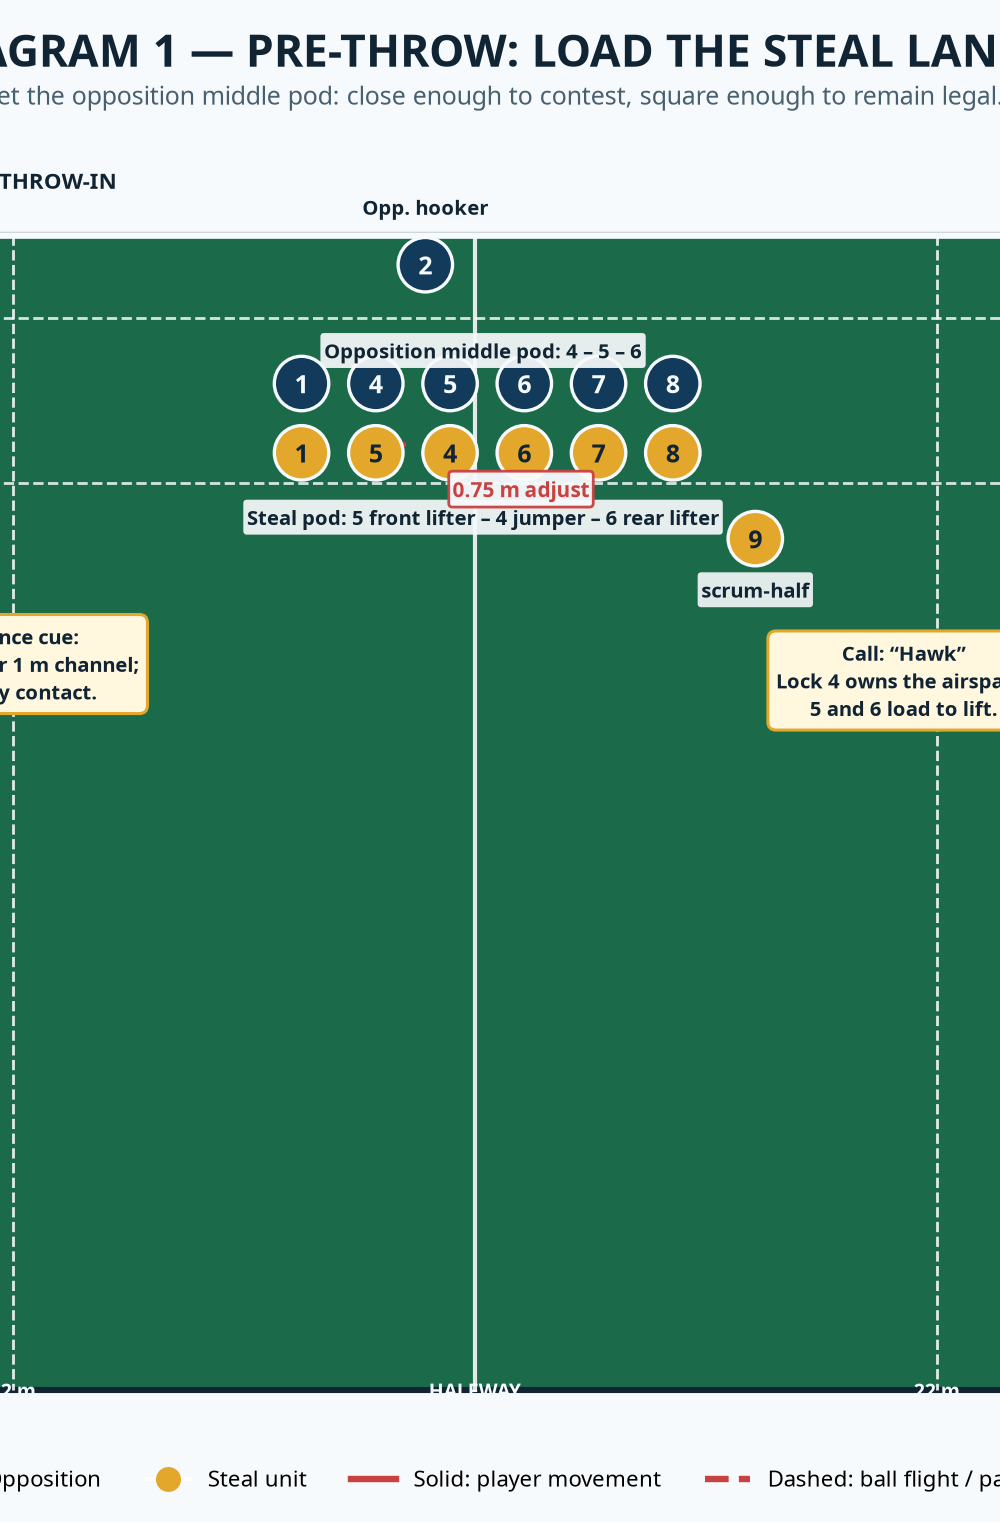
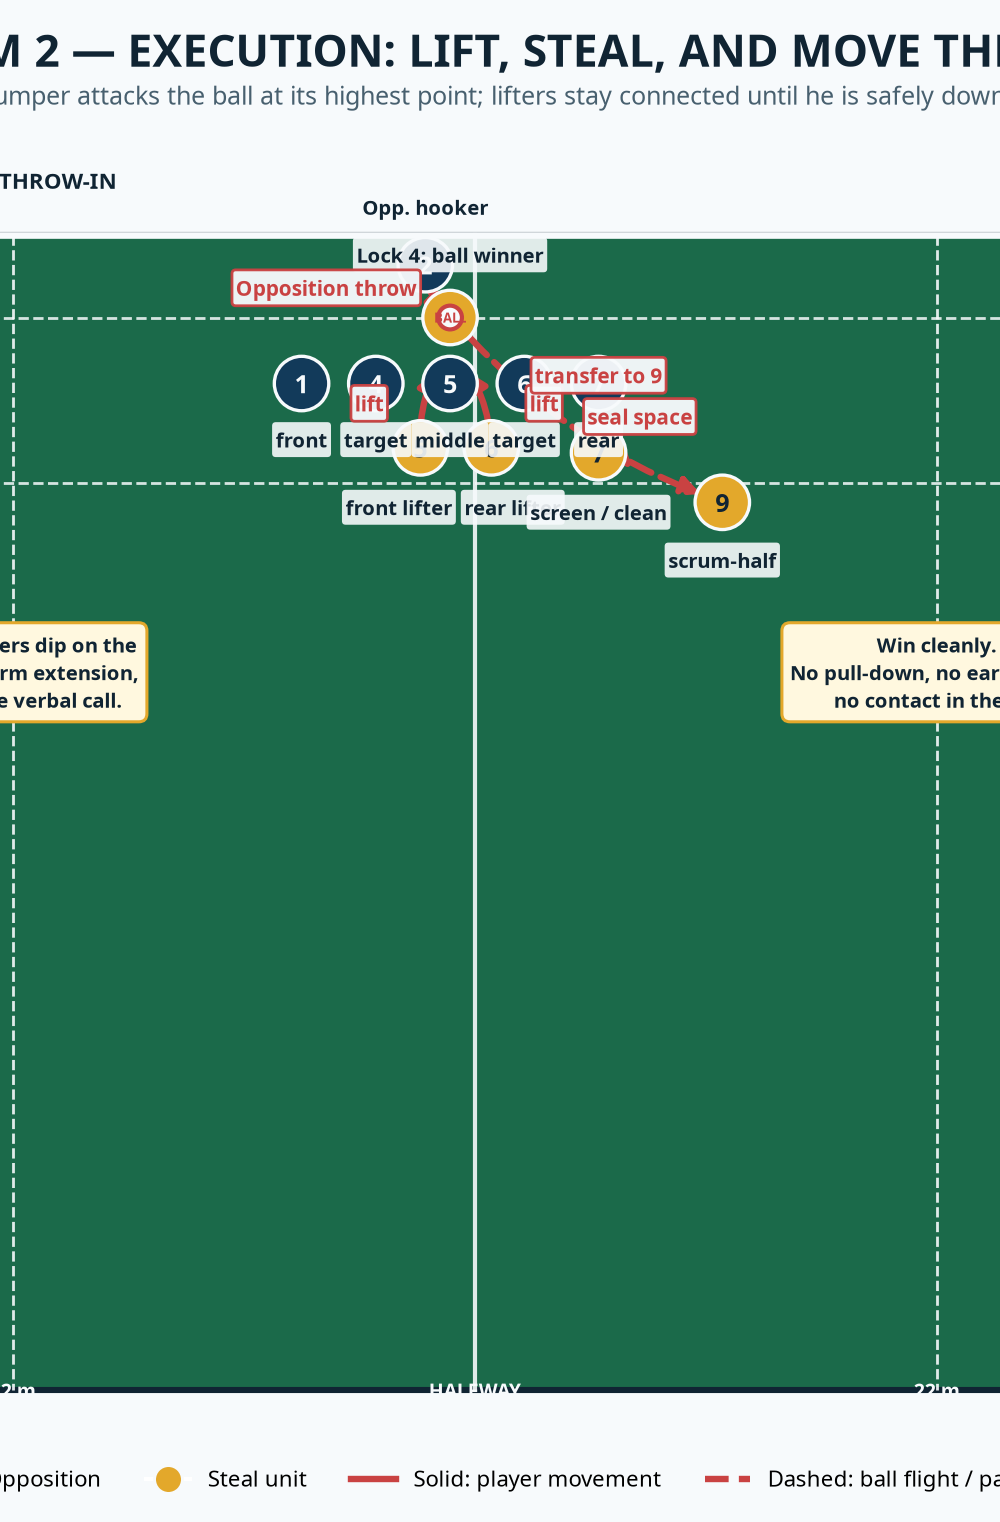
Set your defensive pod as 5–4–6. No. 4 is the nominated jumper and stands level with the opposition’s middle target; No. 5 is the front lifter, No. 6 the rear lifter. No. 7 screens and cleans the landing space. No. 9 begins 4–5 m behind the rear lifter, angled toward the centre of the field. The opposition hooker throws from the mark of touch, while their receiver starts legally away from their line. Call “Hawk” only when your lineout leader identifies a middle-pod cue: a compact four-to-six alignment, a front lifter who has pre-gripped early, or a hooker whose shoulders square to the middle.
| Element | Exact coaching standard |
|---|---|
| Defensive line | Keep a clear legal channel until the ball leaves the thrower’s hands. |
| Steal target | Attack the space just in front of opposition No. 5, not the player. |
| Jumper adjustment | No. 4 makes a maximum 0.75 m late adjustment; do not drift across the mark. |
| Lift timing | No. 5 and No. 6 dip only on the hooker’s arm extension and drive on ball release. |
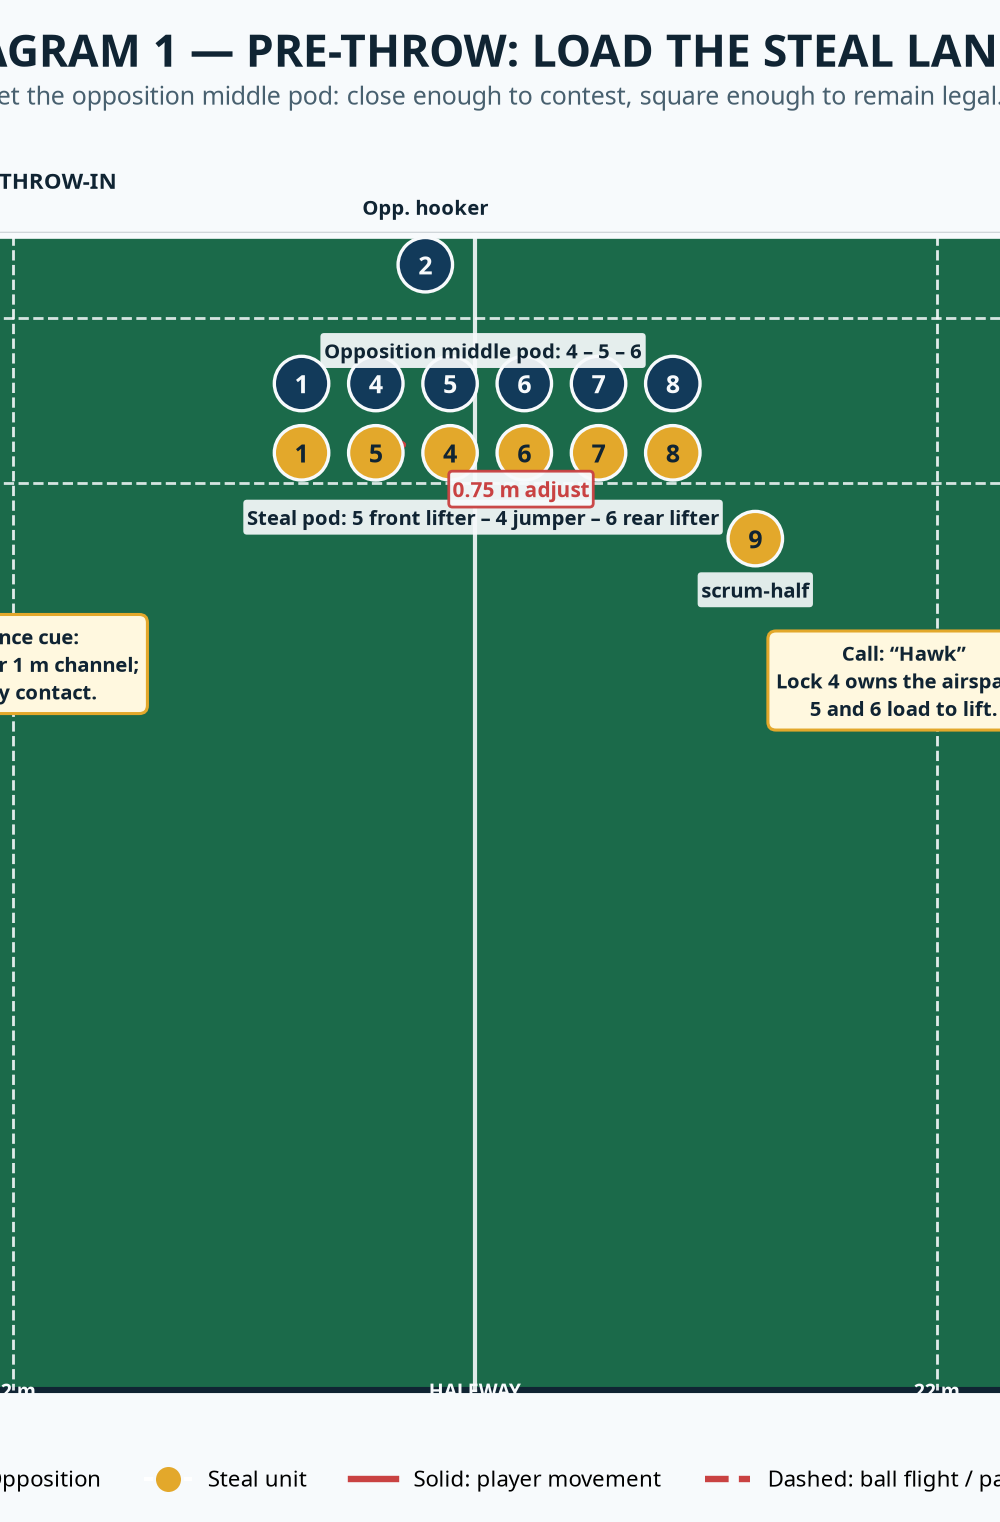
| Exit shape | No. 9 presents 4–5 m behind the rear lifter; No. 10 is 6–8 m wider and deeper. |
Step-by-Step Instructions
Name the picture early. Your lineout leader calls “Hawk” before the opposition hooker settles. No. 4 confirms the target with a short hand signal; No. 5 and No. 6 pre-grip legally and keep their hips loaded. The rest of the unit holds a normal defensive picture so the target is not advertised.
Build a square starting line. Put both lines parallel to touch between the 5 m and 15 m lines. Check that No. 4’s shoulders face straight down the channel. A jumper who starts open usually reaches across the opposition’s space and invites a penalty.
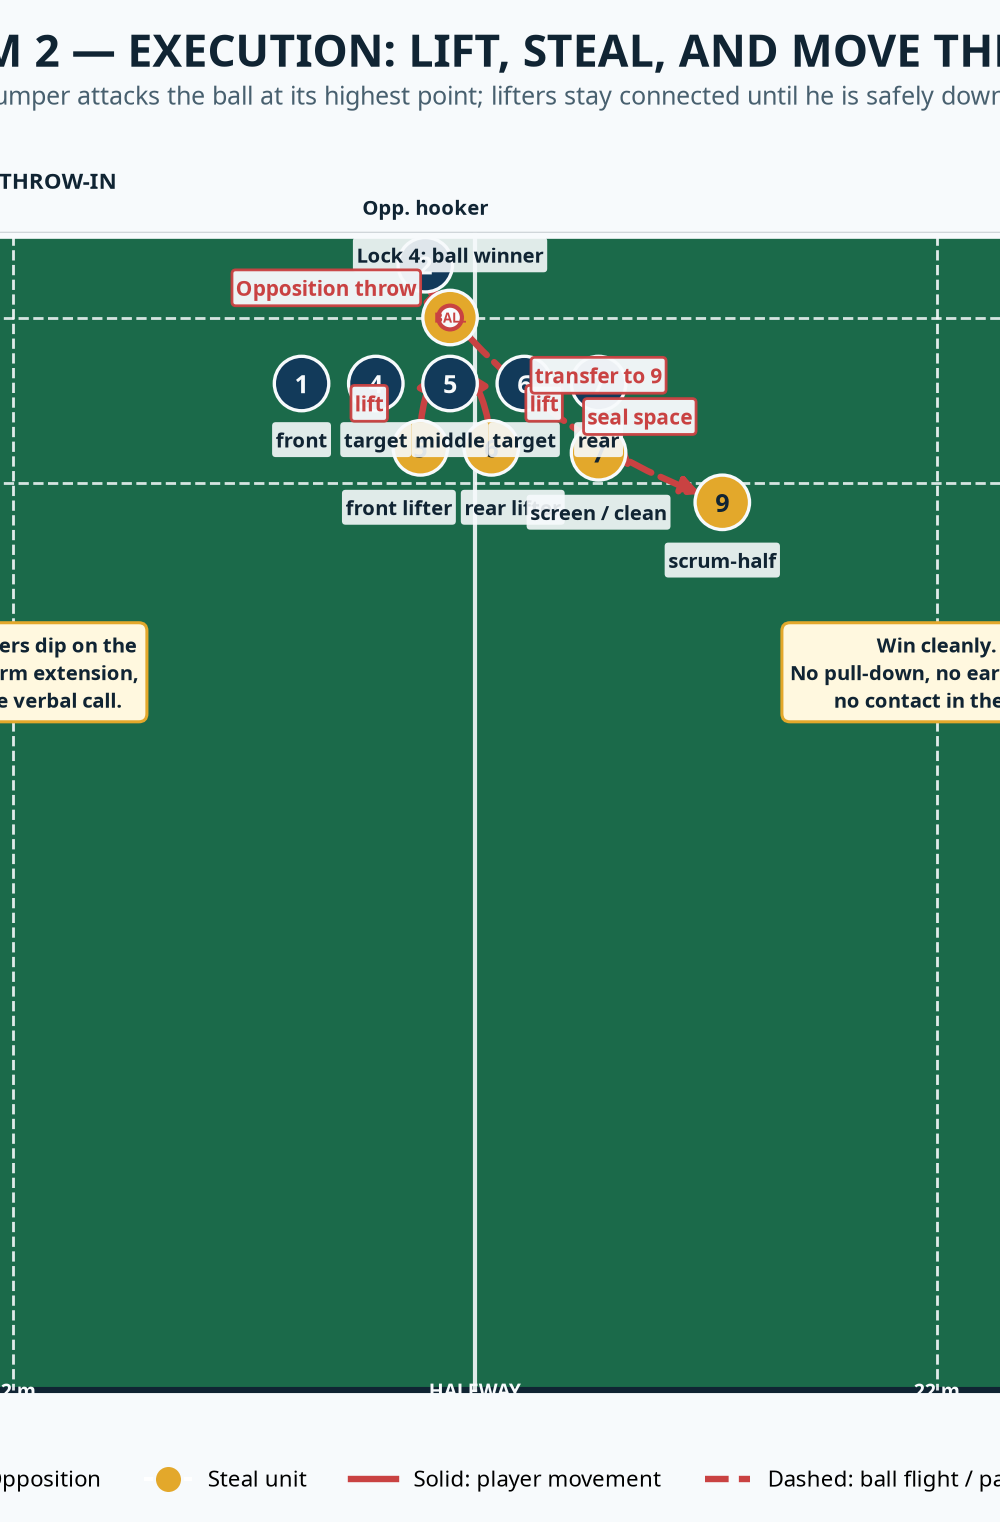
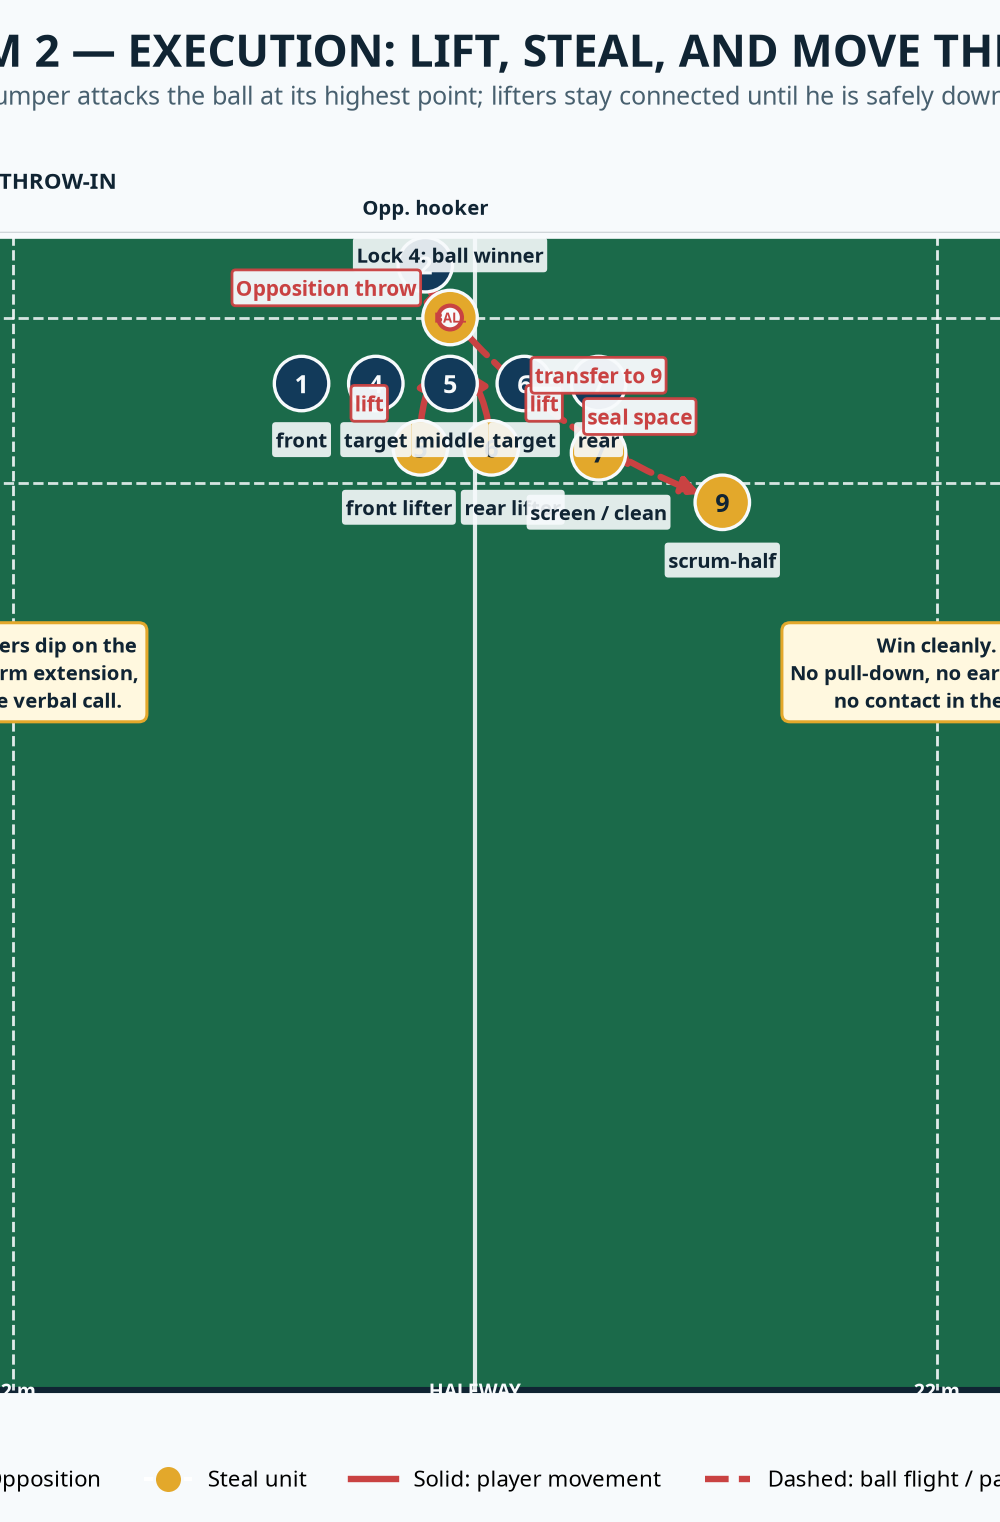
Track the thrower, not the ball. No. 4 stays grounded until the ball leaves the thrower’s hands. No. 5 and No. 6 read the hooker’s arm extension, dip together, and drive through a tall, stable lift. The cue is “late up, long through.”
Win the highest point. Lift No. 4 vertically into the corridor. He reaches with both hands above his head, attacks the front edge of the expected middle throw, and calls “mine” only once the ball is secure. Do not pull the opposition jumper, block their path, or initiate contact in the air.
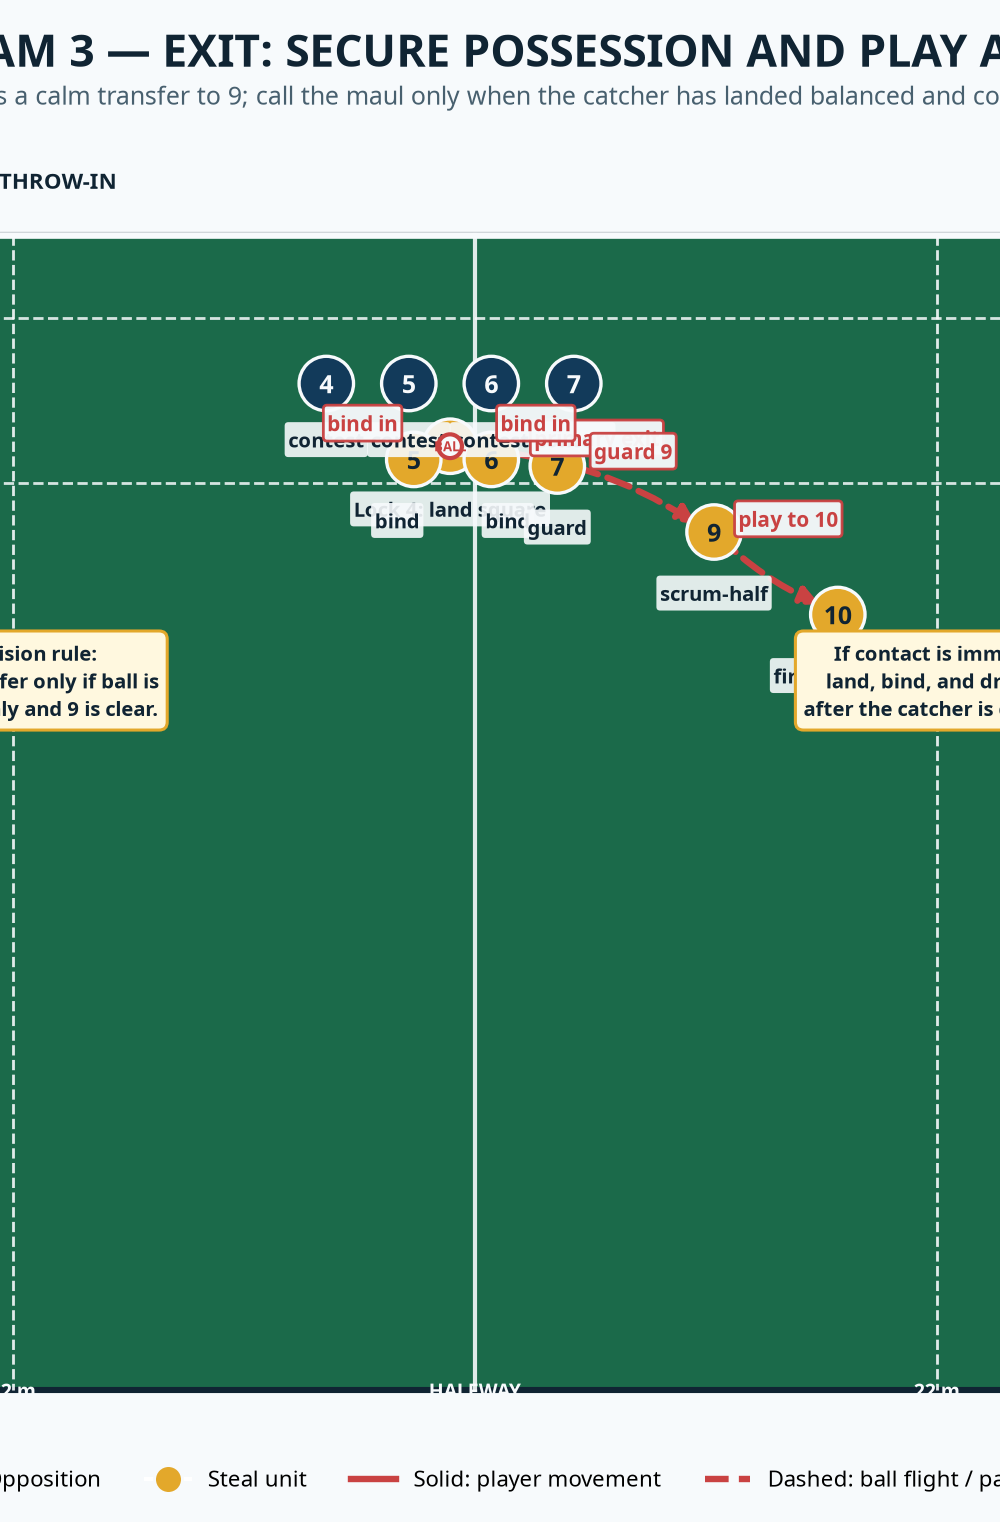
Land under control. Keep No. 5 and No. 6 attached until No. 4’s boots are safely back on the ground. No. 7 arrives as the first protector, eyes up and shoulders square. The law requires supporting players to lower a lifted player safely once possession is won.1
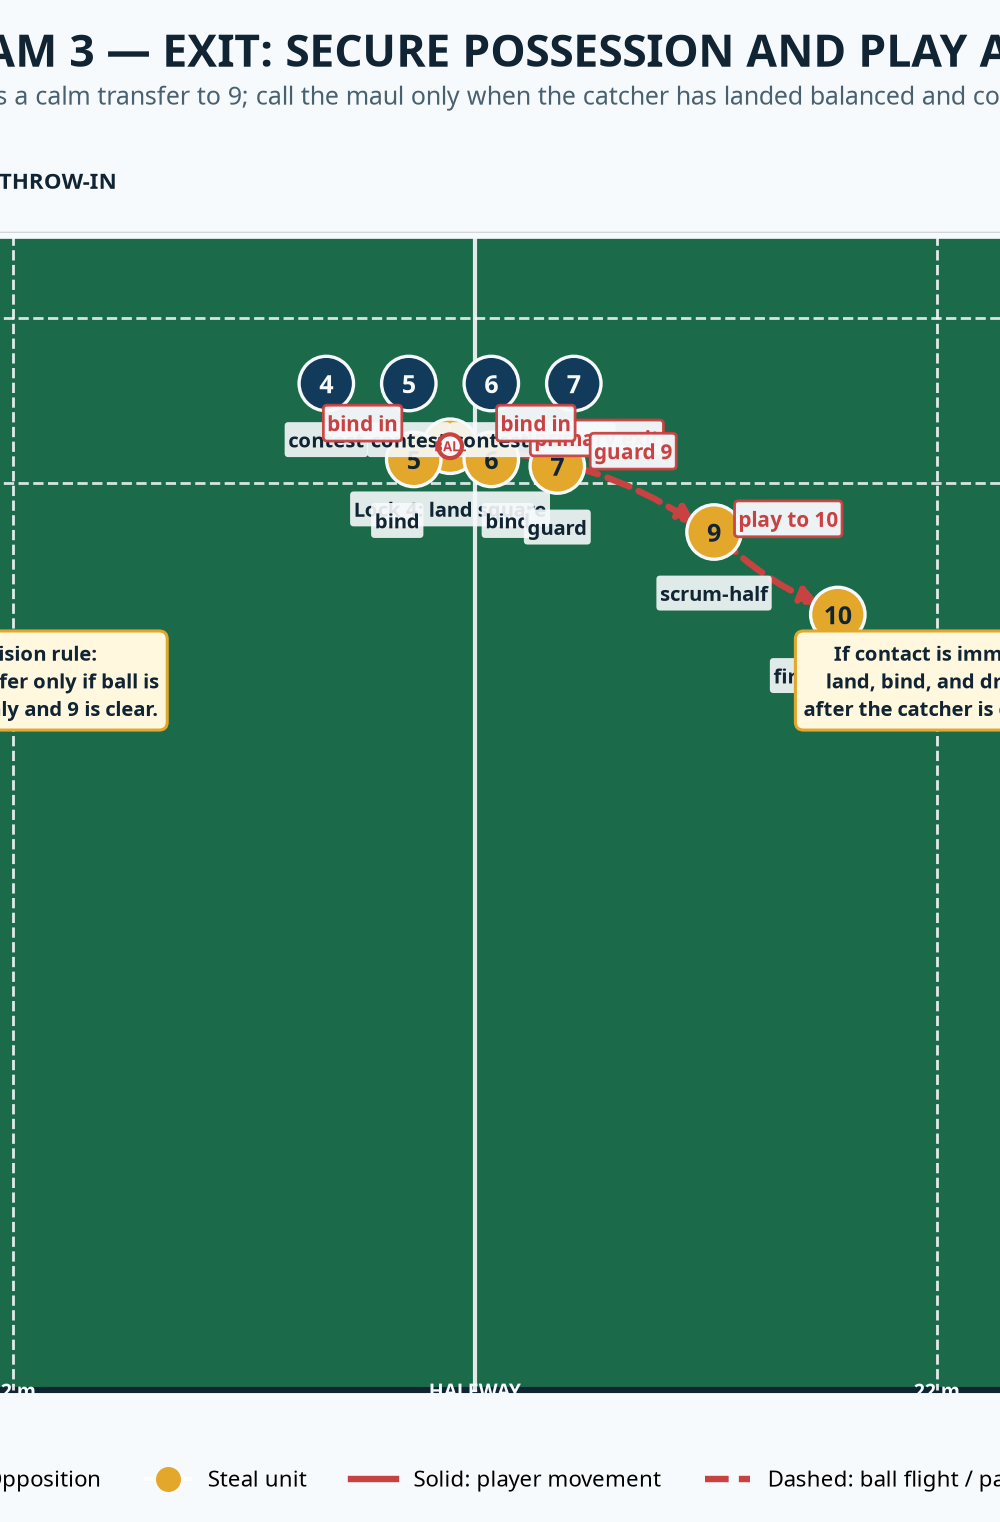
Exit with purpose. If No. 9 has a clean picture, No. 4 transfers immediately to 9, who passes to No. 10 away from the touchline. If opposition pressure meets the landing, No. 5 and No. 6 bind only after No. 4 has landed, then secure a compact maul. The call is “nine if clear, clamp if crowded.”
Key Coaching Points
- Coach the trigger, not a guess. The lift begins on ball release, never on a shouted call or a hooker’s dummy.
- Own a vertical cylinder. No. 4 travels up through his own space and catches at the highest stable point; he does not reach through an opponent.
- Make the lift symmetrical. Both lifters dip and extend together. A split lift rotates the jumper and destroys the catch window.
- Protect the landing before the exit. A spectacular steal is useless if the catcher is exposed or the ball is immediately stripped.
- Rehearse the next action. Train No. 9’s communication and depth as hard as the catch; possession should leave the 15 m channel quickly.
- Keep the referee’s picture clean. No early lift, no early contact, no obstruction, and no player drifting offside through the mark of touch.
Common Mistakes
| Error coaches will see | Immediate correction |
|---|---|
| Jumper rises before release. | Freeze the picture; make the group call “ball out” before every lift. |
| Front and rear lifter lift at different speeds. | Rehearse three unopposed dip-and-drive repetitions, then add the ball. |
| No. 4 chases across the line. | Reduce the target to a 0.75 m adjustment and demand a vertical take. |
| Unit celebrates the catch and loses the ball. | Put No. 9 and No. 7 in every repetition; score only a clean exit pass. |
| Players lean into opponents before the throw. | Re-establish the channel with cones and penalise early contact in practice. |
Variations & Progressions
Start with a static-ball progression: use a coach-held ball above the middle channel so lifters can learn safe hand positions, body height, and landing control without a contested throw. Progress to a controlled opposition throw, then to live six-versus-six lineout competition where the throwing team can choose front, middle, or tail. Award the defence two points for a clean catch plus exit to No. 10, one point for a legal disruption, and zero for a penalty.
Use a tail-shift variation once opponents protect the middle. Keep the same No. 4 jumper but have him begin one space back, then adjust no more than 1 m to attack the rear edge of the opposition six. The key remains late lift timing; do not turn this into a running jump.
For an exit-to-attack variation, place No. 12 10 m infield of No. 10. On a clean steal, No. 9 can play 9–10–12 across the 15 m line. This forces the lineout unit to keep the ball alive and turns a defensive win into a territorial attack.
Age Adaptations
For under-8 and under-10, do not coach contested lifting. Use a non-lifting catch-and-transfer game: one nominated catcher receives a soft coach throw, lands under their own control, and passes to a receiver. Focus on spacing, communication, and safe movement.
For under-12 and under-14, follow your union’s age-grade laws. Use contested lineout positioning only where permitted, limit the number of players, and develop ground-based jumping, safe catching, and clear post-catch passing before introducing any supported lift.
For under-16 and open-age groups where lifting is permitted, introduce the full Hawk sequence only after players can demonstrate stable pre-grip positions, a synchronized two-person lift, secure hands above the ball, and a safe controlled descent. Start at 60% speed and increase to live competition once the referee picture remains consistently legal.
Coach’s Session Close
Finish with five live lineouts from different marks: two middle cues, one front, one tail, and one disguised throw. Your captain has the final decision: call Hawk only when the middle cue is real; otherwise defend the opposition’s preferred exit. Review on three measures: legal lift timing, clean aerial ownership, and possession transferred beyond the 15 m line. That discipline makes Hawk a genuine turnover weapon rather than a hopeful leap.
References