Scrum Blindside Zip: One-Pass Edge Attack
Coach a fast, repeatable blindside scrum strike that uses a flat wing line, a square decoy and immediate inside support to win the narrow channel.

Equipment Needed
Overview
Scrum Blindside Zip is a one-pass strike from a scrum set 6–10 metres from the blind touchline. Use it when the defence expects an open-side launch and its 9 has started to fold. The objective is to put a flat 11 into a narrow channel before the defence can reload.
Call it in the middle third, outside the opposition 22, or whenever the blind channel has at least 6 metres. It works best after an open-side launch. The picture is simple: 8 controls, 9 wraps, 11 attacks square, 12 holds, and 15 reloads.
Coach's definition: The blindside is a space-and-timing opportunity, not merely the narrow side of the scrum. If the defence can reload before 9 arrives, do not force the play.
Setup
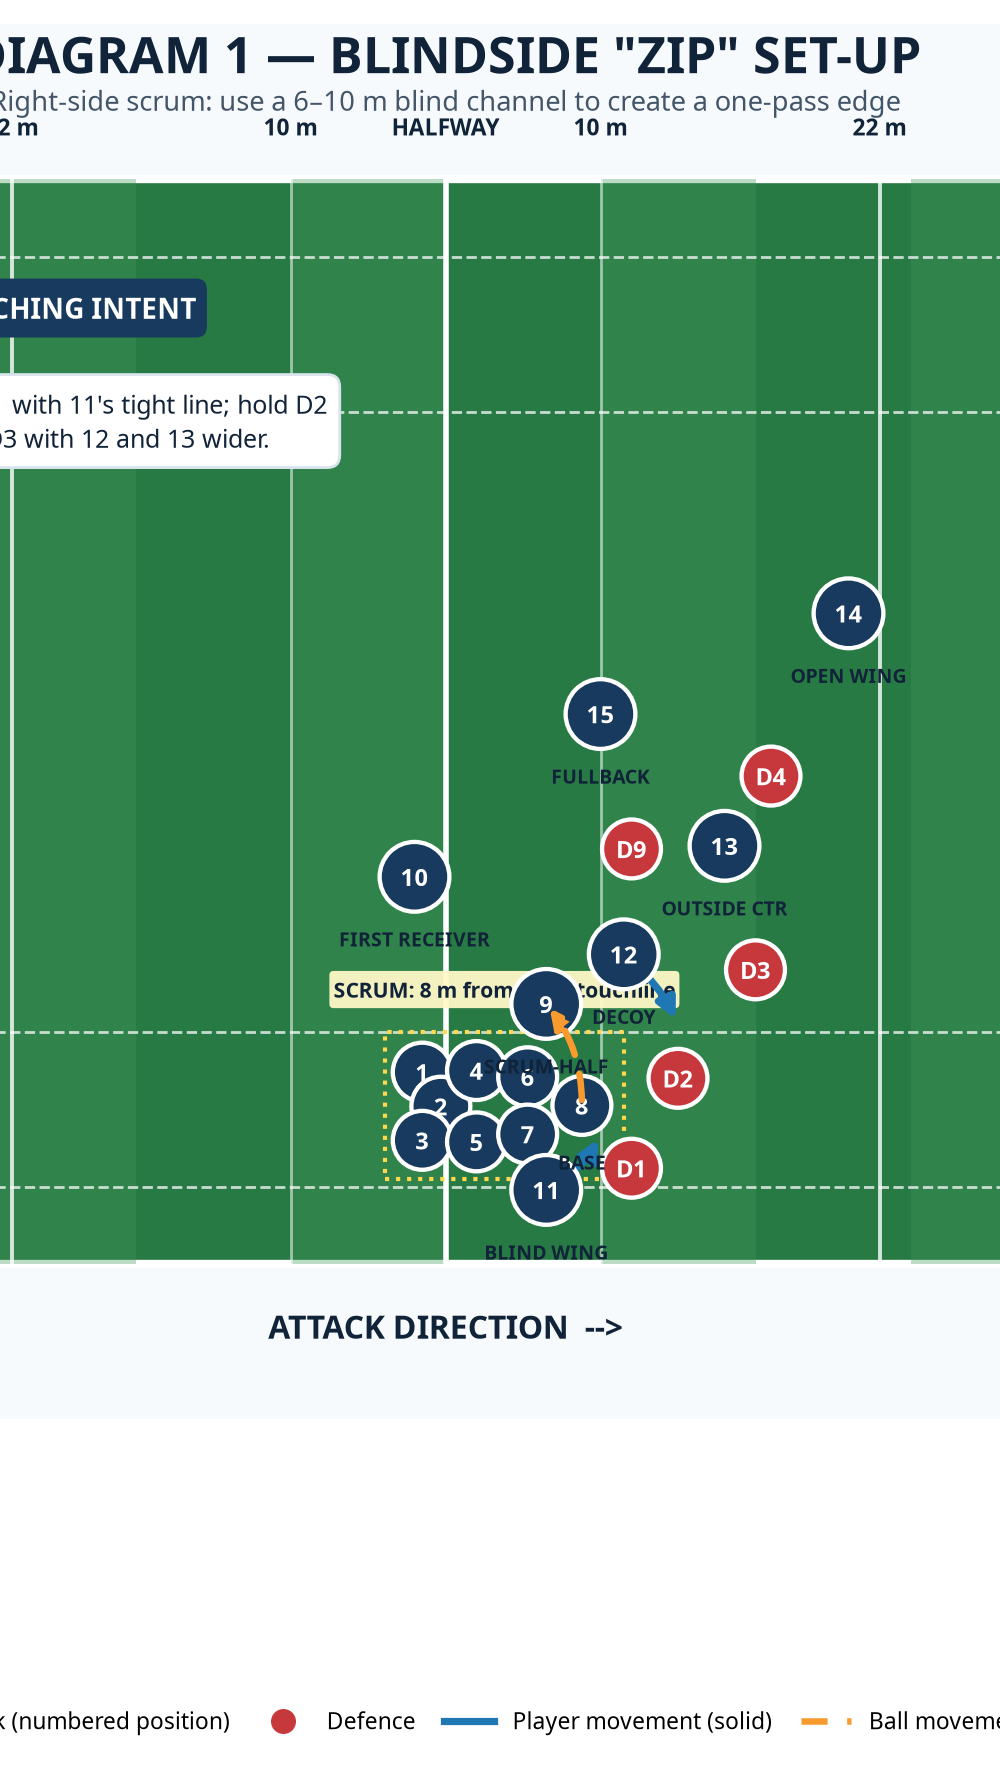
Use a 100 m x 70 m pitch as the reference. Mark a 20 m x 18 m working box beside touch and set the scrum base 8 m from touch. Put one cone 5 m behind the scrum for 9's launch and one 3 m outside 11's start. Rehearse with the attacking 15 and five to seven defenders; then add a full line and play two phases.
| Position | Starting job | Non-negotiable detail |
|---|---|---|
| 8 No. 8 | Controls the ball at the base and communicates the release. | Keep hips square and make the ball available on 9's outside hip. |
| 9 Scrum-half | Calls Zip, launches around the blind, and delivers early. | Arrive before the defensive 9 can fold; pass from no more than 2 m beyond 8. |
| 11 Blind wing | Primary ball carrier. | Start 3–4 m behind the scrum's rear foot, then hit a flat line inside-out. |
| 12 Inside centre | Square decoy and post-contact cleaner. | Hold a credible line at D2; do not drift before 11 receives. |
| 13 Outside centre / 15 Fullback | Width and late support. | Stay alive for the second action, not as spectators of the first carry. |
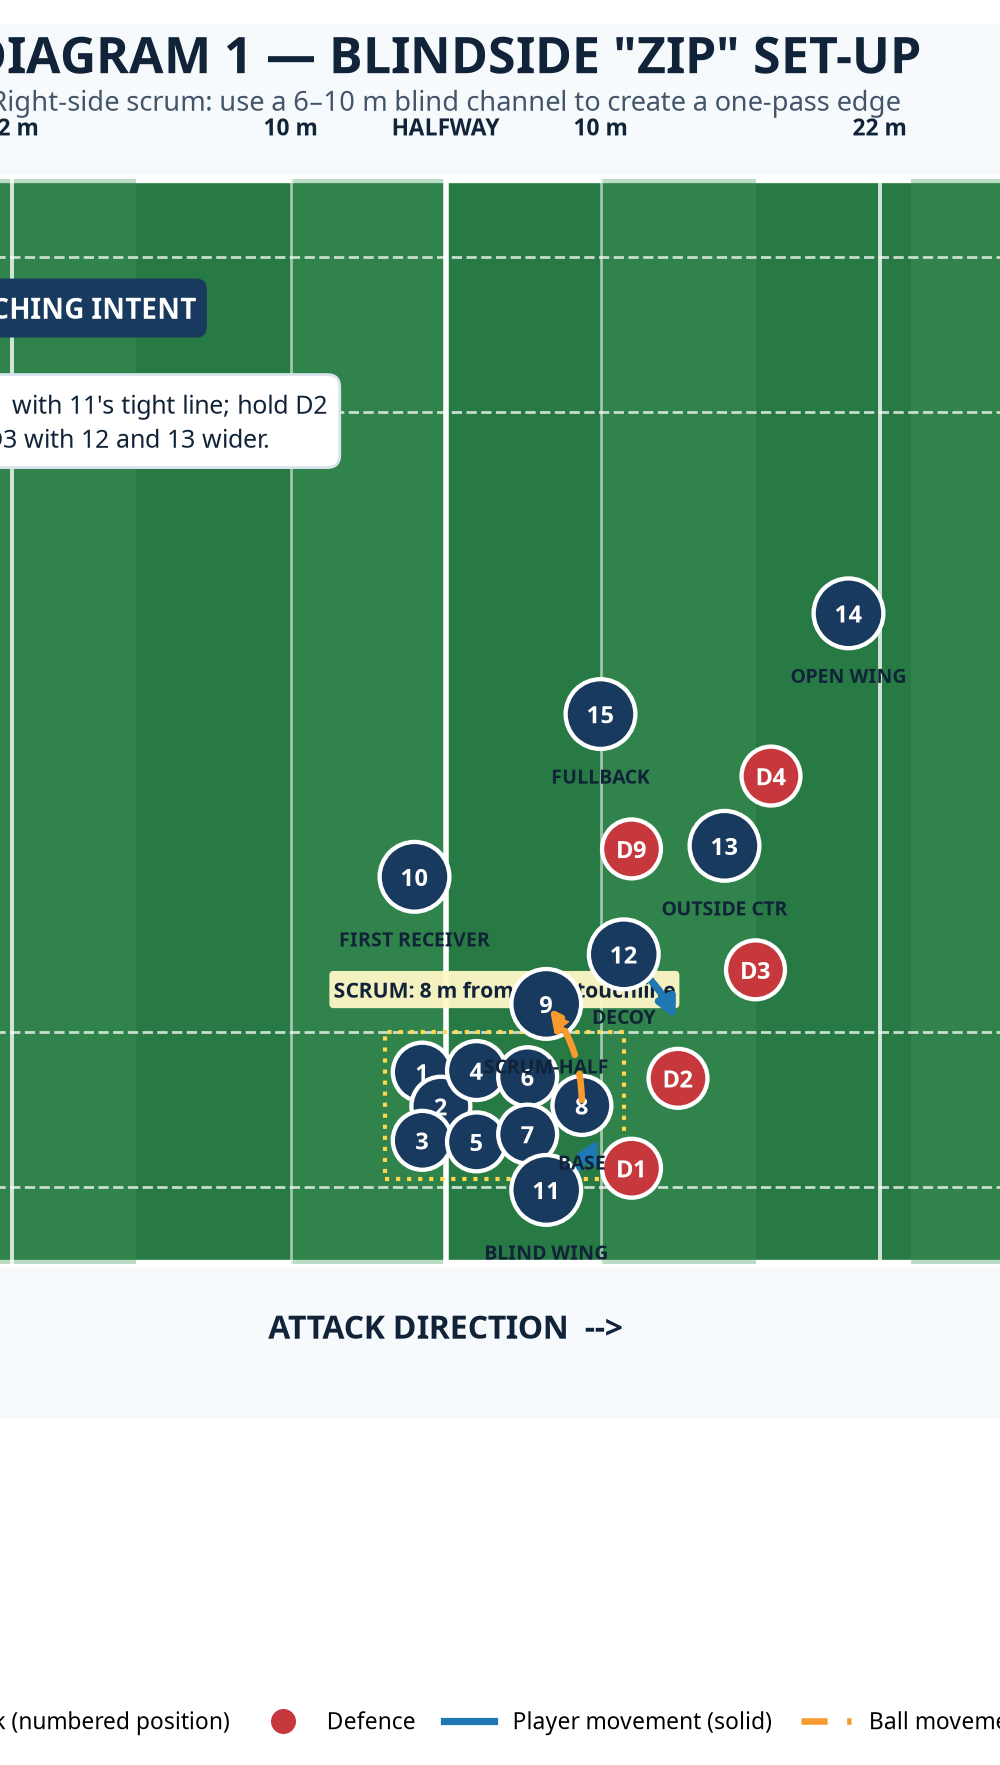
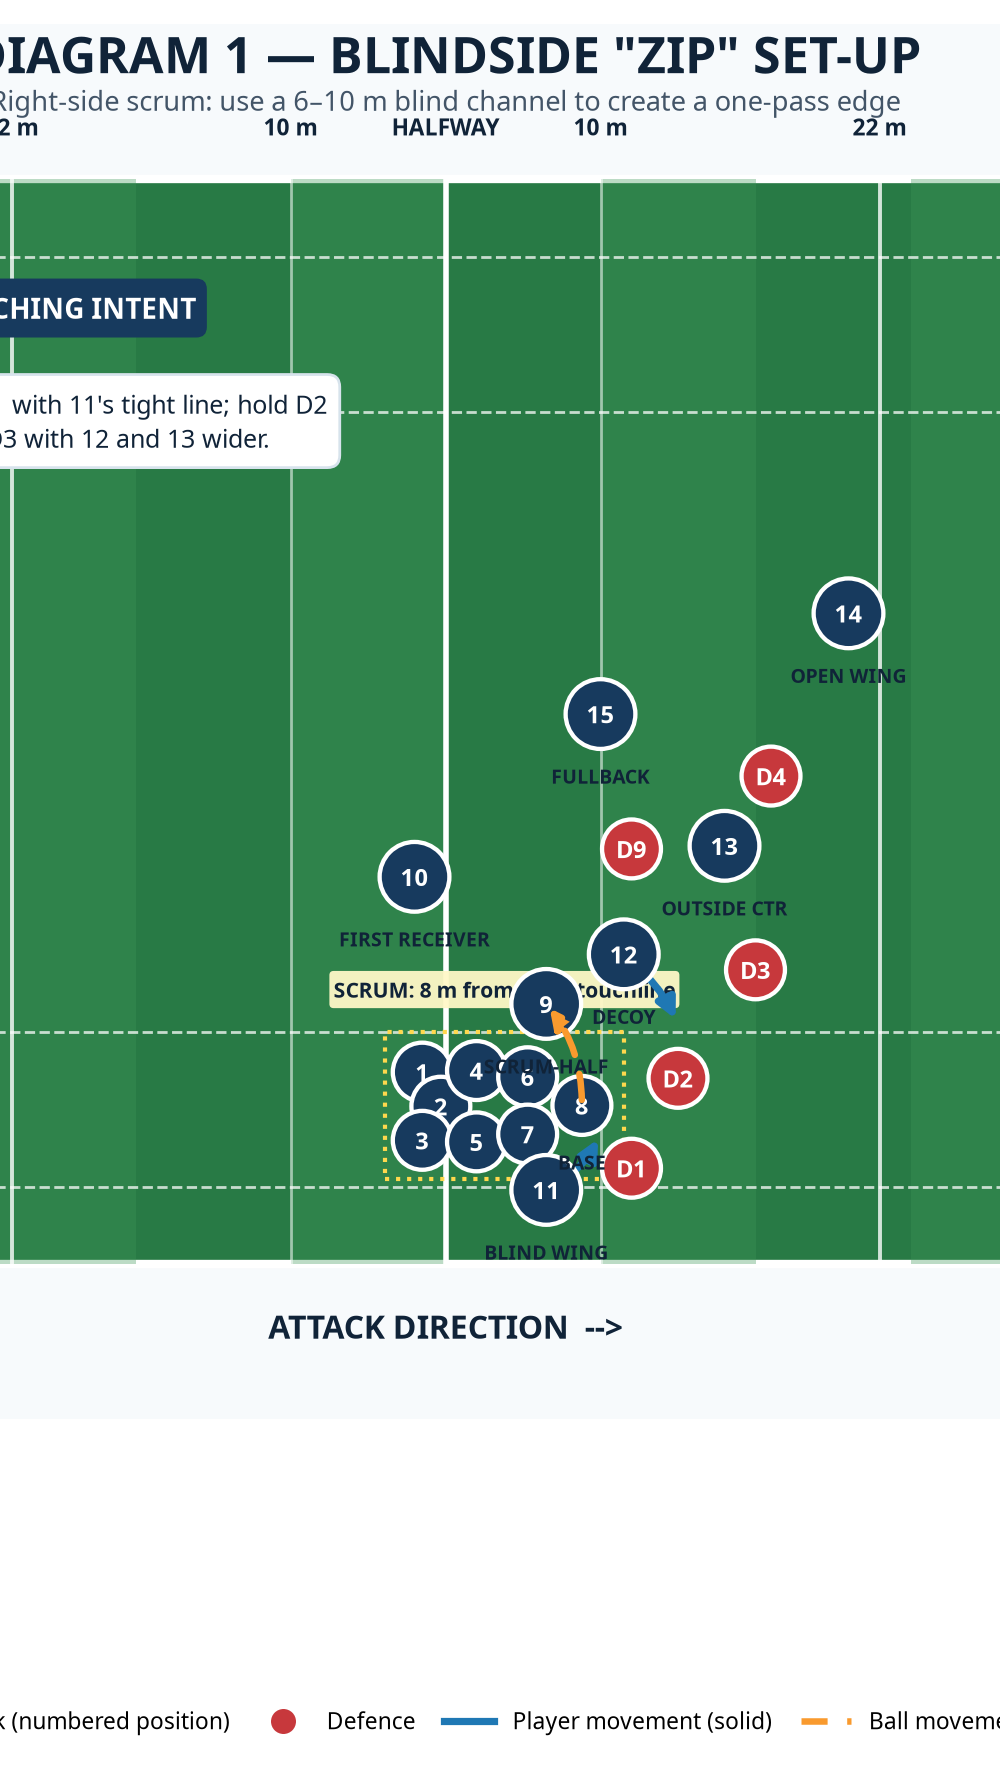
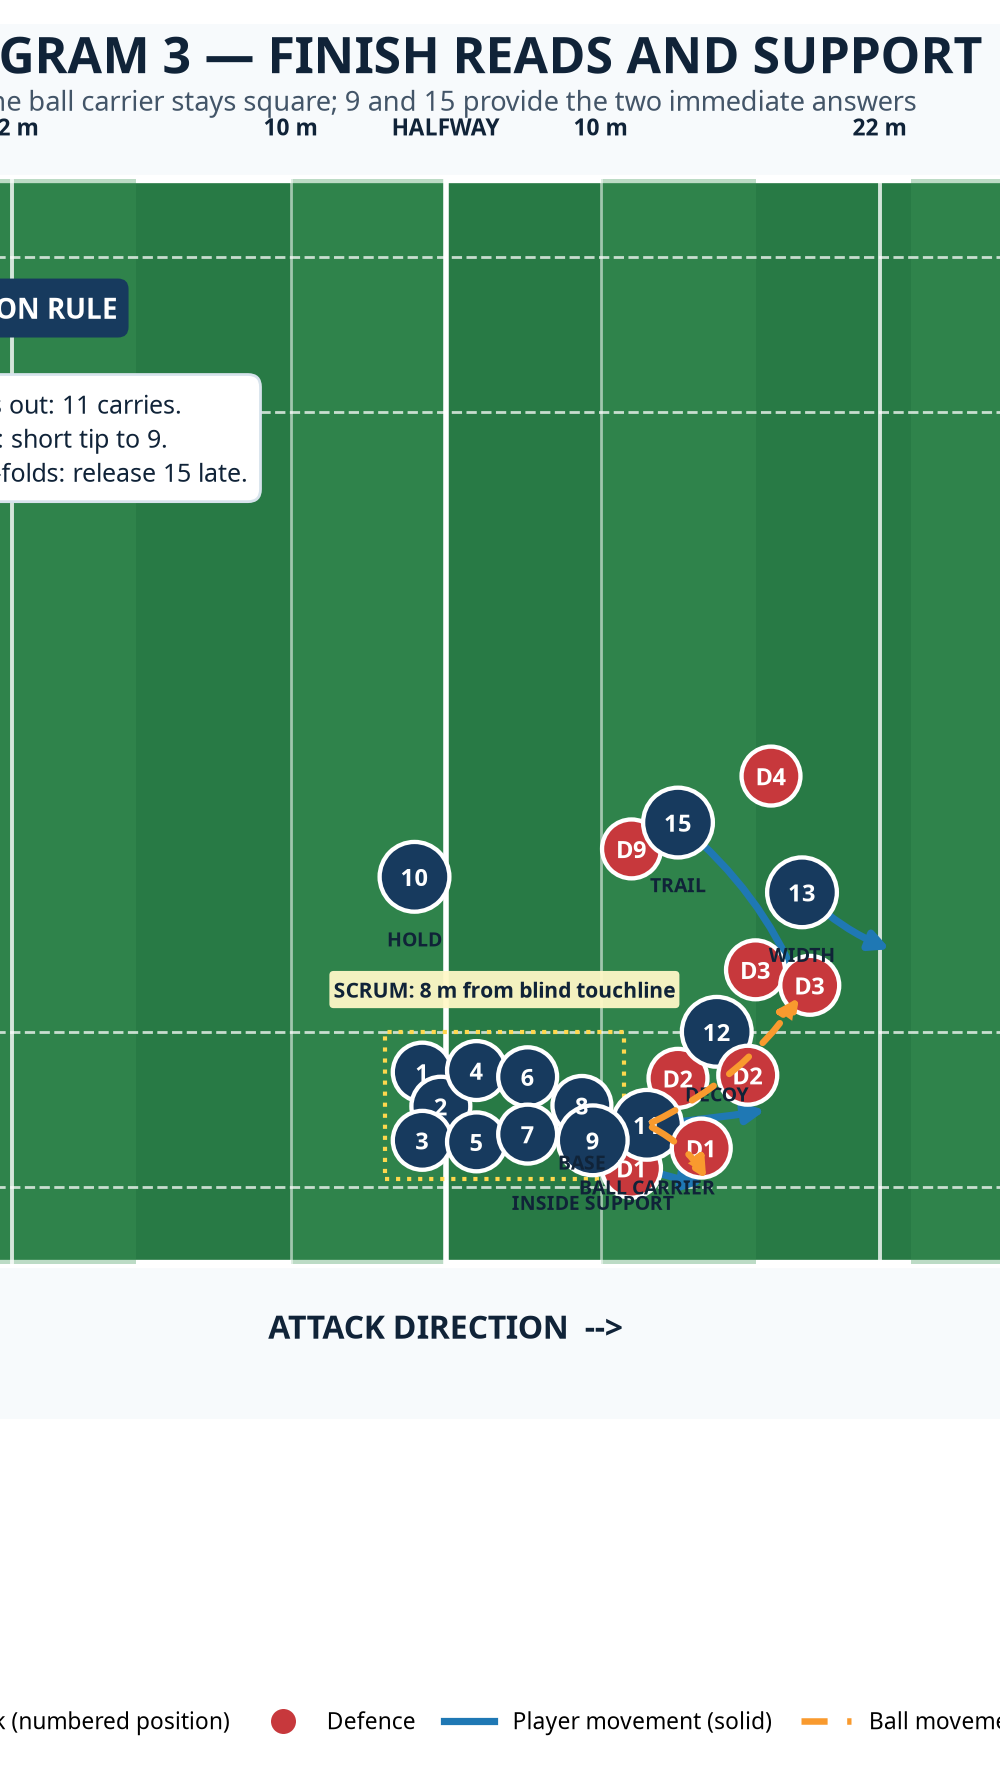
Set the attacking pack in a stable legal scrum before you add speed. Explain the picture with the diagram: blue circles are attack, red circles are defence, solid arrows are player movement, and dashed orange arrows are ball movement. In the first three repetitions, freeze the frame when 9 is level with 8's outside hip; that is the timing picture every player must recognise. Use size-appropriate balls, bibs for defence, 12–16 flat cones, and one or two contact shields for the finish.
Step-by-Step Instructions
Name the side early. Before the feed, 9 calls Zip right or Zip left. 8 repeats it so 11 hears. The pack provides a stable platform, not an extra shove.
Create the launch picture. Put 11 3–4 m behind the rear foot and 2–3 m from touch, facing infield. 11 moves only when 8 controls. Put 12 5–6 m wider and 5 m deeper than the catch point; 13 and 15 stay deep enough to reload.
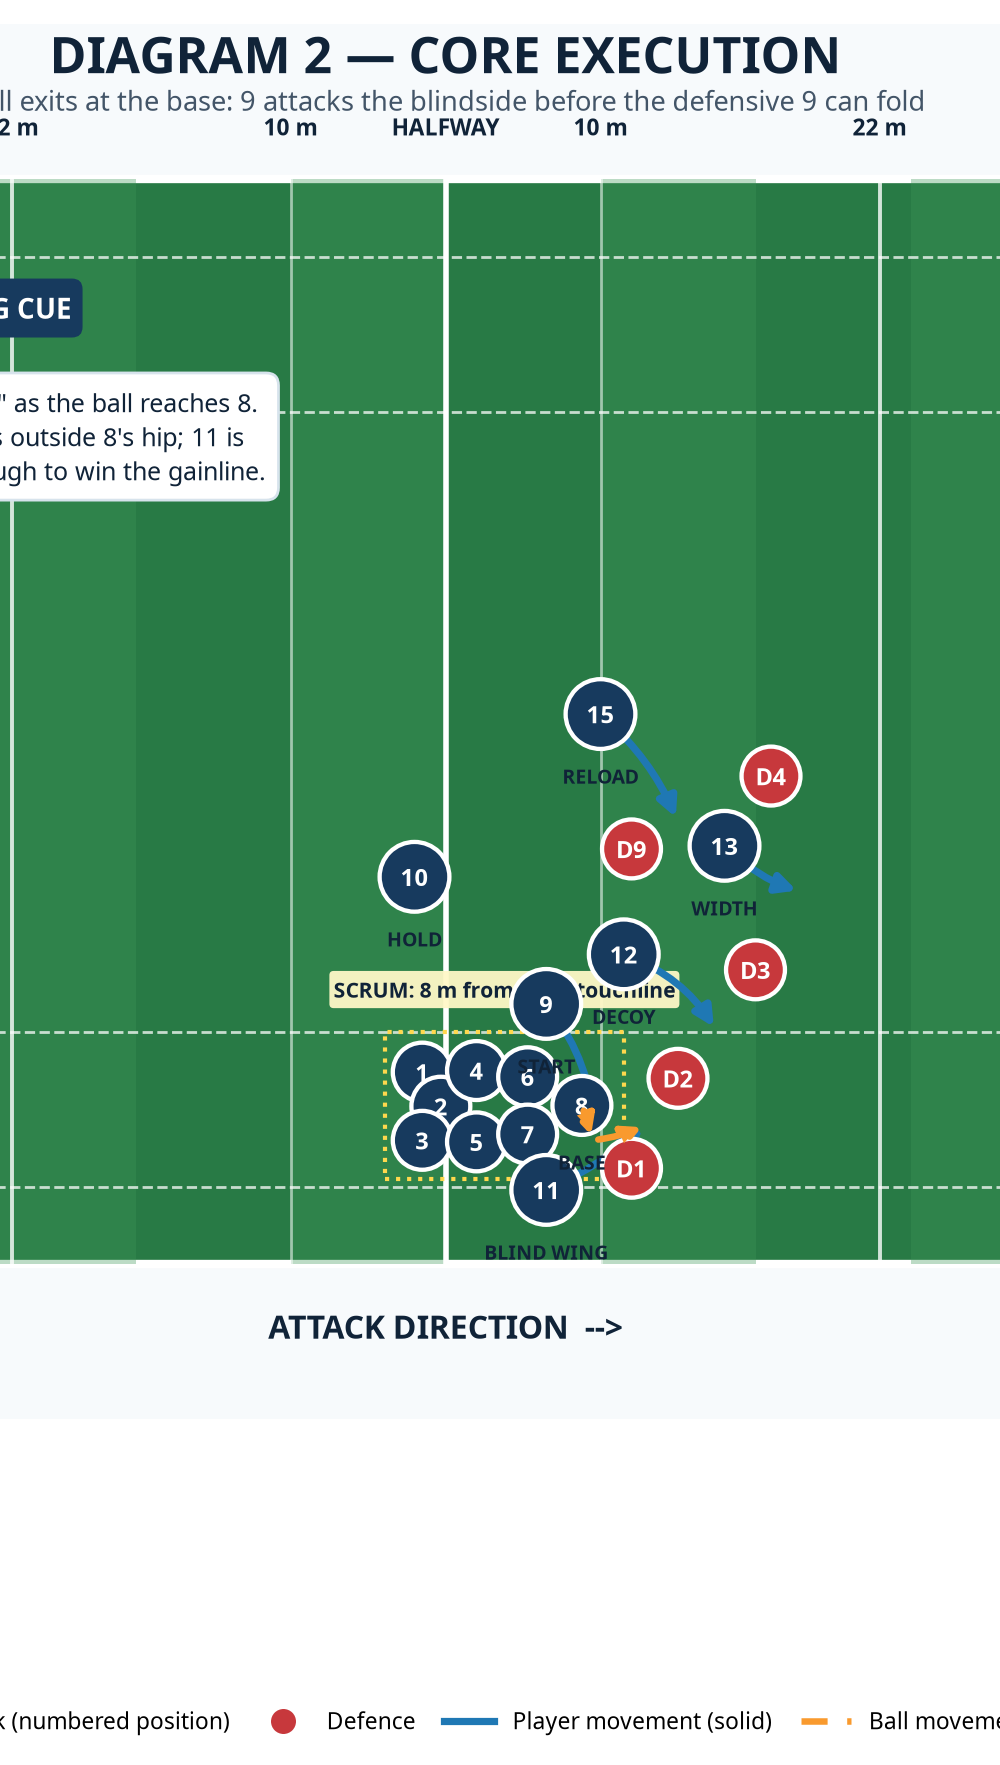
Control at the base. 8 secures the ball, shows it briefly, then presents it on the blind hip. The small hold invites the defensive 9 to detach and gives 9 the cue. Keep hips square.
Send 9 around the corner. 9 takes two quick lateral steps around 8's blind hip. Release a firm pass in front of 11's chest within 1.0–1.5 seconds of 8's control. Late or high means stop and reset.
Win the edge with 11. On 9's release, 11 accelerates on a 20–30 degree inside-out line. The first three steps are hard and square. Carry in two hands until D1 commits; if D1 holds, win the outside shoulder for 3–5 m.
Make the defender choose. 12 runs a square, full-speed decoy at D2 without blocking. 13 holds width so the next defender cannot fold inside.
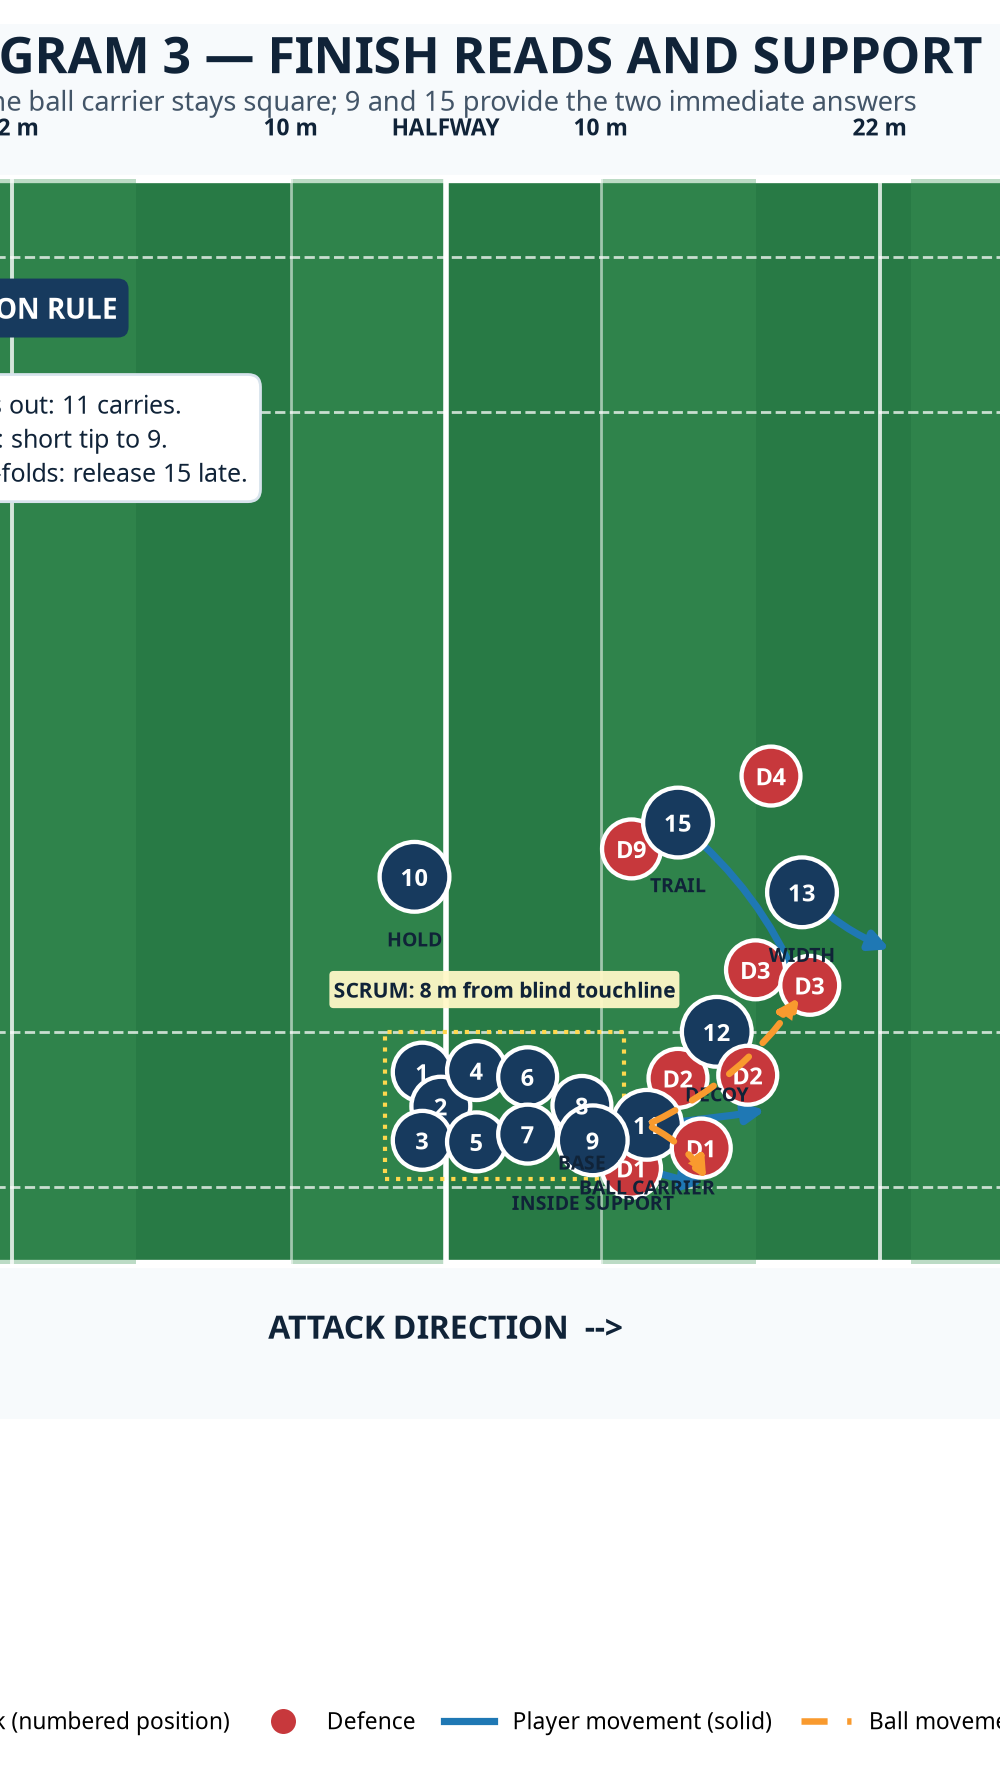
Finish the action. If D1 jams, 11 tips to 9. If D2 over-folds, 11 releases 15 late. Otherwise 11 carries and presents long. 12 cleans first; 8 and 7 fold behind the play.
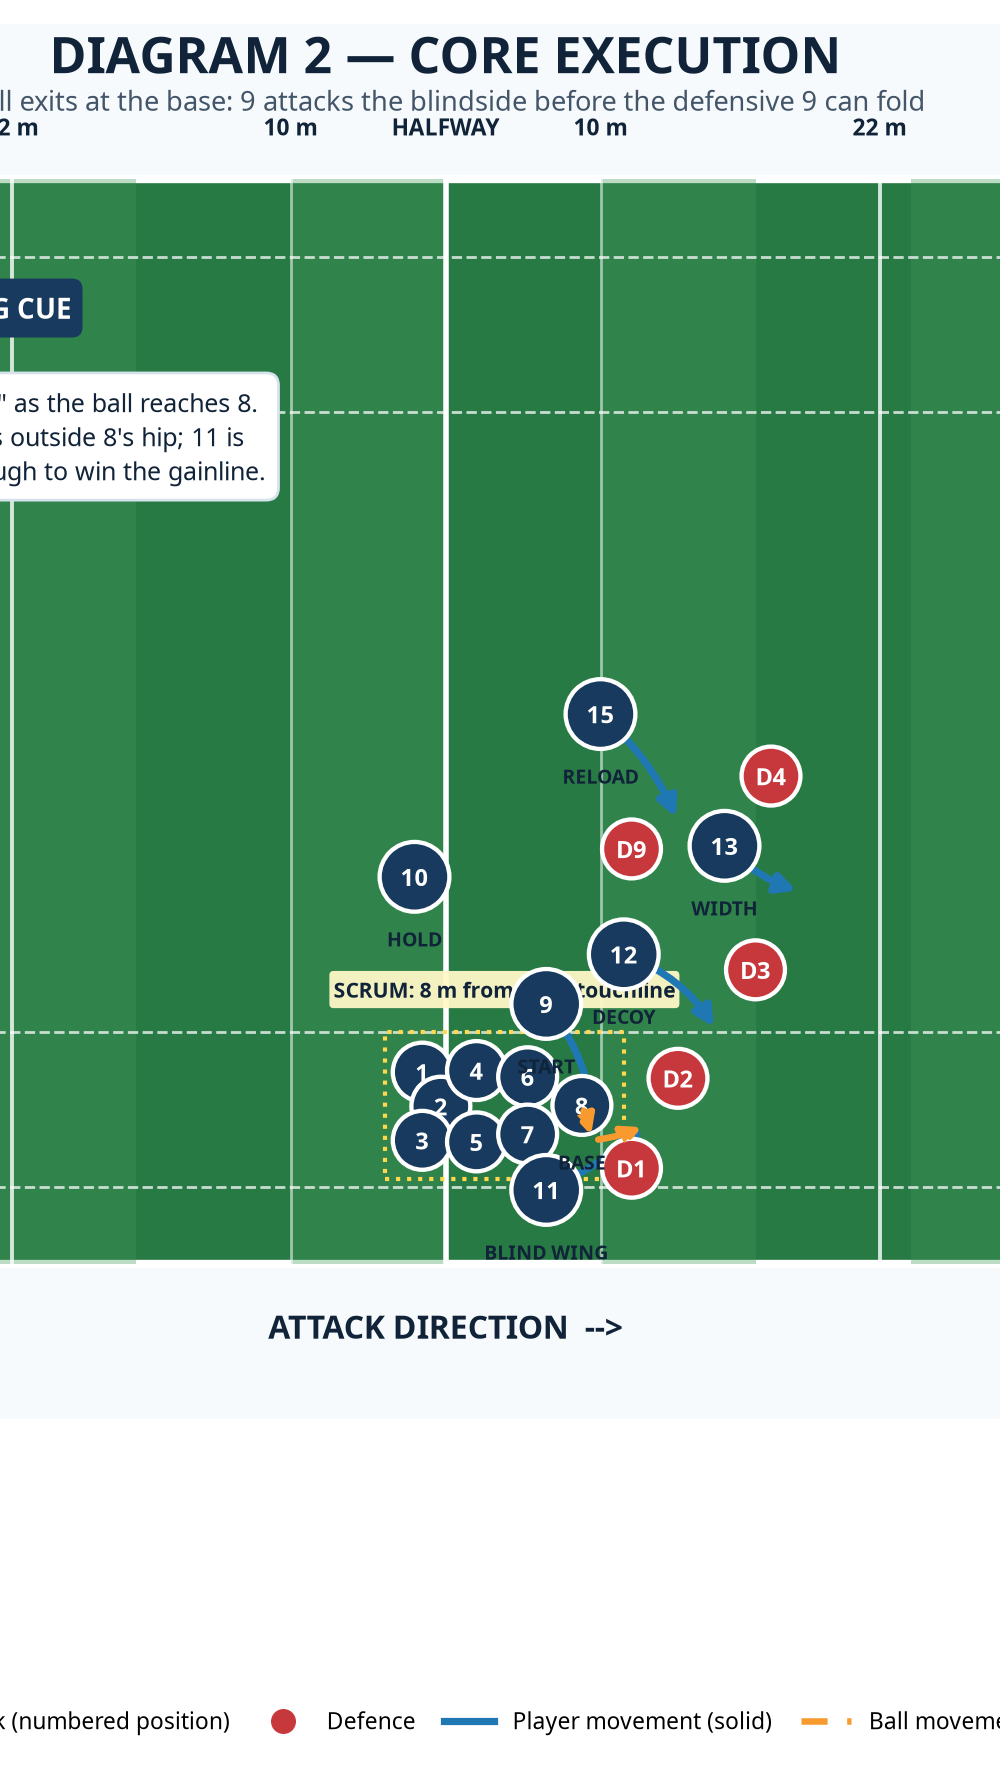
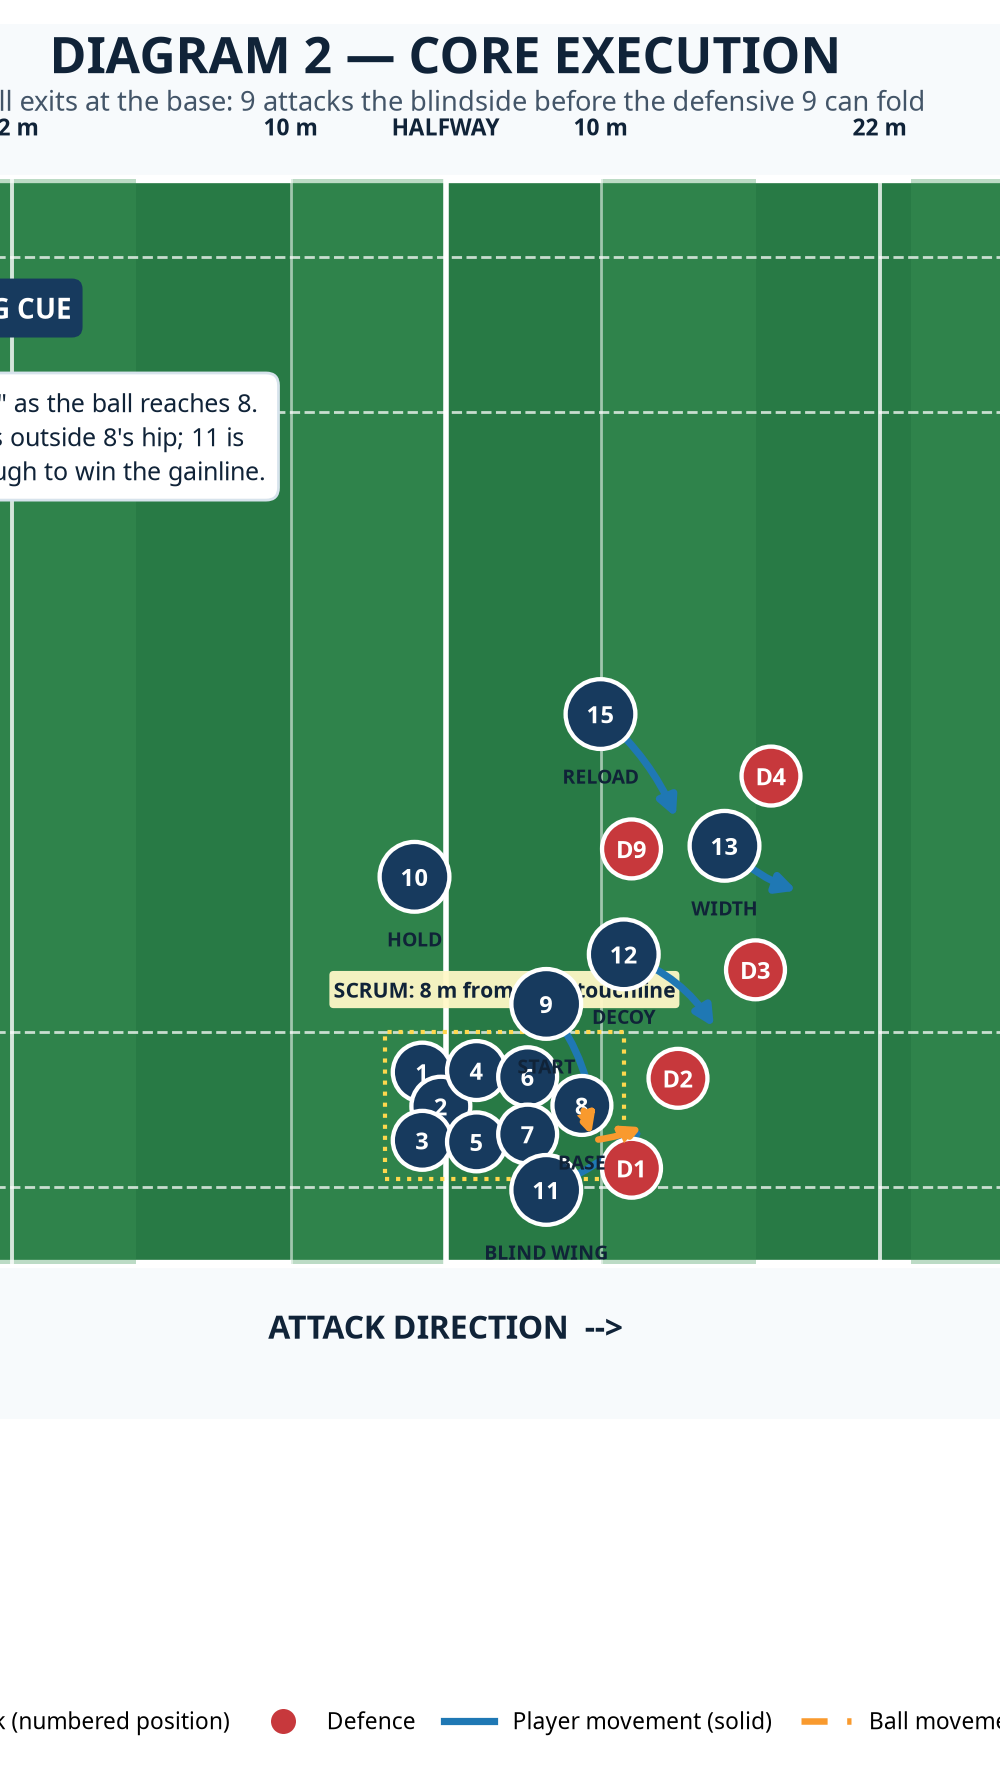
The core execution diagram should be your coaching checkpoint. Run it at walk-through pace once, at 70% twice, then live. Do not progress the speed until the pass hits 11 in stride and 12 is still square at the moment of release.
Key Coaching Points
| Coaching point | What to coach on the field |
|---|---|
| Win the race around 8 | Coach 9 to move when the ball is available, not when it has already left the scrum. The target is an early pass from 9's outside shoulder. |
| Flat does not mean standing flat | 11 starts with depth, accelerates onto the pass, and receives it moving forward. A standing catch invites a dominant tackle. |
| Square decoy, honest line | 12's job is to hold D2, not to obstruct. Hands up, chest square and a line that could genuinely receive the ball. |
| Two hands until the decision | 11 carries in two hands through the first three metres so D1 cannot simply shoulder up and drift. |
| Support owns the next phase | 9 works inside, 12 cleans or reloads, and 15 trails late. Make this visible in every rep. |
| Use the touchline intelligently | The touchline is a spare defender. Give 11 enough room to step infield; do not set the play when the blind channel is already closed. |
Common Mistakes
| Error you will see | Immediate correction |
|---|---|
| 9 waits behind 8 and passes late. | Put a cone at 9's launch point. Reset until 9 crosses it as 8 gains control, then remove the cone after three clean reps. |
| 11 drifts toward touch and runs out of space. | Rehearse the first three steps on an inside-out line; tell 11 to attack D1's outside shoulder, not the sideline. |
| 12 jogs or over-runs the decoy. | Stop the rep at release. Ask whether D2 would honestly believe 12 could receive; if not, run it again square and at pace. |
| 8 turns away from the blind. | Coach 8 to keep hips and shoulders square, then present the ball on the blind-side hip. Do not chase metres before the pass is made. |
| Players admire the break. | Score only after a clean recycle or support-line pass. This forces 9, 12 and 15 to complete the picture. |
Variations & Progressions
Variation 1 — Zip Tip. Keep the same launch, but make the short pass from 11 to 9 the first planned answer. Use it when D1 jams tight or the defensive 9 has over-folded. It gives smaller 11s a safe way to turn line speed into an inside break.
Variation 2 — Zip Switch. Have 15 trail from depth and take the ball from 11 when D2 comes hard inside. This should be a late option, not a pre-called loop; 15 must call only after reading D2's shoulders.
Progression — Chaos release. Begin with a static feed and five defenders. Progress to a live feed, then allow the defence to choose either a hard jam or passive drift after the ball reaches 8. Finally, play two phases with a 10-second scoreboard. The attack earns one point for a 3 m gain, two points for a line break, and no point unless the first ruck is retained.
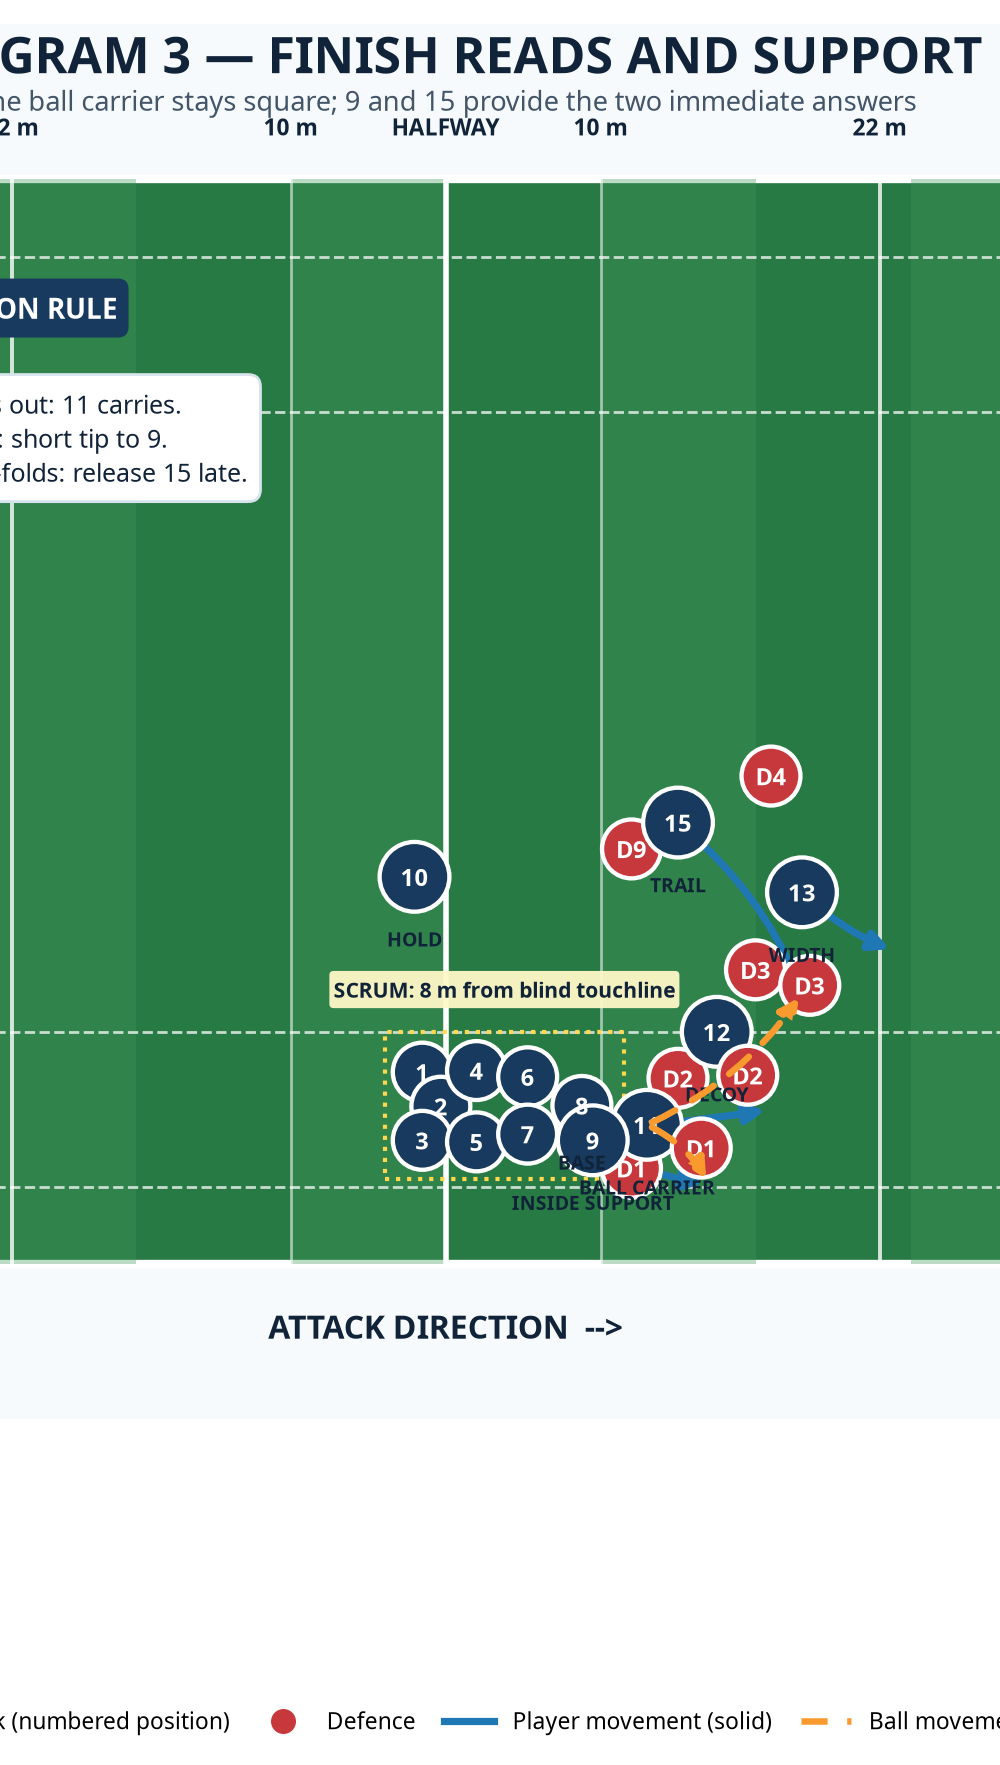
Use the finishing diagram to coach the read, not a robotic pass. The carrier's decision rule is clear: D1 stays out—carry; D1 jams—tip to 9; D2 over-folds—release 15.
Age Adaptations
For under-8 and under-10, use a coach-fed restart or simplified set piece, never contested-scrum detail. Work in a 12 m x 15 m tag or touch box. Give 9 and 11 fixed roles, remove the decoy, and reward a catch in motion.
For under-12, use age-appropriate modified scrum laws and a passive 12 decoy. Keep the channel at 7–8 m, use D1 and D2, and cap the play at the first tackle.
For under-14 to under-16, add the defensive 9 fold and all three decision rules. Run two quality live reps, then rotate passing and decision roles.
For open-age squads, demand a live scrum, full line and second phase. Film from behind the scrum and ask: did 9 beat the fold, did 11 receive in stride, and did support arrive in order?
Safety and law reminder
Use this as a coaching pattern, not as a substitute for current local law, competition modifications or scrum-safety guidance. Review the current World Rugby Laws before live contested-scrum work. 1 2

