Mastering Support Lines: The 'Continuous Wave' Attack Drill
Develop your players' ability to read the defense, hit dynamic angles, and provide relentless support to the ball carrier with this high-intensity attacking drill.

Equipment Needed
1. Overview
Effective attacking rugby is built on the foundation of relentless, intelligent support play. The 'Continuous Wave' drill is designed to train players to anticipate the ball carrier's movements, identify soft shoulders in the defensive line, and hit dynamic support angles at pace.
By simulating game-like scenarios with moving defenders, this drill forces attackers to make split-second decisions—choosing between a hard inside line to exploit a gap or a wide arc to maintain width. This is an essential session for developing attacking fluidity, offloading skills, and ensuring the ball carrier is never isolated.
2. Setup
Pitch Dimensions & Equipment:
- Grid size: 50m long x 30m wide.
- Cones to mark the grid boundaries and internal zones (Zone A: 15m, Zone B: 20m, Zone C: 15m).
- 2-3 rugby balls (keep spares at the starting point to maintain drill intensity).
- Colored bibs to differentiate attackers (Red) and defenders (Blue).
Player Positions:
- Attackers (Red): Scrum-half (9), Fly-half (10), Inside Centre (12), Outside Centre (13), and Wing (14).
- Defenders (Blue): Two defenders (D1, D2) positioned in Zone B to act as a 'decision gate'.

3. Step-by-Step Instructions
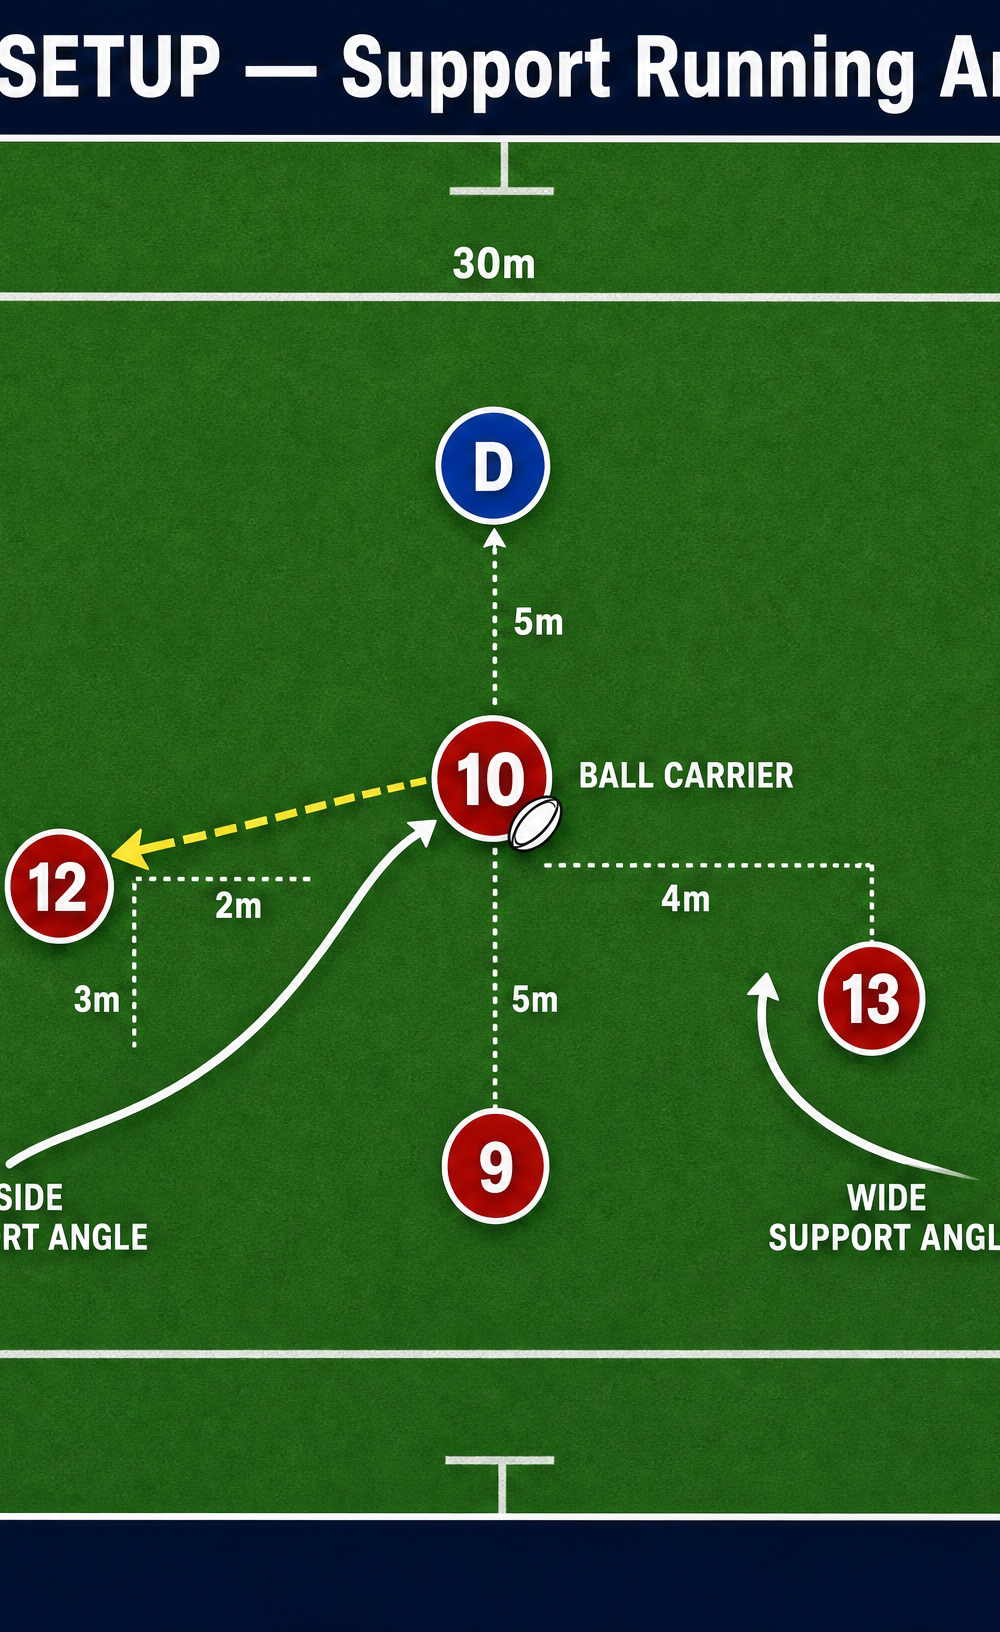
- The Build-Up (Zone A): The drill begins with the Scrum-half (9) passing from a static ruck position to the Fly-half (10), who takes the ball flat and attacks the line at pace.
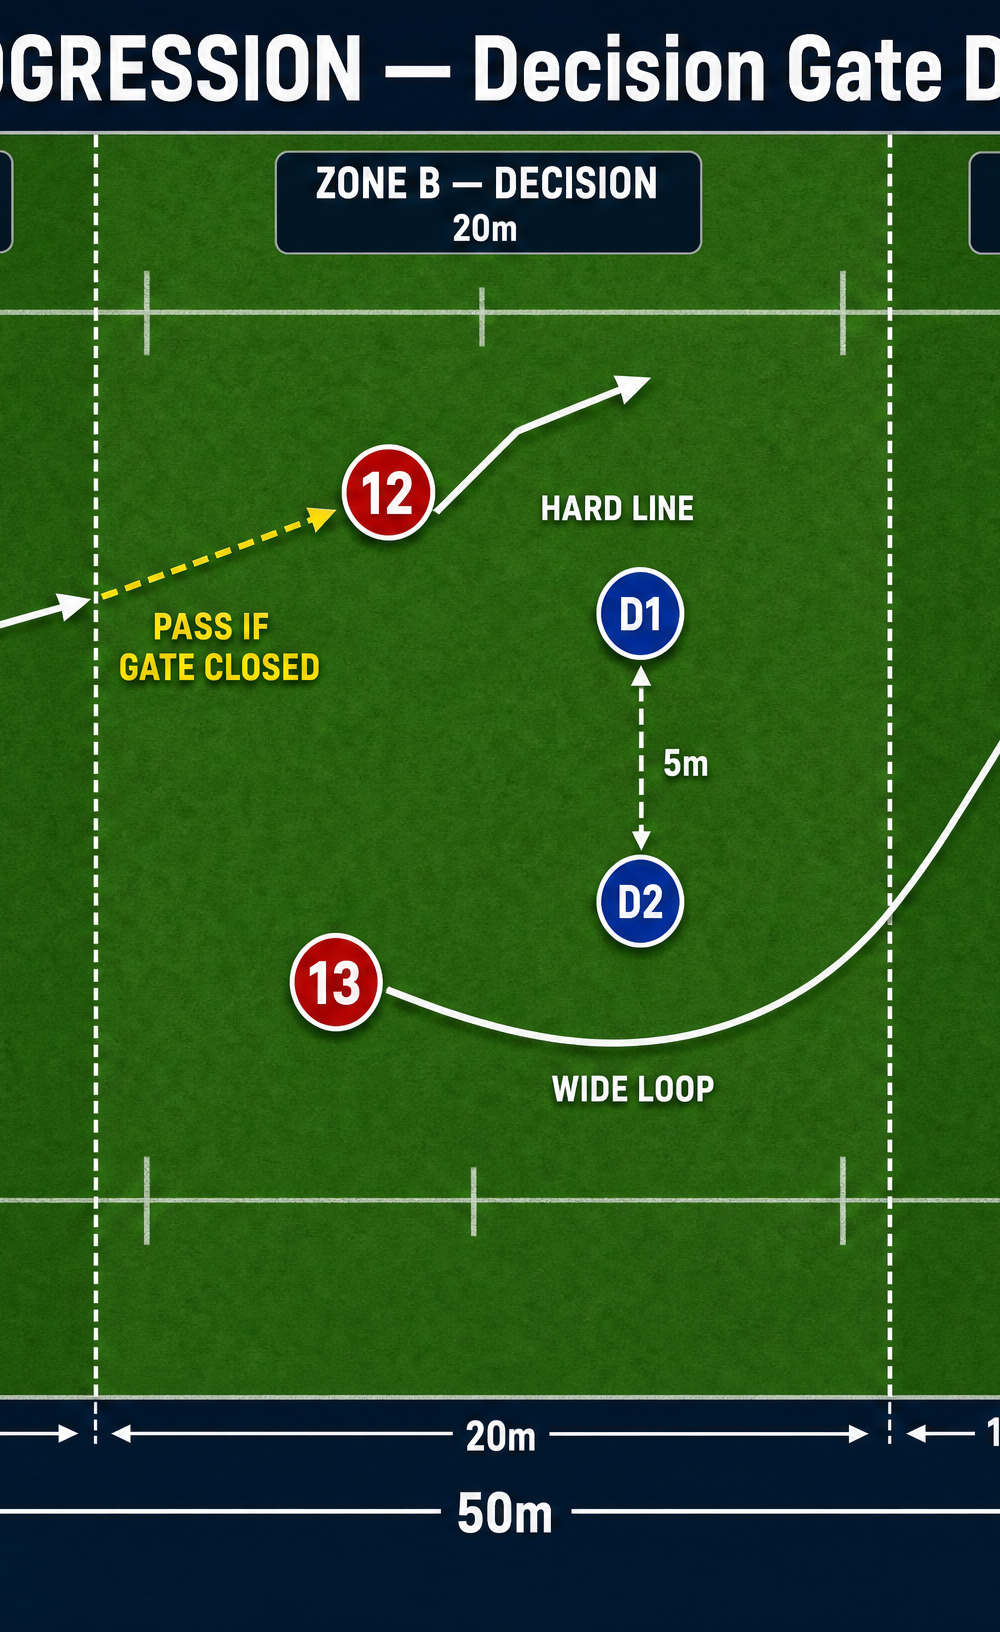
- The Decision Gate (Zone B): As 10 carries the ball forward, the two defenders (D1 and D2) apply passive or semi-active pressure. The support runners (12 and 13) must read the defenders' movements.
- Hitting the Angles:
- If D1 drifts wide, the Inside Centre (12) must hit a hard, sharp angle back against the grain (inside support).
- If the defense pinches in, the Outside Centre (13) must run a wide, looping arc to exploit the outside space.
- The Execution: The ball carrier (10) must commit a defender and deliver a crisp pass or offload to the correct support runner based on the defense's reaction.
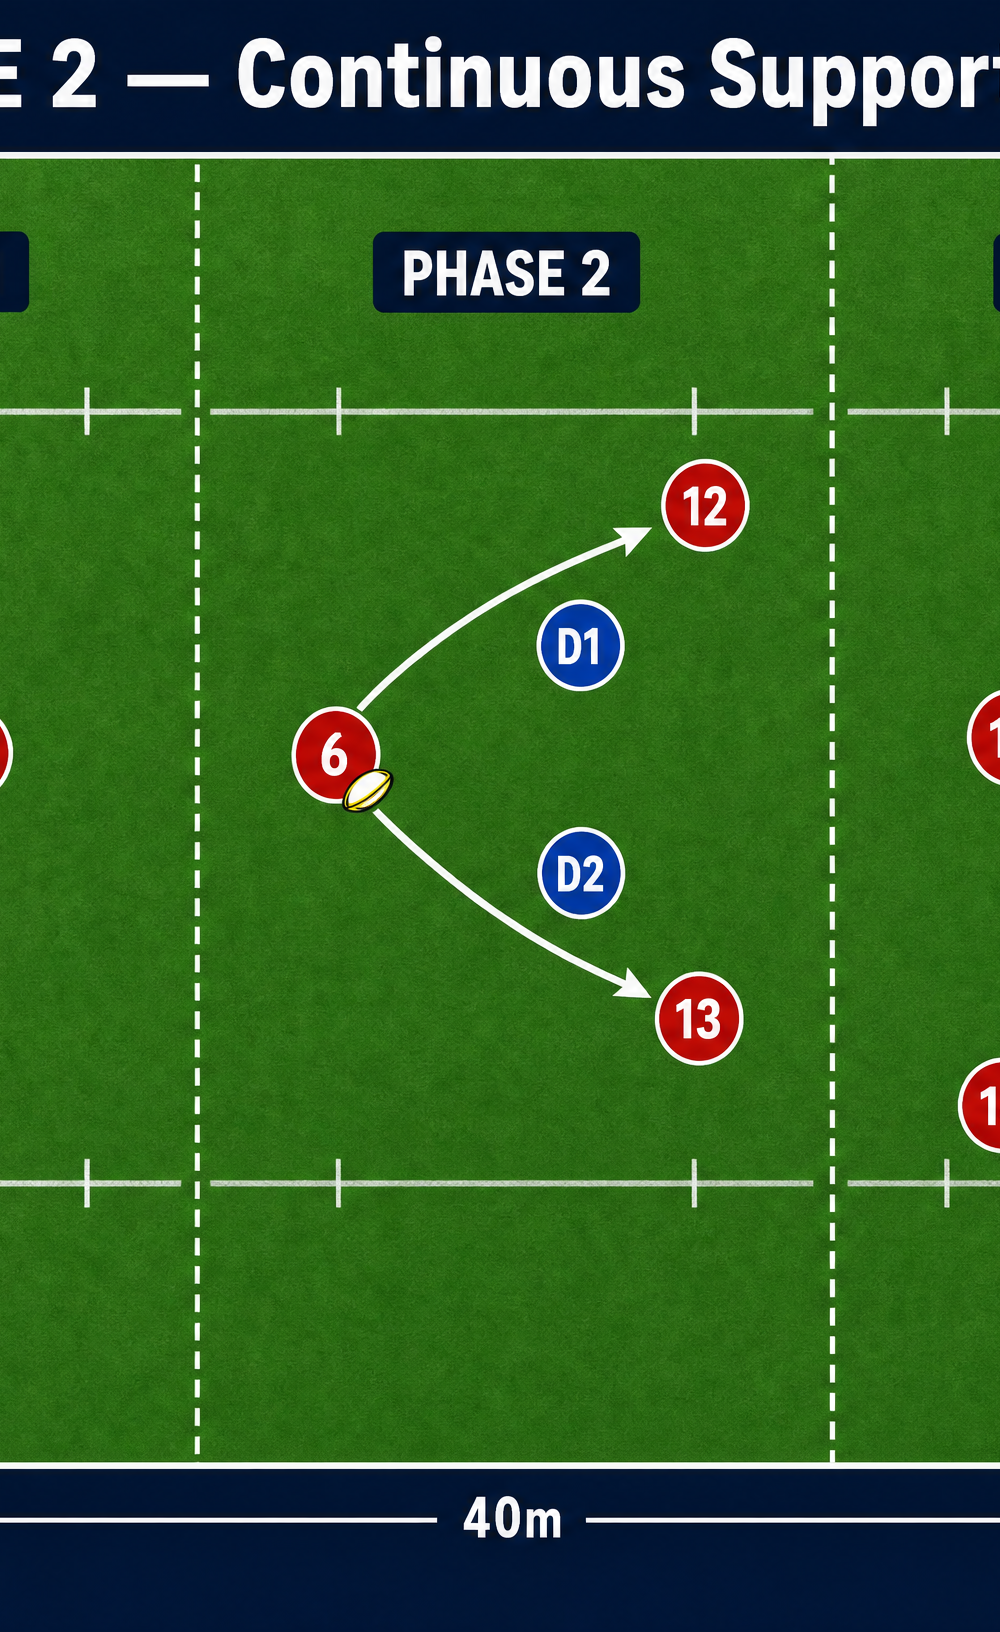
- The Finish (Zone C): The receiving player accelerates through the gap, linking up with the Wing (14) who provides deep support for a final pass to score over the try line.
- Reset and Repeat: Players jog back on the outside of the grid, swap roles (attackers become defenders, etc.), and immediately restart to maintain a high heart rate.
4. Key Coaching Points
- Depth and Pace: Support runners must start deep enough so they can hit the line at maximum pace. Flat runners are easily defended.
- Communication: Attackers must call their lines early and loudly (e.g., "Inside!" or "Wide!") to give the ball carrier confidence.
- Commit the Defender: The ball carrier must run a credible attacking line to fix the defense before passing. Drifting sideways kills the space for support runners.
- Hands Up, Target Up: Support players must have their hands up, providing a clear target for the pass or offload.
- Late Changes of Angle: Encourage support runners to change their angle late to deceive the defense and exploit newly opened gaps.
5. Common Mistakes
- Overrunning the Ball Carrier: Support players arriving too early or too flat, resulting in a forward pass or being easily tackled.
- Silent Support: Players running good lines but failing to communicate, leaving the ball carrier guessing.
- Static Catching: Catching the ball while stationary or slowing down before contact, losing all attacking momentum.
- Tunnel Vision: The ball carrier failing to scan the defense and forcing a pass to a covered player instead of taking the gap themselves.
6. Variations & Progressions
- Add Full Contact: Transition the defenders from two-hand touch to full contact to test the ball carrier's ability to offload in the tackle.
- The 'Chaos' Call: The coach blows a whistle mid-drill; the current ball carrier must immediately go to ground, and the support players must secure a rapid ruck before continuing the attack.
- Overload Defense: Add a third defender in Zone C to force a 2v1 decision for the final support runners.
7. Age Adaptations
- Under 10s: Simplify the drill by removing the defenders. Focus entirely on the timing of the run, catching at pace, and basic communication.
- Under 14s: Introduce passive defenders who can only move laterally. Emphasize depth and identifying the correct gap.
- Under 16s to Open: Run the drill at match intensity with active defenders. Introduce complex calls, decoy runs, and offloading in contact.