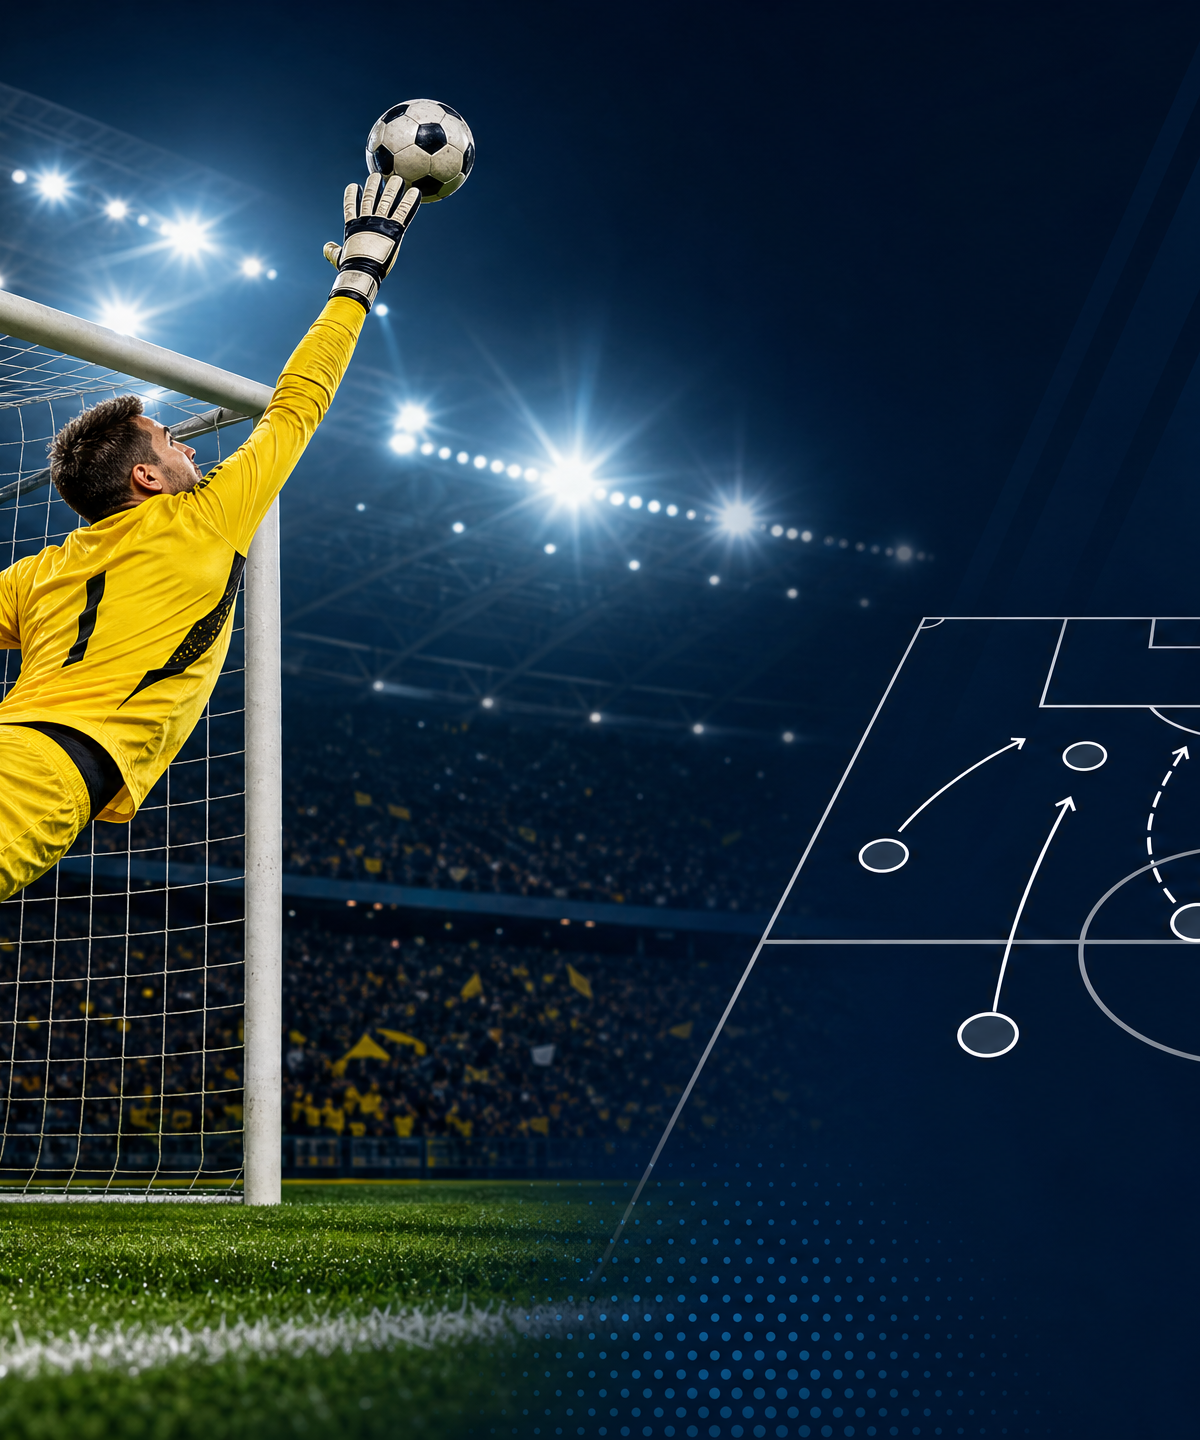
The Ultimate Goalkeeper Shot-Stopping & Reaction Drill
A comprehensive 3-phase goalkeeper training session designed to improve shot-stopping mechanics, rapid-fire reaction times, and optimal angle cutting in game-like scenarios.
Equipment Needed
1. Overview
Shot-stopping is the fundamental cornerstone of any elite goalkeeper's skill set. This drill resource is designed to provide coaches with a structured, progressive approach to developing a goalkeeper's ability to save shots from various angles, react to rebounds, and maintain optimal positioning. The session is broken down into three distinct phases, starting with foundational mechanics and progressing to high-intensity, match-realistic scenarios.
This drill is ideal for integrating into the main technical phase of a goalkeeper-specific training session or as a station in a broader team defensive circuit. It focuses heavily on footwork, set position, handling, and the physical conditioning required for explosive diving.
2. Setup
Pitch Area: Penalty area (18-yard box) and the D (penalty arc) on a standard 100-110m x 64-75m pitch.
Equipment Required:
- 1 Full-size goal (8 yards x 8 feet)
- 8-10 Footballs
- 6-8 Marker cones (for defining shooting zones and starting positions)
- 1-2 Rebound boards (optional, for Phase 2)
Player Positions:
- 1 Goalkeeper (GK): Starts centrally on the goal line or slightly advanced depending on the phase.
- 3-5 Servers/Shooters (S1, S2, S3, etc.): Positioned at varying distances and angles outside the 6-yard box.
- 1 Coach (C): Manages the tempo, provides the initial trigger, and feeds balls if necessary.
- 2 Rebound Runners (R1, R2): Positioned to crash the box for secondary saves (Phase 2).
3. Step-by-Step Instructions
Phase 1: Basic Shot-Stopping Setup
This initial phase focuses on warming up the goalkeeper's handling and diving mechanics from fixed, predictable angles.
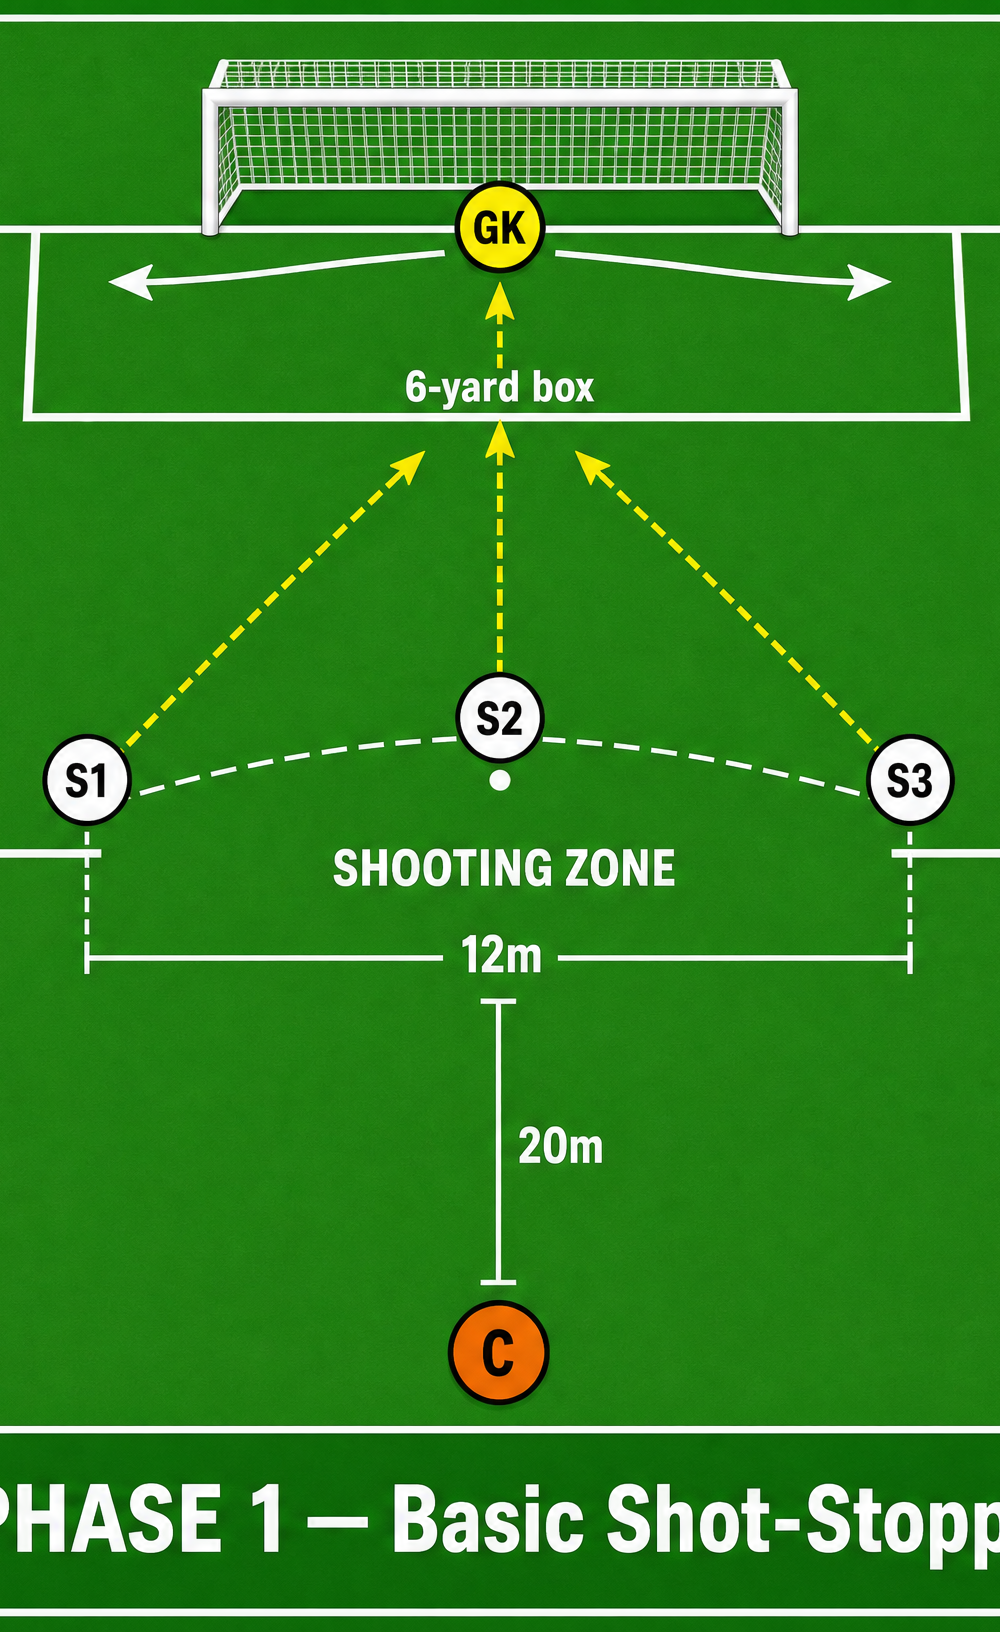
- Positioning: The GK starts centrally, approximately 1-2 meters off the goal line, adopting a strong set position (knees slightly bent, weight on the balls of the feet, hands ready).
- The Trigger: The Coach (C) positioned 20m out initiates the drill by calling the number of the active server (S1, S2, or S3).
- The Shot: The designated server takes a touch and strikes a firm, driven shot toward the goal from the 12m mark.
- The Save: The GK must read the strike, make the save (prioritizing catching over parrying if possible), and quickly distribute the ball back to the Coach.
- Reset: The GK immediately recovers to the central starting position and prepares for the next call.
- Rotation: Complete 6-8 repetitions before resting. Ensure shots are varied between low dives, mid-height saves, and central handling.
Phase 2: Rapid-Fire Reaction & Rebound
This progression introduces chaos, forcing the GK to make secondary saves and deal with realistic penalty box traffic.
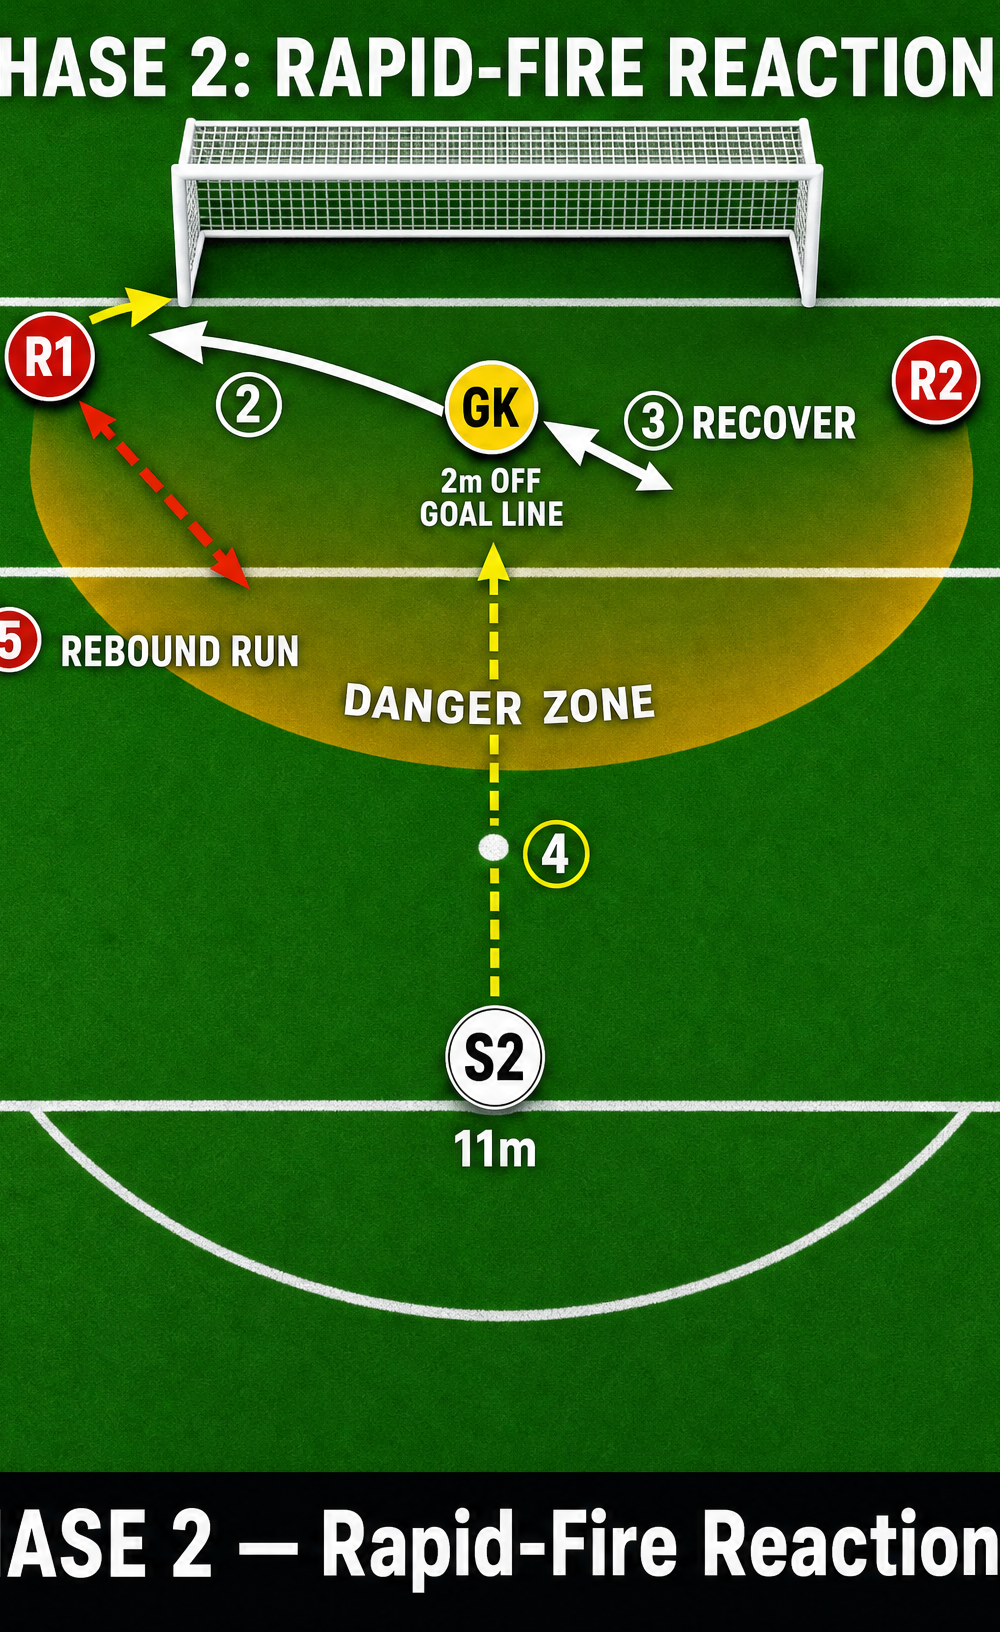
- Initial Strike: S1 (positioned 20m out on the left) drives a shot aiming for the bottom corners.
- The Save & Recovery: The GK makes the initial diving save. As soon as the ball is parried or caught, the GK must immediately recover to their feet and reset their position.
- The Second Ball: The moment the GK is back on their feet, S2 (at the 11m penalty spot) immediately strikes a second ball. The GK must react instantly to this rapid-fire shot.
- Rebound Pressure: If the GK parries the second shot into the "Danger Zone" (the shaded area in the diagram), the Rebound Runners (R1 and R2) crash the box to finish the rebound. The GK must scramble to make a potential third save.
- Focus: Emphasize the speed of recovery. The GK cannot admire their first save; they must immediately prepare for the next action.
Phase 3: Angle Cutting & Positioning
This final phase refines the goalkeeper's spatial awareness and ability to narrow the angle for the shooter.
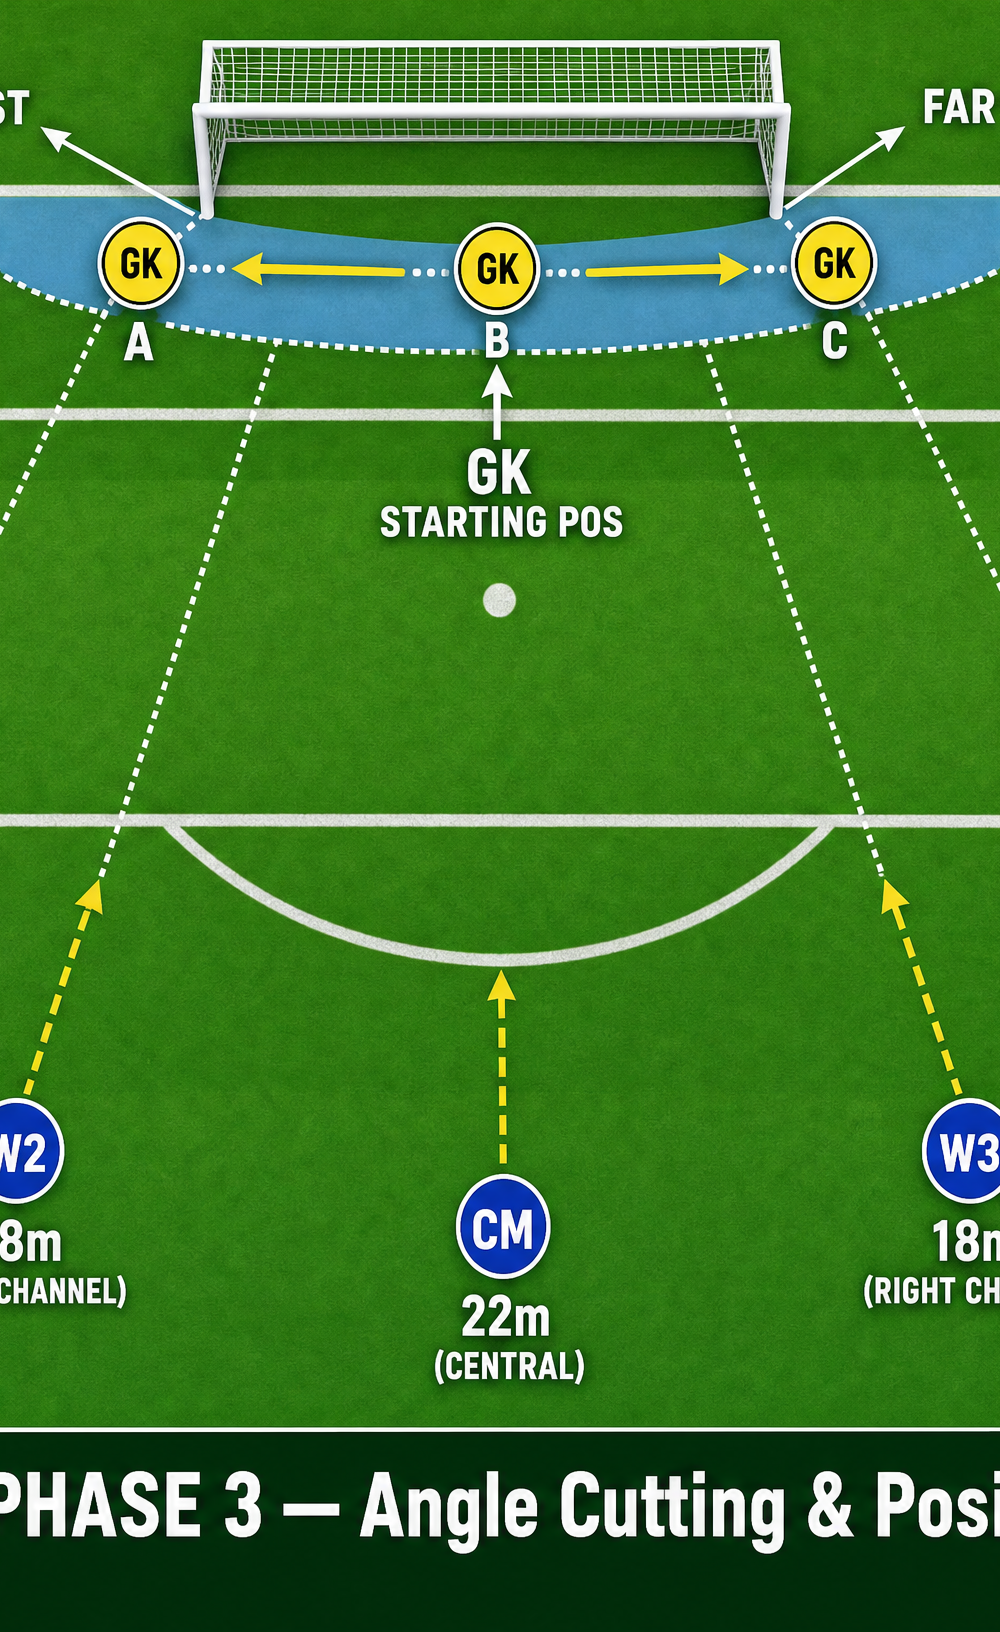
- The Arc Setup: Five servers (W1, W2, CM, W3, W4) are positioned in a wide arc ranging from 18m to 25m from the goal.
- Movement: The Coach calls a server. The GK must rapidly adjust their position along the "Optimal Position" arc (1-2m off the goal line) to bisect the angle between the ball and the two goalposts.
- The Strike: Once the GK is set, the designated server takes a touch and shoots.
- Key Metric: The GK should aim to be stationary and in the "set position" before the striker makes contact with the ball. Moving while the ball is struck significantly reduces save percentage.
- Progression: Have the servers pass the ball to each other around the arc, forcing the GK to constantly adjust their feet and angle before a random server decides to shoot.
4. Key Coaching Points
- The Set Position: The GK must be stationary and balanced at the exact moment the ball is struck. "Set early, save easy."
- Forward Momentum: When diving, the GK should aim to attack the ball diagonally forward, cutting down the distance and reducing the angle, rather than diving flat along the goal line.
- Handling vs. Parrying: Always prioritize catching the ball. If a parry is necessary, push the ball wide and away from the central "Danger Zone."
- Speed of Recovery: After a dive, the GK must use their momentum and core strength to spring back to their feet immediately. The play is not dead until the ball is cleared.
- Footwork: Small, rapid steps are crucial for adjusting to the line of the ball before diving. Avoid crossing the feet.
5. Common Mistakes
- Moving on the Strike: Goalkeepers often try to anticipate the shot and are caught mid-step when the ball is hit, making it impossible to push off effectively.
- Diving Backwards: Collapsing backward onto the goal line rather than attacking the ball forward. This makes the goal bigger for the shooter.
- Parrying into the Center: Deflecting shots straight back into the penalty spot area, setting up easy tap-ins for the opposition.
- Poor Angle Assessment: Over-committing to the near post and leaving the far post completely exposed, or standing too deep in the goal mouth.
6. Variations & Progressions
- Variation 1: Visual Impairment. Place a mannequin or a passive player in front of the GK to obscure their vision of the strike, simulating a crowded penalty box.
- Variation 2: Unpredictable Bounce. Use a deflector ramp or an uneven surface just inside the penalty area to create unpredictable bounces that test the GK's reactions.
- Progression 1: Live Play Integration. Instead of static servers, initiate the drill with a 2v1 or 3v2 attacking overload entering the penalty area, forcing the GK to read the game dynamically.
7. Age Adaptations
- Under 8 - Under 10: Focus purely on Phase 1. Reduce the distance of the shots (8-10m). Emphasize basic catching technique (the "W" grip) and safe falling mechanics rather than explosive diving.
- Under 12 - Under 14: Introduce Phase 2 but remove the rebound runners initially. Focus on the speed of getting back to their feet after a save. Ensure correct diving technique (leading with the hands, not the elbow).
- Under 16 - Open: Run all phases at match intensity. Demand perfection in angle cutting and rapid-fire reactions. Introduce the variations to increase cognitive load.