1–3–1 Zone Offense: High-Post Overload and Baseline Runner
Teach your team to crack a 1–3–1 zone with a decisive high-post touch, a late baseline runner, and an inside-out skip read.

Equipment Needed
1–3–1 Zone Offense: High-Post Overload and Baseline Runner
Overview
This is a five-player continuity entry designed to make a compact 1–3–1 zone defend two decisions at once: the high-post catch in the nail area and the baseline runner behind the bottom line of the zone. Use it after a timeout, to settle a young team that is rushing perimeter shots, or whenever the defense is comfortable keeping the ball outside. The set begins with a simple wing entry but its purpose is not merely to pass around the zone. Your players must force a middle defender to step up, then make the next pass before the zone can recover.
Run it on a full FIBA court, whose inner playing area is 28 m × 15 m.1 For teaching, use the 14 m frontcourt. The ball must not stay in one lane for two beats: reverse, touch inside, or skip after every catch.
Coach’s intent: The first quality shot is a high-post turn-and-score, a short-corner finish, or a feet-set three created by an inside-out skip. Do not accept a contested wing three before the middle has been moved.
Setup
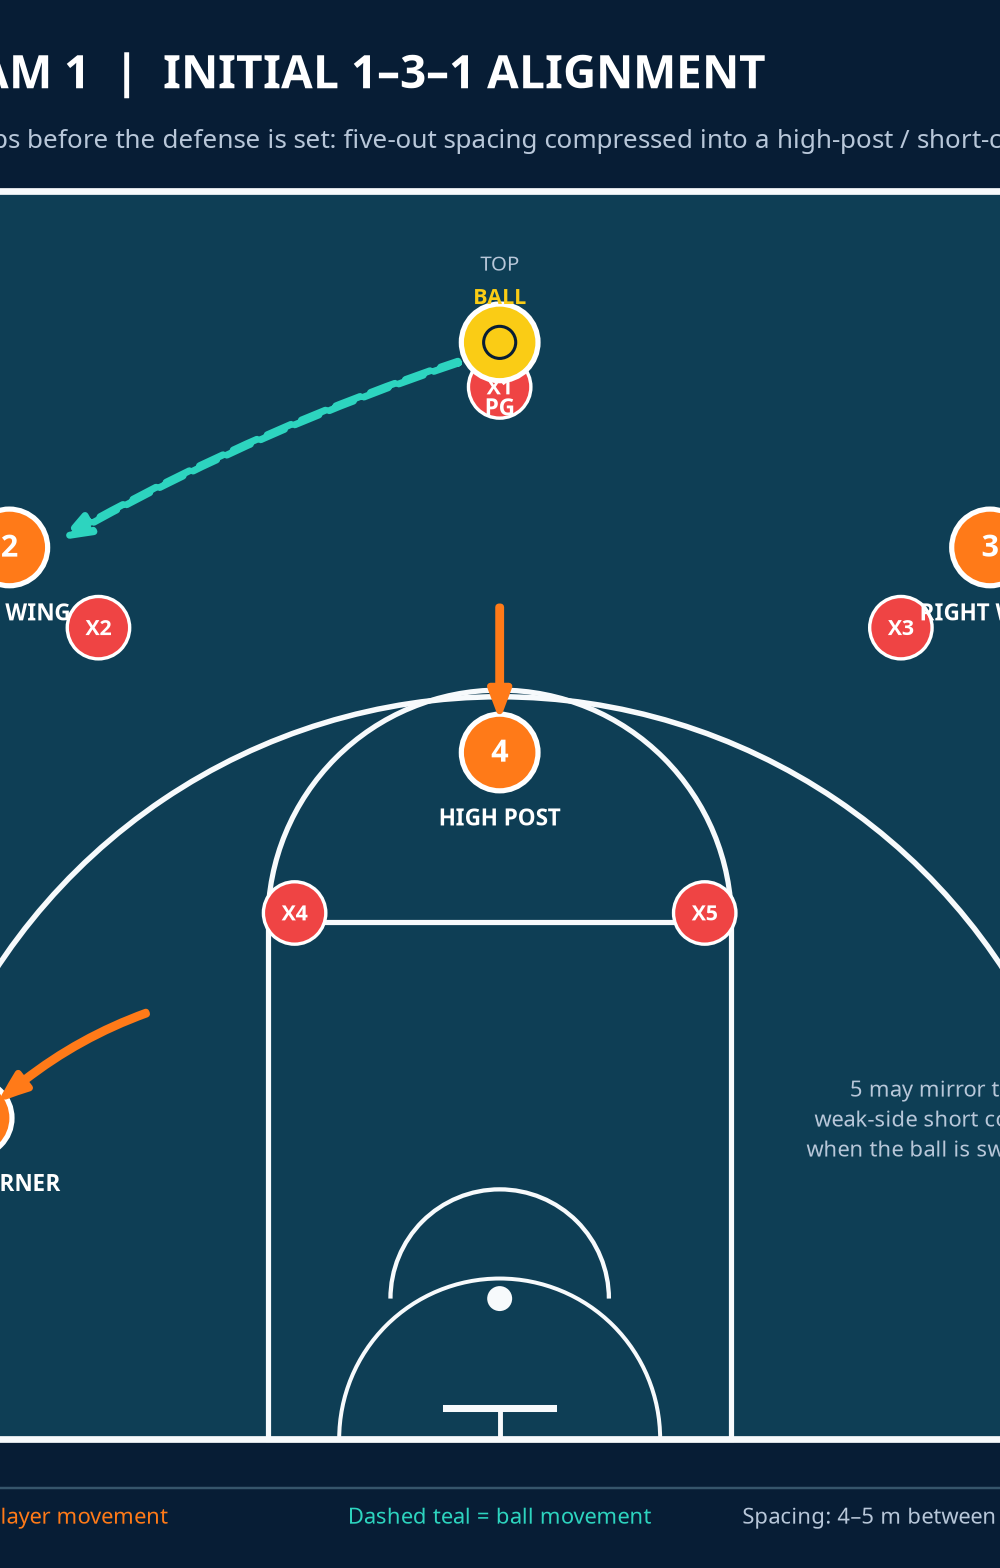
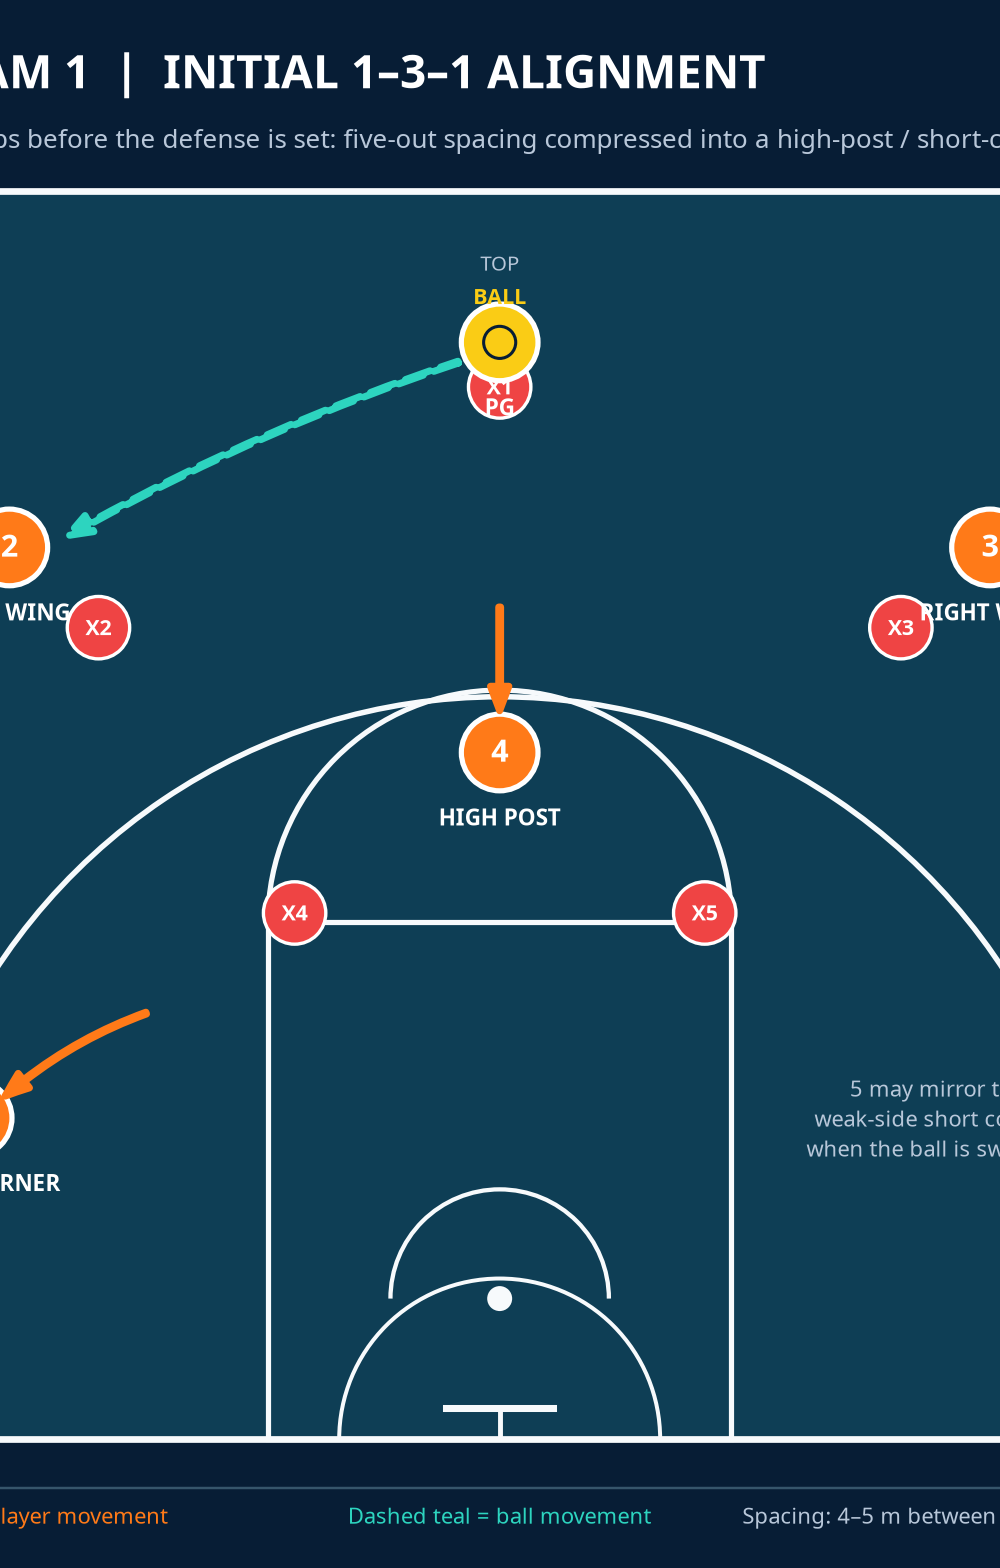
Bring five offensive players, five defenders, six flat cones, and two basketballs. Put one cone at each wing (roughly 4–5 m above the free-throw-line extended), one at the top, one in the middle of the foul line area, and one in each short corner, about 1.0–1.5 m above the baseline. The offense uses standard numbers: 1 is the point guard, 2 the left wing/guard, 3 the right wing/guard, 4 the high-post forward, and 5 the baseline runner/centre. In a game, 2 and 3 may be either guard or wing; what matters is that both can catch, pass, and shoot.
| Player | Starting spot | First job | Spacing cue |
|---|---|---|---|
| 1 — PG | Top, 1 m above the arc | Initiate and become safety | Stay central until the wing receives |
| 2 — left wing | Ball-side wing | Receive, see inside, reverse if denied | Toes outside the three-point line |
| 3 — right wing | Weak-side wing | Lift into the skip window | Be ready before the high-post catch |
| 4 — forward | High post / nail | Flash, catch, and read the middle | Present two hands at the foul line |
| 5 — centre | Ball-side short corner | Run baseline behind the zone | Arrive late, below the defender’s vision |
Set-Up Check
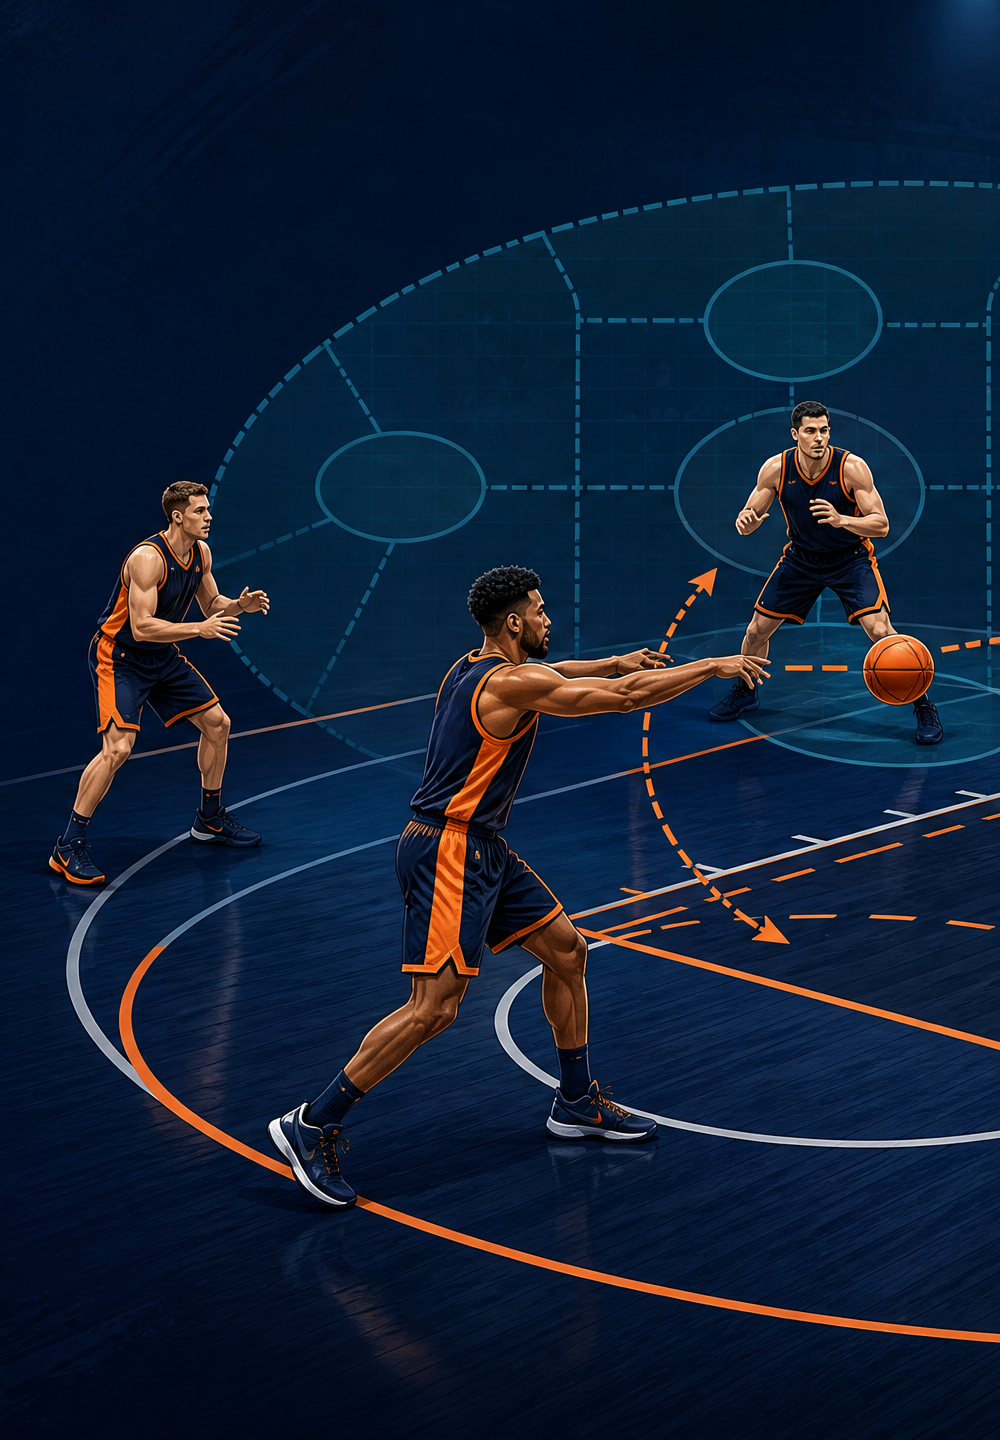
Before live play, identify the nail (centre of the free-throw line) and short corner (outside the lane near the baseline). Demand 4–5 m of perimeter separation and keep 5 out of the restricted area until the high-post entry; an early 5 lets one low defender guard player and rim.
Step-by-Step Instructions
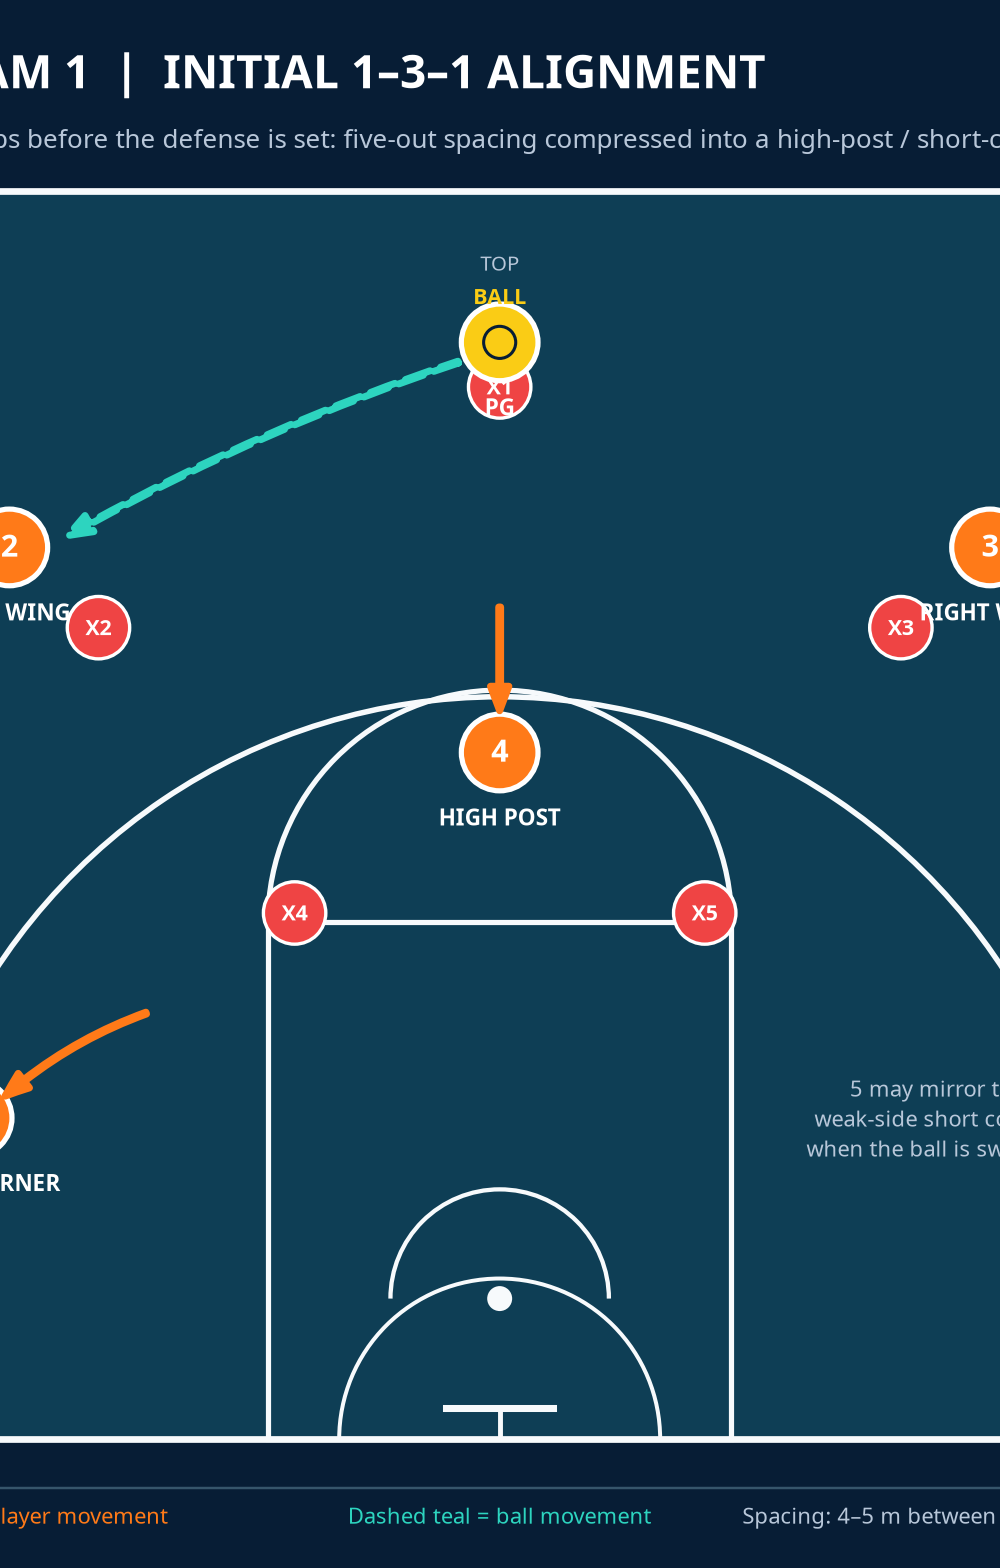
Start in the 1–3–1 alignment. 1 brings the ball to the top, with 2 and 3 wide at the wings. 4 begins just above the nail and 5 begins in the ball-side short corner. On the coach’s command, 4 gives a sharp V-cut—one step away, then a two-step flash toward the ball—so the defender cannot sit on the passing line.
Make the first wing entry. 1 passes to 2. The pass must travel outside the top defender’s reach; use a crisp chest pass or a purposeful bounce pass, never a soft lob. As the pass travels, 1 slides one step toward the ball-side slot for a return pass and safety balance. 3 stays wide and lifts a half-step to remain visible over the zone.
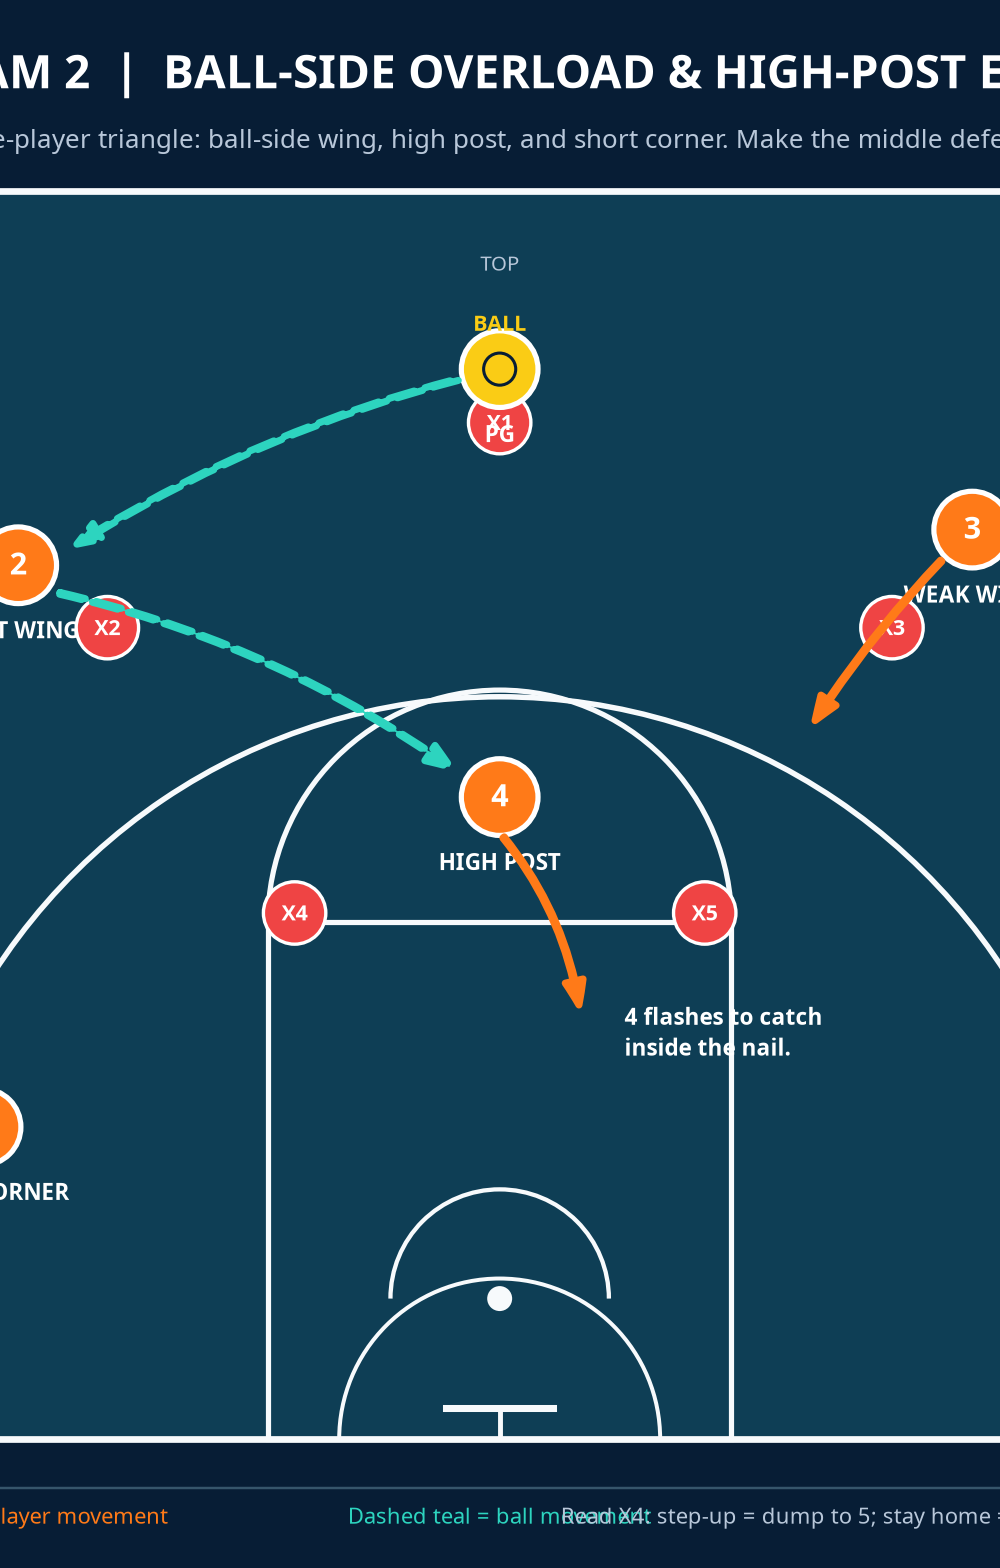
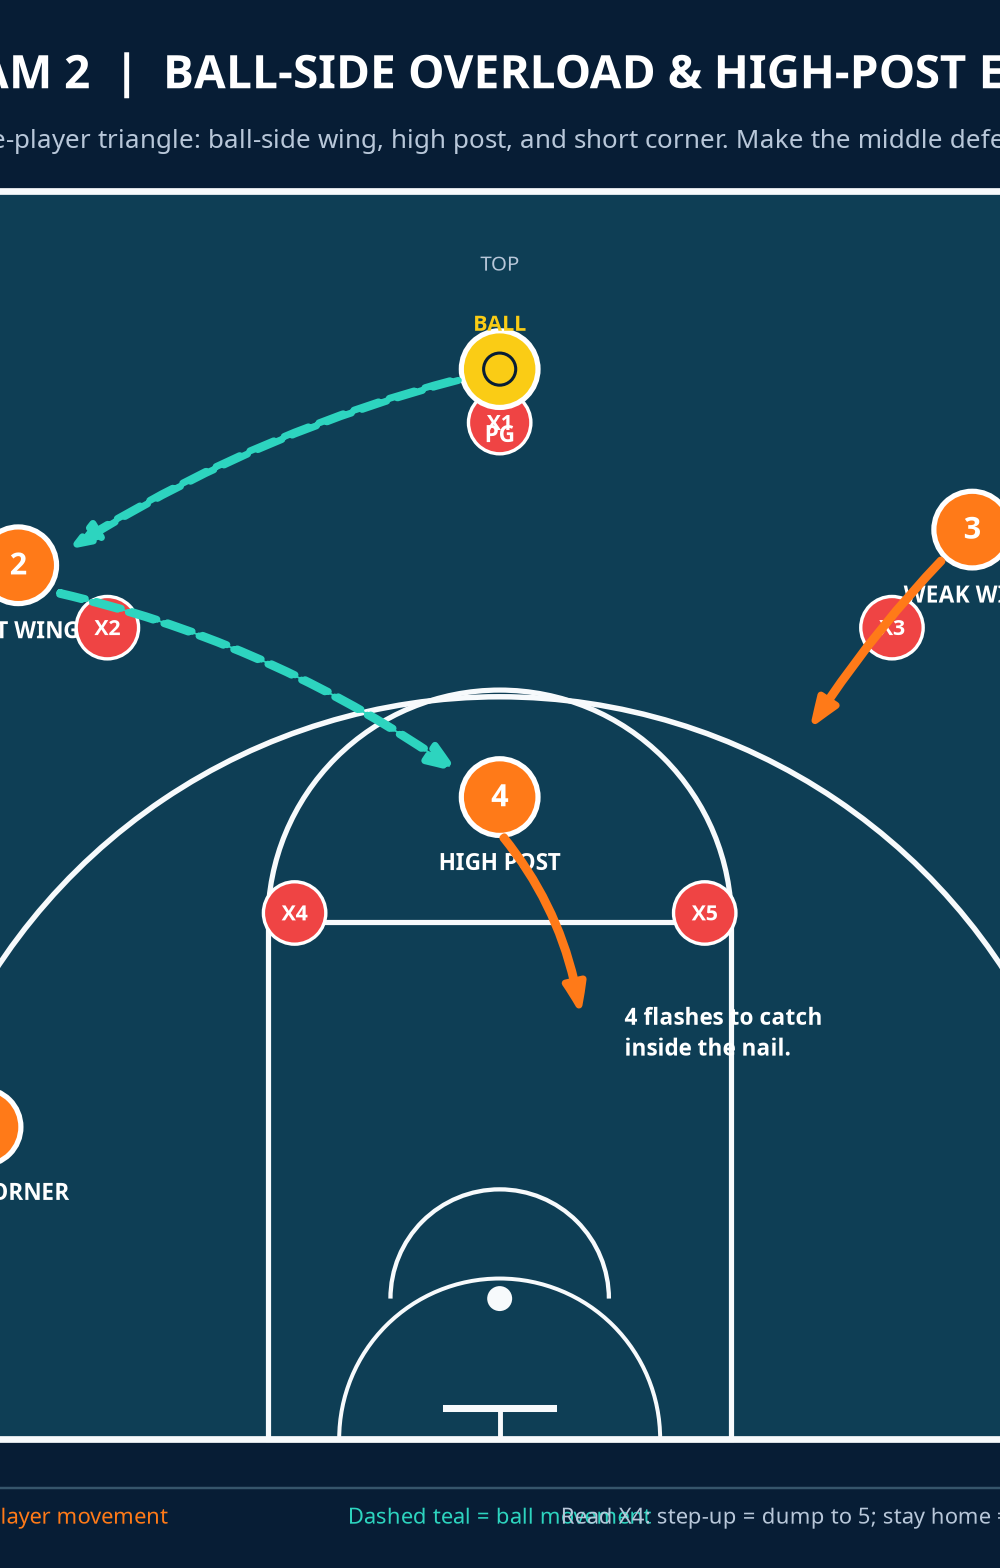
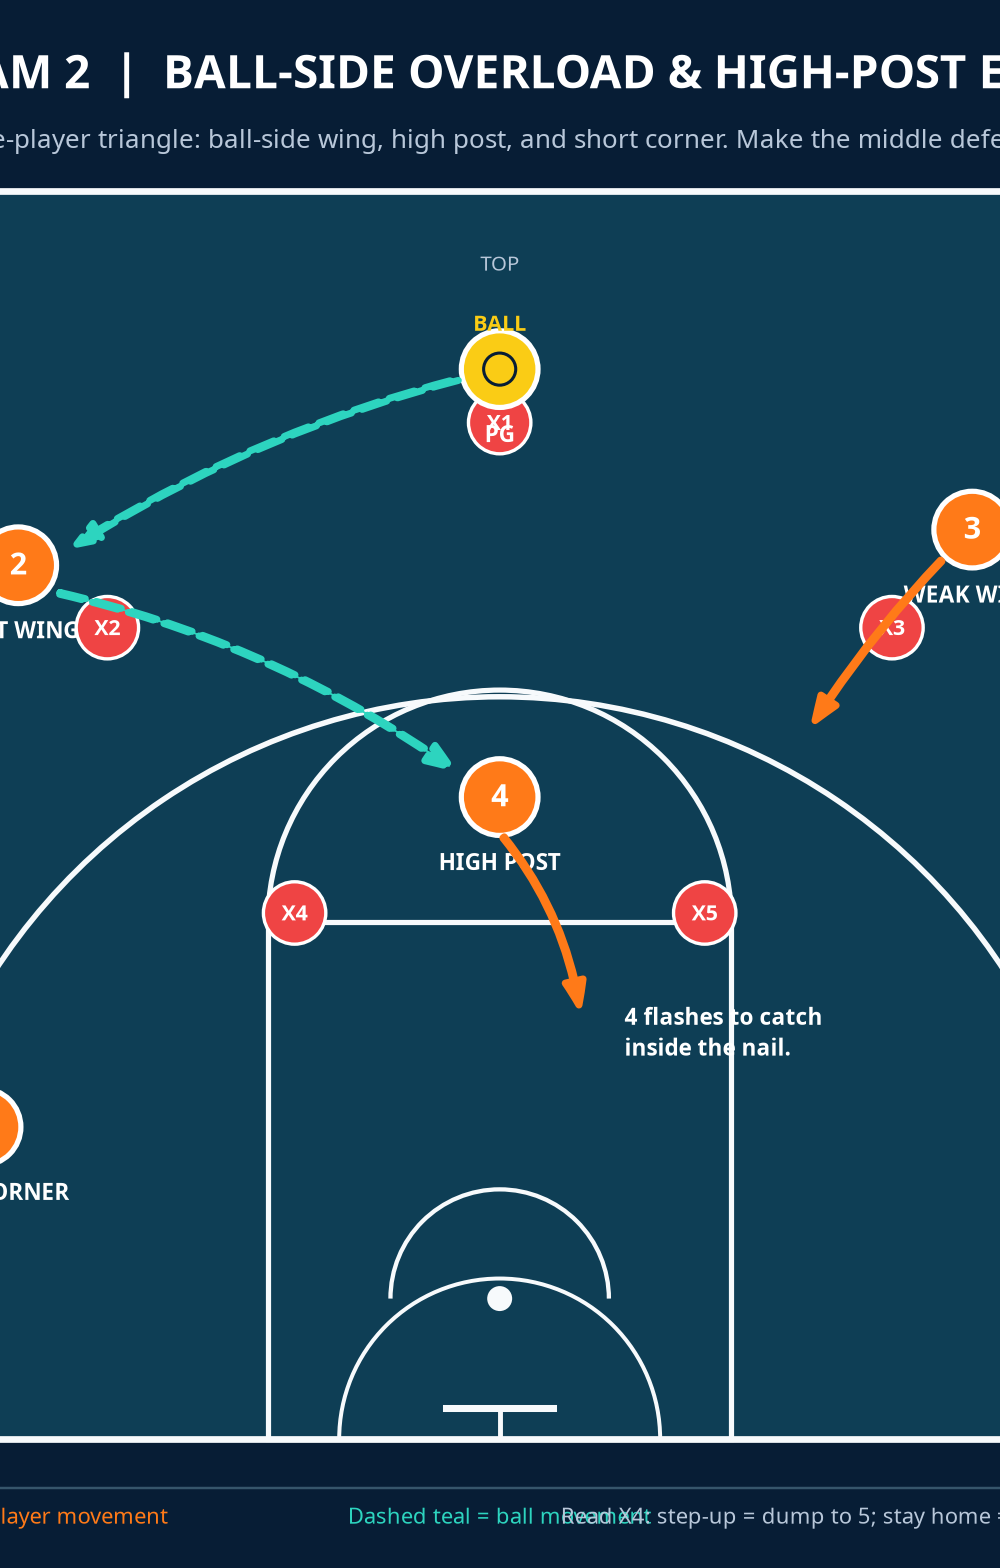
Overload the ball side. The ball-side triangle is now 2 on the wing, 4 at the high post, and 5 in the short corner. 2 looks inside immediately. If X2 closes hard, 2 attacks one dribble toward the elbow to improve the angle, but does not dribble into the trap. 4 shows a target at chin height and seals the middle defender on the outside hip.
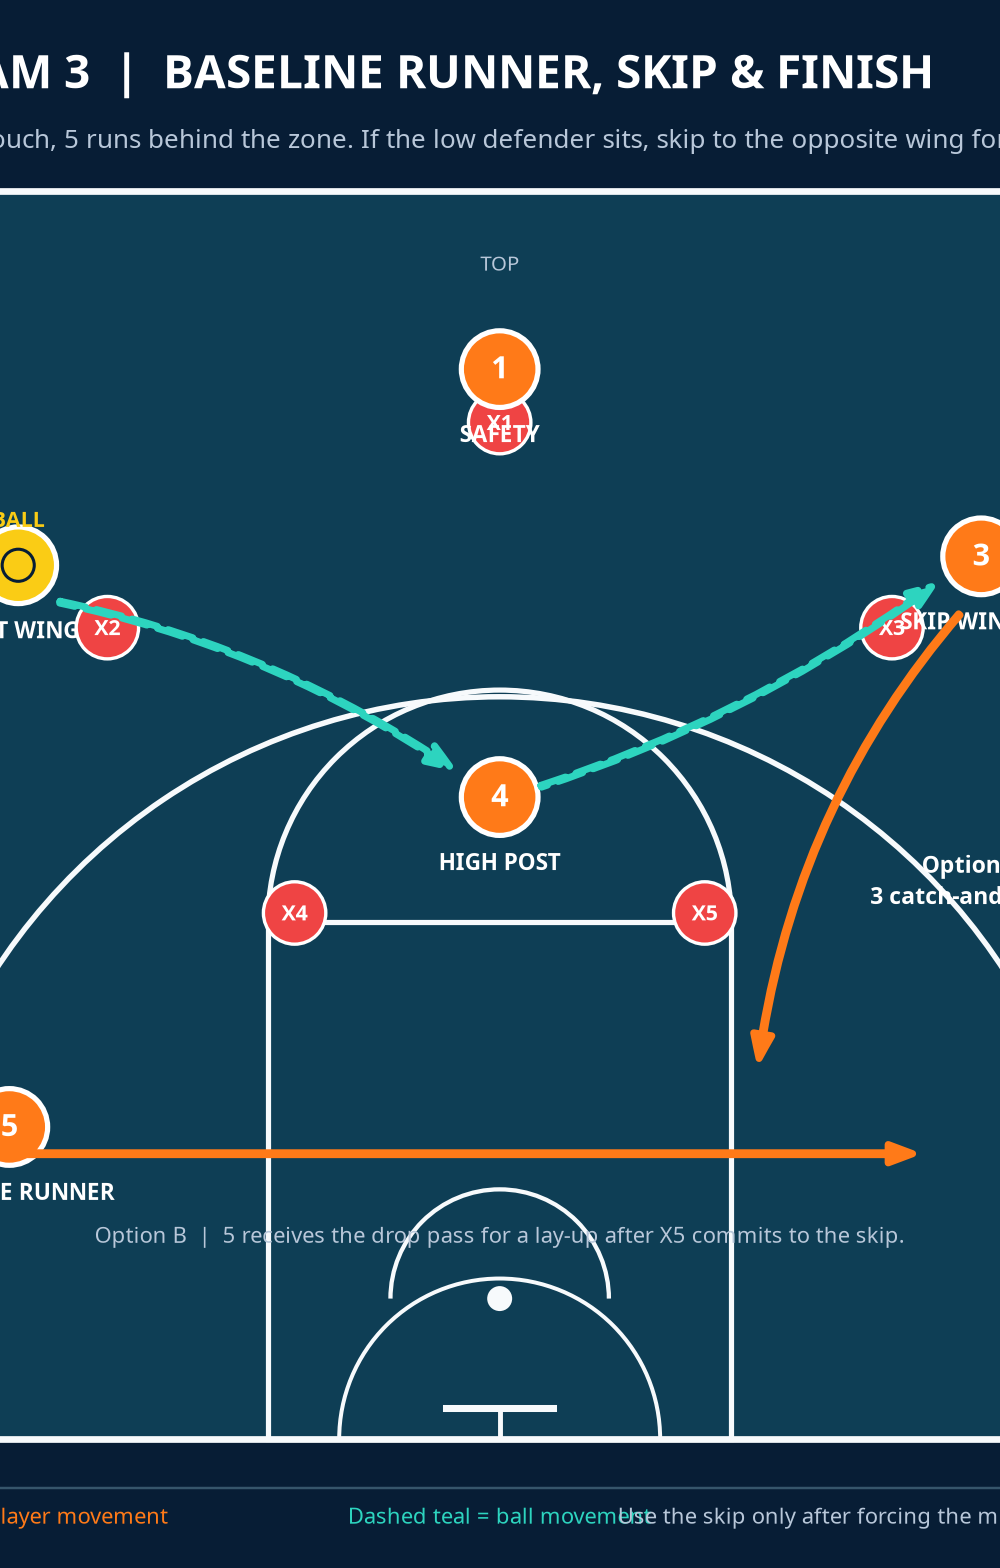
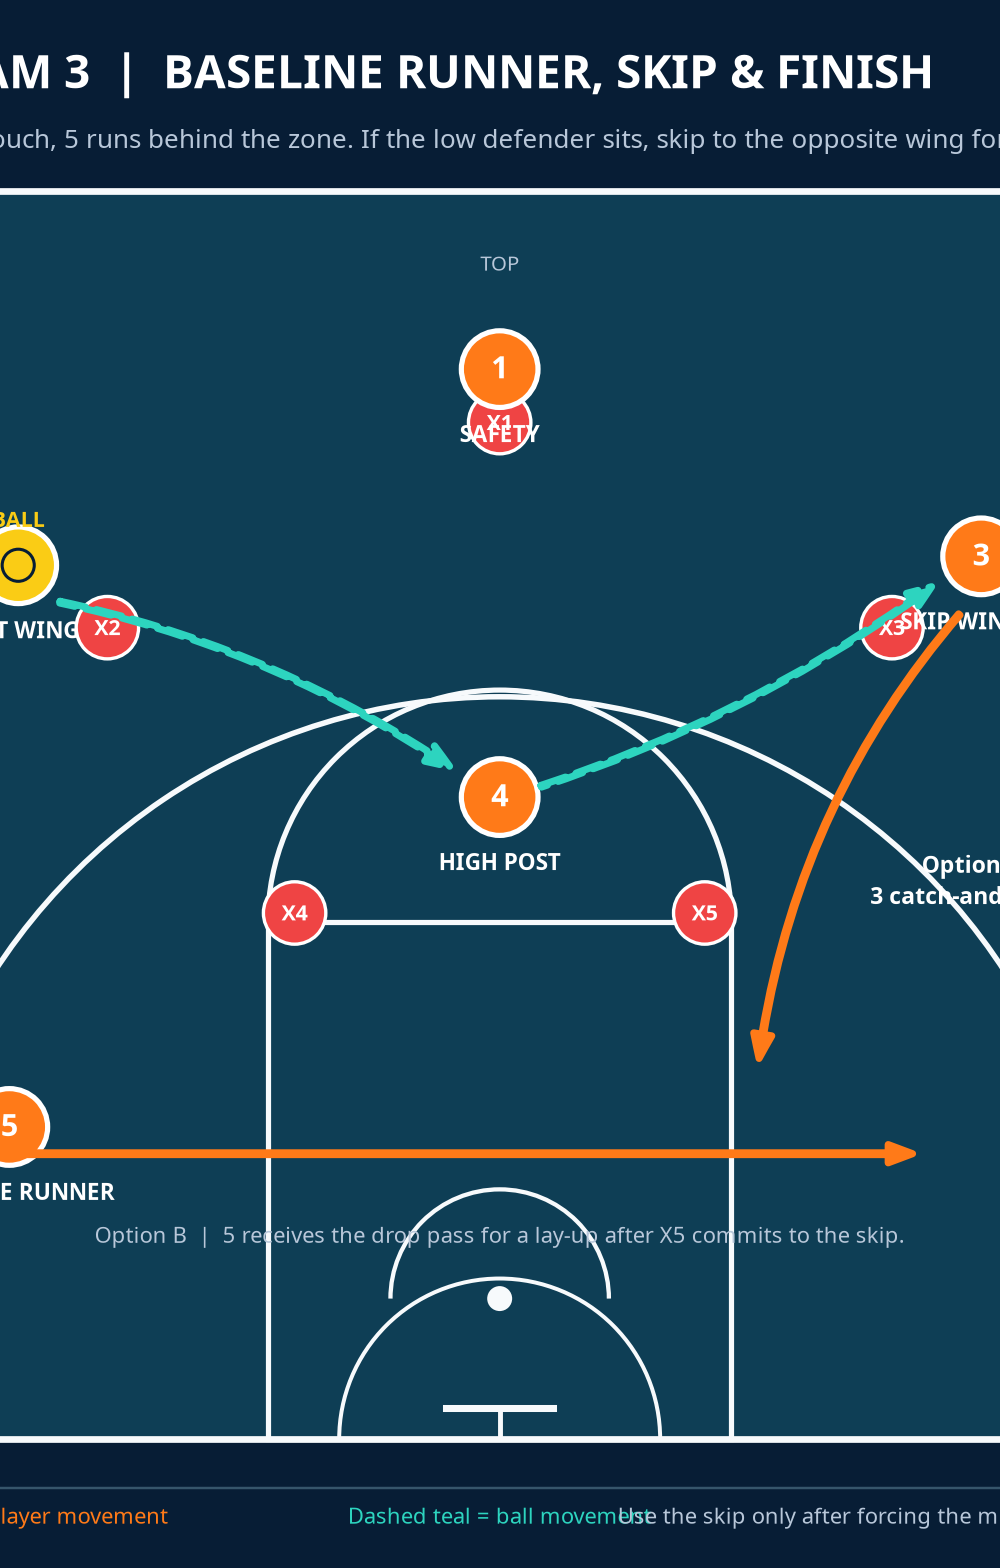
Feed 4 at the high post. 2 hits 4 at the nail. Teach 4 to meet the ball, jump-stop, chin it, and pivot so the eyes face the rim. This is the decision point: if X4 is late, 4 turns and scores or takes one power dribble. If the low defender steps up, 4 delivers a short bounce pass to 5. If both low defenders pinch the paint, 4 keeps the pivot and skips out to 3.
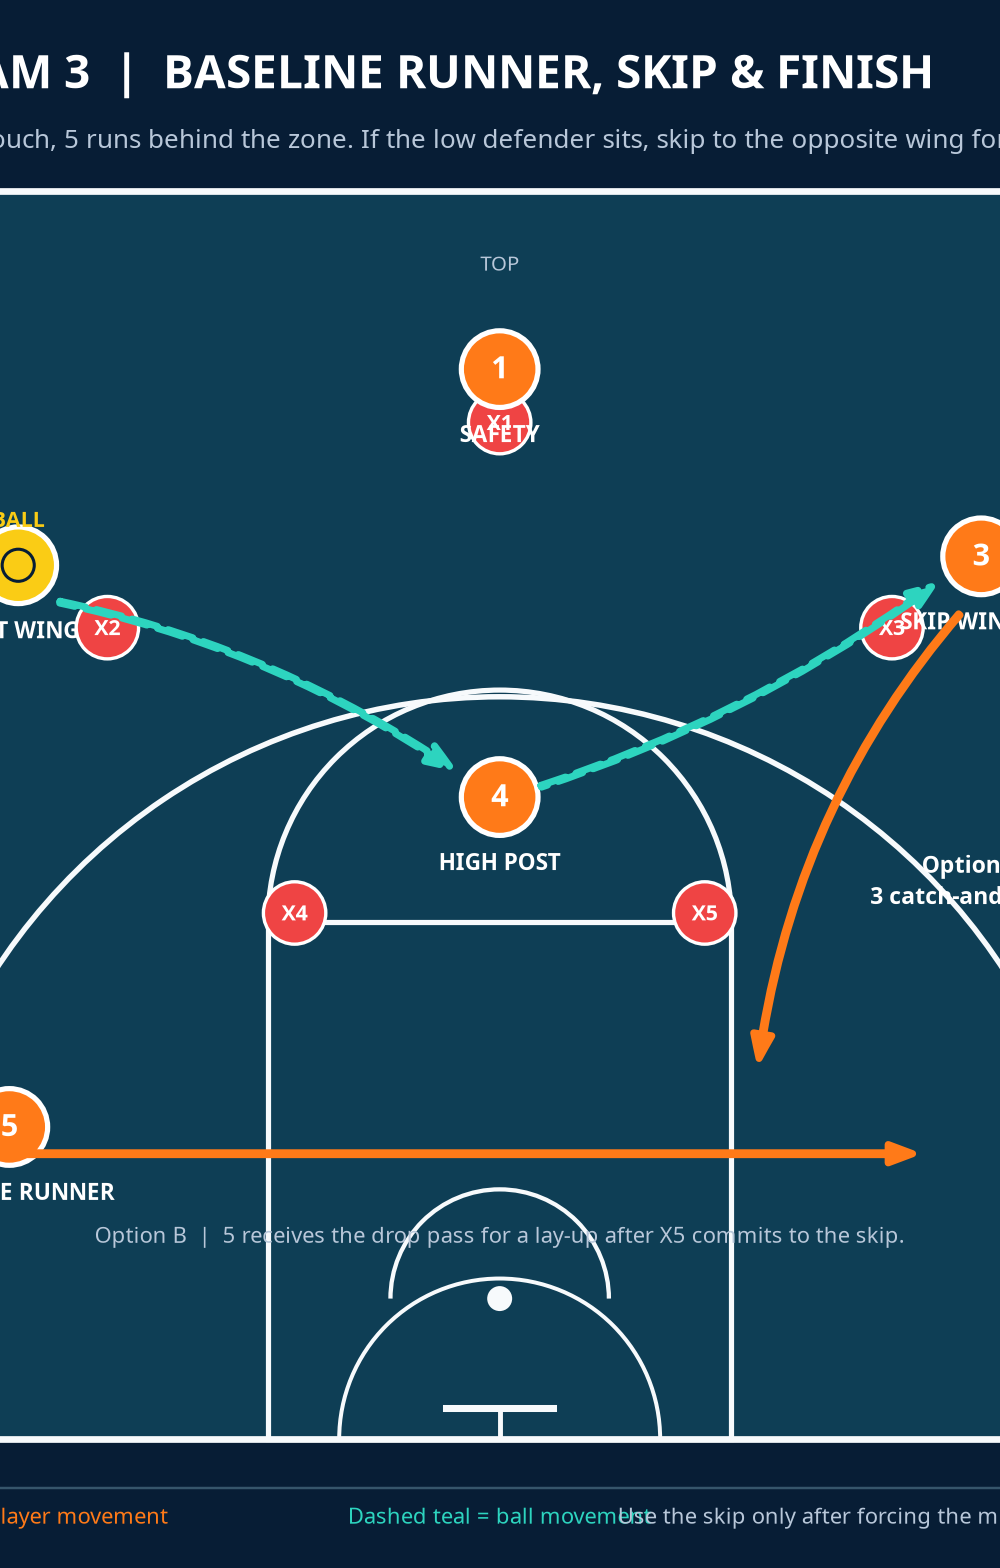
Release the baseline runner. The instant 4 catches, 5 sprints along the baseline behind the lowest defender’s vision. The run is baseline-to-baseline, not through the lane. 5 should show a hand only after clearing the far side of the lane. That late arrival creates the lay-up window when X5 is drawn toward 4.
Finish the weak-side read. 3 is shot-ready in the skip window. On the pass from 4, 3 catches on a 1–2 step or hop, reads the closeout, and shoots if balanced. If X3 flies at the shot, 3 drives the outside shoulder and passes to 5 or 1 rather than forcing a contested lay-up. 1 remains top safety and immediately calls “one more” if the zone has recovered.
- Flow into continuity. If no advantage appears, 3 reverses to 1, 4 re-flashes through the nail, and 5 arrives at the opposite short corner. The same sequence now runs to the other side. Give the group a four-second decision clock from the moment 4 catches; this trains quick inside-out reads rather than static holding.
Key Coaching Points
| Coaching point | What to demand in practice |
|---|---|
| Make the nail a scoring spot | 4 catches with a jump-stop and shoulders square enough to threaten the rim immediately. |
| Pass, then create a new angle | 2 does not admire the pass; after every entry, players slide, lift, flash, or run baseline. |
| Show hands and see the ball | Every receiver presents a target before the passer loads the ball. This reduces deflections. |
| Baseline timing wins | 5 goes on 4’s catch—not on 2’s pass—so the runner arrives after the defense commits. |
| Skip with purpose | 4 pivots away from pressure and throws the skip to 3’s shooting pocket, not above the head. |
| Protect transition balance | 1 stays above the ball until a clear finish is created; do not place all five below the foul line. |
Common Mistakes
The most common error is standing after the wing entry. Correct it with a constraint: a passer must change position before the next pass. Rehearse 4’s V-cut against a pad and insist on a nail-area catch. Make 5 restart whenever the baseline run begins before the high-post catch. Finally, remind guards that the skip follows an inside touch; slow float passes allow the zone to recover.
Variations & Progressions
Begin with a 5-on-0 shell, freezing after each pass so players can name the next two reads. Progress to 5-on-5 guided defense: instruct the defence to stay in its zone and allow the high-post catch, then add active hands and deflections. Finish with a score-and-stop game: the offense earns two points for a paint score, three for an inside-out three, and loses possession for a catch held longer than four seconds.
Invert the entry by starting 3 with the ball, sending 2 to the skip window, and running 5 right to left. If X4 fronts, use 4 as a hand-off hub: 2 passes to 1, 4 steps toward 1, and 2 cuts behind for the return.
Age Adaptations
| Group | Adaptation | Coach emphasis |
|---|---|---|
| Under 10 | Use three players: wing, high post, short corner; no skip pass yet. | Pass-and-move, two hands, jump-stop. |
| Under 12 | Use five spots but shorten wing spacing by 1–2 m and allow a controlled extra dribble. | Find the high post before shooting. |
| Under 14 | Run the full pattern against a passive 1–3–1, then add a 4-second decision clock. | Read the middle defender and time the baseline run. |
| Under 16 / Open | Add trapping on the wing and score the skip only after a paint touch. | Deception, passing window, transition balance. |
Session finish: Put two minutes on the clock. The unit must produce three consecutive paint touches and two uncontested shots without a turnover before moving to live play. That measurable standard turns a diagram into a habit.
References