BLOB Corner Lift: 2.5-Second Basketball Buzzer-Beater Set Play
Teach a repeatable 2.5-second baseline inbound that frees your best shooter for a wing three while preserving an immediate safety valve.
Equipment Needed
Overview
BLOB Corner Lift is a baseline-out-of-bounds, catch-and-shoot set for a tying or winning three when the ball is advanced to the frontcourt and 2.5–3.0 seconds remain. It uses a short decoy cut by the 1, a cross screen by the 4, and a flare screen by the 5 to lift the 2 from the ball-side corner into a clean window at the wing. The design gives the inbounder, 3, one decisive first read and one immediate safety valve rather than asking a player to improvise against a switching defense.
Use it after a timeout when you need a three and the opponent is likely to top-lock or deny the corner. It is drawn on a 28 m × 15 m FIBA court. FIBA rules permit a frontcourt throw-in choice after an eligible timeout in the final two minutes, and require the thrower-in to release the ball within five seconds.1 2
Coach’s objective: create a clean, on-balance catch for 2 by 1.2 seconds, leaving enough time for the shot to be released before the horn.
Setup
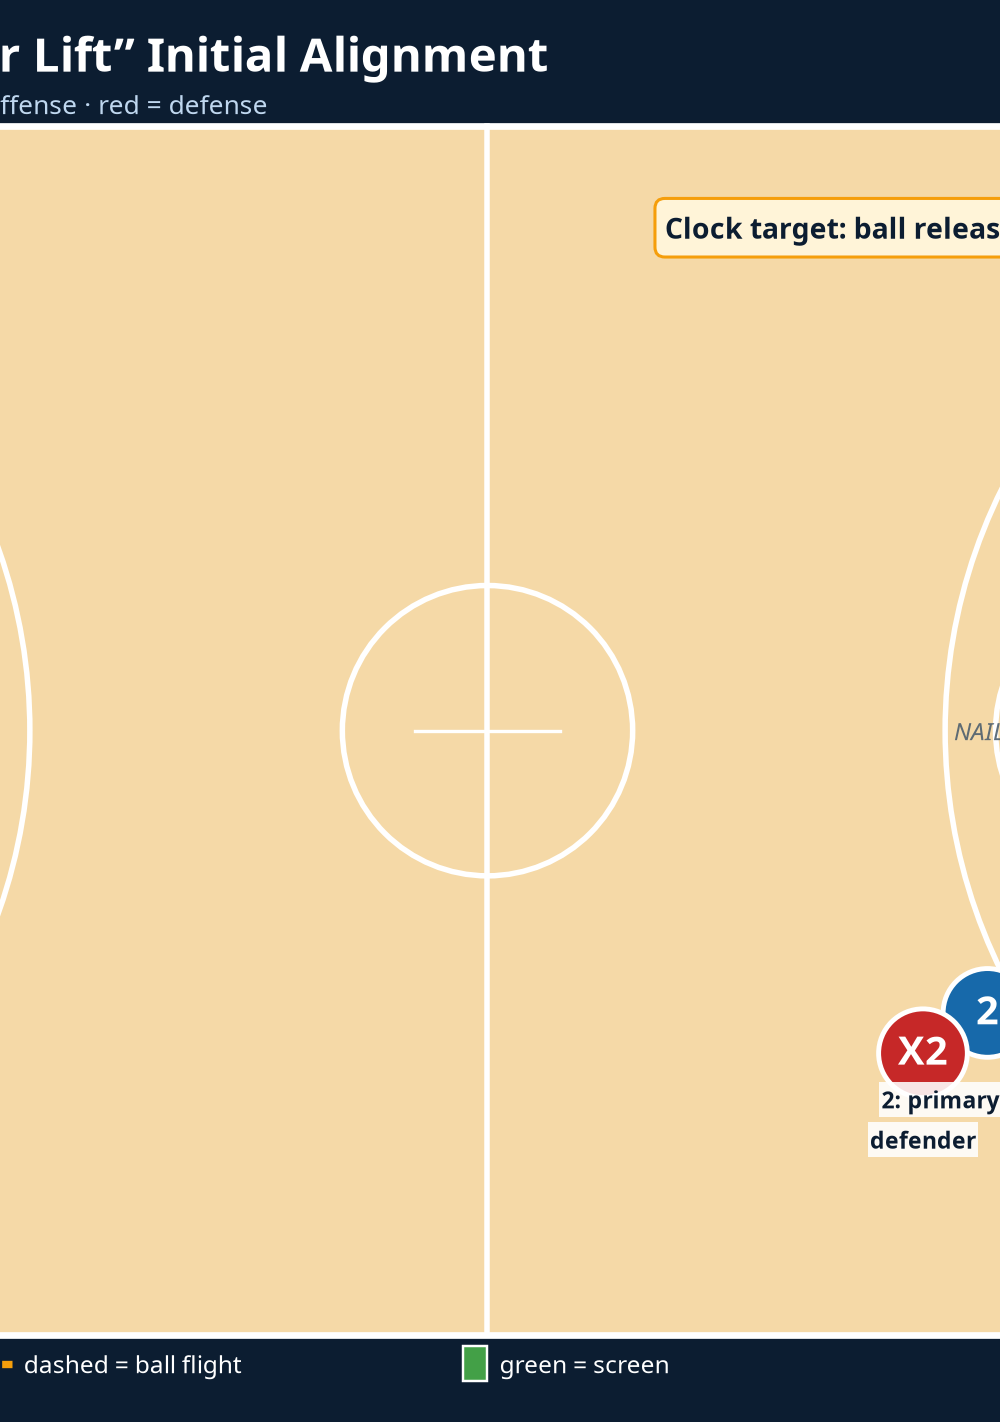
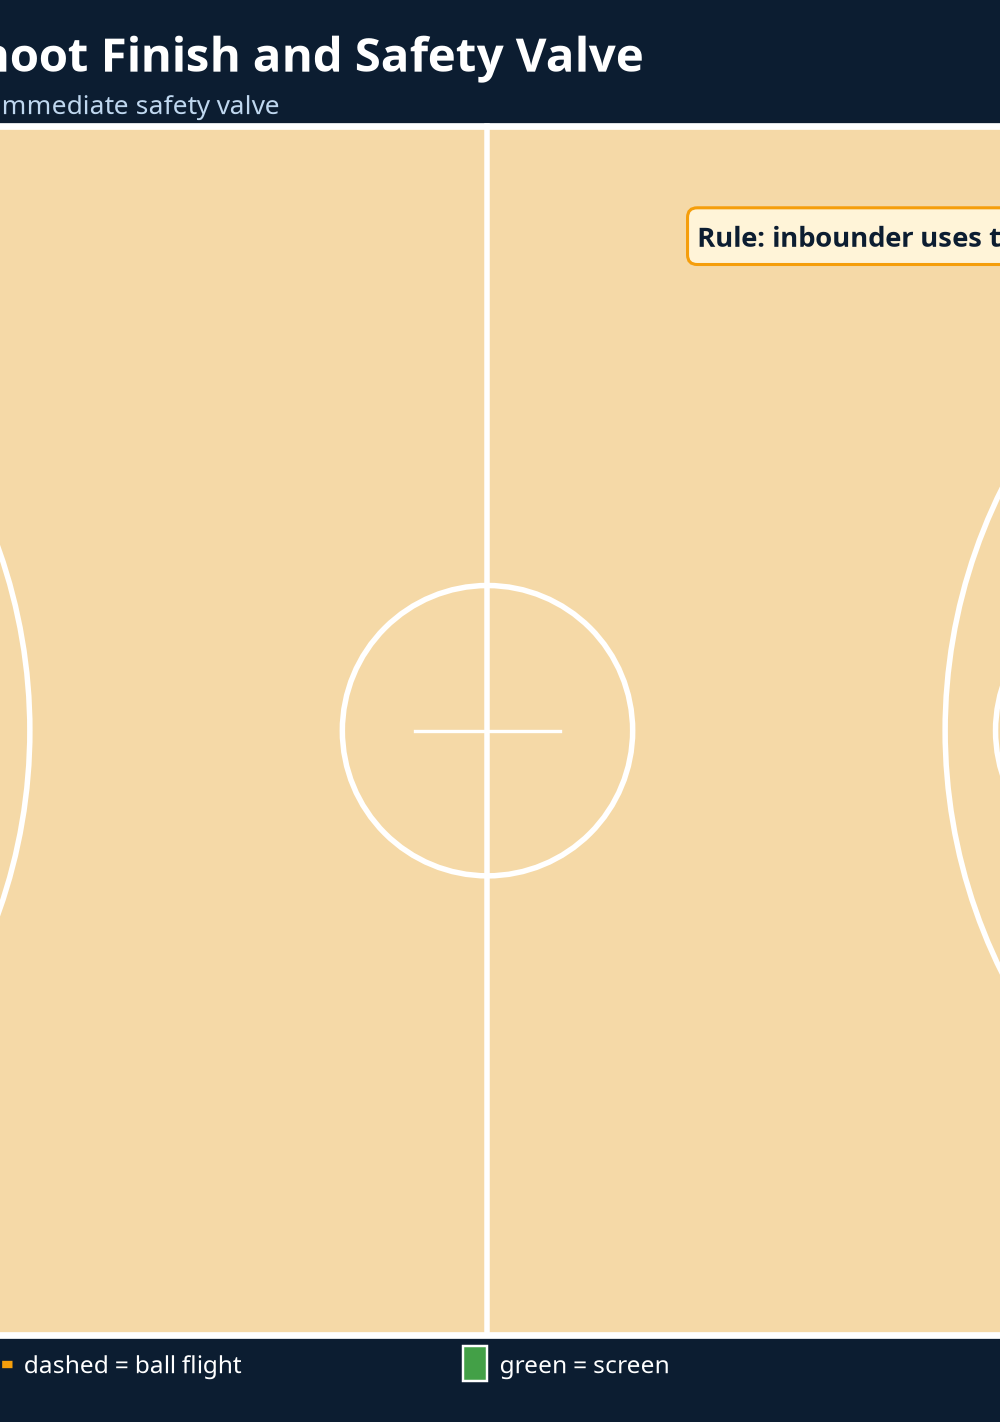
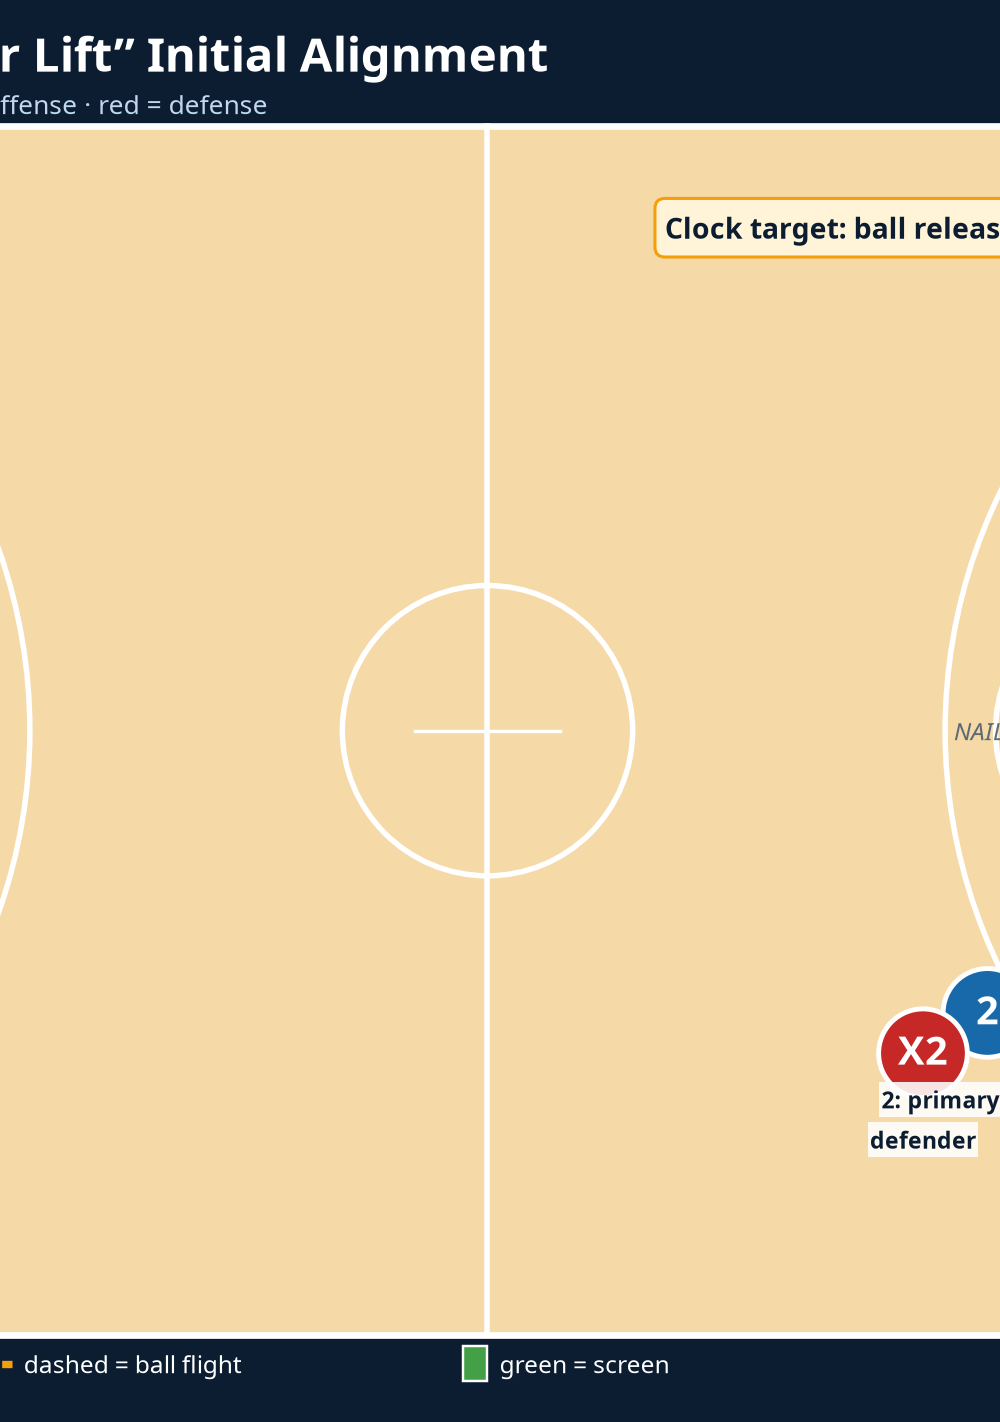
Use one ball, five offensive players, five defenders for the competitive phase, a visible countdown clock, and four flat cones if the court markings are unavailable. The baseline is your launch line. In the diagram, 3 is the inbounder; 2 is the primary shooting guard; 1 is the point guard decoy; 4 is the power forward cross screener; and 5 is the center who sets the flare screen and then seals the rim.
| Player | Starting landmark | Job | Non-negotiable detail |
|---|---|---|---|
| 3 (inbounder) | 0.5 m outside the right baseline, 1.5 m above the lane line | Read 2, then 4 | Show the ball early and pass on time. |
| 1 (point guard) | Weak-side lane-line extended | Sell the corner cut | Sprint hard enough to carry X1 away. |
| 2 (shooting guard) | Ball-side corner, one step inside the 3-point line | Lift to the wing as the shot option | Plant outside the 3-point line; hands ready before the ball arrives. |
| 4 (power forward) | High block | Cross screen, then present to the nail | Make legal chest-to-shoulder contact; do not drift. |
| 5 (center) | Low block, opposite the 2 | Flare screen, then seal | Hold the screen for a beat, then occupy the rim defender. |
Court and defensive setup
Run it toward the right basket in the diagrams, then mirror it left. The 3-point arc is the shot boundary: 2’s outside foot must land clearly beyond it. Start with X1–X5 in man coverage. Begin a visible five-count only when 3 receives the ball. Under FIBA rules, a thrower-in may not take more than five seconds to release the ball or move laterally more than one metre from the designated place.1
Step-by-Step Instructions
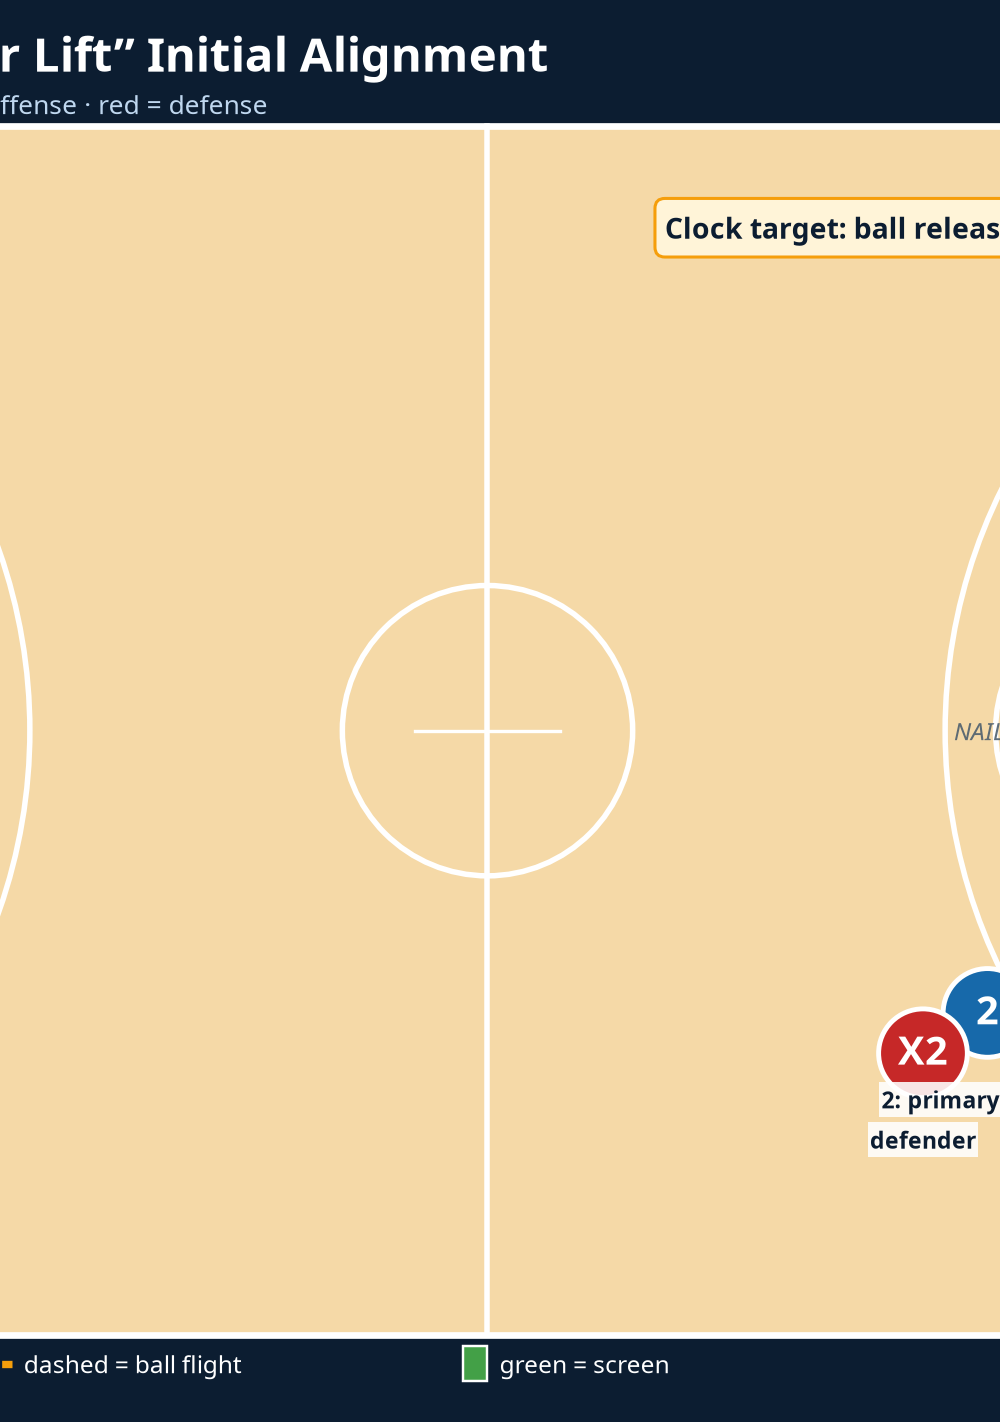
Call and confirm the target. In the timeout, call “Corner Lift.” State the score, time, and shot value: “We need three; 2 is the first look; 4 is safety.” Place 1, 4, and 5 in the stacked alignment shown. The coach or floor captain gives the go signal when 3 receives the ball.
Sell the first layer at 0.0–0.3 seconds. On the ball becoming live, 1 cuts hard to the deep ball-side corner, looking back briefly as if they are the target. Simultaneously, 4 steps across the high block and squares up to screen X1’s pursuit. The purpose is not to free 1; it is to pull the low defender and make the defense communicate.
Set the flare at 0.2–0.6 seconds. 5 turns their hips toward the sideline and sets a stationary flare screen for 2 around the ball-side elbow/short-corner line. Keep the feet wider than shoulder width, hands tight, and chest square. This is where the play is won: a moving screen, a soft angle, or a late arrival lets X2 lock and trail.
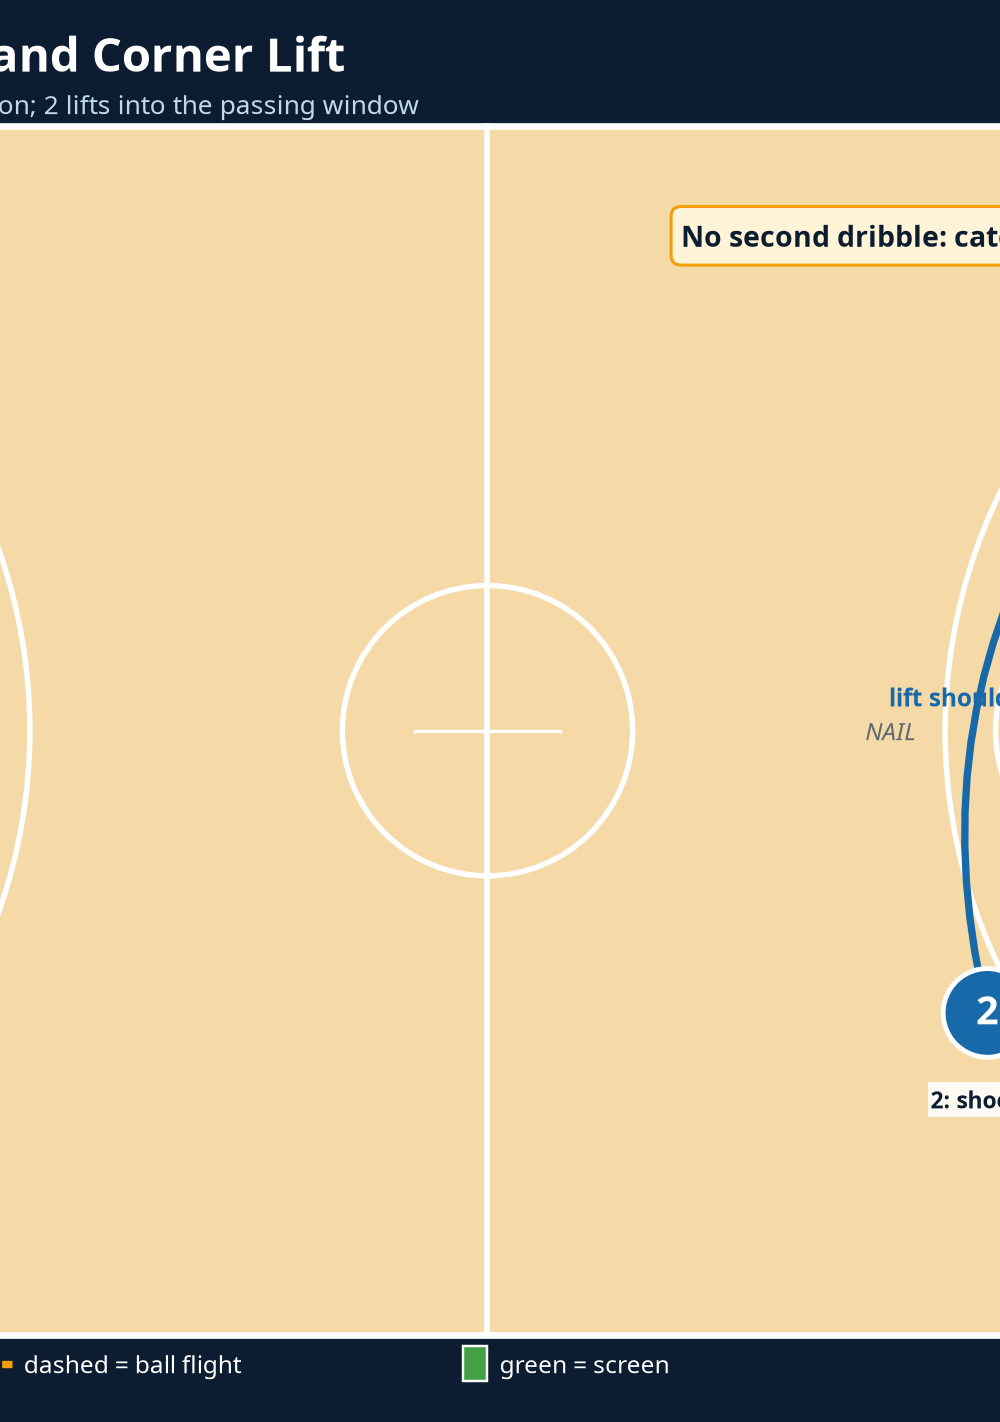
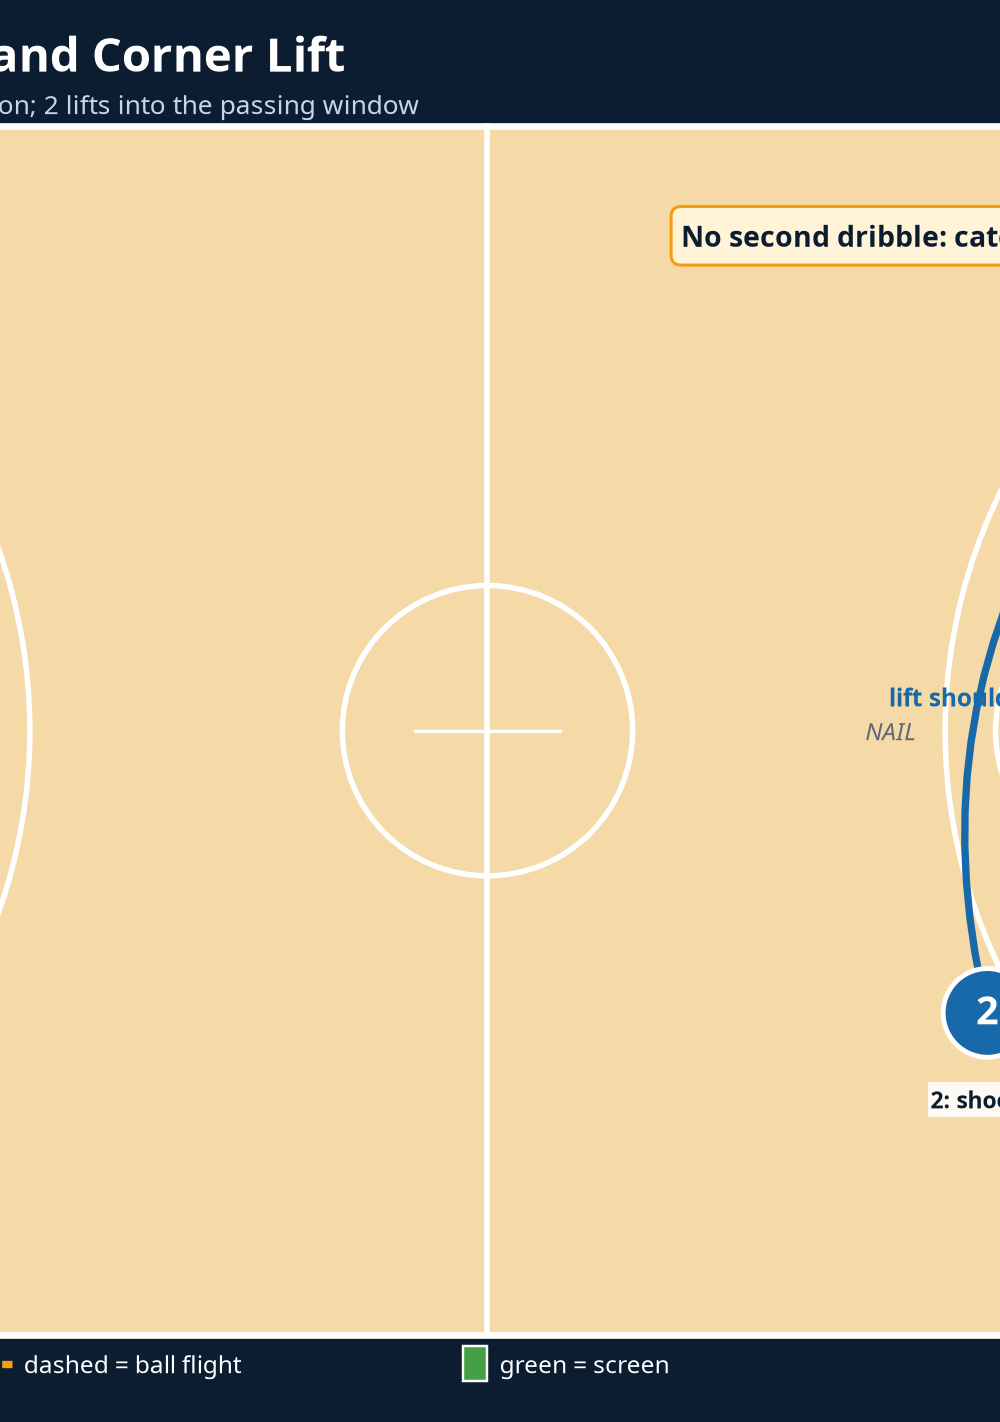
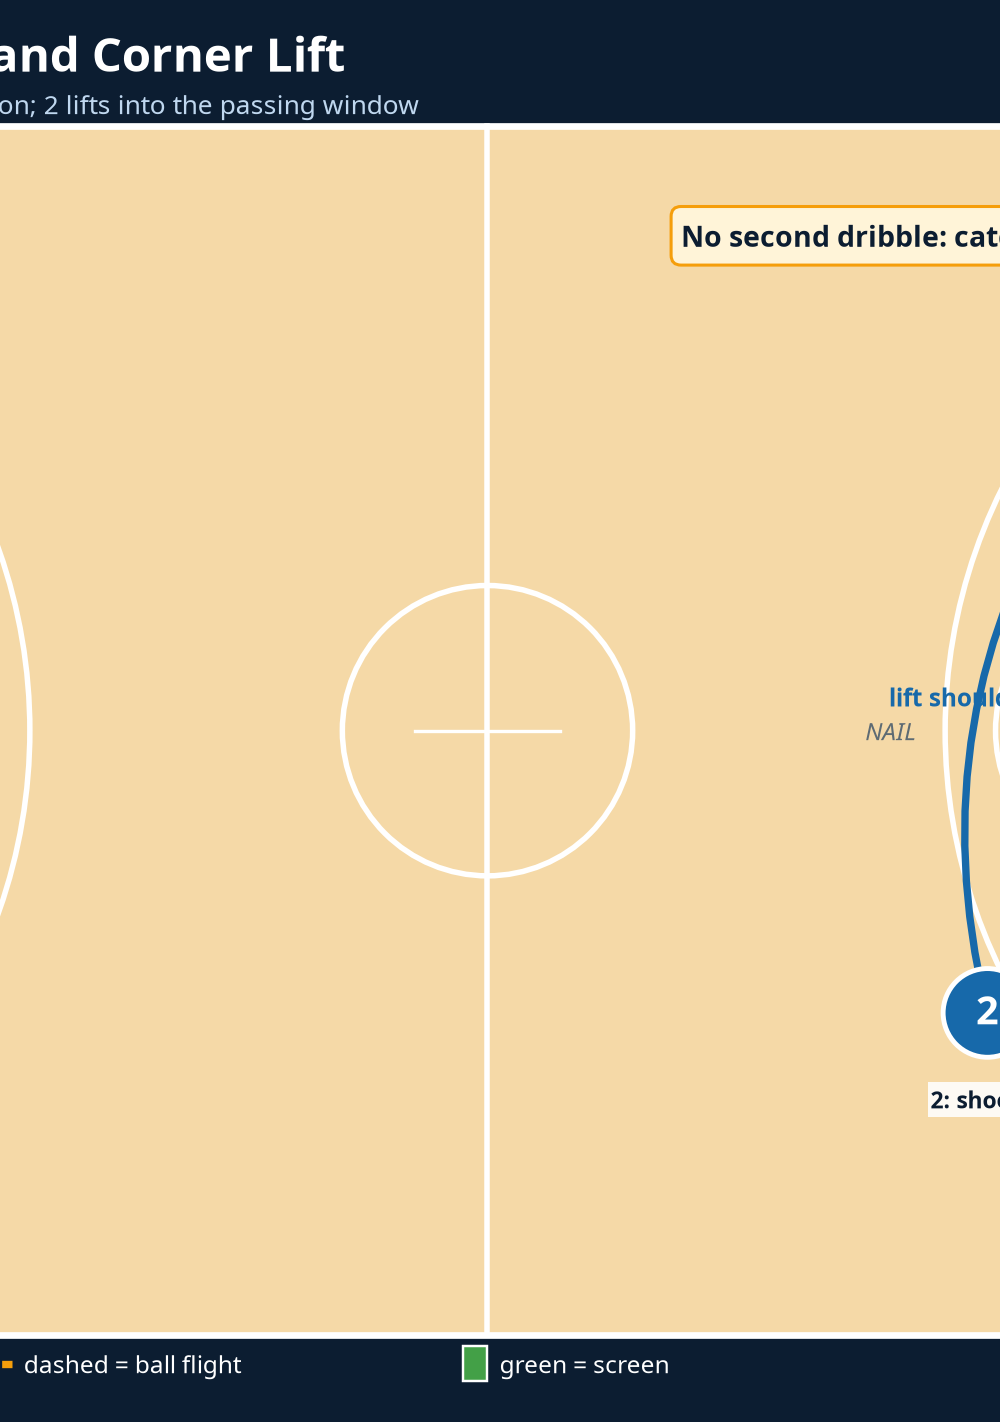
Lift 2 into the catch window at 0.5–1.0 seconds. 2 takes one sharp step toward the baseline to sell the corner, then comes shoulder-to-shoulder off 5 and lifts diagonally to the wing, about 6.75 m from the basket and 1 m outside the sideline-to-arc junction. 2 should arrive with the inside foot first, hips already turning toward the rim, and both hands shown as a target.
Make the first clean pass at 0.8–1.2 seconds. 3 throws a chest-high, outside-hand pass to 2’s shooting pocket—away from the trailing defender. Do not wait for the perfect picture; if 2 has a half-step and a clear passing lane, pass it. 3 must not fake twice or drift along the baseline. The ball should travel while 2 is still moving into the catch, not after they stop.
Finish the shot by 2.5 seconds. 2 catches with a one-two rhythm, squares the feet and shoulders, and shoots without a dribble. 5 immediately seals X5 on the rim, while 1 stays in the corner to prevent a help defender from sitting in the lane. If X2 jumps the route or 3 cannot see 2 cleanly, 4 opens at the nail as the safety valve. 4 catches, turns in one motion, and shoots or drives only if more than 1.0 second remains.
Key Coaching Points
Coach timing before route: screens must be set before 2 lifts. Use “screen, shoulder, window” as the practice language. Require 2 to finish at a known wing spot, not drift to the top; that gives 3 a repeatable pass and keeps the attempt behind the arc.
Train 3 to read X2’s chest. Hit 2 early when X2 trails; back-cut only with a direct lane and at least 1.5 seconds. If both are covered, find 4 immediately. Demand legal, stationary screens from 4 and 5, then rehearse the end-clock communication: 2 calls “mine,” 3 calls “ball,” and everybody plays through the horn.
Common Mistakes
| Error | What it looks like | Immediate correction |
|---|---|---|
| 2 leaves before 5 is set | X2 follows with no contact | Freeze the rep; make 2 wait until 5’s feet are planted. |
| 1 jogs the decoy cut | The help defender stays in the lane | Require a full-speed cut to the corner on every walk-through. |
| 3 holds the ball for a perfect read | The shot comes after the horn | Use a 1.2-second pass constraint in practice. |
| 5 turns and watches the shot | No rebound protection | Add a “screen, seal, pursue” verbal cue. |
| 4 drifts after screening | The safety valve disappears | Mark the nail with a cone and demand a visible target hand. |
Variations & Progressions
Switch-counter: Against a defense that switches the flare, 5 slips straight to the rim after showing the screen. 2 continues lifting as a decoy and 3 hits 5 for a quick finish. This is especially useful when the switching big is late or smaller.
Two-point version: If you need only two, start 2 one step higher and curl 2 into the lane line at the elbow. 4 becomes the short-corner spacer. The same decoy and screen timing apply, but 2 takes one balanced dribble only if the clock is above 2.0 seconds.
Pressure progression: Begin 5-on-0 with a coach’s clap as the go cue. Advance to guided 5-on-5, where defenders trail but do not switch. Finish with live special-situations: randomize the clock from 1.8–3.5 seconds, allow switches and top-locks, and award the defense a point for a deflection or a shot after the horn.
Age Adaptations
For Under-10, remove the cross screen and use 1 as the inbounder with a simple pass-and-relocate action. Put 2 at a closer wing mark, use a soft foam ball if appropriate, and coach a catch-and-shoot decision without requiring a three-point attempt.
For Under-12, retain the 5 flare screen but use cones as passive defenders before introducing contact. Give 2 a two-dribble maximum so players learn to arrive on balance rather than dribble into traffic.
For Under-14 and above, run the full version against switching, face-guarding, and zone-match defenses. Require the inbounder to identify the coverage before the ball is live and to call the counter—“slip,” “safety,” or “back-cut”—without looking to the bench.
References