SLOB Hammer 2: Sideline Inbound Play Against Man-to-Man
Install a dependable man-to-man sideline inbound that creates a cross-screen layup, clear counters, and a safe outlet under the five-second count.
Equipment Needed
Overview
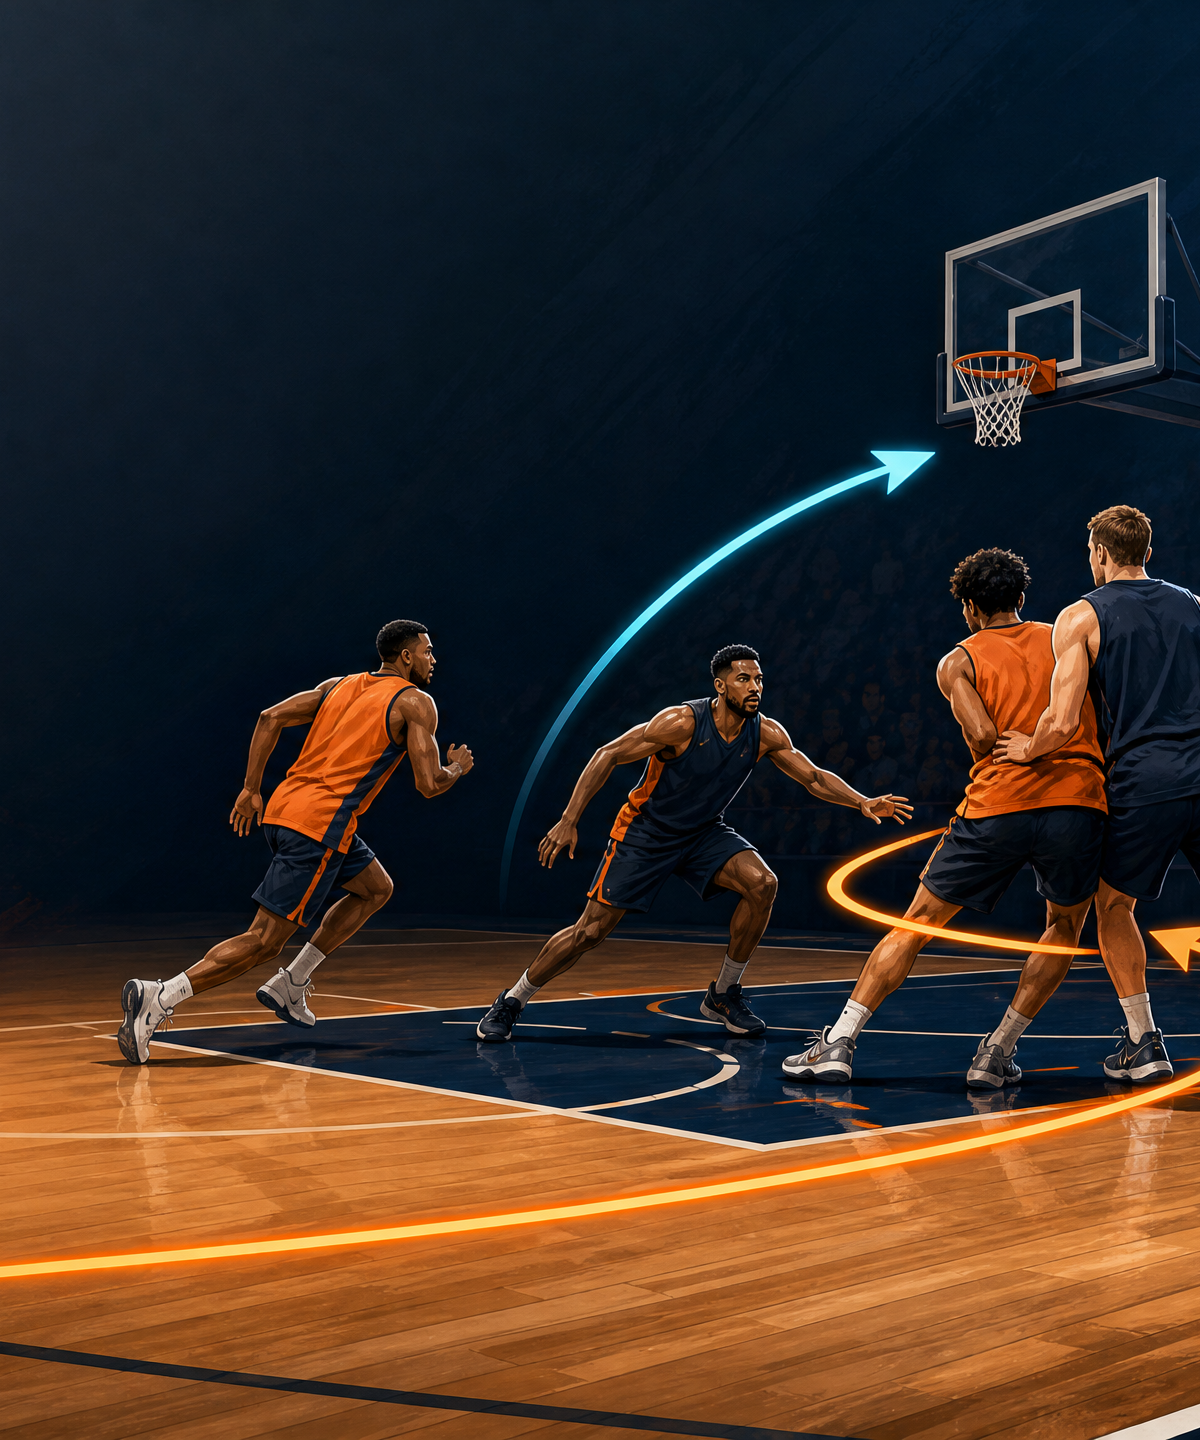
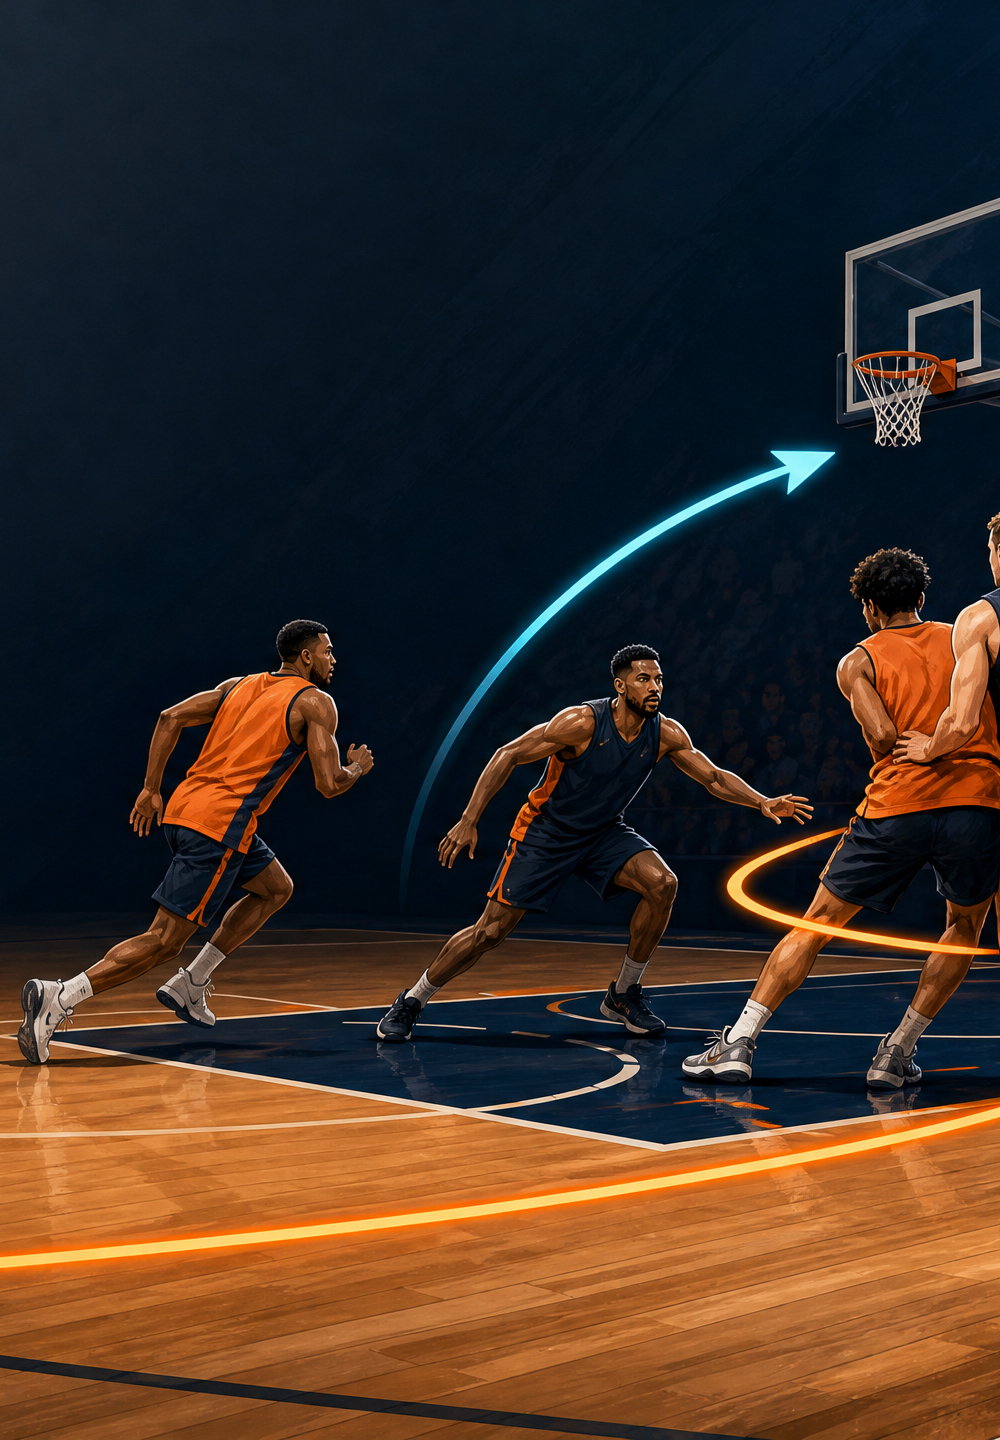
SLOB “Hammer 2” is a sideline inbound (SLOB) designed to produce a layup for the 2 (shooting guard) against a man-to-man defence. The first look is simple: 4 (power forward) cross-screens D2, allowing 2 to cut shoulder-to-shoulder to the front of the rim. The design works because the defence must navigate a legal screen while also respecting 5’s lift from the weak-side block and 3’s weak-side safety movement. If the layup is not there, the structure gives the inbounder a clear second and third read rather than a forced pass.
Use it after a dead ball on the ball-side sideline, ideally from 6–9 m above the baseline. On a regulation FIBA court, the playing floor is 28 m × 15 m; this resource diagrams the 15 m × 14 m attacking half so your players learn the same visual landmarks they will see in a game.[1] The inbounder has a five-second release count, so every cut must begin on the referee’s handoff and every player must know the read sequence before the whistle.[1]
This intermediate set also works as a first SLOB for youth teams because it teaches spacing, pace, screen angle, and a safe release valve. Install it in a 20–24 minute special-situations segment.
Setup
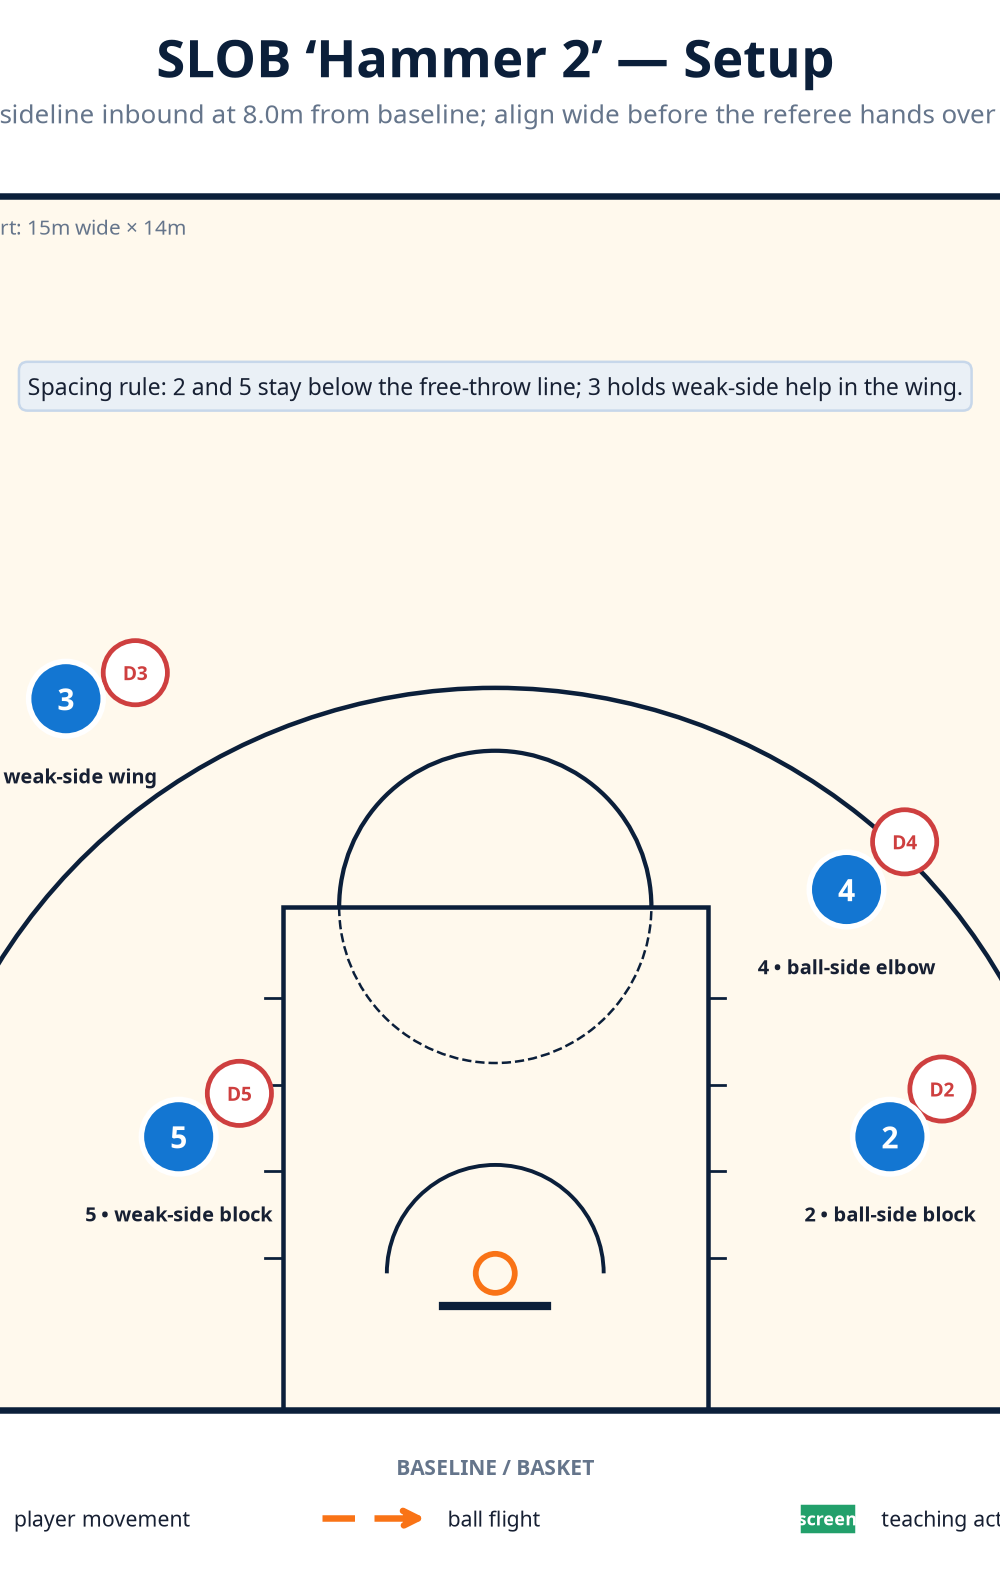
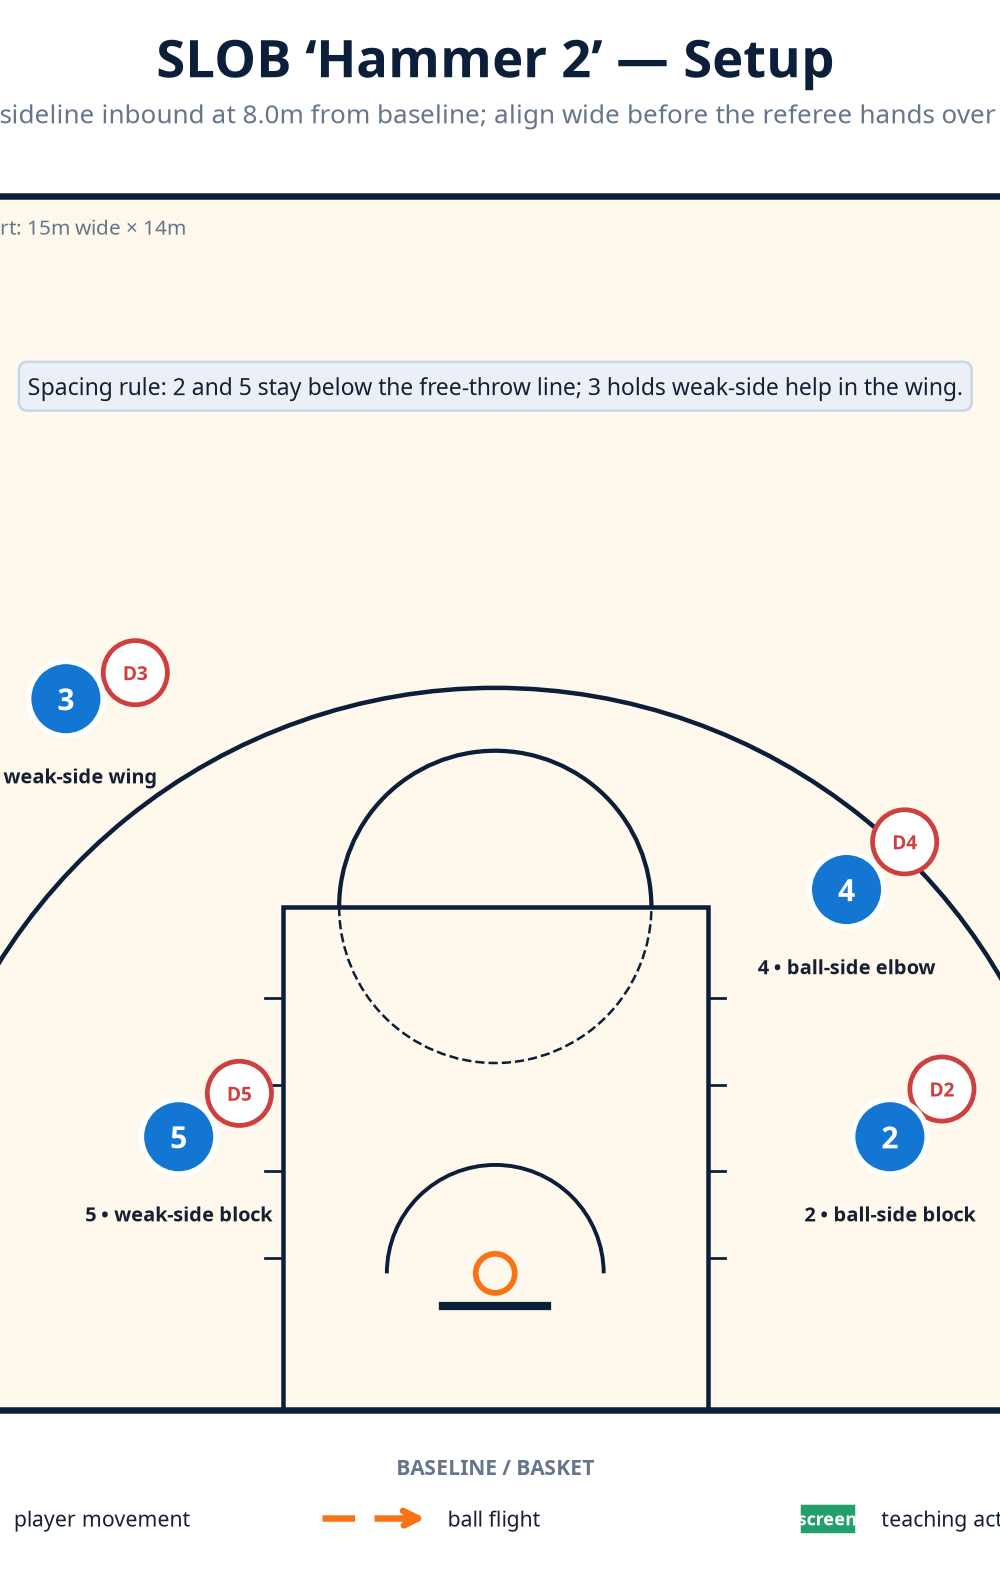
You need one ball, bibs or jerseys for offence and defence, five floor markers, and a whistle. Start with five offensive players and then add five live defenders. Place the ball on the right sideline, 8.0 m from the baseline; reverse the formation for a left-side inbound. Number players conventionally: 1 point guard/inbounder, 2 shooting guard, 3 small forward, 4 power forward, and 5 center.
| Player | Starting location | Job on the call |
|---|---|---|
| 1 | Out of bounds on the ball-side sideline, 8.0 m above the baseline | Inbounder; read 2, then 4/2 counter, then 3 safety. |
| 2 | Ball-side low block, one foot above the block marker | Primary scorer; sell a half-step up, then cut tight off 4’s screen. |
| 4 | Ball-side elbow, outside the lane line | Cross-screen D2; then open, hold, or slip depending on coverage. |
| 5 | Weak-side low block | Lift diagonally to the weak-side elbow to occupy rim help. |
| 3 | Weak-side wing, 1.0 m outside the three-point arc | Lift to safety space above the arc and stay visible to 1. |
Court setup: Mark the five spots before you add defenders. Tell 2 and 5 to remain below the free-throw line until “GO.” The lane is the traffic zone, the corners are pressure-release zones, and the weak-side wing is the safety zone.
Step-by-Step Instructions
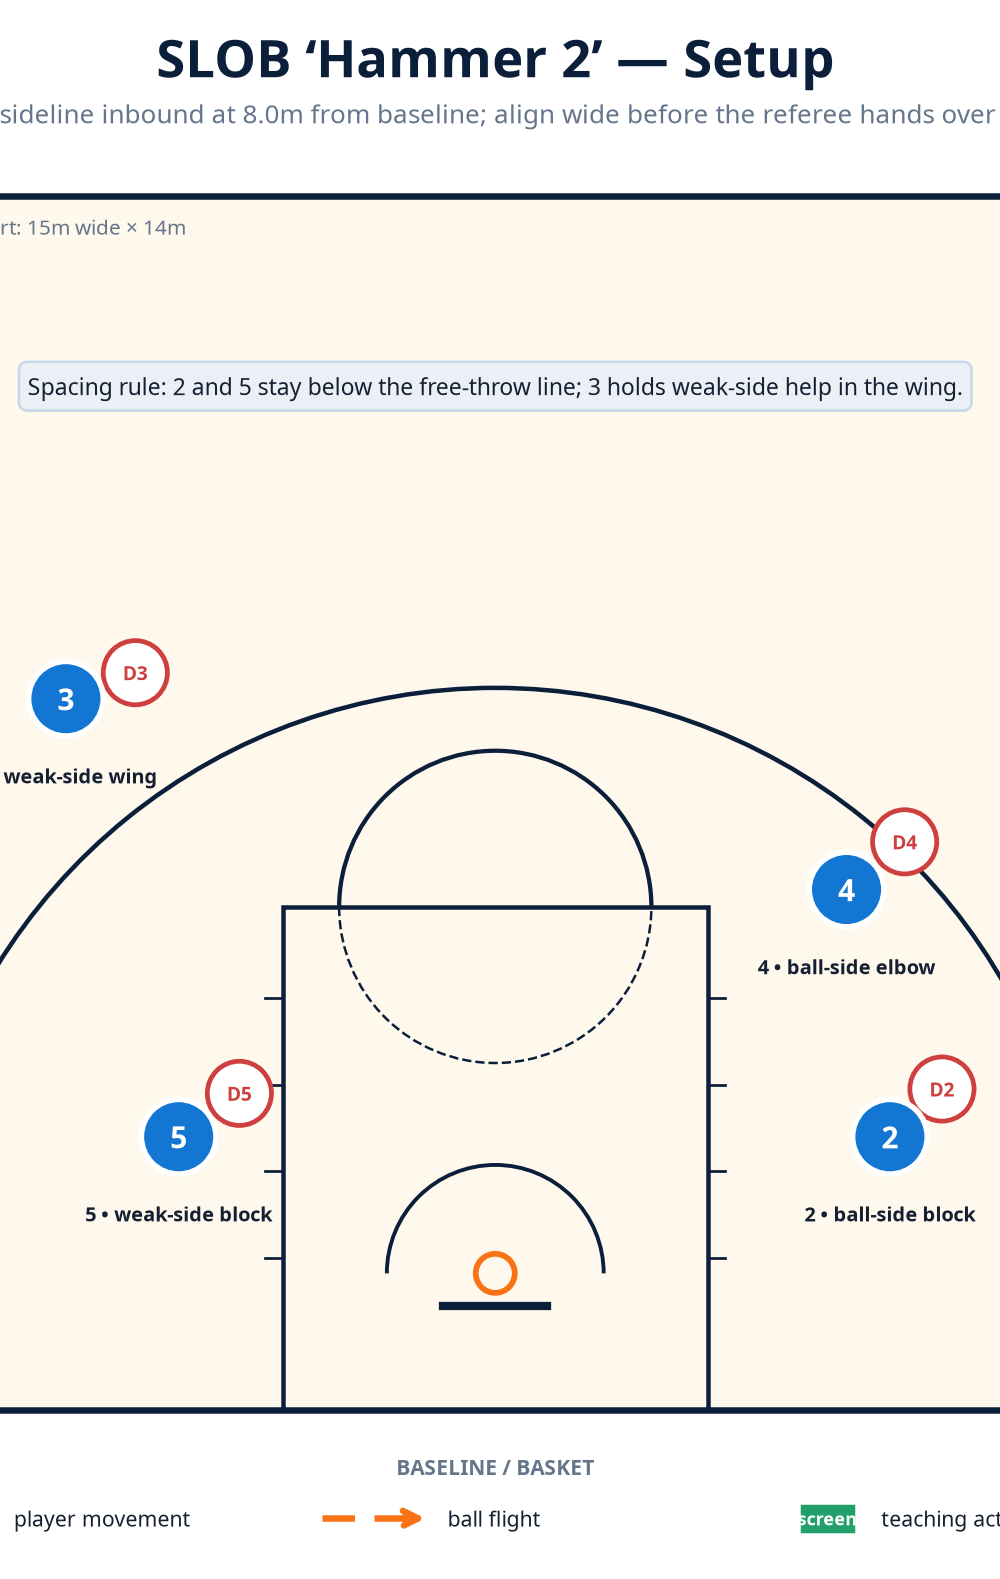
Call and align. The coach calls “Hammer 2.” 1 shows the referee a target hand and stands square to the court, with both feet out of bounds. 2 is on the ball-side block, 4 is at the ball-side elbow, 5 is on the weak-side block, and 3 is on the weak-side wing. Defenders should be in a tight man-to-man denial position for the first teaching reps.
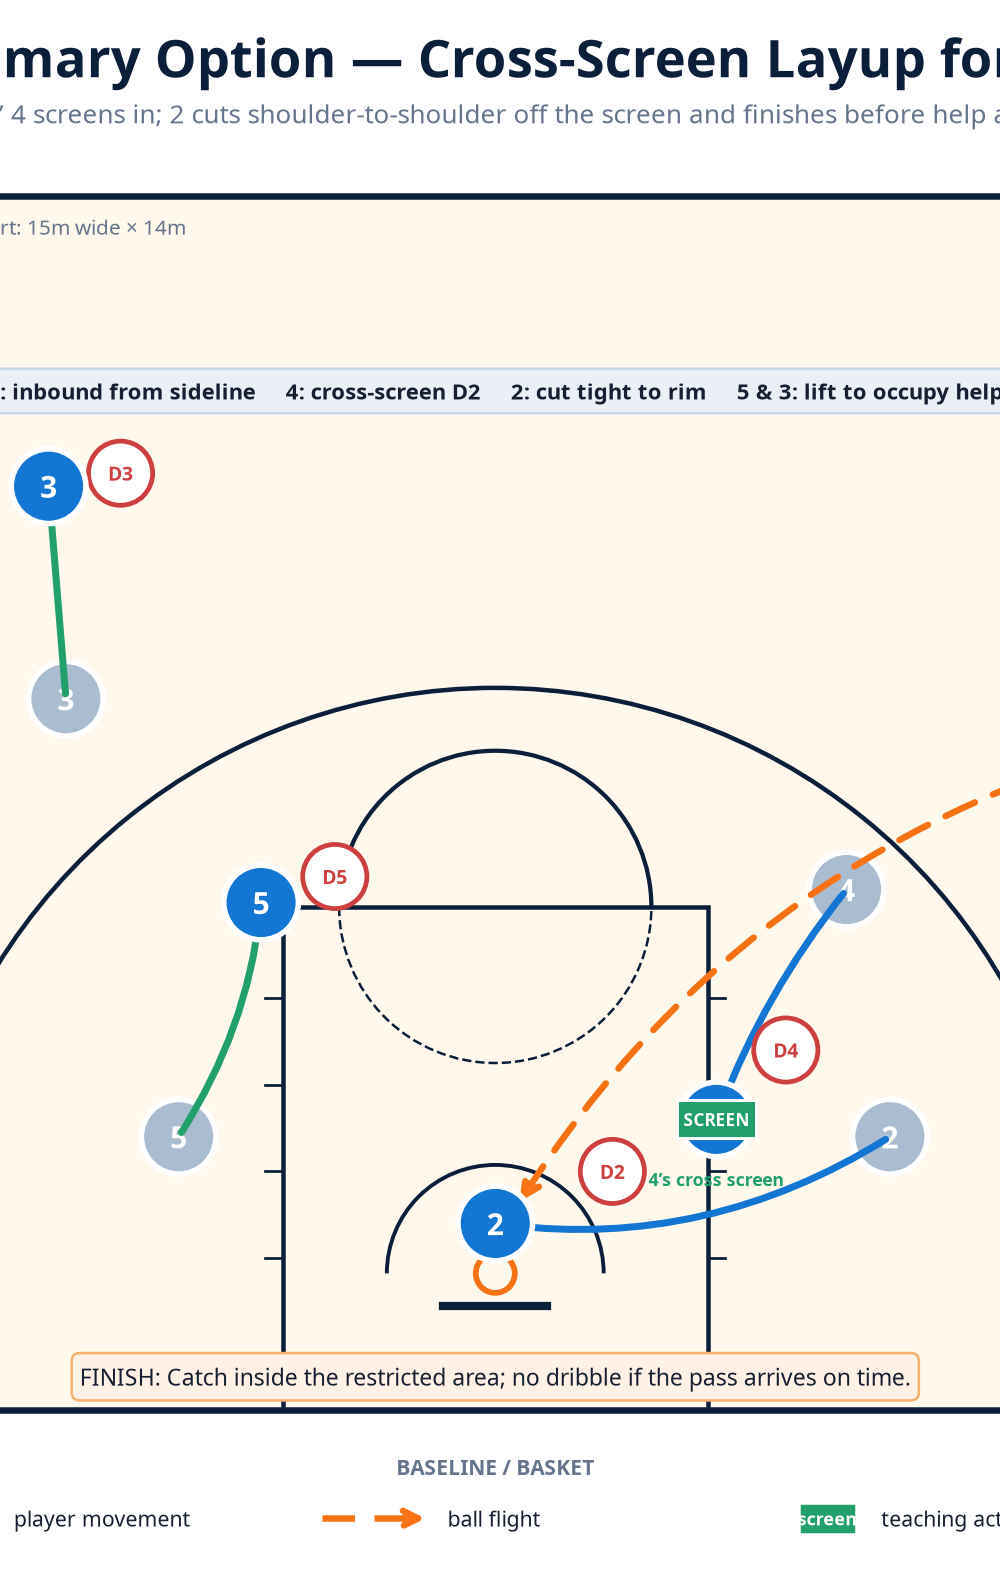
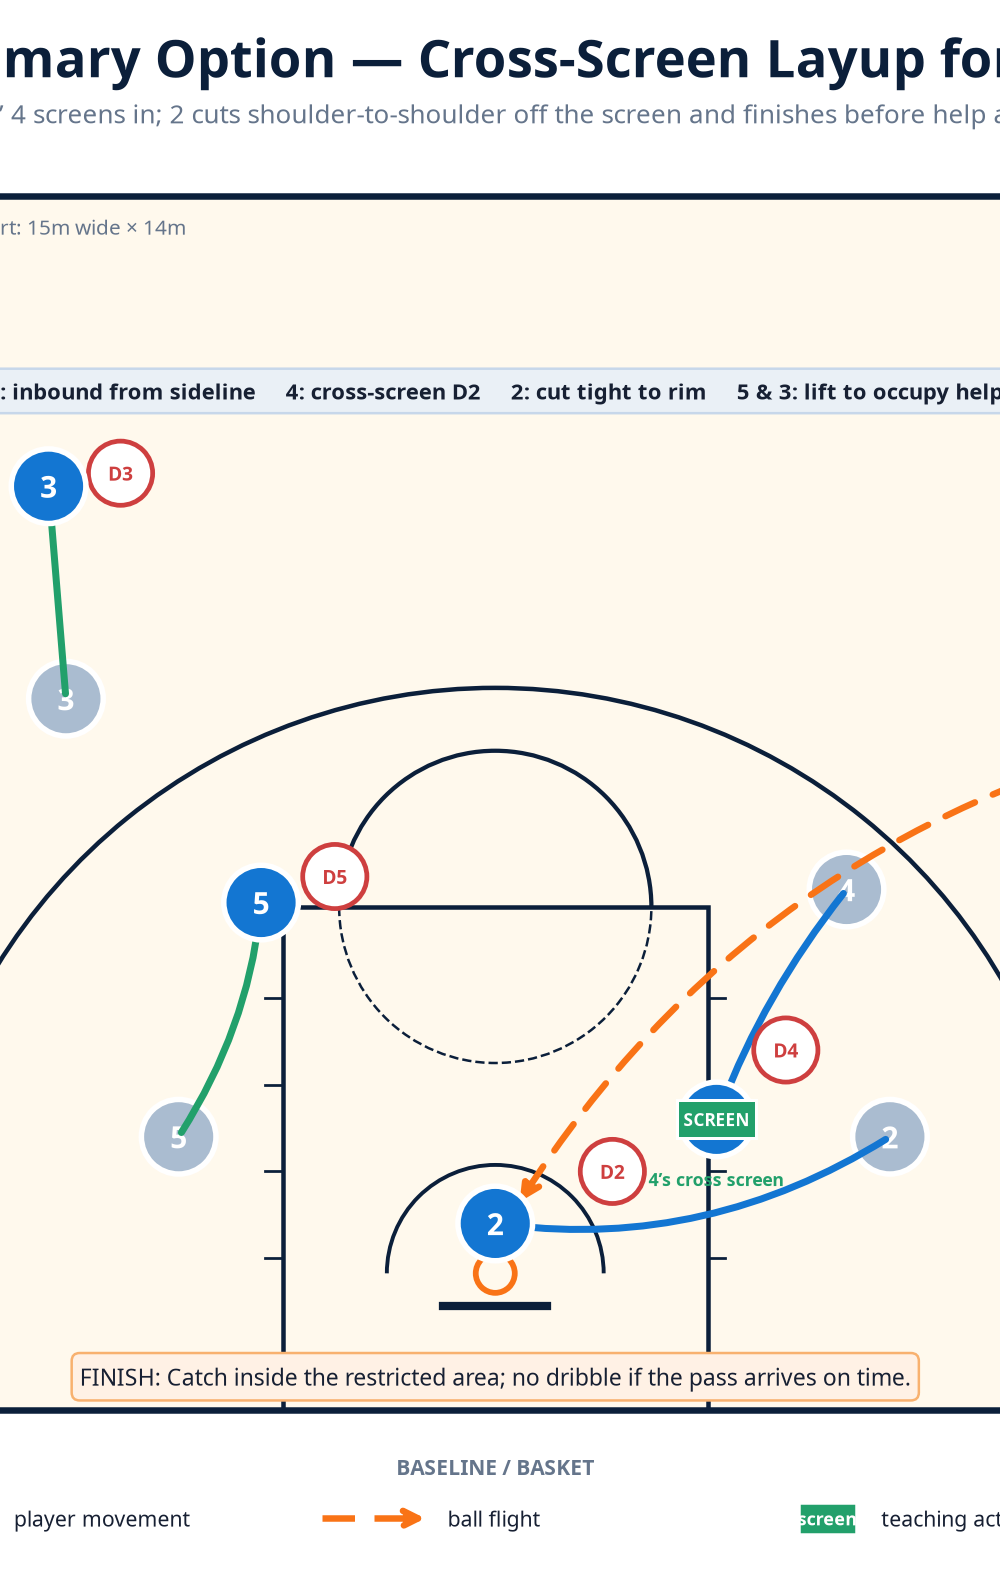
Start on the referee’s handoff. The instant 1 receives the ball, 2 takes one controlled step toward the elbow to raise D2’s eyes. At the same time, 4 sprints down the lane line toward D2’s path. Do not let 4 drift into the lane and wait; the screen must arrive with pace and stop under control.
Set the cross-screen. 4 plants with a wide, balanced base just inside the ball-side lane line, chest facing the weak side. Give D2 enough space to avoid an illegal moving screen, then become stationary before contact. The useful cue is: “Arrive early, be still, make the defender go long.”
Cut to score. 2 drops the inside shoulder next to 4’s hip and sprints across the face of the basket. The cut finishes in the restricted area, not under the backboard. 2 shows both hands, catches on the run, and finishes immediately off one foot or two feet depending on the pass location.
Clear the help. As 2 cuts, 5 lifts from the weak-side block toward the weak-side elbow. This movement takes D5 away from the rim and creates a clean passing window. Simultaneously, 3 lifts from the wing to a visible safety spot above the arc, roughly level with the top of the key. Neither 5 nor 3 should cut through 2’s driving line.
Deliver the first pass. 1 sees the screen, then fires a firm chest pass to 2’s outside hand as 2 enters the front of the rim. The pass should lead 2 toward the basket and arrive before D2 can recover. 1 must not step onto the court before releasing the ball.
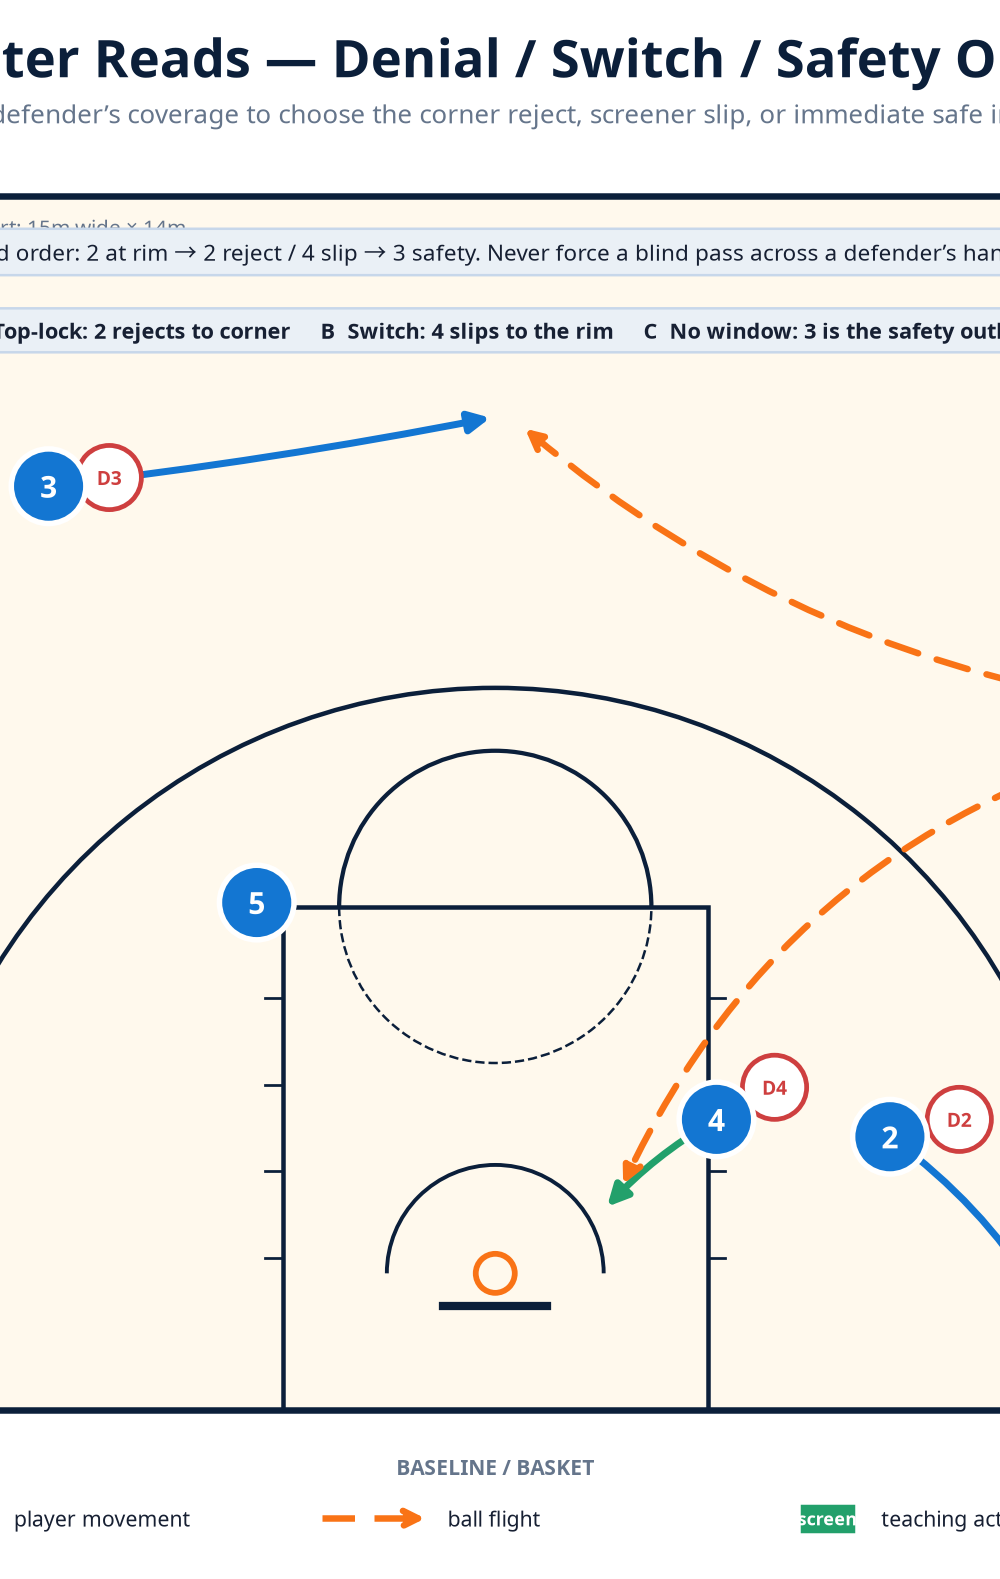
- Use the counter rather than forcing the first look. If D2 top-locks the screen, 2 rejects the cut and sprints to the near corner for a short, direct inbound. If the defence switches the screen, 4 immediately slips to the basket with hands high; 1 hits the slipping 4. If neither option is clean by the count of three, 1 finds 3 above the arc and the team flows into its half-court offence. The inbound is a possession starter, not a compulsory layup attempt.
Key Coaching Points
| Teaching point | What the coach should demand |
|---|---|
| Screen legality and angle | 4 must be stationary at contact, with a wide base and chest pointed to the weak side. A moving screen erases a good design. |
| Cut discipline | 2 must brush 4’s hip; a 0.5 m gap lets D2 squeeze through. Finish in front of the rim, not behind it. |
| Pass timing | 1 passes on the second stride of 2’s cut, not after 2 stops. Lead the receiver away from the defender. |
| Weak-side occupation | 5 lifts with purpose and shows hands. A lazy lift allows D5 to sit in the paint and take away the layup. |
| Safety first | 3 stays above the ball and visible. A completed safe pass is better than a five-second violation or a turnover. |
| Read vocabulary | Use one shared language: “top-lock = reject,” “switch = slip,” and “no window = safety.” |
Common Mistakes
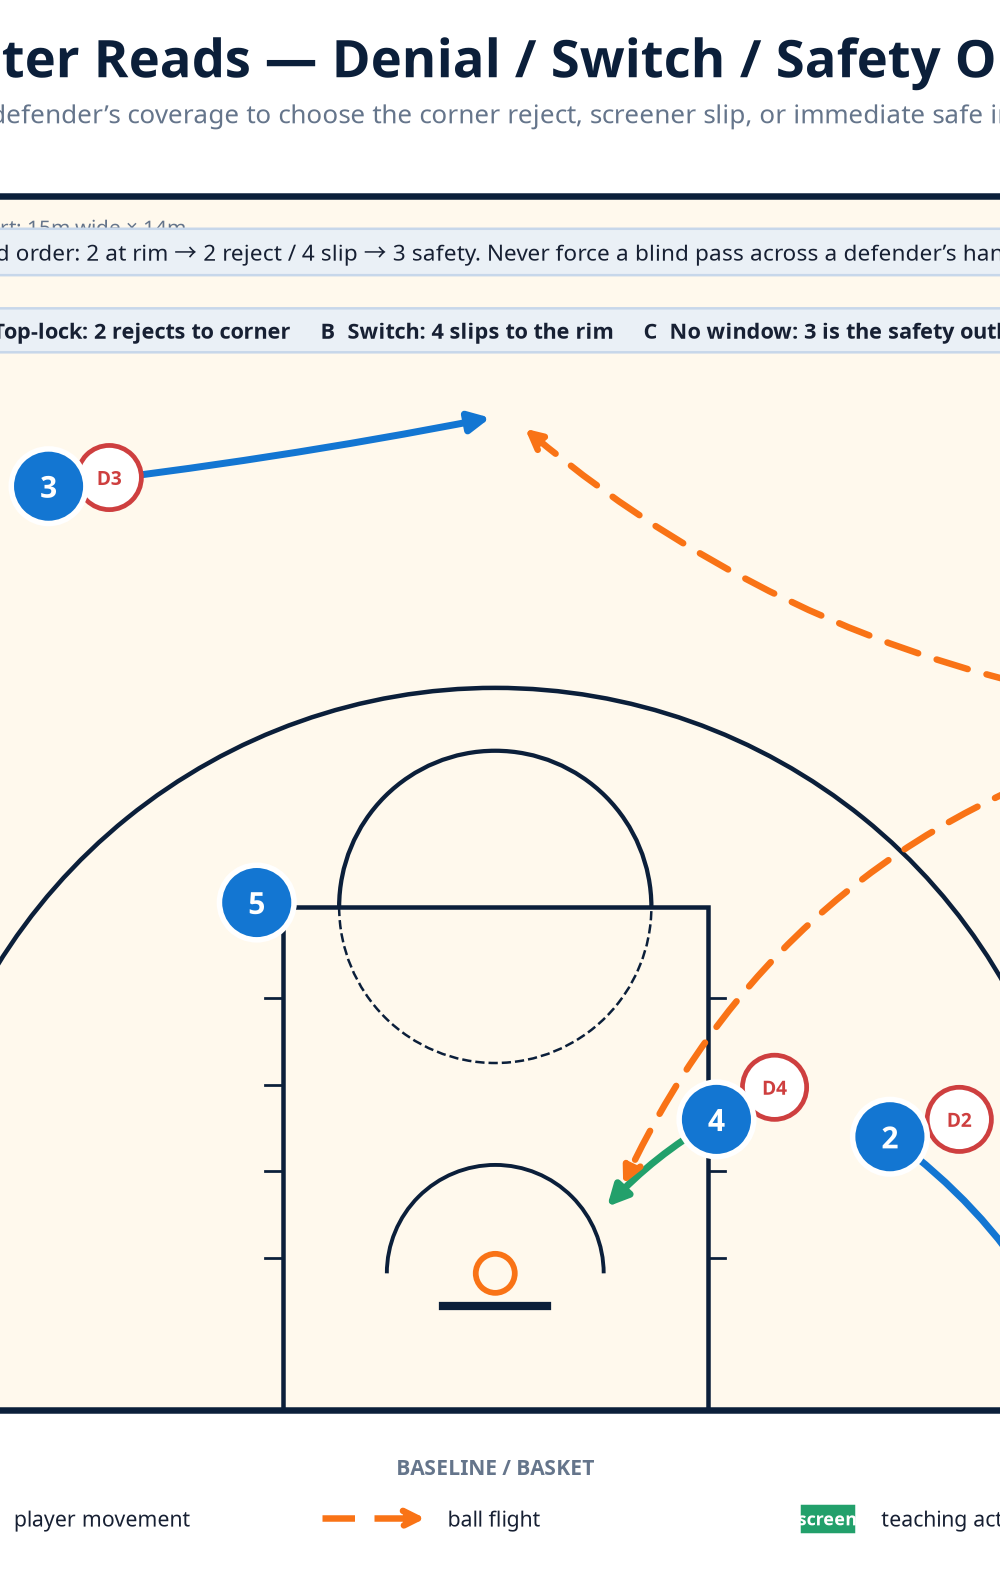
The usual error is that 4 screens before 2 sells the setup step. Freeze the action and require 2 to step up before cutting down. A screen set too low sends 2 under the rim; move 4’s target just inside the lane line.
A second issue is 1 staring at the layup and missing 3. Use an audible “rim, counter, safety” count in early reps. Correct 5’s horizontal drift with a cone at the weak-side elbow. Finally, eliminate looping passes: the ball must arrive early and on a direct line.
Variations & Progressions
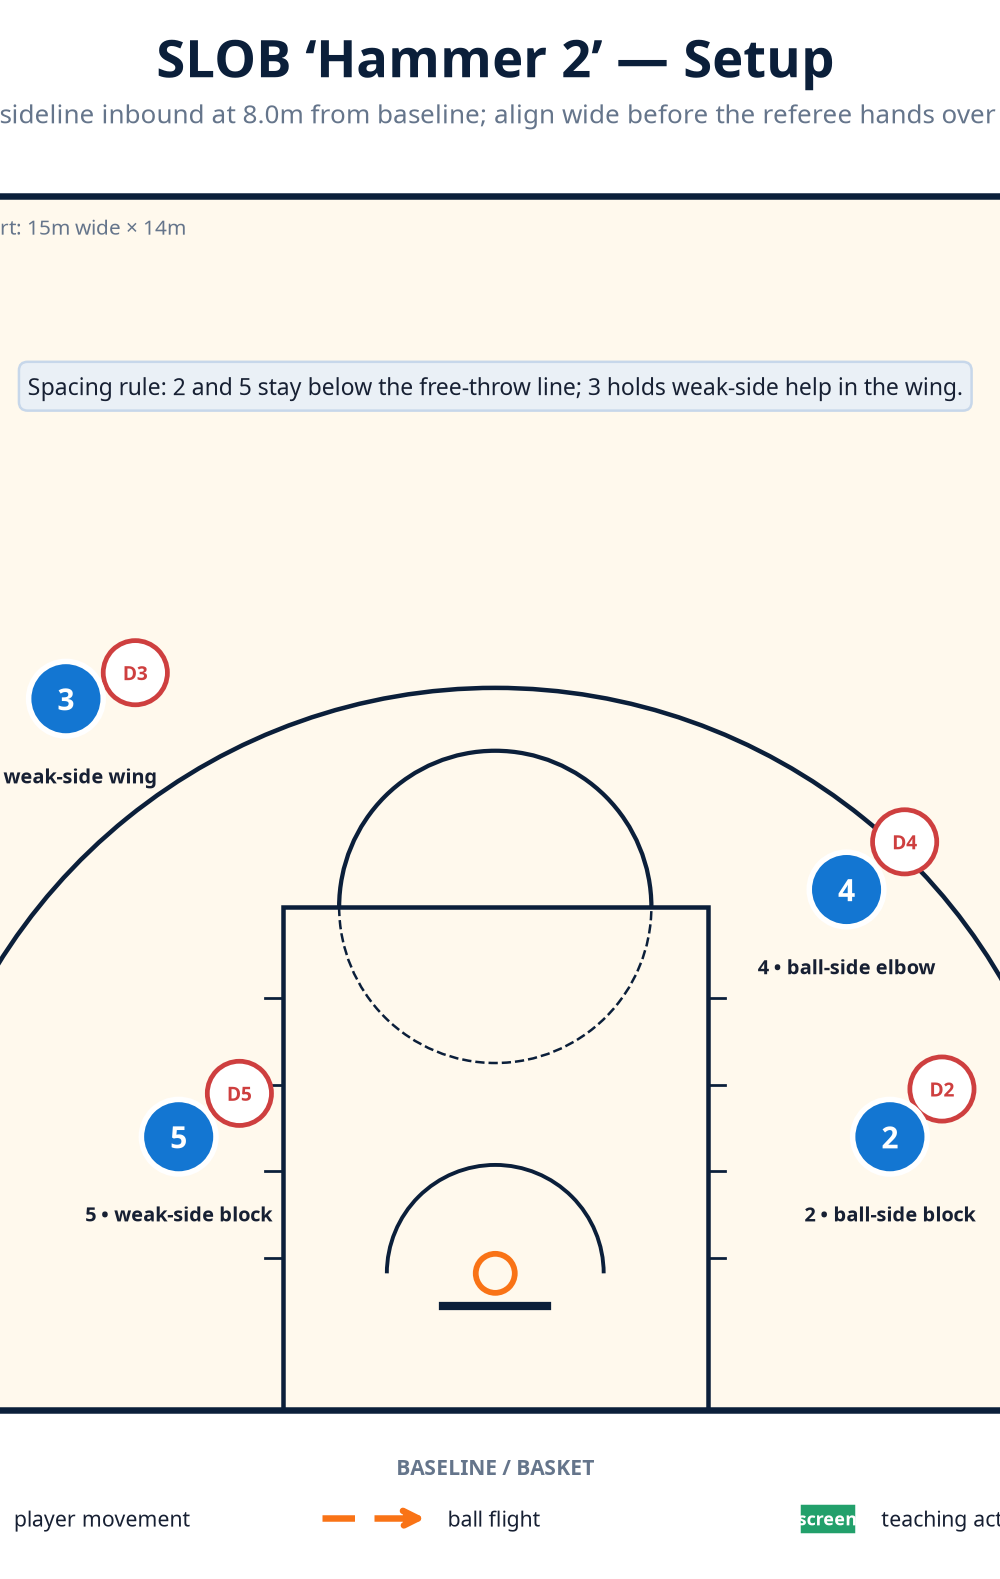
For the reject variation, tell 2 to plant and burst to the near corner when D2 beats the screen to the inside. This is the easiest counter and should be installed first. For the slip variation, have 4 release immediately to the rim when D4 switches or jumps the screen; 2 continues through to keep D2 occupied. For an advanced three-point variation, keep 2’s cut as a decoy, have 5 flare 3 from the weak-side wing, and pass to 3 for a catch-and-shoot three. Only add this once your team can consistently protect the inbound and recognise the switch.
Build from 0v5 air reps, to 5v0 with a five-second timer, then guided and live 5v5. Score two points for a rim catch, one for a safe catch by 3, and minus one for a turnover or violation. This rewards decisions, not forced passes.
Age Adaptations
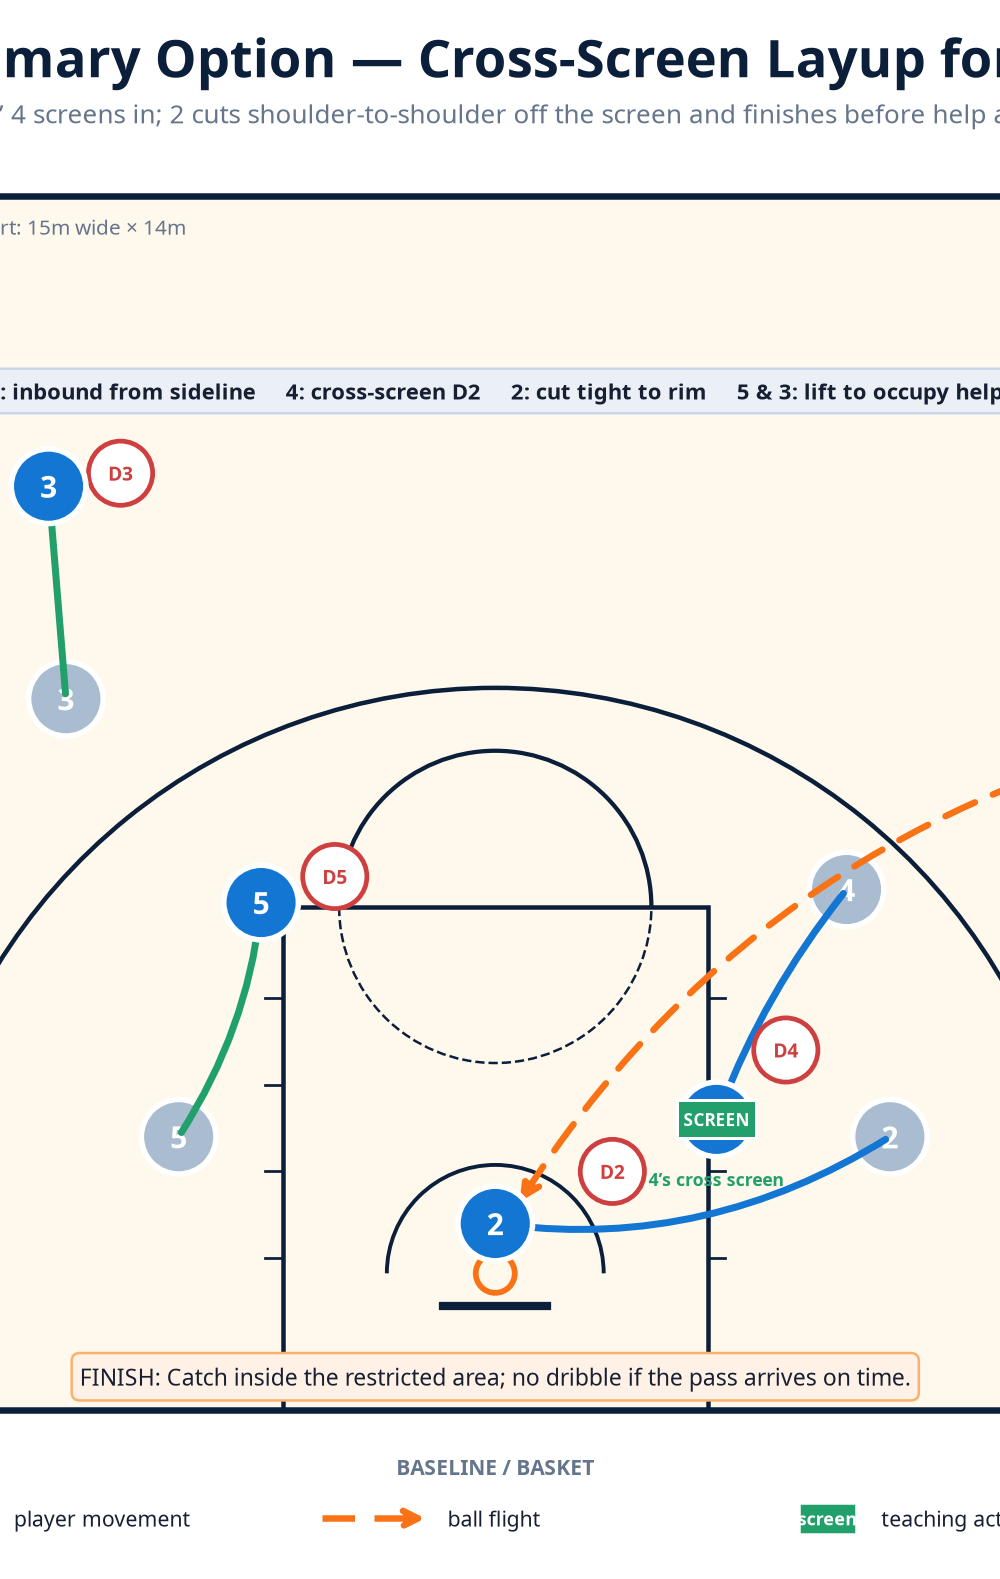
For Under-10, use only 1, 2, and 4 in a reduced half-court; use a cone for the screen and reward a crisp pass. For Under-12, add 5’s lift and introduce live D2 at 60–70% pace.
For Under-14 and Under-16, use the full 15 m-wide frontcourt, a true five-second count, and live coverage. For open-age players, run both sides, scout trail/top-lock/switch coverage, and make the counter call from the bench. At every level: create the rim window, read the defender, and value the ball.
Practice Finish
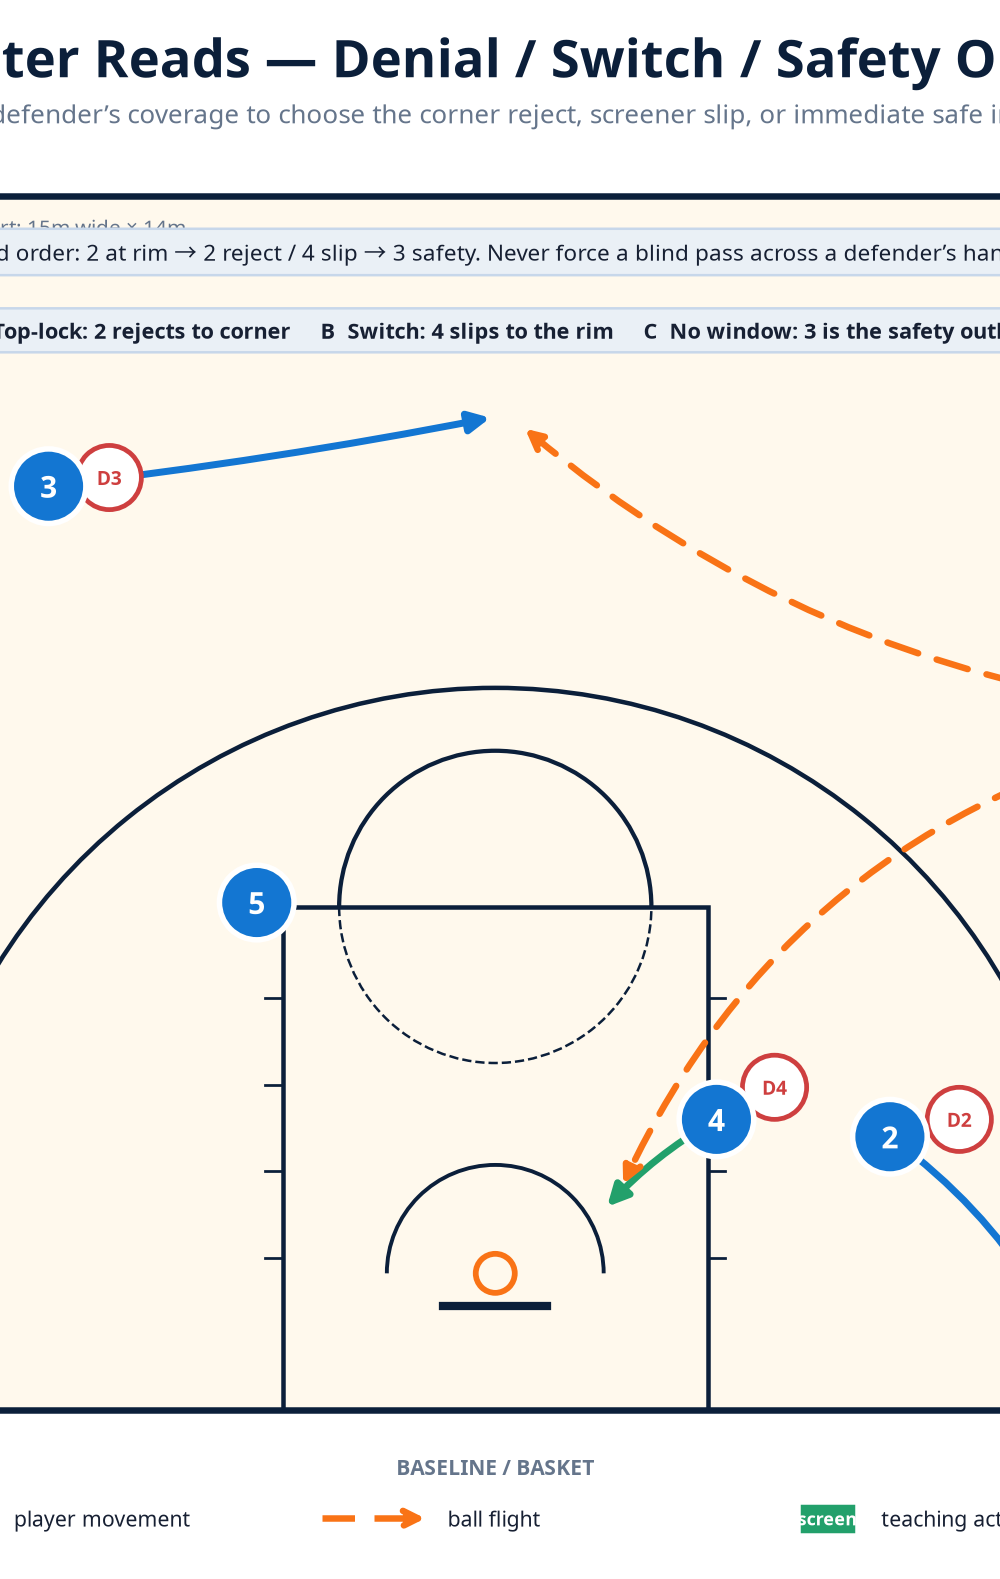
End the segment with three consecutive live reps from each sideline. The unit only “wins” the set if it produces either a layup-quality catch at the rim or a controlled safety pass to 3 without a violation. That definition reinforces what matters on game night: not a pretty diagram, but a reliable possession under pressure.
References