

Rugby
Box Kick Exit Strategy from the 22-Meter Line
A reliable, structured exit strategy designed to clear your lines safely, contest possession in the air, and transition effectively into defense.

What you need
Rugby balls, Cones (for marking pitch zones and chase lanes), Tackle shields (optional, for practicing the screen)
1. Overview
Exiting your own 22-meter area is one of the most critical pressure-relieving moments in rugby. A poorly executed exit invites immediate attacking pressure, whereas a well-structured exit allows a team to regain territory and dictate the terms of engagement. This set play focuses on a structured box kick exit strategy from the base of the ruck. It utilizes the scrum-half (9) to execute a high, contestable kick, supported by a staggered, aggressive chase line to regain possession or force a turnover.
This strategy is highly effective when under pressure, particularly off a slow ball or when the opposition's defensive line speed restricts passing options. By kicking from the base, the scrum-half minimizes the risk of charge-downs and allows the forwards to set a solid protective screen.
2. Setup
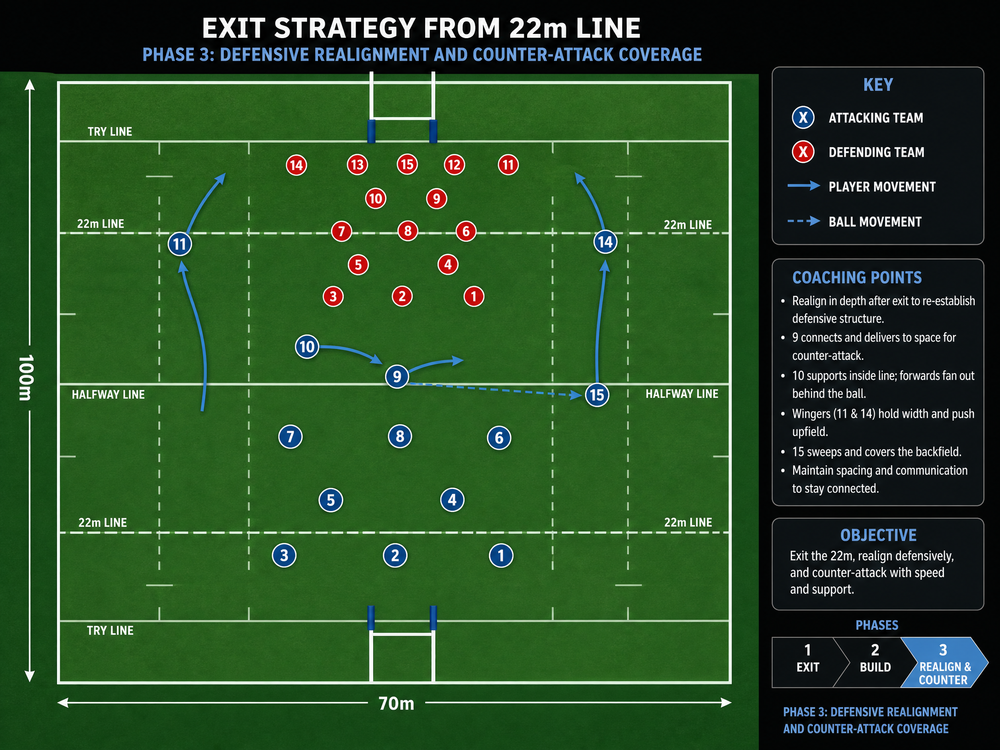
Pitch Area: Own 22-meter zone (standard 100m x 70m pitch).
Player Positions:
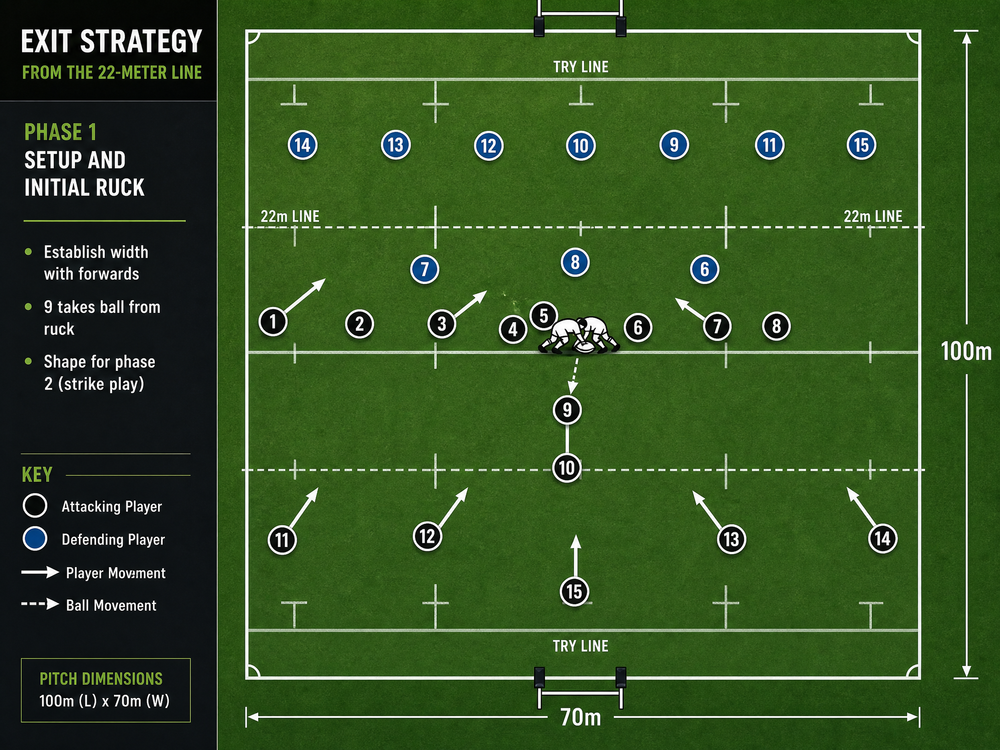
- Forwards (1-8): Form a protective screen around the ruck, particularly on the side of the kicker's dominant foot. The back row (6, 7, 8) must be ready to support the chase or secure the breakdown.
- Scrum-half (9): Positioned at the base of the ruck, ready to execute the box kick.
- Fly-half (10) and Centers (12, 13): Positioned deep and wide to offer a secondary kicking option if the box kick is shut down, or to join the chase line.
- Wingers (11, 14) and Fullback (15): The primary chasers. They must be aligned onside, ready to sprint the moment the ball leaves the boot.

3. Step-by-Step Instructions
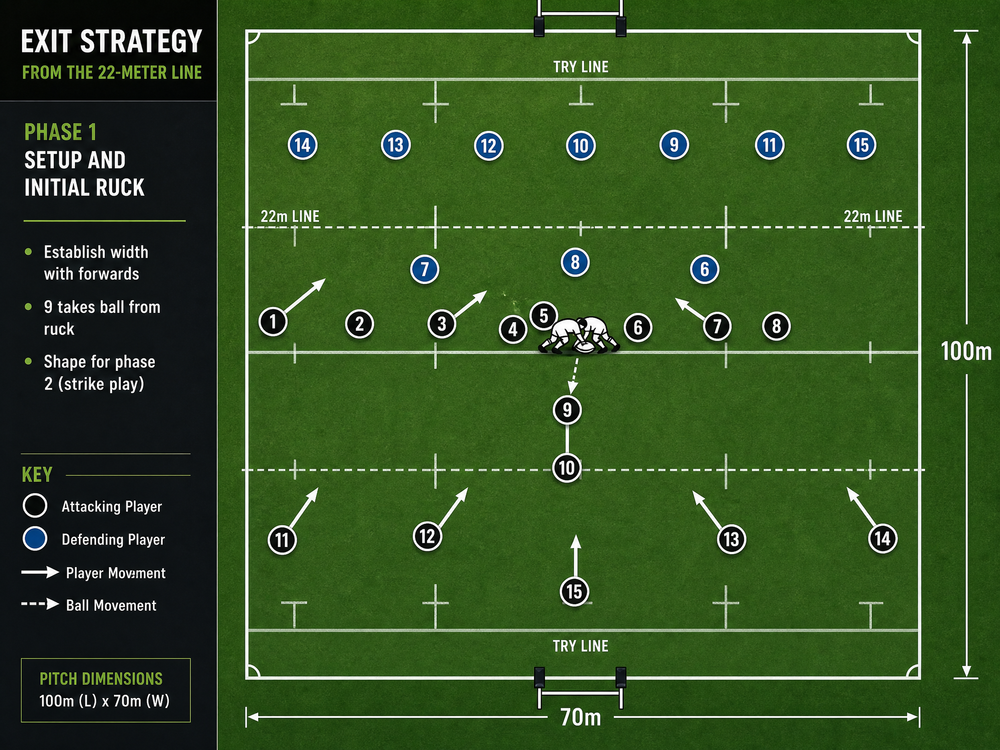
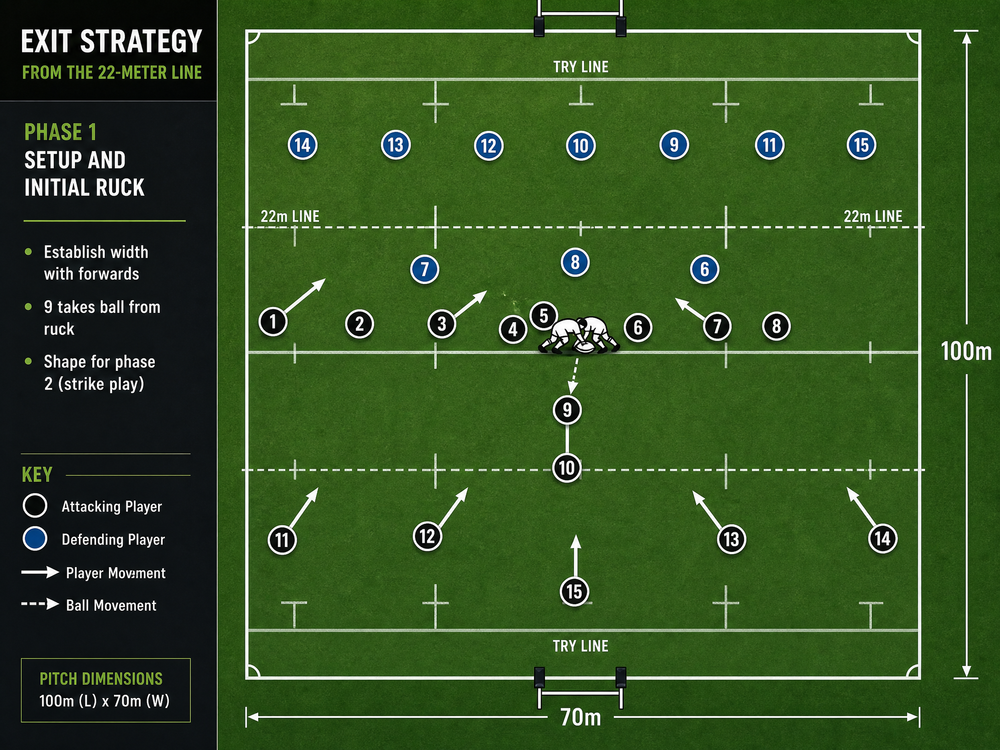
- Secure the Breakdown: The forwards must secure the ruck quickly and establish a strong, wide base. A 'caterpillar' formation (forwards binding onto each other extending backward from the ruck) can be used to buy the scrum-half extra time and distance from the defensive line.
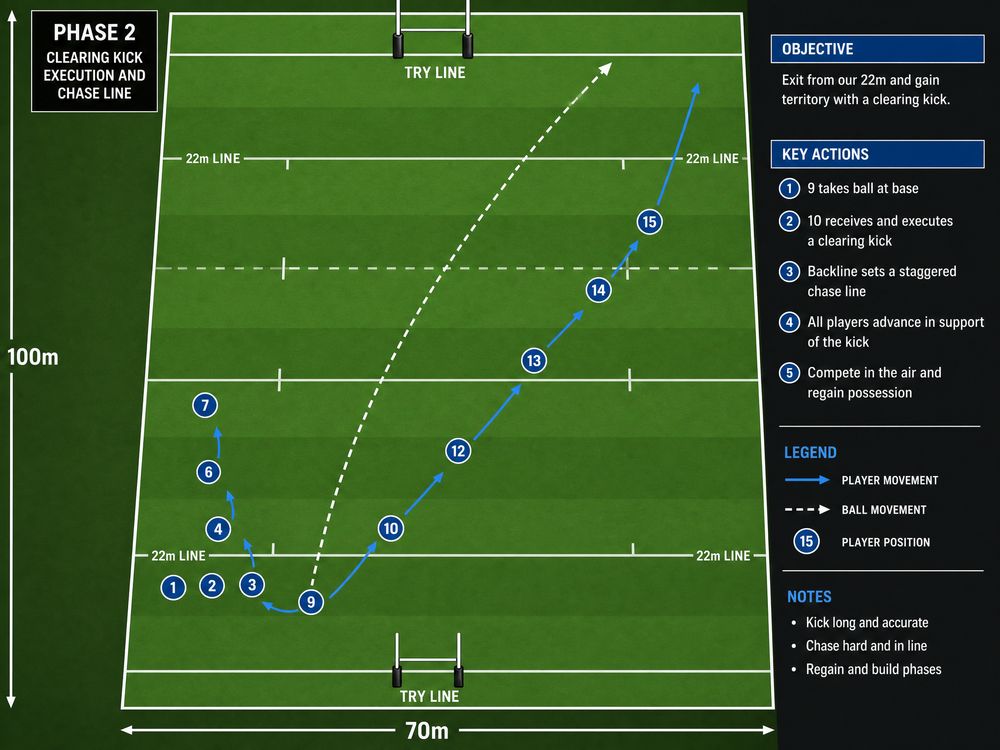
- The Call: The scrum-half (9) communicates the exit play call, ensuring the chase line (11, 14, 15) is set and onside.
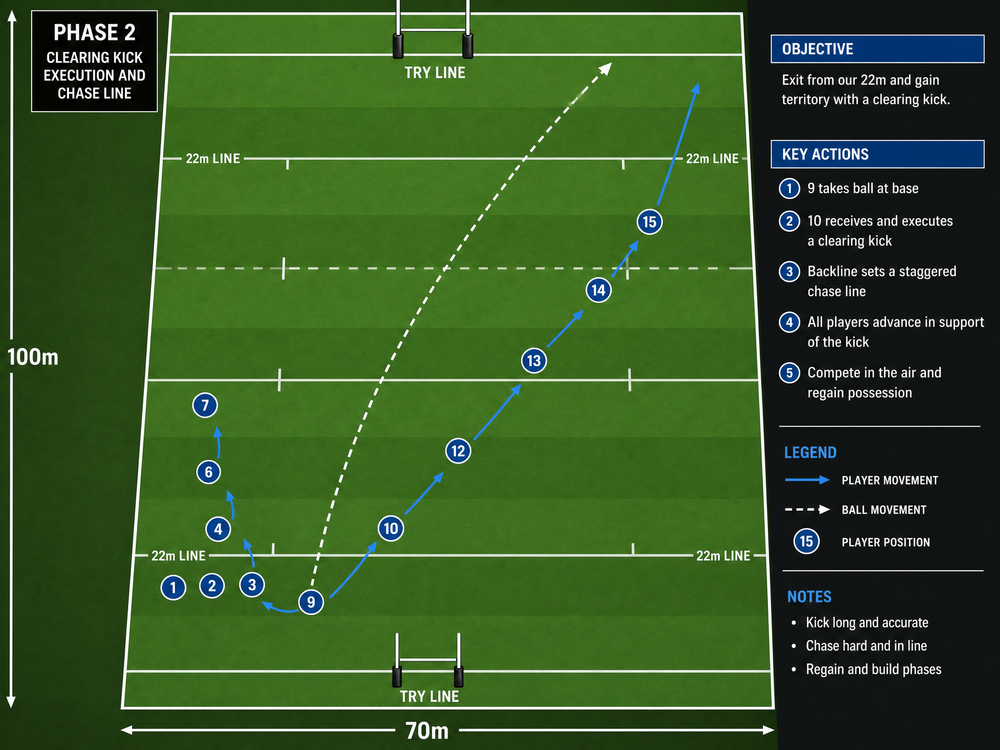
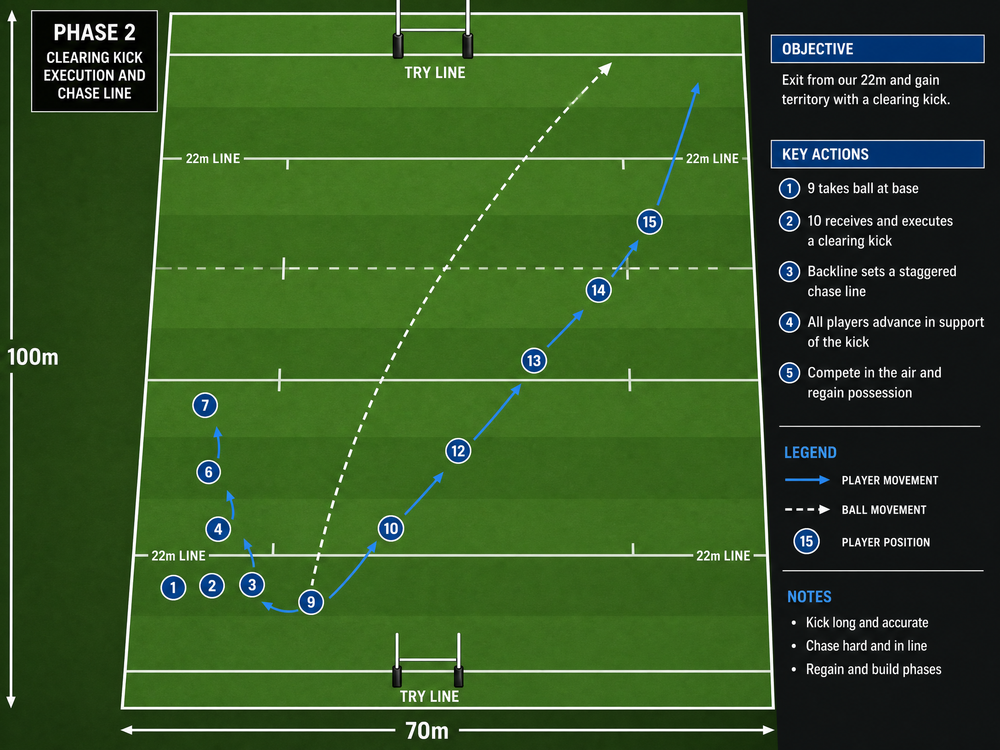
- The Kick Execution: The scrum-half steps back, maintaining a low body position, and executes a high box kick. The aim is to drop the ball just outside the 22-meter line, with a hang time of 3.5 to 4 seconds to allow the chasers to compete.
- The Chase: The moment the ball is kicked, the designated chasers (typically the blindside winger and the fullback) sprint forward. They must stay in their lanes to avoid creating doglegs in the defensive line.
- The Contest: The lead chaser aims to catch the ball or disrupt the opposition catcher. If the catch is not possible, they must make an immediate, dominant tackle to prevent a counter-attack.
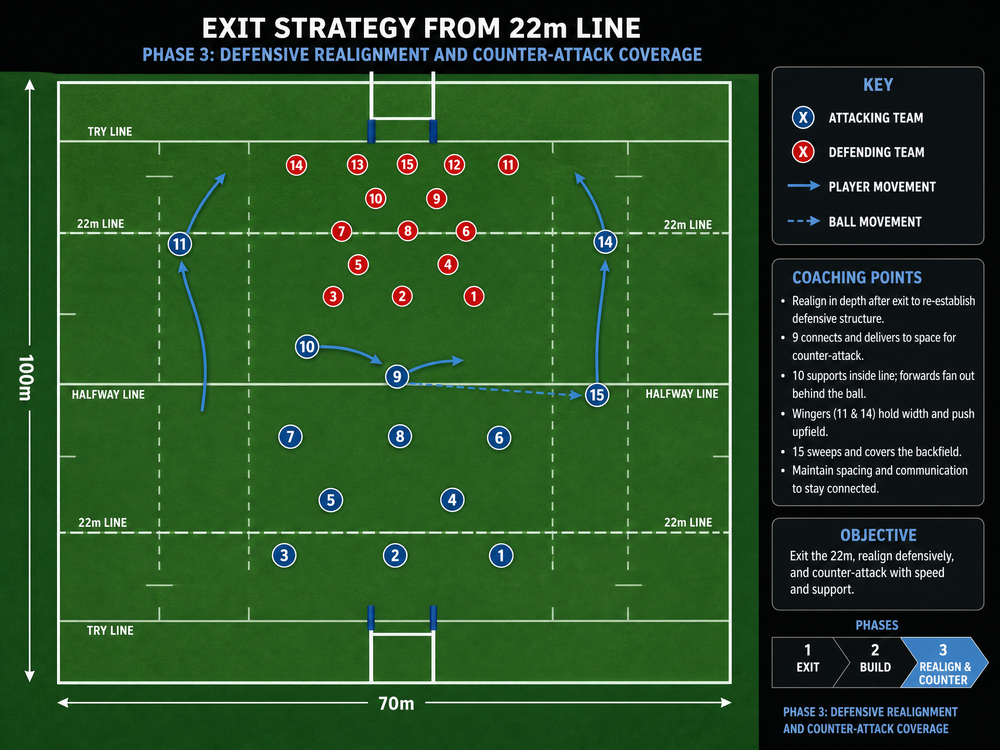
- Secondary Support: The rest of the team pushes up quickly to support the breakdown, form a new defensive line, and contest the subsequent ruck if the ball is not caught cleanly.
4. Key Coaching Points
- Hang Time is Crucial: A long kick with no hang time is a free counter-attack for the opposition. The kick must be high enough (3.5+ seconds) to allow the chasers to arrive at the same time as the ball.
- Onside Discipline: Chasers must be religious about staying behind the kicker until the ball is struck. An offside penalty in this area is disastrous.
- The Protective Screen: The forwards must not detach from the ruck too early. They need to protect the 9 from charge-downs, especially from the blindside.
- Chase Line Integrity: The chase must be coordinated. A staggered line is often best, with a lead chaser to contest the ball and secondary chasers to make the tackle or secure the breakdown if the ball hits the ground.
- Communication: Clear, loud communication from the 9 to the forwards (to hold the screen) and the backs (to initiate the chase) is non-negotiable.
5. Common Mistakes
- Rushed Execution: The 9 panicking under pressure and kicking before the screen is set or the chasers are ready.
- Kicking Too Long: Overkicking the chase line, giving the opposition back three time to catch and counter-attack against a fragmented defense.
- Weak Chase: Chasers jogging or losing their lanes, allowing the catcher to step inside and break the line.
- Poor Screen: Forwards failing to bind correctly or drifting away, allowing a defender to charge down the kick.
6. Variations & Progressions
- The 10 Exit (Variation): If the opposition aggressively targets the 9, the ball can be passed quickly to the 10, positioned deep in the pocket, for a longer clearance kick to touch. This requires a strong pass from the 9 and excellent protection from the centers.
- The Cross-Field Kick (Progression): For advanced teams, if the opposition defense shifts heavily to the side of the expected box kick, the 9 or 10 can execute a cross-field kick to the opposite winger, who should be in space.
- The Dummy Kick and Run (Variation): If the defense drops back too early anticipating the kick, the 9 can dummy the kick and snipe around the fringes of the ruck, looking to offload to a supporting forward.
7. Age Adaptations
- Under 10s / Under 12s: Focus heavily on the basics of securing the ruck and making a simple pass to the 10 for a kick to touch. Box kicking requires technical proficiency that may be difficult at this age. Emphasize the importance of moving forward as a team after the kick.
- Under 14s / Under 16s: Introduce the box kick, but focus on technique rather than distance. Use a smaller pitch area if necessary. Teach the forwards how to form a basic screen and emphasize the importance of the chase line staying onside.
- Open / Senior: Full implementation of the strategy, including caterpillar rucks, complex chase patterns, and reading the opposition's defensive alignment to choose the best exit option.
