The Right Flank Wing Overload: Breaking Down Low Blocks
Master the art of creating numerical superiority out wide to bypass stubborn defences and deliver high-quality scoring chances.
Equipment Needed
Overview
The Wing Overload is a fundamental attacking strategy designed to break down compact, deep-lying defences (low blocks). By committing multiple attacking players to one side of the pitch—typically the winger, full-back, and an attacking midfielder—you create a 3v2 or 2v1 numerical advantage. This forces the defending team to either shift their defensive block, leaving space centrally or on the opposite flank, or remain compact, allowing your team to easily progress down the wing and deliver high-quality crosses into the penalty area.
This specific play focuses on a right-sided overload, utilising an overlapping full-back, an inverted winger, and late runs into the box to create confusion and high-percentage scoring opportunities.
Setup
- Pitch Area: Full attacking half (approximately 50m x 68m).
- Players: 11 Attackers (working in a 4-2-3-1 shape) vs 8-11 Defenders.
- Equipment: 1 Full-size goal, balls, cones to mark starting positions and overload zones, bibs for two teams.
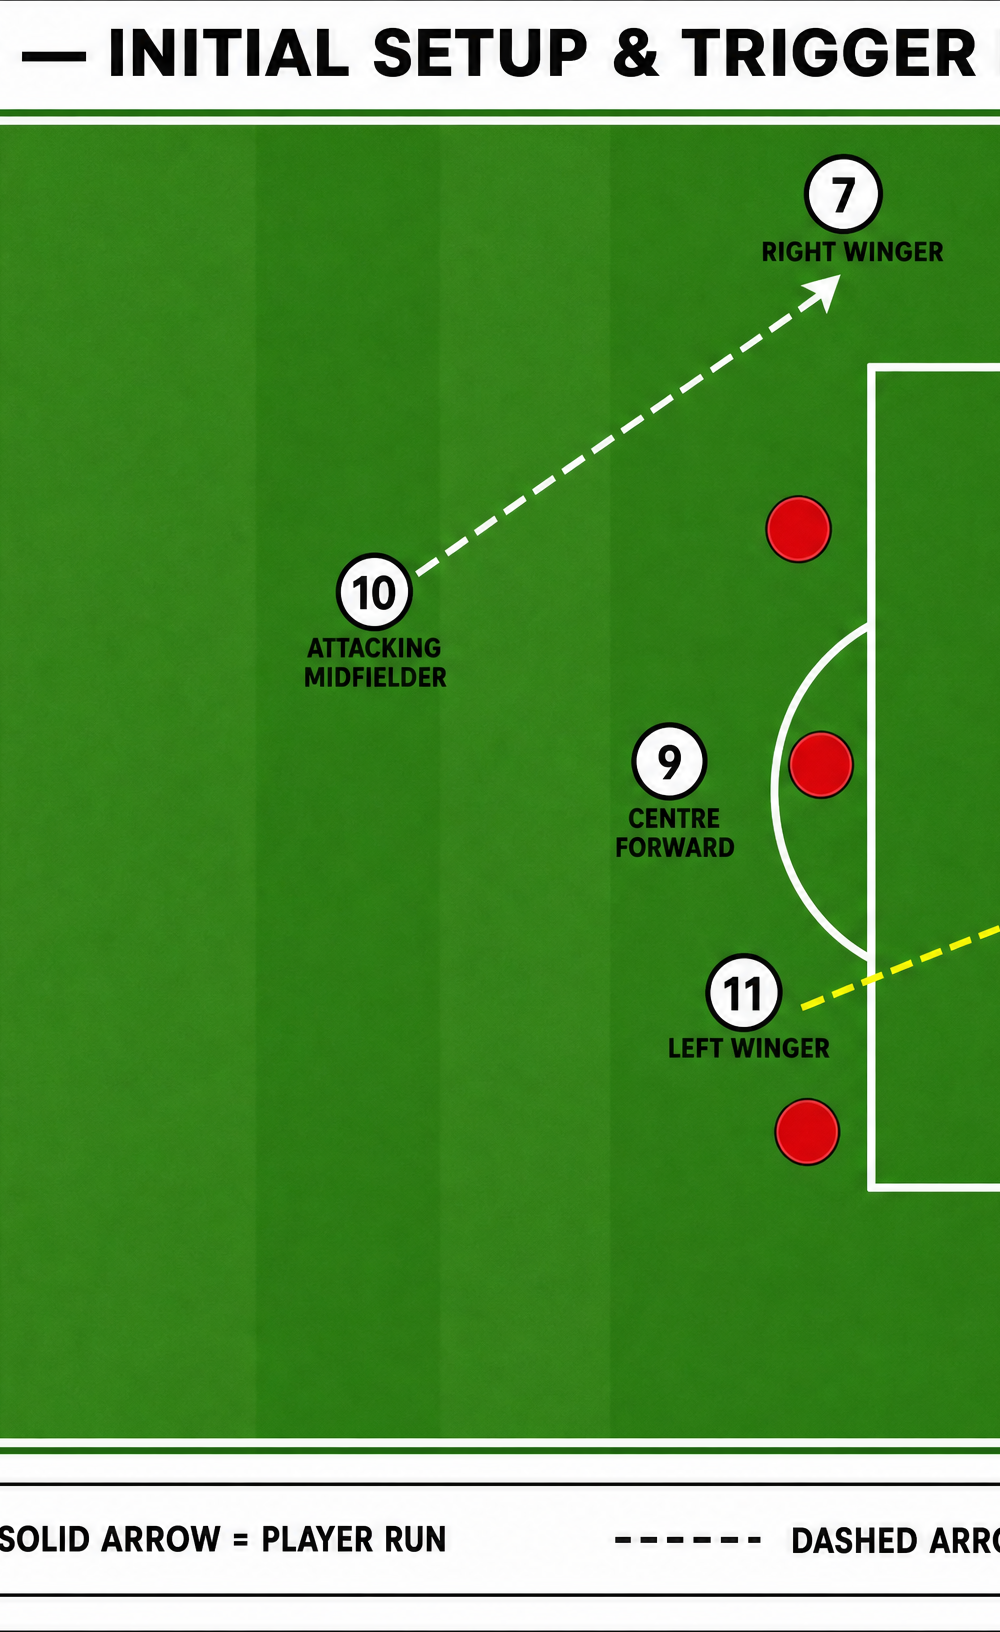
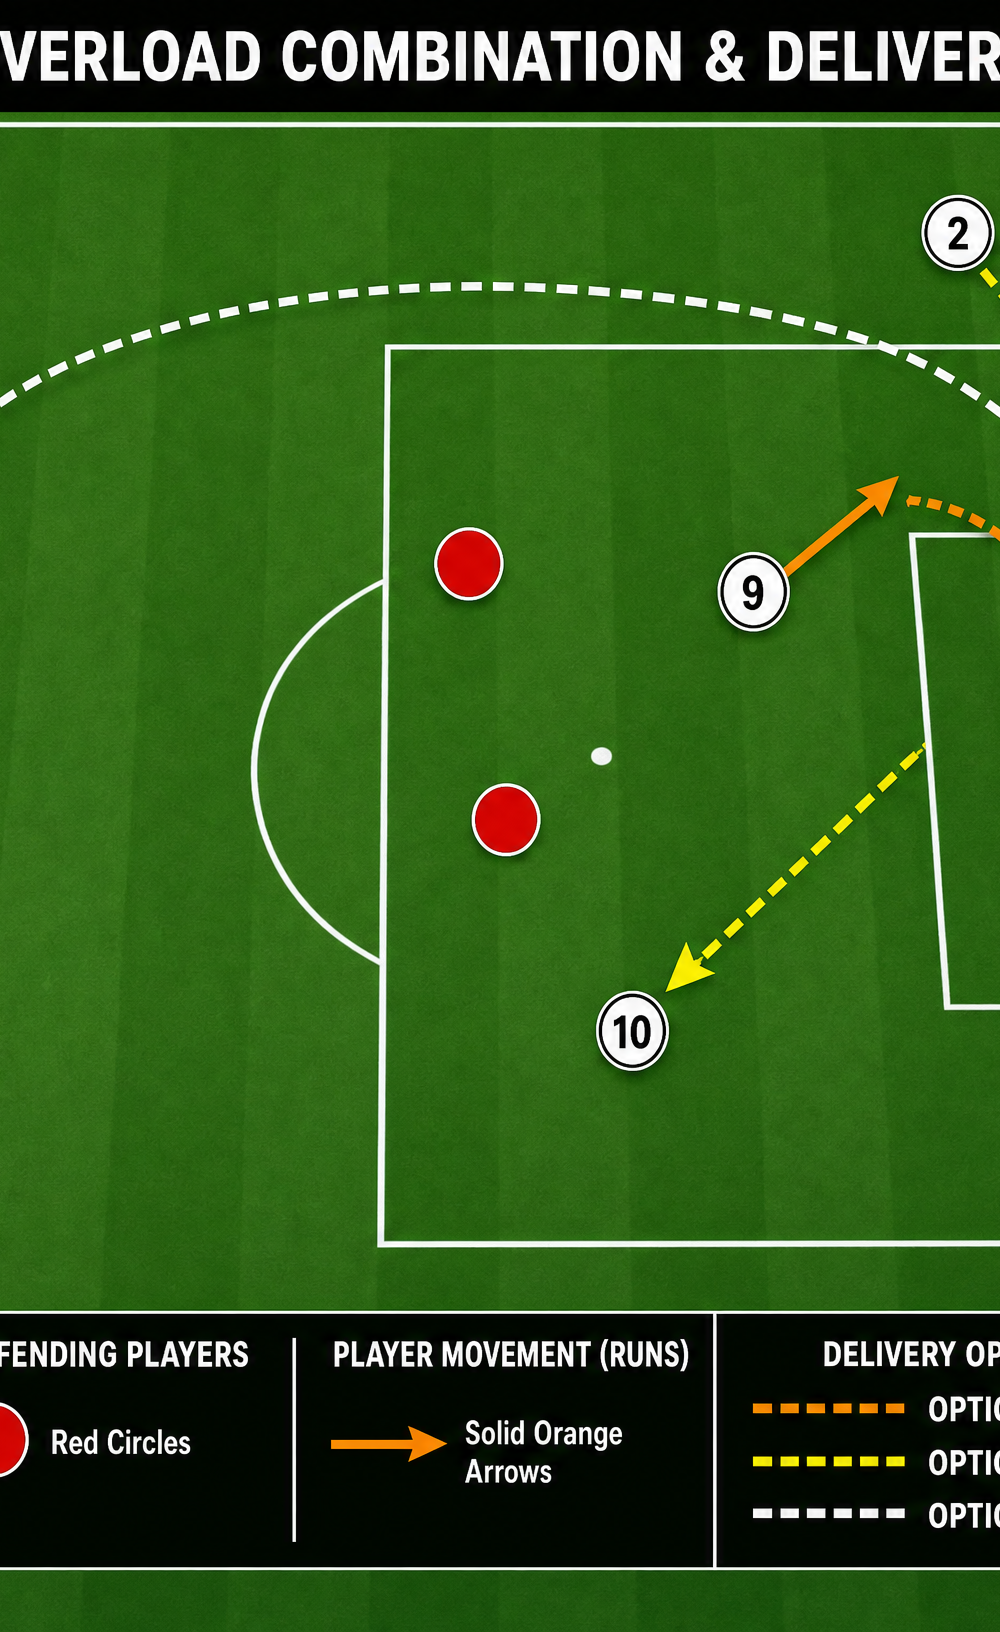
- Key Positions: Right Back (2), Right Winger (7), Attacking Midfielder (10), Centre Forward (9), Left Winger (11).
Step-by-Step Instructions
Phase 1: The Trigger and Initial Movement
- Establish Possession: The attacking team circulates the ball patiently across the backline and defensive midfield, waiting for the right moment to strike.
- The Trigger Pass: The Attacking Midfielder (10) receives the ball in the right half-space, approximately 25m from goal. This is the trigger for the play to begin.
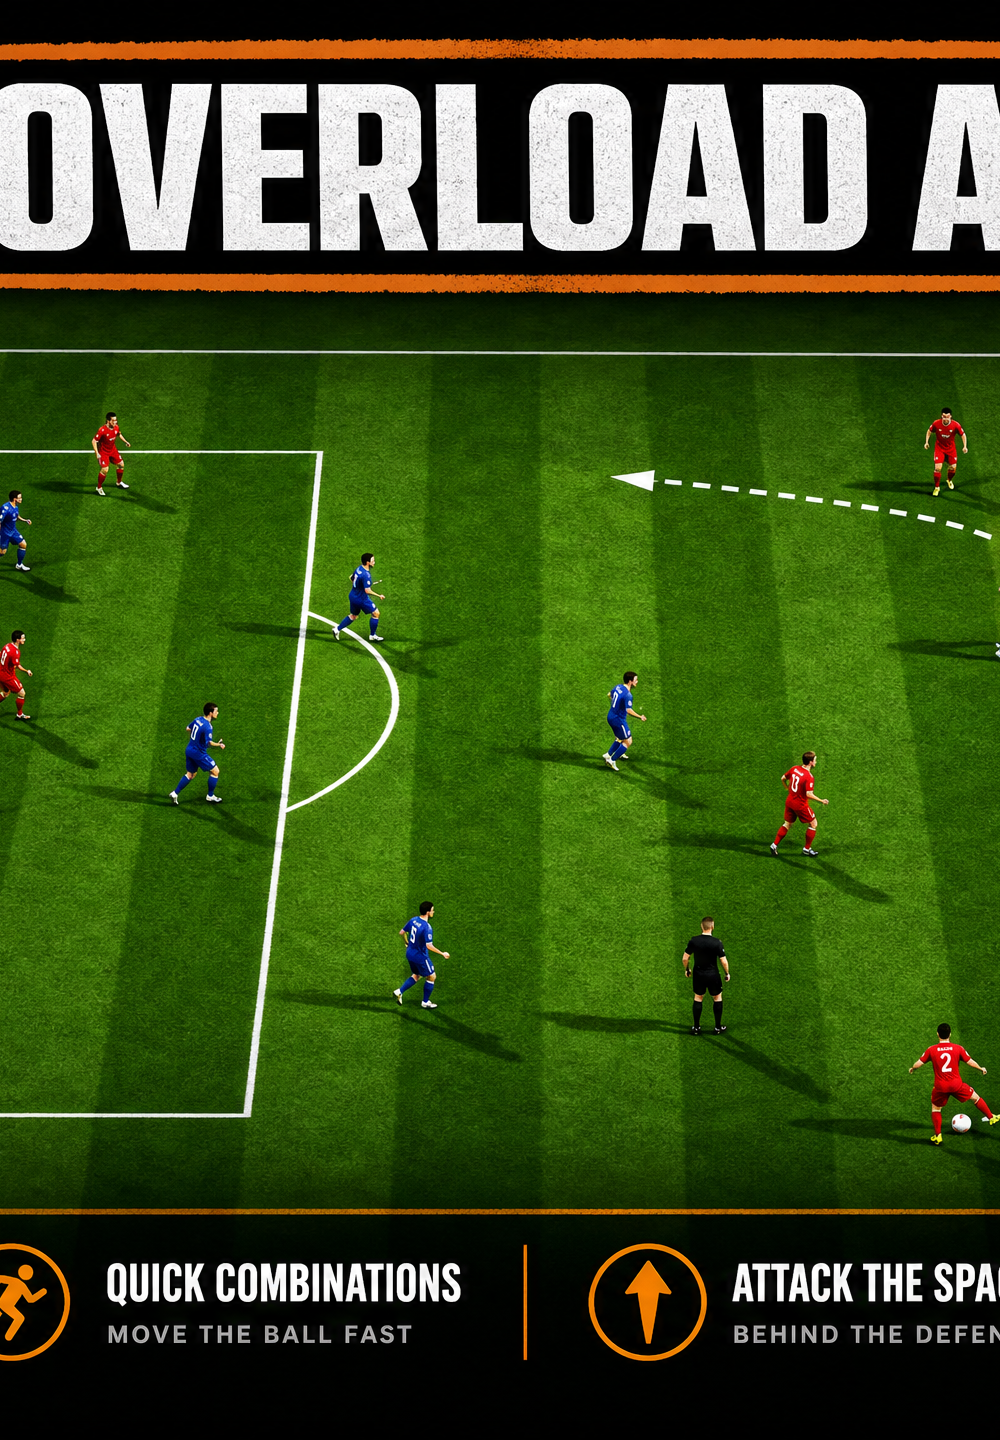
- The Winger's Movement: The Right Winger (7) stays wide initially, hugging the touchline to stretch the defence, then drops slightly to receive a pass to feet from the No. 10.
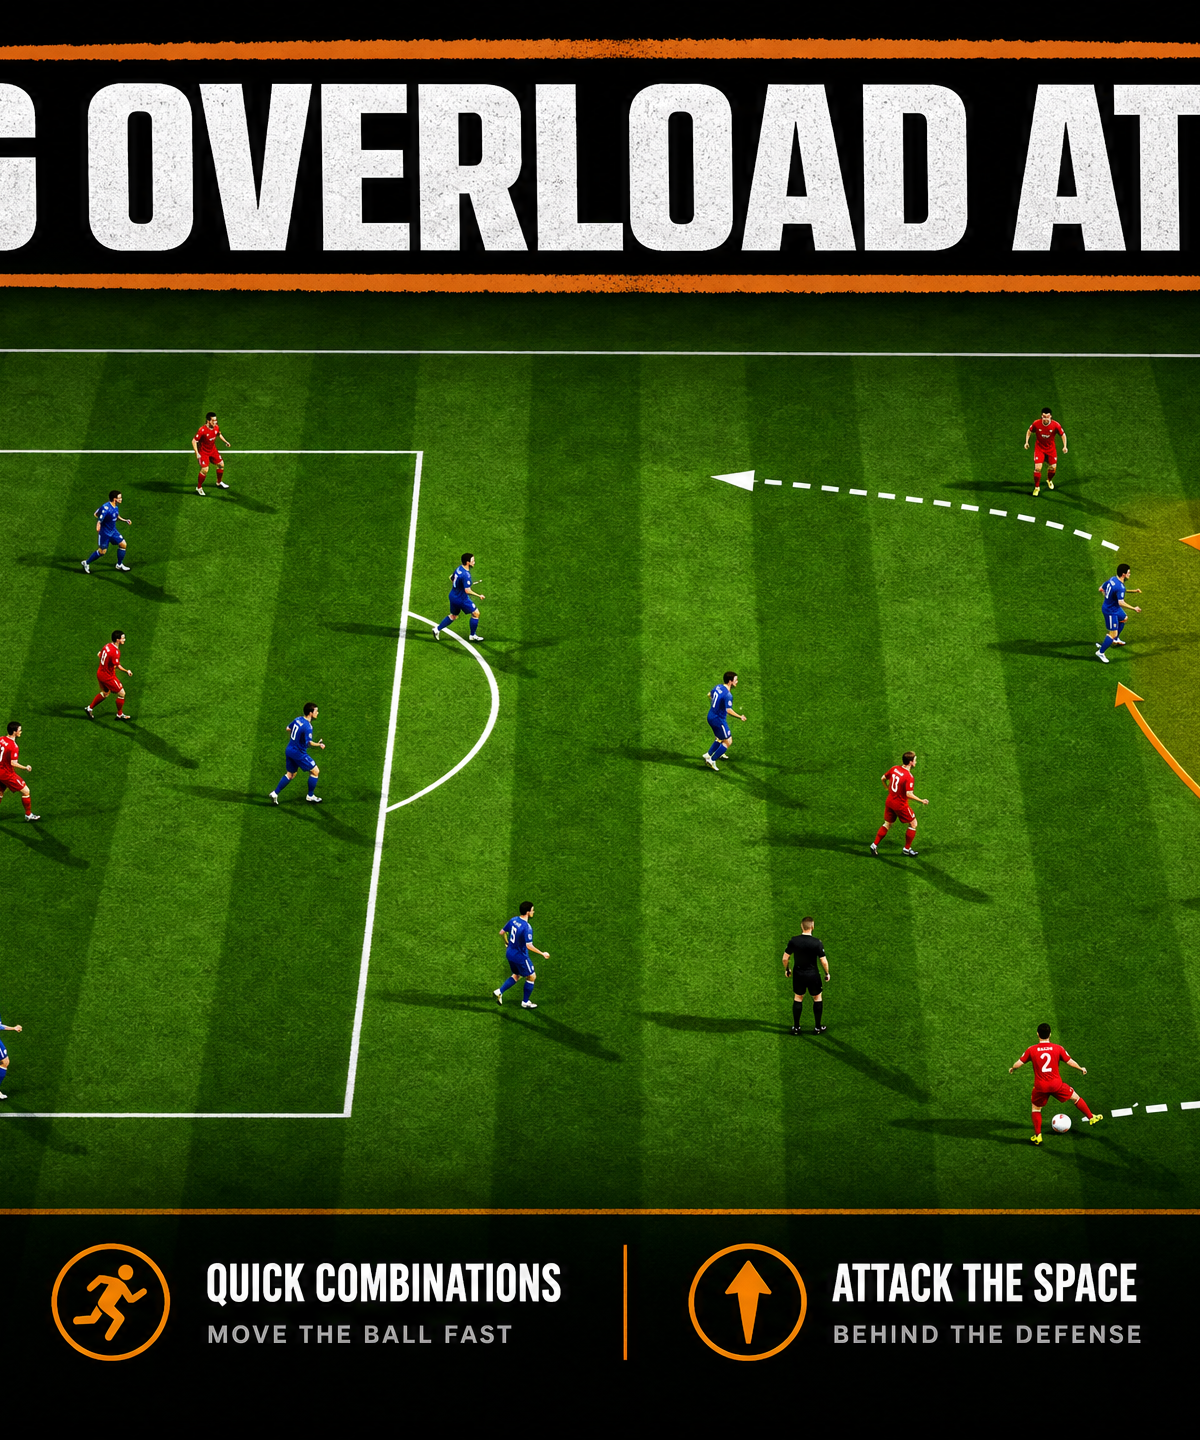
- The Overlap: As the ball travels to the Right Winger (7), the Right Back (2) immediately launches a high-speed overlapping run down the right flank, aiming for the space behind the opposing full-back.
Phase 2: The Combination and Delivery
- Engaging the Defender: The Right Winger (7) receives the ball and drives directly at the opposing full-back, forcing them to commit.
- The Decision: The Right Winger (7) now has a 2v1 advantage. They can either:
- Option A: Slip the ball down the line to the overlapping Right Back (2) if the defender steps inside.
- Option B: Cut inside and shoot or cross if the defender drops off to cover the overlap.
- The Delivery: Assuming the pass goes to the Right Back (2), they must deliver a first-time cross into the penalty area. The key is to avoid the first defender and pick out a specific run.
- Box Runs:
- The Centre Forward (9) makes an aggressive near-post run to drag the centre-backs.
- The Left Winger (11) makes a diagonal run to the far post.
- The Attacking Midfielder (10) arrives late at the edge of the penalty area (the cut-back zone).
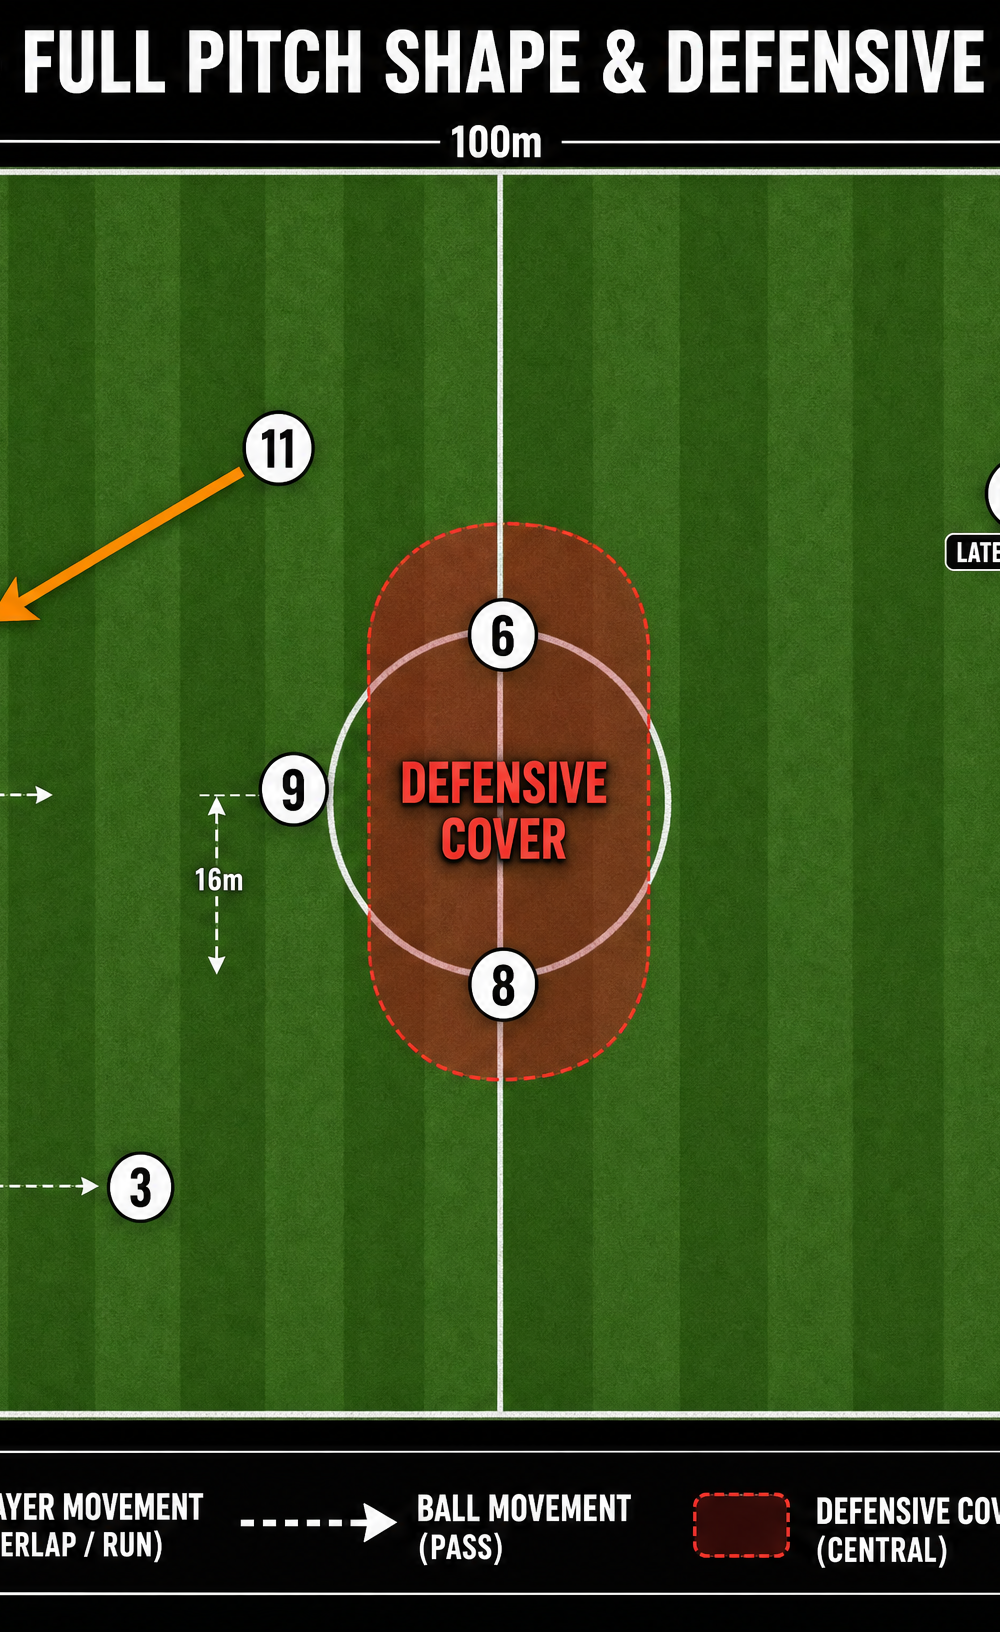
Phase 3: Defensive Balance
- Rest Defence: While the overload happens on the right, the rest of the team must maintain defensive balance to prevent counter-attacks.
- Central Cover: The two Defensive Midfielders (6 & 8) sit centrally, providing a shield in front of the centre-backs.
- Opposite Flank: The Left Back (3) tucks inside to form a back three with the two centre-backs, ensuring numerical superiority against any opposing forwards left up the pitch.
Key Coaching Points
- Timing is Everything: The overlapping run from the full-back must be timed perfectly with the pass to the winger. Too early, and they are offside or tracked; too late, and the momentum is lost.
- Quality of the Final Ball: The cross must have purpose. Aim for specific zones (near post, far post, cut-back) rather than just putting the ball into an area.
- Commit the Defender: The winger with the ball must drive at the defender to force a decision. If the winger is passive, the defender can cover both options.
- Aggressive Box Runs: Attackers entering the box must do so with conviction, anticipating where the ball will be delivered and beating their markers to the spot.
Common Mistakes
- Static Wingers: The winger receives the ball standing still, allowing the defence to set up and track the overlapping run easily.
- Poor Spacing: The attacking midfielder, winger, and full-back get too close to each other, making it easy for one defender to mark two players.
- Lack of Defensive Balance: Committing too many players forward without leaving adequate cover centrally, leaving the team vulnerable to quick counter-attacks.
Variations & Progressions
- The Underlap: Instead of overlapping, the full-back drives inside (underlaps) the winger, dragging defenders centrally and leaving the winger isolated 1v1 on the outside.
- Third-Man Run: The winger passes back to the attacking midfielder, who immediately plays a through ball down the line for the overlapping full-back (a classic third-man combination).
- Switch of Play: If the overload draws the entire defensive block to the right, the attacking midfielder quickly switches the ball to the isolated left winger on the opposite flank for a 1v1 situation.
Age Adaptations
- Under 10s: Focus purely on the 2v1 aspect. Set up small-sided games where a winger and full-back attack a single defender.
- Under 14s: Introduce the timing of the runs and the specific areas to attack in the penalty box. Emphasise the quality of the cross.
- Under 16s & Open: Implement the full tactical setup, including defensive balance and complex variations like underlaps and third-man runs. Require high-speed execution under pressure.