Rugby
Drill
intermediate
Mastering the Lineout: Foundation to Execution
A comprehensive guide to building a dominant lineout, covering standard setups, front ball variations, and devastating maul drives.
Jun 5, 20265 min read30 min drill15 players

Equipment Needed
3-5 Rugby balls
Cones
Training bibs
1. Overview
The lineout is a critical set piece in Rugby Union, offering a prime platform for launching attacks or securing possession. This comprehensive drill focuses on establishing a robust lineout foundation. It begins with the fundamental setup, ensuring all players understand their roles and spacing. Once the foundation is solid, the drill progresses into two distinct tactical options: a quick front ball with a peel runner, and a longer throw to the back to set up a powerful maul drive. By mastering these variations, a team can keep the opposition guessing and exploit different defensive weaknesses.
2. Setup
Pitch Setup
- Utilize a standard rugby pitch (100m x 70m).
- Mark the line of touch clearly. The lineout must form between the 5-metre and 15-metre lines.
- Ensure a 1-metre gap between the attacking and defending lines.
Equipment Needed
- 3-5 Rugby balls.
- Cones to mark the 5m and 15m lines if pitch markings are unclear.
- Training bibs to differentiate attackers and defenders.
Player Positions
- Hooker (2): Thrower, positioned on the touchline.
- Props (1 & 3): Primary lifters, positioned at the front and middle of the lineout.
- Locks (4 & 5): Primary jumpers.
- Flankers (6 & 7): Secondary lifters or peel runners.
- Number 8 (8): Positioned at the back, crucial for maul control.
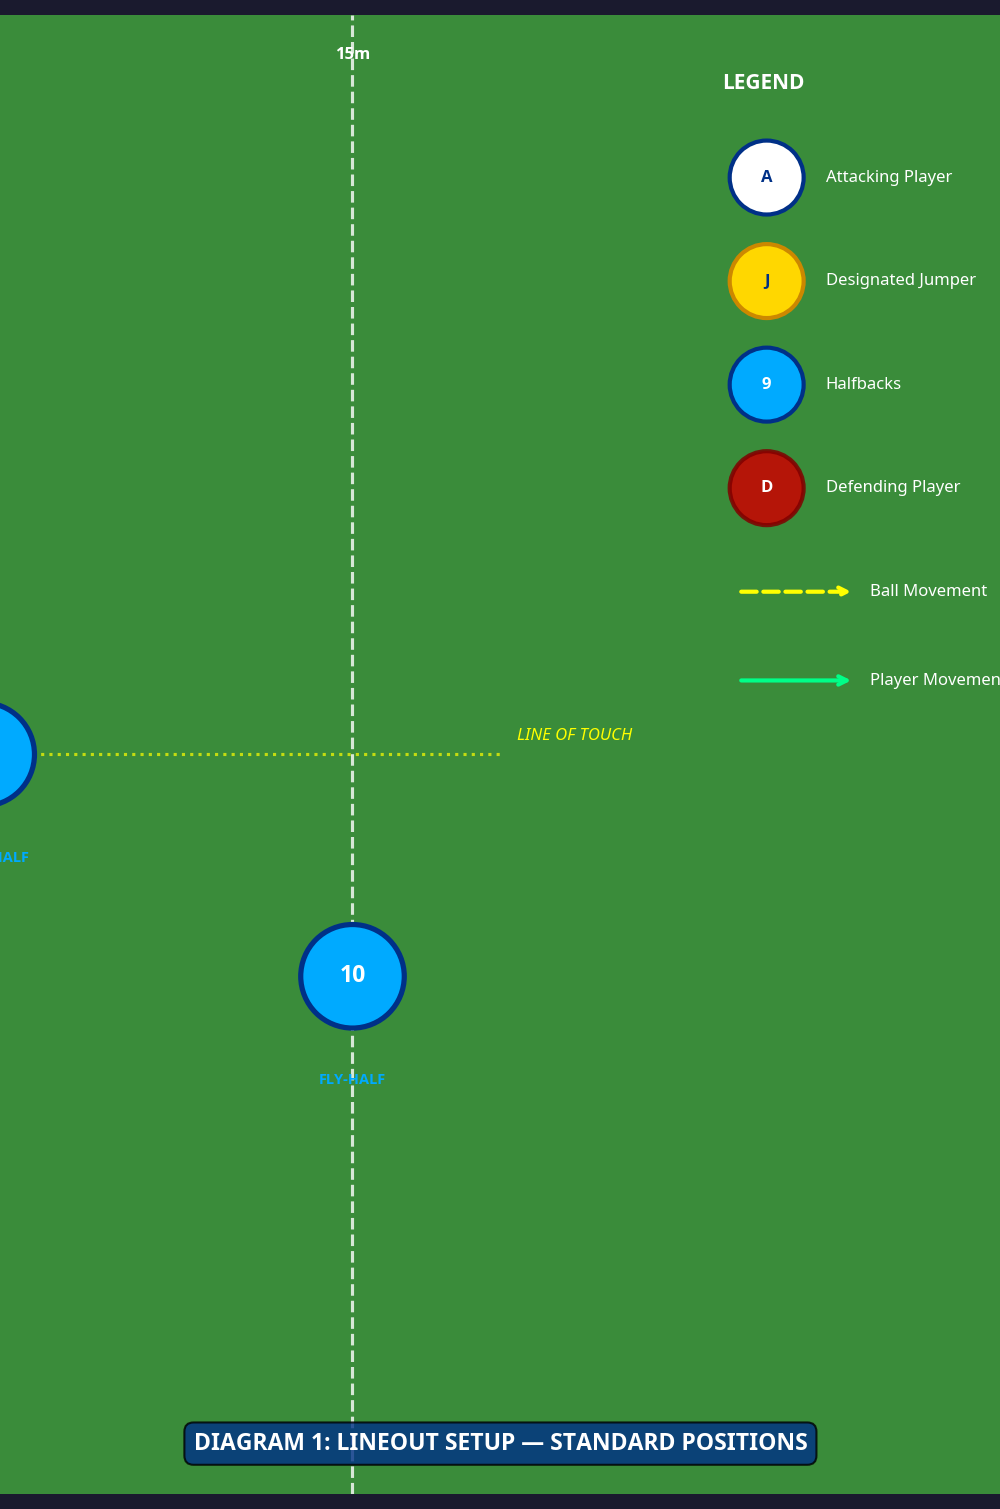
- Scrum-half (9): Receiver, positioned 2 metres back from the lineout.
- Fly-half (10) & Inside Centre (12): Positioned 10-12 metres back, ready to receive or run decoys.
3. Step-by-Step Instructions
Phase 1: The Foundation (Standard Setup)
- Form the Line: The forward pack forms a line between the 5m and 15m lines. Ensure players are evenly spaced and balanced.
- The Call: The lineout caller (usually a lock or hooker) clearly communicates the play using a pre-agreed code.
- The Movement: The designated jumper and their lifters make a synchronized, explosive movement to create separation from the defense.
- The Lift: The front and back lifters grip the jumper firmly (typically on the thighs/shorts) and lift them aggressively into the air.
- The Throw: The hooker delivers a flat, accurate throw to the peak of the jumper's reach.
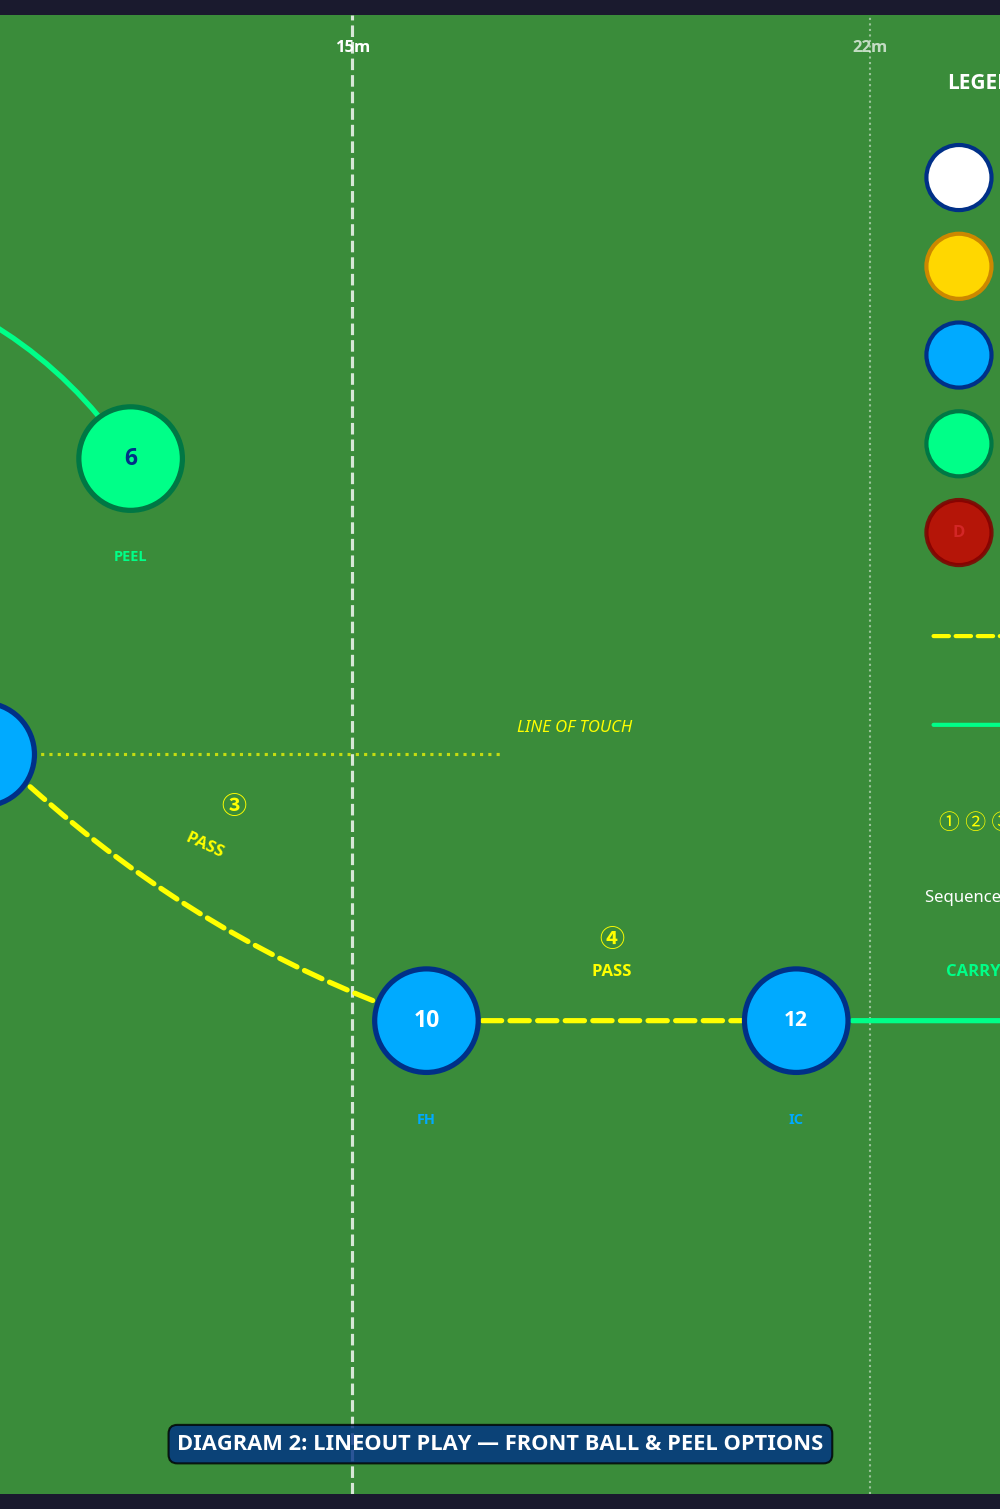
Phase 2: Option A - Front Ball & Peel
- The Jump: The front lock (4) jumps to secure the ball.
- The Delivery: The jumper immediately delivers the ball down to the waiting scrum-half (9).
- The Peel: Simultaneously, the blindside flanker (6) peels around the front of the lineout.
- The Pass: The scrum-half has two options: pass to the peeling flanker (6) for a hard carry, or pass out to the fly-half (10) to initiate a backline attack.
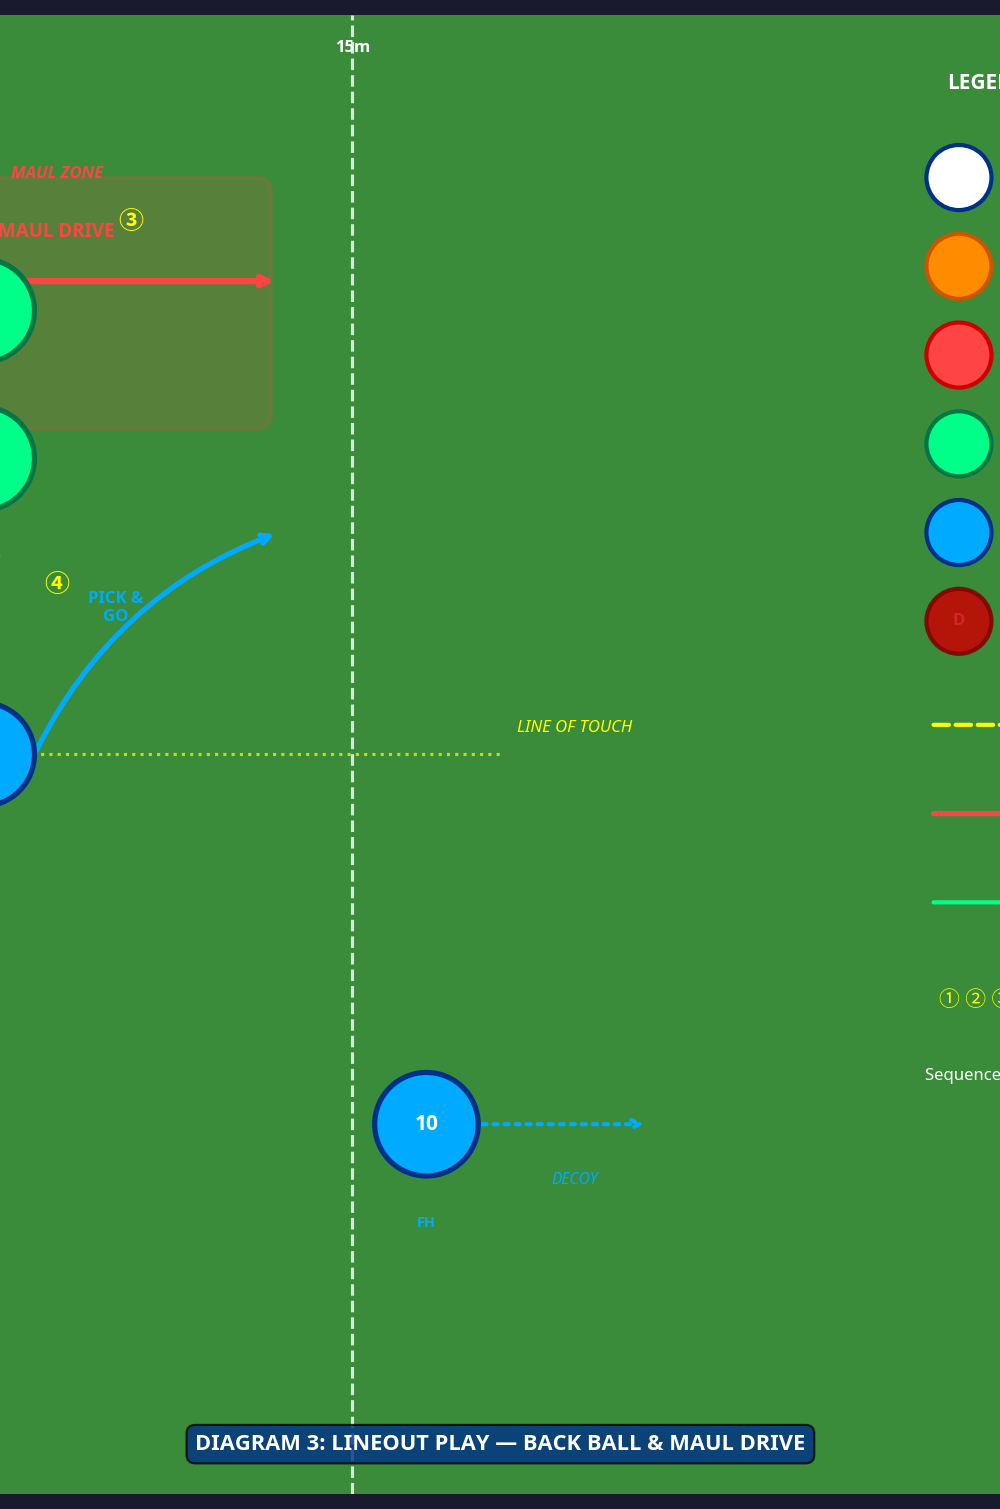
Phase 3: Option B - Back Ball & Maul Drive
- The Long Throw: The hooker throws a high, accurate ball to the back lock (5).
- The Catch: The back jumper secures the ball and brings it down securely.
- The Bind: As the jumper lands, the surrounding forwards immediately bind onto the jumper, forming a tight, low maul.
- The Drive: The Number 8 (8) anchors the back of the maul. The entire pack drives forward collectively.
- The Exit: The scrum-half (9) extracts the ball from the back of the maul when the drive stalls or an opportunity arises.
4. Key Coaching Points
- Timing is Everything: The success of a lineout hinges on the precise synchronization between the caller, the jumper, the lifters, and the thrower.
- Explosive Lifting: Lifters must use their legs and core, not just their arms, to elevate the jumper quickly and safely.
- Accurate Throwing: The hooker must throw a consistent, flat trajectory to the jumper's target hand.
- Strong Binding (Maul): In a maul situation, players must bind tightly and stay low.
- Clear Communication: The lineout caller must be loud and decisive.
5. Common Mistakes
- Telegraphing the Jump: Jumpers looking directly at their intended lifting spot or shifting their weight prematurely.
- Poor Lifting Technique: Lifters using only their upper body, resulting in a slow, low lift.
- Not Closing the Gap: Failure to maintain the 1-metre gap before the throw.
- Fragmented Mauling: Players joining the maul individually rather than as a cohesive unit.
6. Variations & Progressions
- Uncontested to Contested: Begin with unopposed lineouts to perfect timing and technique.
- Shortened Lineouts: Practice 4-man or 5-man lineouts to create more space in the midfield.
- Dummy Jumps: Introduce dummy jumps to confuse the defensive lifting pods.
7. Age Adaptations
- Under 12s & Below: Focus entirely on throw and catch mechanics. Lifting is generally not permitted.
- Under 14s: Introduce supported jumping focusing heavily on safety and correct lifting technique.
- Under 16s & Above: Full lifting introduced. Focus on dynamic movement and driving maul.