

Football
Penalty Box Movement Play for Crosses
Master the art of coordinated penalty box runs to maximize scoring opportunities from wide areas and confuse opposition defenses.
What you need
Full-size goal, Football supply, Cones/Markers, Bibs for defenders (optional)
Overview
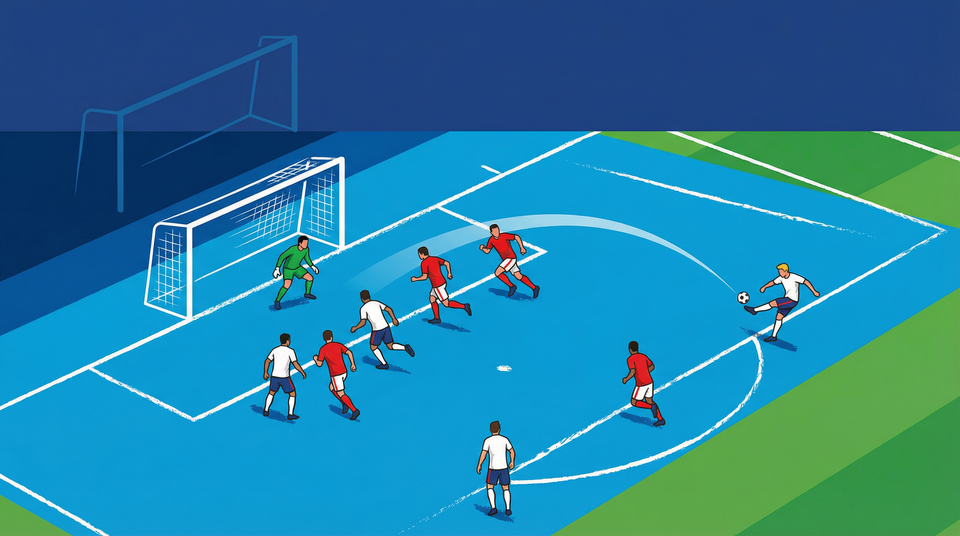
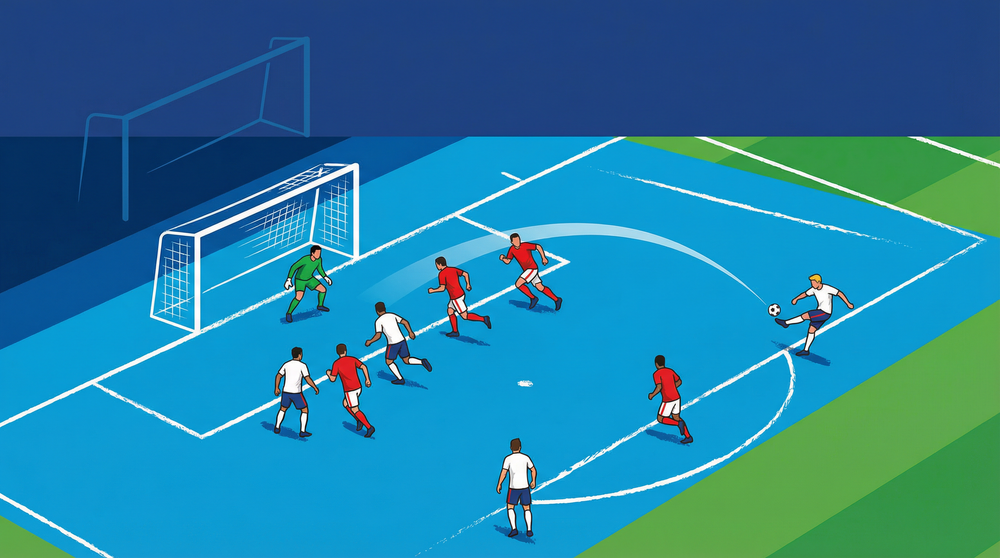
One of the most common scenarios in football is delivering the ball from wide areas, yet many teams fail to capitalize due to static positioning or uncoordinated runs. This "Penalty Box Movement Play for Crosses" is designed to create structured, dynamic movement inside the penalty area (100-110m x 64-75m pitch) as the ball is delivered from the flank. By assigning specific zones—near post, far post, penalty spot, and edge of the box—you ensure that all dangerous areas are occupied, forcing defenders to make split-second decisions and creating high-probability scoring chances.
This play is highly effective against both man-marking and zonal defensive systems, as the synchronized movements disrupt defensive lines and open up passing lanes for the crosser.
Setup
To effectively run this set play in training, you will need to recreate match-like conditions in the attacking third of the pitch.
Equipment Needed:
- Full-size goal with a goalkeeper.
- 5-6 attacking players (typically a winger/fullback, striker, opposite winger, attacking midfielder, and a holding midfielder).
- 4-5 defending players (optional for progression, start unopposed).
- A supply of footballs positioned out wide.
- Cones to mark starting positions and target zones (near post, far post, penalty spot, edge of the box).
Pitch Setup:
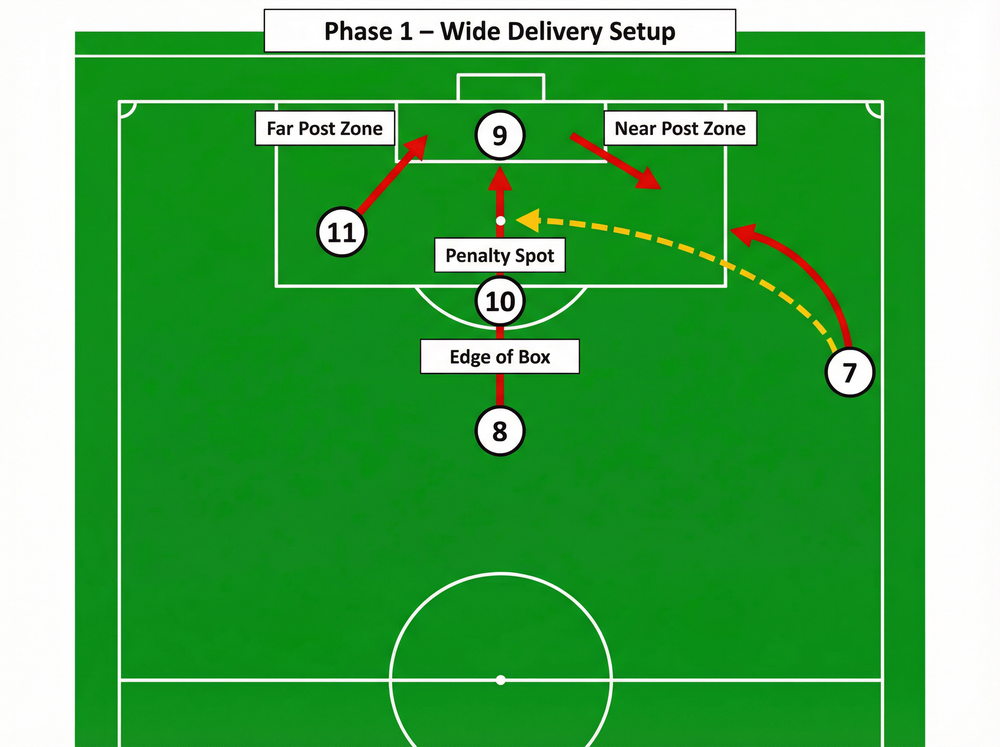
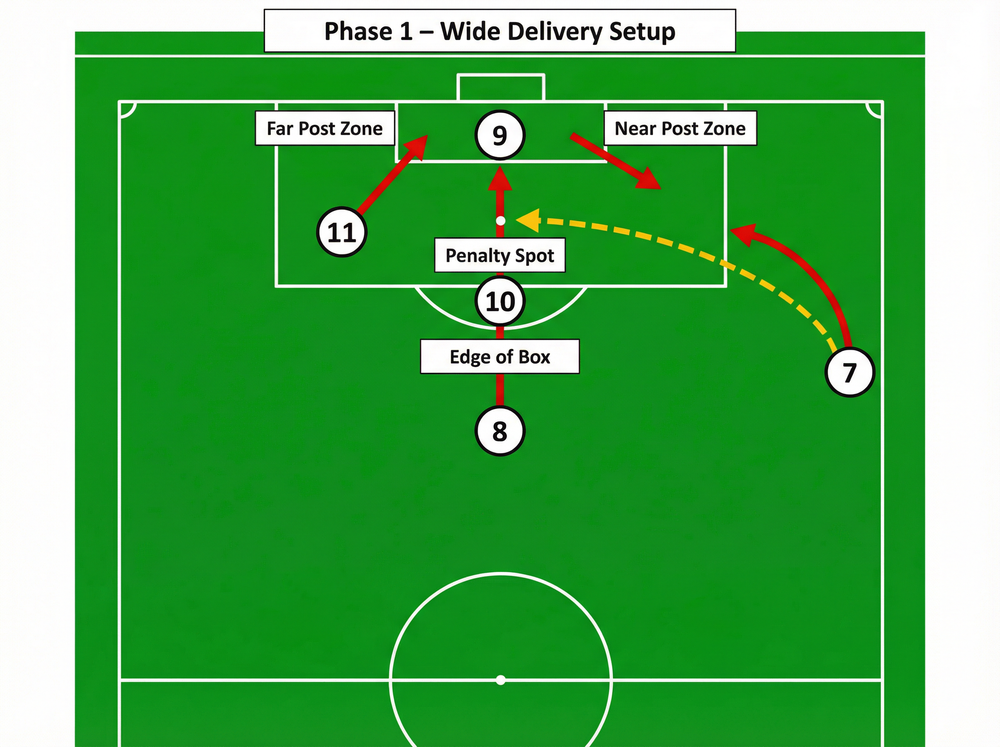
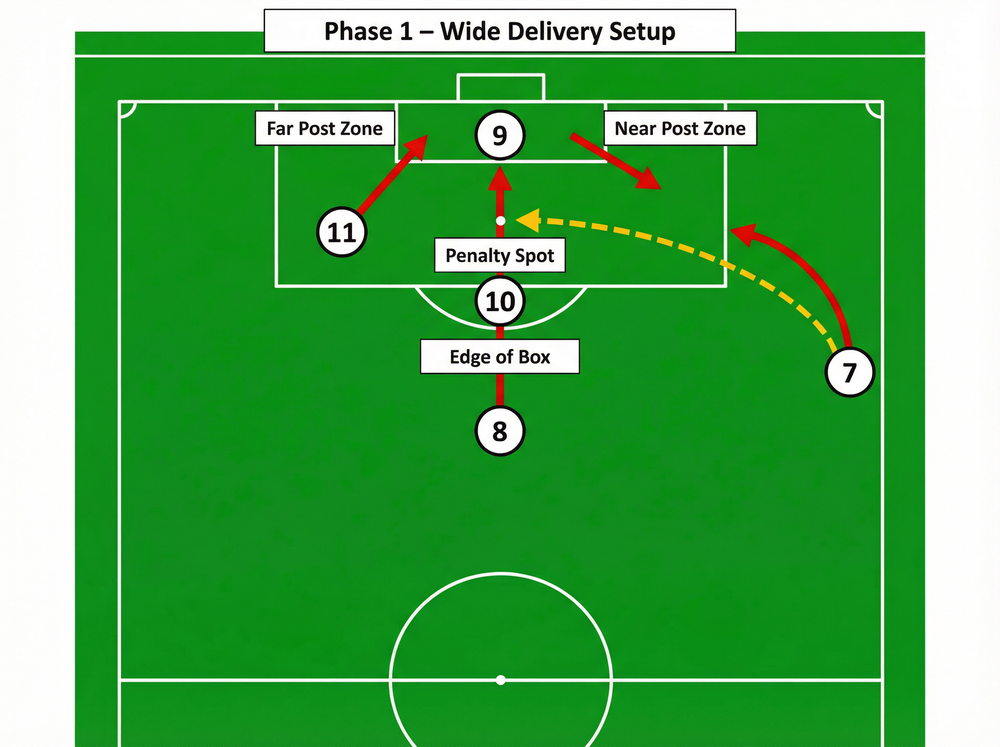
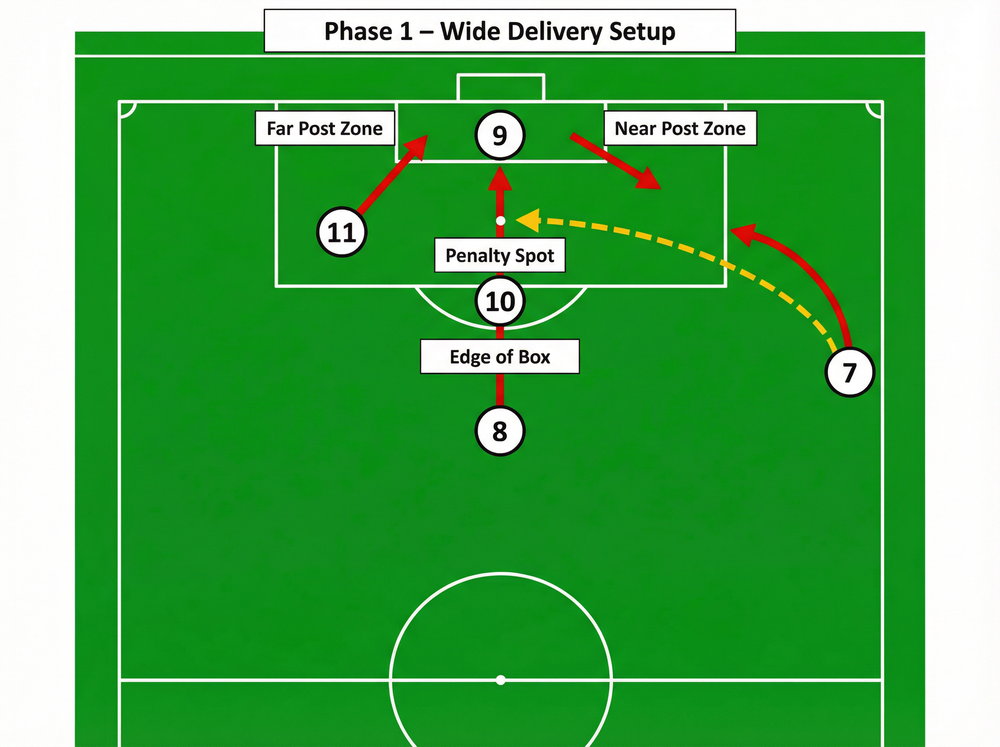
Utilize the attacking third of a standard pitch. Place a server or a wide player (e.g., the #7 or #2) on the right flank, roughly 15-20 yards from the byline. Position the central attackers just outside the penalty box, ready to make their runs as the ball is prepared for delivery.
Step-by-Step Instructions
Step 1: The Trigger
The play begins when the wide player (#7) takes a heavy touch down the line or looks up to assess the box. This visual cue is the trigger for the attackers to begin their coordinated runs.
Step 2: The Near Post Run
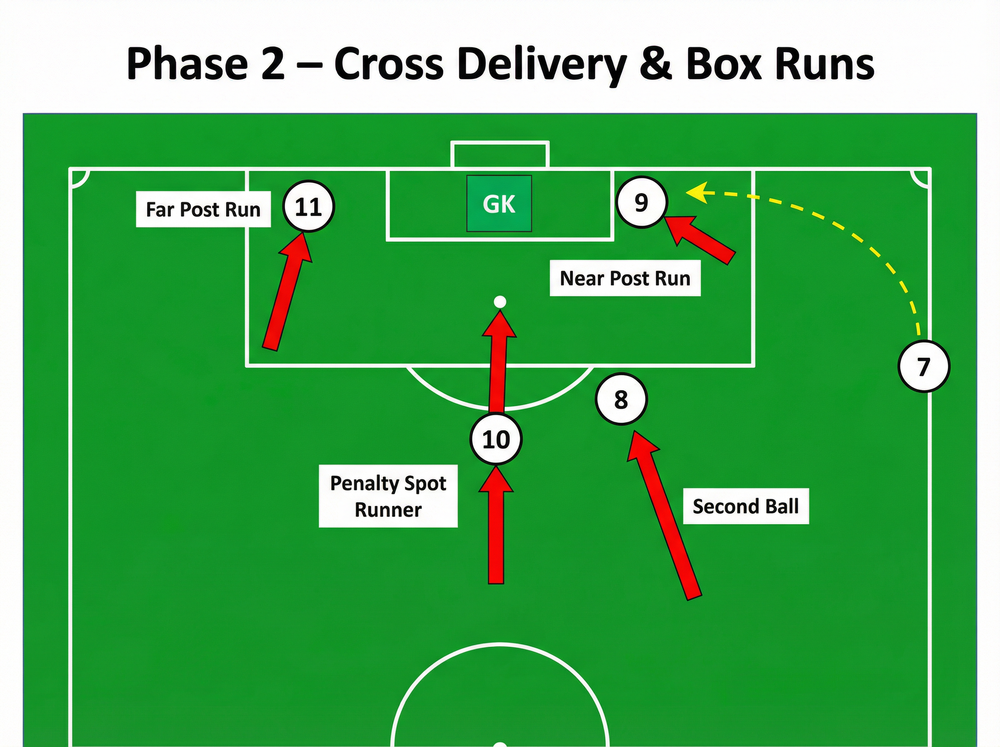
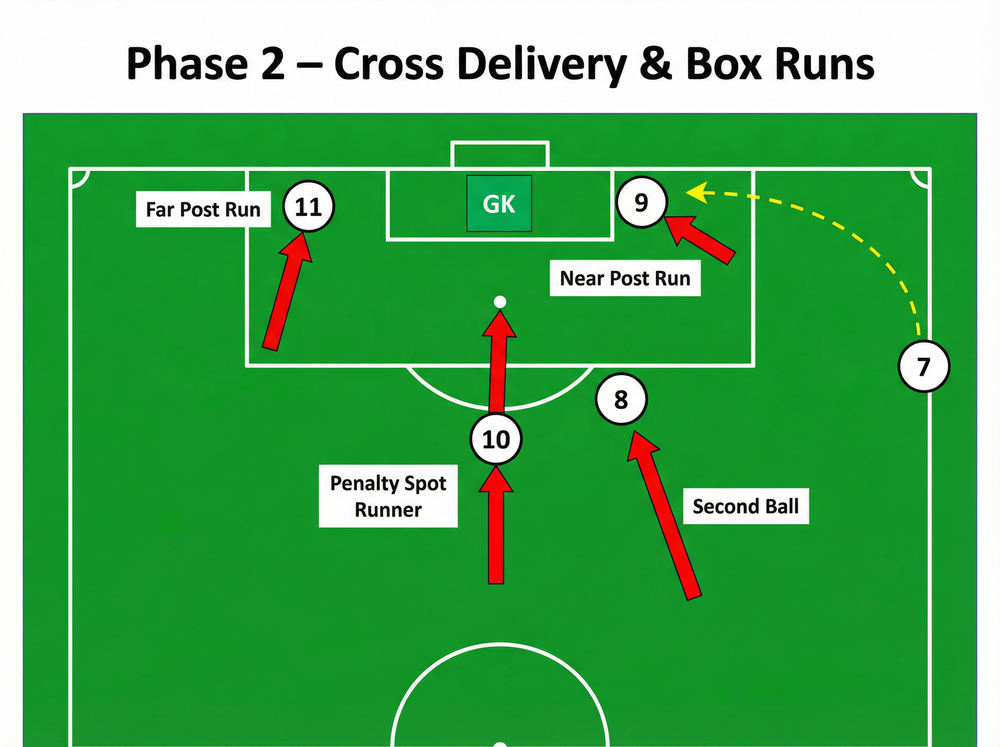
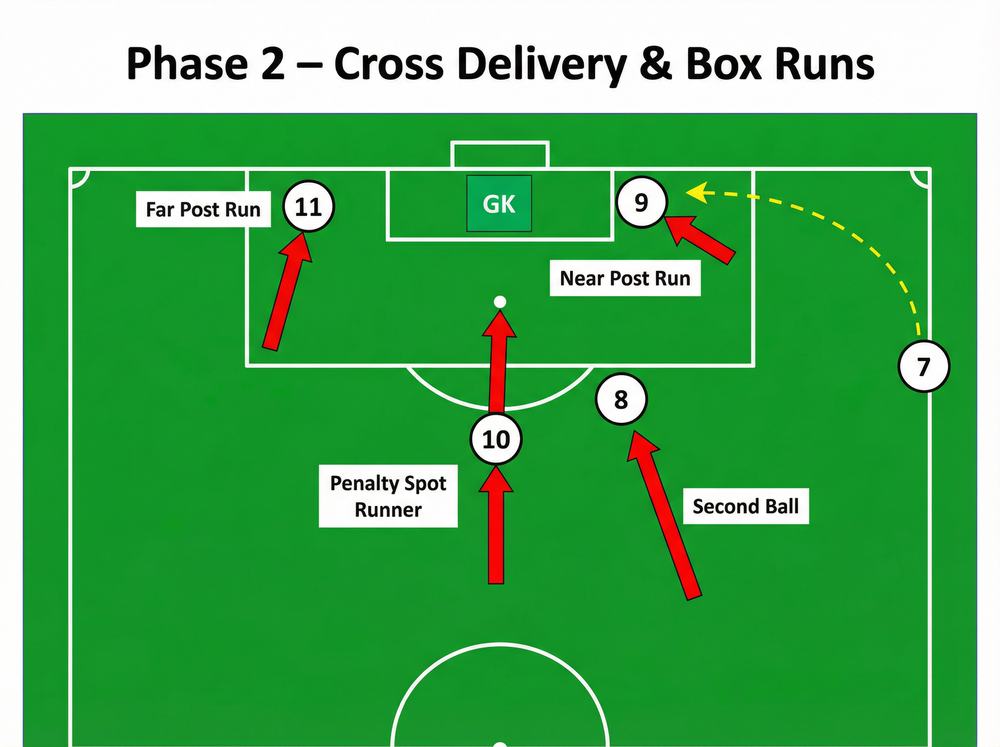
The centre forward (#9) initiates a sharp, aggressive run across the face of the nearest central defender, aiming for the near post zone (roughly 6-8 yards out, in line with the near post). This run must be the first to happen, as it drags defenders deep and clears space behind.
Step 3: The Far Post Run
Simultaneously, the opposite winger or wide midfielder (#11) makes a looping run toward the back post. Their goal is to arrive on the blind side of the opposing full-back, ready to attack any cross that evades the near post and center of the goal.
Step 4: The Penalty Spot Run
The attacking midfielder (#10) delays their run slightly, waiting for the #9 to clear the space. They then drive into the area around the penalty spot (12 yards out). This player is targeting the cut-back or a driven cross that bypasses the near-post runner.
Step 5: The Second Ball Position
A central midfielder (#8) arrives late, positioning themselves at the edge of the penalty arc (Zone 14). Their primary responsibility is not necessarily to score from the initial cross, but to win any defensive clearances, secure the "second ball," and sustain the attack or take a shot from distance.
Step 6: The Delivery
The wide player (#7) assesses the movement and selects the best option. They can hit a driven ball to the near post, a lofted ball to the far post, or a firm cut-back to the penalty spot.
Key Coaching Points
- Timing is Everything: Players must not arrive in their zones too early. They should aim to arrive exactly as the ball enters the space. Arriving early makes them static and easy to mark.
- Aggressive Near Post Run: The #9 must commit fully to the near post run. Even if they don't receive the ball, their movement is crucial for creating space for the #10 at the penalty spot.
- Eye Contact and Cues: The crosser must get their head up before delivering the ball. Attackers should use the crosser's body shape (e.g., planting the non-kicking foot) as the final cue to accelerate into their zones.
- Staggered Runs: Ensure runs are made at different depths and angles. If all attackers run in a straight line toward the goal, one defender can clear the ball easily.
Common Mistakes
- Running in Straight Lines: Attackers running straight toward the goal rather than curving their runs to stay on the blind side of defenders.
- All Players Crashing the Six-Yard Box: Failing to leave a player at the penalty spot or the edge of the box, resulting in missed cut-back opportunities and vulnerability to counter-attacks from clearances.
- Poor Delivery Selection: The crosser hitting the ball blindly into the box without picking out a specific run or zone.
Variations & Progressions
- Add Defenders: Start the drill unopposed to build confidence and timing. Progress by adding passive defenders, and eventually, fully active defenders to create match realism.
- Vary the Delivery Angle: Practice the same movements from different crossing positions, such as early crosses from deep or cut-backs from the byline.
- Switch the Play: Run the drill from the opposite flank to ensure players are comfortable making runs from both sides of the pitch.
Age Adaptations
- Under 8 - Under 10: Focus simply on getting one player to the near post and one to the far post. Keep the delivery simple and unopposed.
- Under 12 - Under 14: Introduce the concept of the "cut-back" and the penalty spot run. Begin adding passive defenders to teach spatial awareness.
- Under 16 - Open: Implement the full system with the edge-of-box player. Use active, organized defenses and focus heavily on the micro-timing of runs and the quality of the final delivery.
