

Rugby
Penalty Corner Attack: The 'Crash & Cut' Pod System
A high-percentage attacking shape from a 5m lineout that manipulates edge defenders and creates scoring channels through hard forward carries and a sharp midfield cut-back.
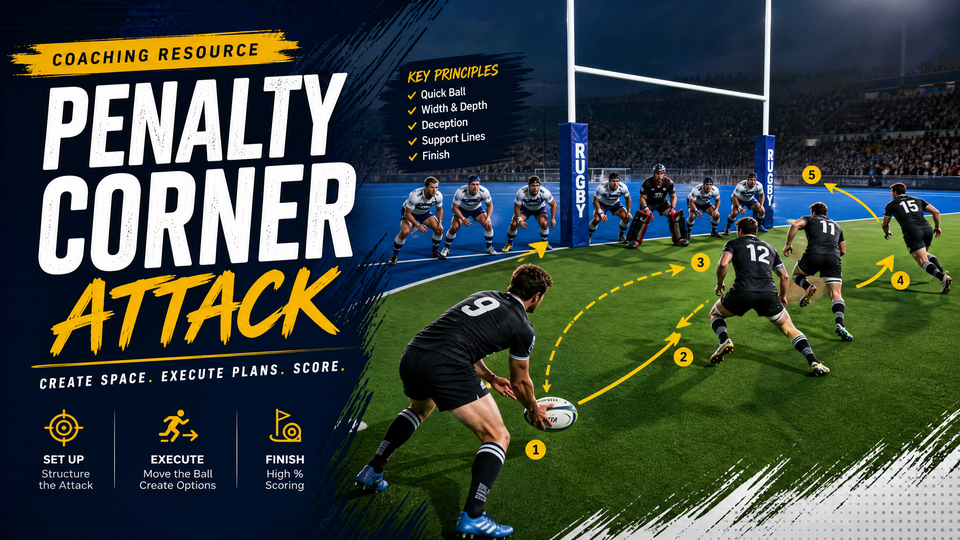
What you need
1 Rugby Ball, 15 Training Cones, Bibs (for opposed practice)
1. Overview
The 'Crash & Cut' penalty corner attack is designed to maximize scoring efficiency when awarded a penalty near the opposition's 5m line. Rather than relying solely on a traditional driving maul, this set play uses a structured forward pod to crash the gain line, immediately followed by a rapid redistribution to the midfield. By forcing the defense to over-commit to the initial forward threat, it opens up a critical seam for the inside center (12) cutting back against the grain. This play is best utilized when the opposition defense tends to fold heavily toward the touchline or when your forward pack needs a dynamic alternative to the maul.
2. Setup
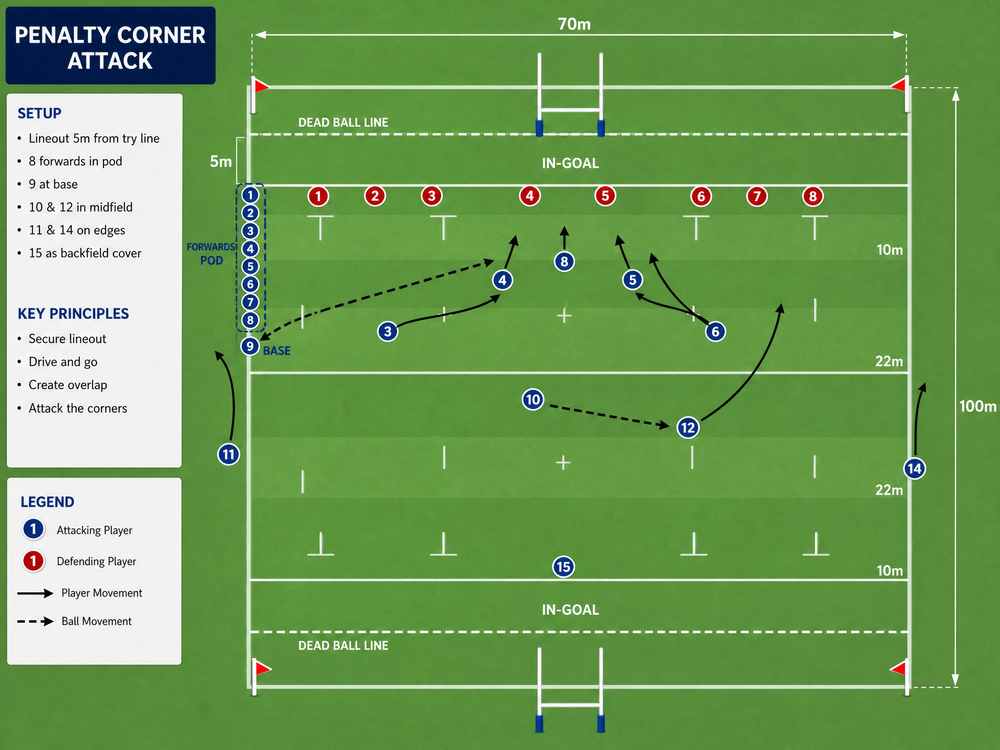
Pitch Location: Attacking 5m line, usually starting from a lineout resulting from a penalty kick to the corner.
Equipment Needed: 1 ball, minimum 15 cones (to mark the 5m channel, 15m line, and defensive starting points during practice).
Player Positions:
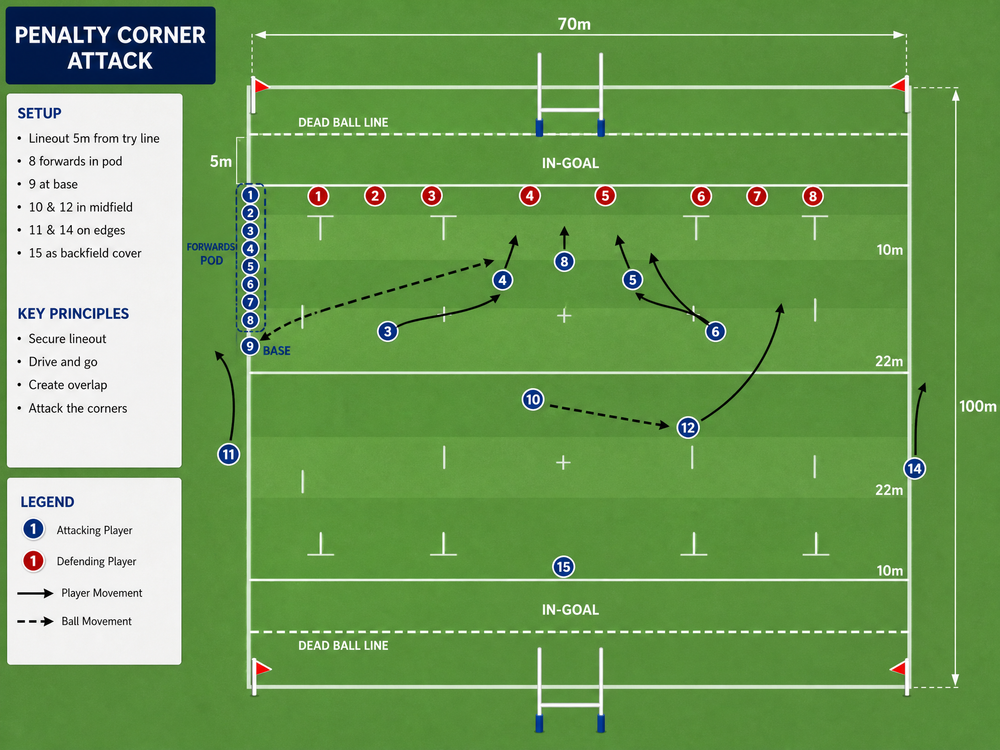
- Forwards (1-8): Set up in a 7-man lineout with the scrum-half (9) operating as the receiver. The forwards will form a striking pod immediately upon securing possession.
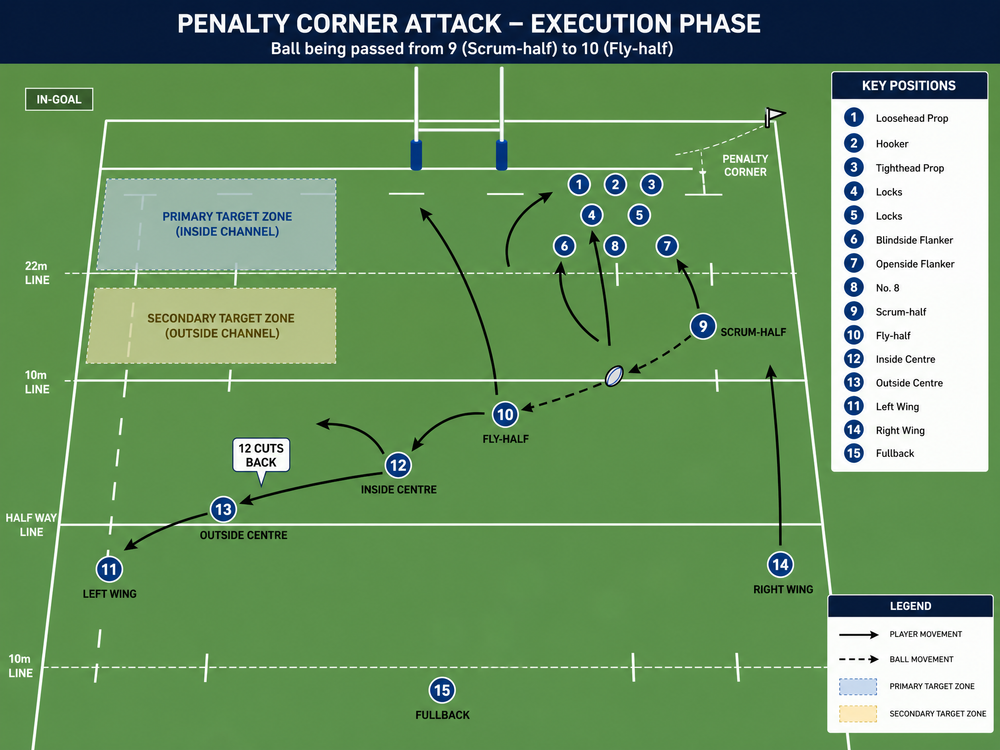
- Halfbacks (9 & 10): The 9 stands at the base of the lineout. The fly-half (10) positions themselves flat, roughly 10-12 meters infield.
- Midfield (12 & 13): The inside center (12) starts slightly deeper and wider than the 10, ready to run a hard unders line. The outside center (13) runs a wider decoy line to hold the drift defense.
- Back Three (11, 14, 15): The blindside wing (11) holds the short side, while the openside wing (14) and fullback (15) provide width and cover.
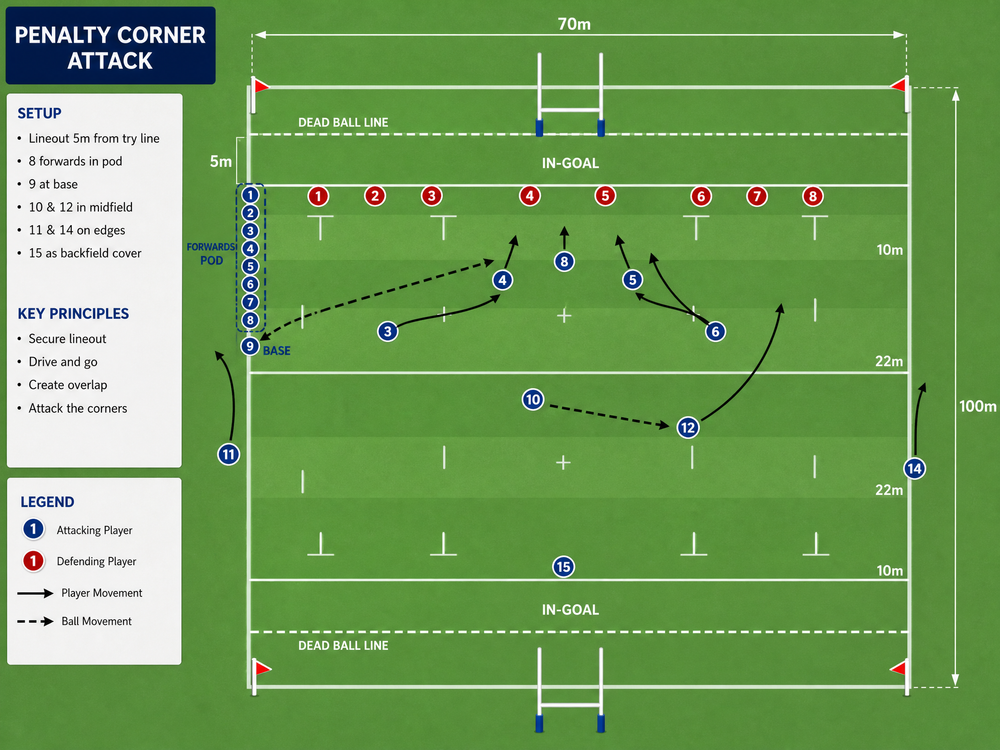
3. Step-by-Step Instructions
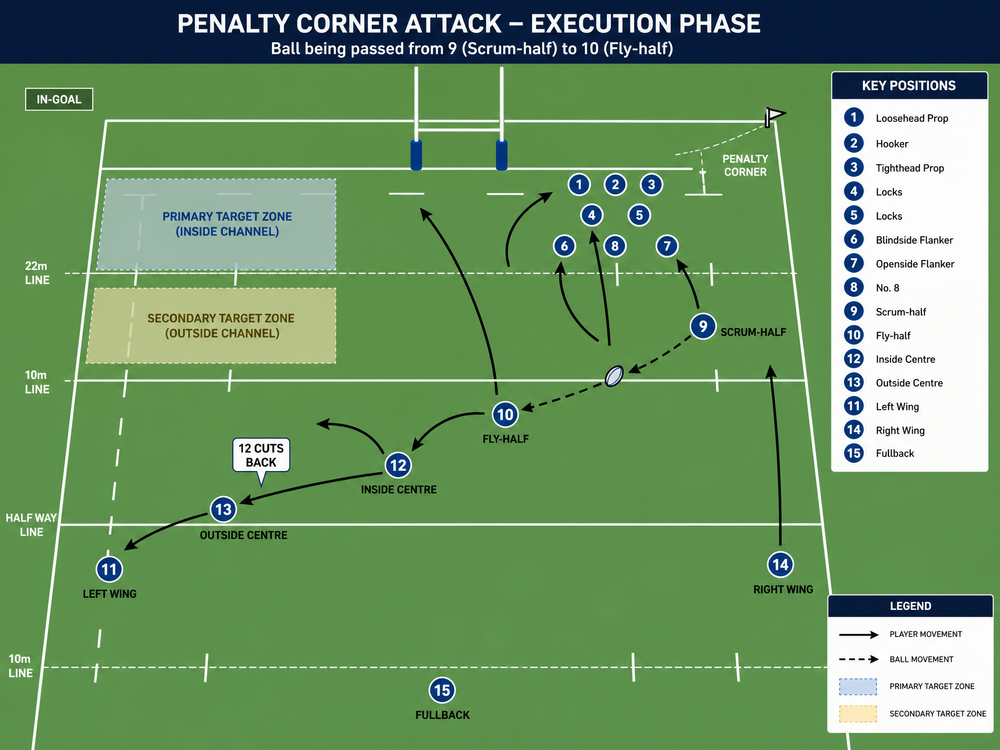
- The Catch and Set: The hooker (2) throws to the middle jumper (usually the 4 or 5) at the 5m lineout. The jumper delivers quick off-the-top ball to the scrum-half (9).
- The Forward Crash: Instead of forming a maul, a pre-designated pod of three forwards (e.g., 1, 3, and 6) wraps around the back of the lineout and hits a hard, flat line directly at the opposition's 10-12 defensive seam. The 9 fires a flat pass to the lead runner.
- The Quick Recycle: The ball carrier must fight through the initial contact, aiming to get their shoulders parallel to the try line to present clean ball. The two support forwards secure the ruck instantly, aiming for a sub-2-second recycle time.
- The Midfield Strike: The 9 clears the ball rapidly from the base to the fly-half (10).
- The Cut-Back: As the 10 receives the ball, the outside center (13) runs a hard, visible overs line (drifting out) to pull the defensive 13 and wing wider. Simultaneously, the inside center (12) cuts back sharply on an unders line, attacking the space left by the folding defense.
- The Finish: The 10 slips a short, flat pass to the 12, who accelerates through the gap to score.
4. Key Coaching Points
- Speed of Recycle: The entire play hinges on the forwards generating lightning-quick ball from the initial crash. If the ruck takes longer than 3 seconds, the defense will have time to realign, and the cut-back lane will close.
- Decoy Conviction: The outside center (13) must run their decoy line with absolute conviction, calling for the ball and forcing the defensive edge to respect the wide threat.
- Timing of the Cut: The inside center (12) must time their run perfectly. If they start too early, they will overrun the pass; if they start too late, the defense will easily drift onto them. They should hit the gap at maximum velocity just as the ball arrives.
- Fly-half Vision: The 10 must square their shoulders to the defense to freeze the inside defenders before delivering the pass to the 12.
5. Common Mistakes
- Poor Ball Presentation: The initial forward carrier gets isolated or turned in the tackle, resulting in slow, messy ball that kills the momentum of the play.
- Telegraphing the Pass: The fly-half (10) drifts sideways before passing, which allows the defense to easily slide across and cover the 12's cut-back line.
- Lack of Depth: The inside center (12) starts too flat, meaning they catch the ball while stationary rather than hitting the gap at pace.
6. Variations & Progressions
- The Wide Strike: If the defense begins to cheat and over-commit to the 12's cut-back, the 10 can bypass the 12 and hit the 13 on the wider line, exploiting the space left on the outside.
- The Forward Tip: Instead of the 9 passing to the 10 on the second phase, the 9 can hit a forward runner (e.g., the 8) tipping the ball on to the 10, adding an extra layer of deception and delaying the defensive fold.
7. Age Adaptations
- Under 12s: Focus heavily on the basic mechanics of the lineout catch and the initial forward carry. Simplify the backline movement to a standard pass down the line rather than a complex cut-back.
- Under 14s/16s: Introduce the timing of the decoy runners and the cut-back line. Spend time drilling the fly-half to square up the defense before passing.
- Open/Senior: Execute the full play at match speed, focusing on ruck speed (sub-2 seconds) and the subtle visual cues used by the 10 to manipulate the defense.
