Basketball Drills
8 Training Drills for Rugby Coaches and Young Players
Discover 8 training drills for rugby covering passing, defence, contact, conditioning and game sense, with age adaptations and practical session plans.
Build Players Who Thrive Under Pressure
You can see the problem before the whistle even goes. The squad is keen, energy is high, and everyone wants the ball. Then the first live phase starts. A pass goes behind the runner, support arrives a step late, and defenders hesitate because no one is sure who should press and who should slide. That's youth rugby for plenty of coaches, players and parents. The effort is there, but the detail breaks down when pressure arrives.
The best training drills for rugby don't just polish isolated skills. They connect technique to decisions, communication, timing and match-like demands. A good drill teaches a player how to catch and pass. A better one teaches that player how to do it while moving, scanning, talking and solving a problem.
That's why this eight-drill pathway is built as a full development journey. It starts with movement and handling, builds confidence in defence and the breakdown, adds set-piece organisation and decision-making pressure, then finishes with rugby-specific conditioning that feels like the game. For younger groups, the progressions stay safety-first and age-appropriate. For older or more experienced players, each drill can be sharpened with more speed, competition and complexity.
There's a practical side to this too. Once you've got drills that work, the next step is making them repeatable. Coaches can turn these ideas into organised weekly sessions with Vanta Sports drill cards, attendance tools and performance tracking, so progress doesn't live only in your notebook or memory. It becomes visible to players, staff and families.
1. Ruck and Maul Simulation Drill
Contact contests decide momentum, confidence and possession. Young players often rush into them with courage but poor shape. This drill slows the moment down first, then rebuilds it with better body height, stronger foot placement and clearer communication.

Start in a small channel with one ball carrier, one support player and one defender. For beginners, remove the live contest and coach the shapes. Ball carrier presents long, support player arrives square and low, defender learns safe entry position and body control. Once those habits look stable, add a second support player or defender and increase the speed of entry.
Make contact safer before you make it harder
The biggest mistake is loading young players with repetitions before they can hold good positions. English youth injury surveillance showed that risk in training differs by setting. Academies saw more injury risk in attack, defence and ruck or maul drills, while schools saw more risk in individual skills, weight training and scrummaging practice, according to English youth rugby injury epidemiology findings. That's your reminder to tailor contact dose to age, experience and environment.
Practical rule: Start with body position, then controlled entry, then live competition. Don't skip steps because the players are excited.
A useful coaching pattern is whistle control. One whistle to set. One whistle to engage. One whistle to freeze. That lets you coach feet, spine angle and bind position before the drill becomes messy. Rotate players through ball carrier, cleaner and defender roles so they understand what each player is trying to achieve.
If you want a structured example, the Dominant Ruck advanced clear out and clean out drill is a strong template for building those habits.
Here's a good moment to show live examples and slow the learning down with video.
2. Passing Accuracy and Timing Ladder Drill
The attack looks promising for two phases, then the ball hits the ground because one runner catches late and the next passer has to reach behind their body. Coaches often blame the final pass. The problem usually starts one step earlier. This drill fixes the chain, from footwork into catch, catch into transfer, and transfer into support.

Set out a ladder or marked running lane beside a passing channel. Players travel through the footwork pattern, receive on cue, and pass on a nominated step. That matters because match passing is rarely a standing skill. It works more like dancing to a beat. If the feet arrive late, the hands rush. If the feet stay balanced, the ball usually moves cleanly.
Start simple. Use three or four attackers with no defence and keep the pattern predictable. Jog through, show hands early, catch in front of the chest, then pass before the body turns inward. After each pass, the player follows to become the next support option. Once that rhythm is stable, change the picture by asking for a pop pass, a longer spin pass, or a catch after a quick foot adjustment through the ladder.
Build the rhythm before the pressure
A useful coaching model is 4v0 in a tight grid or channel. The small space teaches players to keep the ball alive with short movements, soft hands, and early communication, rather than big loopy passes. For younger players, that is often the missing link. They know how to throw a ball. They have not yet learned how early feet and hands make the throw easier.
Use coaching cues they can carry into games:
- Hands early: Present a target before the ball arrives.
- Catch in front: Keep the ball away from the body so the next action stays quick.
- Pass off the run: Release while moving, not after stopping.
- Follow the ball: Reload as support straight away.
Progress the drill as part of the wider development pathway in your session. Early in the season, or with less experienced groups, keep it as handling and movement work. Add light decision pressure only after the basic rhythm holds up. A simple next step is one passive defender at the end of the channel. If the defender drifts, pass to space. If the defender closes hard, straighten and carry. That turns a technique drill into a game-sense drill without jumping too fast.
Age and level matter here. Under-10 and beginner groups usually get more from walking pace, two-hand passing, and wider spacing. Teenage or senior players can scan before the catch, vary tempo, and work off either hand. Advanced players can start from the floor, bounce up through the ladder, then connect two or three passes while fatigued. That gives you a clean bridge later to decision-making and conditioning work.
One easy session sequence is six minutes of stationary catch-pass, eight minutes of ladder timing at jog pace, eight minutes of 4v0 flow, then six minutes with a passive defender. Across a training block, build from clean execution to pressured execution. Players enjoy it more as well, because they can feel the drill getting closer to the game instead of repeating empty reps.
Small competitions help if they reward quality, not chaos. Count clean sequences, accurate passes, and support lines. The aim is simple. Make good handling repeatable before defenders and fatigue try to break it.
3. Defensive Positioning and Read-React Drill
A defence line often breaks before anyone misses a tackle. One player plants too early, another turns their shoulders out, and a third stays quiet. The attack sees daylight and takes it. This drill teaches defenders to stay connected, read cues sooner, and make calm decisions under pressure.
Set up a channel with three attackers against three or four defenders. Start from a clear picture. Attackers jog into shape, the ball carrier has two support options, and defenders begin square with enough depth to move forward without lunging. Your first coaching job is to help players see the same problem at the same time. Who is the immediate threat? Where is the extra attacker? Which defender can press, and which defender must hold?
A good way to frame it for players is traffic control. If one car swerves, the whole lane gets messy. If everyone holds their line and signals early, space closes without panic. Defence works the same way.
Run the drill in waves rather than blocks:
Wave 1: Read shape
Players walk or jog through the picture. Defenders point, name numbers, and match up.
Wave 2: Close space
Attackers run at moderate pace. Defenders move together, keep shoulders square, and finish with a two-hand touch.
Wave 3: Force a choice
Attackers can pass late, straighten, or use a short runner. Defenders must decide whether to drift, press, or hold.
Wave 4: Add contact
Use controlled tackles only when footwork, spacing, and tracking stay consistent.
That sequence matters. Young players often chase the ball because the picture changes faster than they can process it. Slowing the first two waves gives them time to connect what they see with where they move. Older or more experienced players can handle a later call from the attack, tighter channels, or an extra folding defender coming from the inside.
What coaches should watch first
Start with feet and hips. If defenders cross their feet, they cannot adjust. If hips turn out too early, they invite an inside line. Eyes come next. Players should scan the ball carrier, then the support runners, then return to their own assignment. Communication ties it together. Short calls work best because players can use them at speed.
Useful cues include:
- "Square" for body position
- "Up together" for line speed
- "Short" or "wide" for threat identification
- "Hold" when a defender is tempted to overchase
One sentence can change the rep. A clear early call helps the whole line move with purpose instead of reacting one by one.
For under-10 or beginner groups, keep the numbers even, use touch only, and allow the attack just one pass. For teenage school players, add an overload and let the attack choose from two patterns after the first receiver catches. Senior players can start from a previous phase, such as folding around a cone before resetting into the line, which makes the drill feel more like match defence after a breakdown.
You can also place this drill within the full training pathway. Early in the session or early in the season, use it to build movement habits and scanning. Later in the training block, place it after handling or support drills so defenders must organise while slightly fatigued. A simple session sequence could run from passing rhythm into this read-react drill, then into breakdown work once players are making better first decisions in space.
Success is not the loudest hit. Success is an attack running out of room, options, and time.
4. Breakdown Speed and Support Play Drill
A strong carry means very little if the next two players arrive late, too high, or from the wrong angle. This drill teaches the moment after contact, when attack can keep momentum or hand the ball straight back.
Set up a narrow breakdown channel with one ball carrier, one tackler and two support players starting from depth. The carrier goes to ground under control and presents the ball long. Support players react on movement, not on a whistle, so the picture feels closer to a real phase. At first, keep the defender passive and focus on body height, foot speed and decision clarity. Once those habits settle, allow a live jackal or a second defender folding around the corner.
The key idea is simple. Support is not just arriving fast. It is arriving usefully.
Young players often sprint straight at the tackle like shoppers rushing the same doorway. They get there quickly, then block each other, lose balance, or clean out past the ball. Better support lines work like lanes joining a motorway. Each player enters at an angle that keeps space clear and gives the team a next action.
A useful way to coach it is to give each support player a job before the rep begins, then let that job change if the picture changes:
- First support: Secure the ball if the carrier is isolated.
- Second support: Scan for the pass, reload option or guard threat.
- Late support: Fold in and prepare for the next phase.
That sequence turns the drill into part of your wider development pathway. Earlier sessions build handling and movement. Here, players learn how to connect that movement to contact. Later, the same habits feed into decision-making games and conditioned fitness blocks, where players must support accurately while tired.
If you want players to sharpen their entry lines before adding contact, the rugby support running angles drill pairs well with this phase of training.
Coach the rep in snapshots instead of stopping every error. Watch the first three steps after the tackle. Watch the shoulder height on entry. Watch whether players clear, pass, or reload with purpose. Those details matter more than turning every repetition into a long wrestle on the floor.
For under-10s and new players, use tackle bags or touch-to-ground only, with one support player securing and one presenting as the next passer. For teenage school players, add a live contest and require a pass within two seconds of the cleanout. Senior squads can start from a previous phase, such as a tip pass or carry around the corner, then flow straight into the breakdown so support decisions happen under real pressure.
A simple session order works well here: handling and support lines first, then breakdown speed, then game-sense work where players must spot when to secure and when to play away. Across a training block, begin the season with clean arrival habits and low contact volume. Add contested pictures next. Finish by folding this drill into conditioning games, where players have to win the race, make the right choice and get back up for the next job.
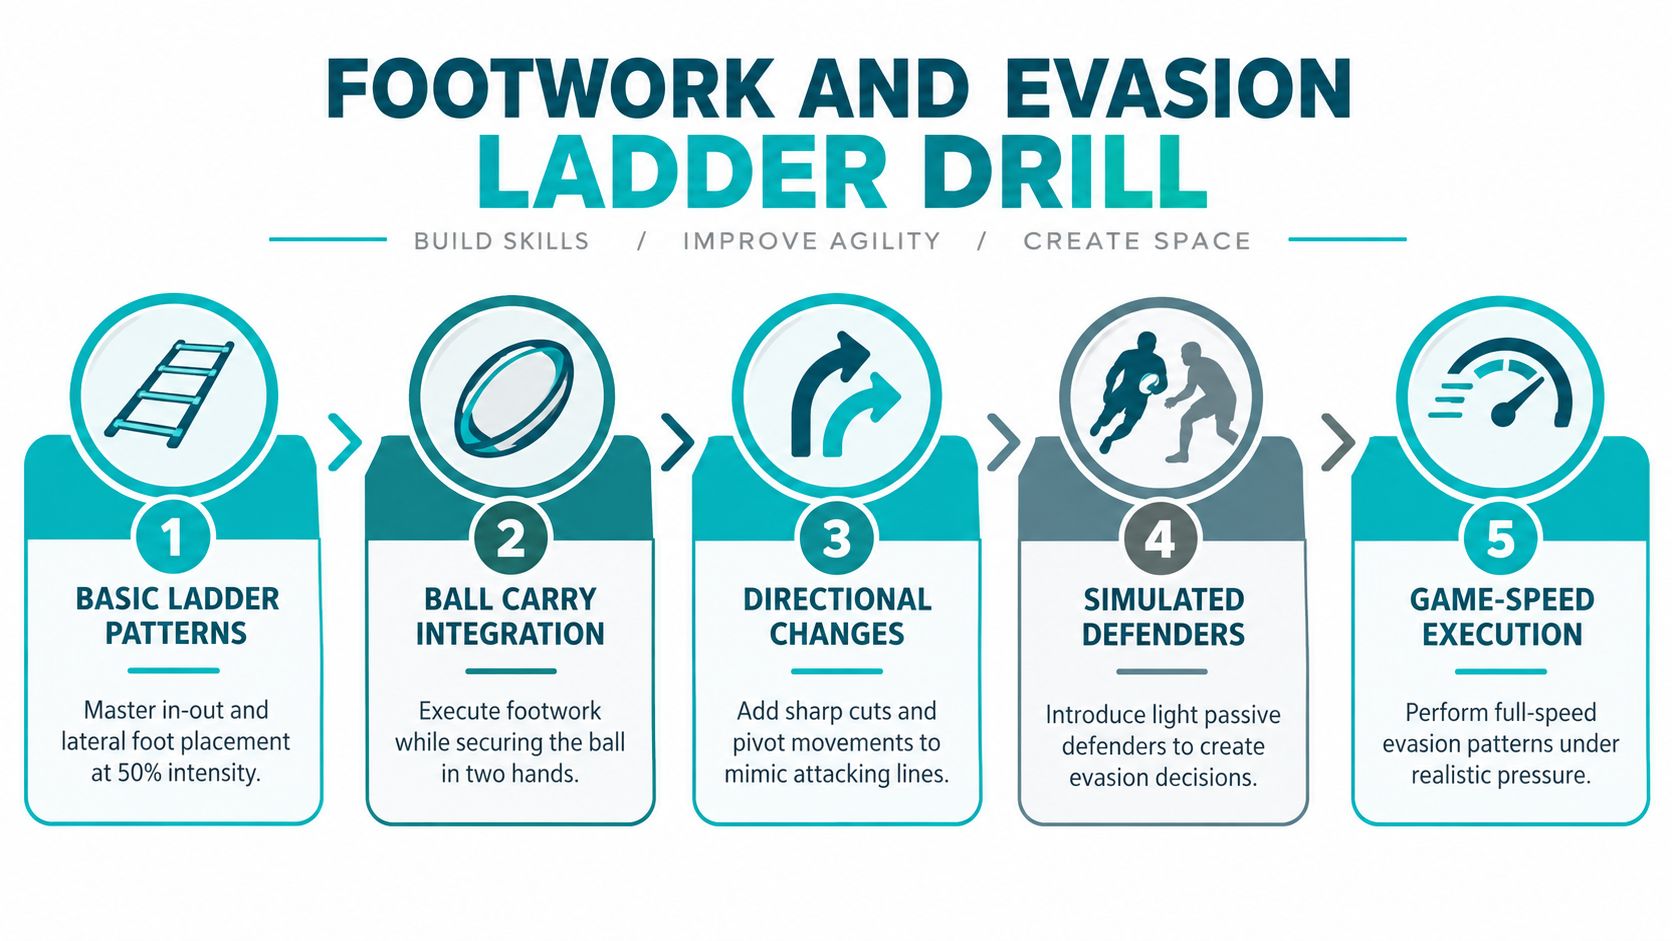
5. Footwork and Evasion Ladder Drill
A player catches the ball with space in front, sees a defender square up, and still gets tackled because the feet arrive late. That moment usually starts earlier than coaches think. It starts in the first two steps, the body angle before the cut, and whether the player can change direction without the ball drifting away from the chest.
Use this drill to teach evasion as a sequence, not a trick. The ladder or cone pattern gives players a repeatable route for learning rhythm and balance. The exit turns that movement into rugby. Add a coach call, a coloured gate, or a defender holding inside or outside space, and players learn that good footwork only matters if it leads to the right line after contact threat appears.
A useful coaching picture is this: the ladder is the alphabet, and the finish is the conversation. Players first learn how to place their feet cleanly. Then they learn how to use those steps to solve a live problem.
Run it in three short waves rather than one long block. Open with clean movement through one pattern. Shift to the same pattern with a ball and strong carry posture. Finish with a race out of the ladder into a decision, where the player must beat space, not just complete the steps. That change in rhythm stops the section from becoming a track-and-field exercise with a rugby ball added at the end.
Coaching points are simple, but they need sharp eyes:
- Hips and shoulders stay controlled through the ladder, not twisting wildly.
- Ball stays tight to the body, with eyes lifted before the final cut.
- Plant foot goes under the body, so the player can push out fast.
- The rep ends with acceleration for several strides, because the step only creates space if the player takes it.
Young players often confuse fast feet with useful feet. Help them slow the pattern down until it looks clean. Quiet contacts, balanced posture and one clear change of direction beat messy speed every time. Older or more experienced players can add a fend cue, a late pass option, or a second defender recovering from inside, which turns the drill into a bridge between basic movement and the decision-making work that comes later in the training pathway.
This drill fits best near the front of a session, after a warm-up and before heavier contact or set-piece detail. For under-10s, keep the patterns short and playful, with obvious gates to attack. For school-age players, add reaction cues and competitive chases. Senior squads can connect the ladder exit to a carry, a pass, or a support line so the feet serve the phase, not the other way around.
A sidestep works when the body stays balanced enough to change line and powerful enough to leave the defender behind.
Across a training block, start pre-season with movement quality and ball security. Add late cues and passive defenders next. Closer to competition, place the drill inside conditioned games or short repeat efforts so players must evade while breathing hard and still make a clean rugby decision.
6. Lineout Throwing and Jumping Drill
A lineout can swing from calm to chaotic in one mistimed lift. The throw is good, but the jumper leaves early. The call is correct, but two players hear it differently. That is why lineout practice should be built like a school lesson. Start with the simplest version, make the picture clear, then add pressure only when the group can repeat the skill cleanly.
For younger or newer players, begin with two separate jobs. Hookers throw at fixed targets. Jumpers practise take-off, body shape and safe landings without a contest. That split matters because many players struggle when timing, lifting and catching are all introduced at once. Once the basics look stable, bring the units together so players learn how one action sets up the next.
A useful progression looks like this:
- Stage 1, target throwing: Throw to hoops, cones or a standing receiver.
- Stage 2, jump mechanics: Rehearse dip, drive, reach and controlled landing.
- Stage 3, lifter connection: Add lifters and coach the timing of hands, feet and verbal cue.
- Stage 4, live pod timing: Use simple front, middle and back calls with movement into position.
- Stage 5, light opposition: Add a passive contest, then a realistic defensive read and exit play.
The key coaching point is shared timing. A lineout works like a relay exchange. If one runner arrives early or late, the whole movement loses speed and accuracy. Cue players to hear the call, set the feet, then move together. Lifters should arrive with the jumper, not chase the jumper after take-off. Hookers need the same pre-throw routine each rep so accuracy comes from repeatable mechanics, not guesswork.
If you want a progressive session plan, the Mastering the lineout foundation to execution rugby drill offers a useful coaching model.
Keep safety at the centre. Teach balanced lifting positions, firm grips and clear landing space before you raise contest height or speed. Under-10s can stay with throw-to-target games, jump-and-catch races and simple calls. School-age players can add pods, movement and clean transfer off the top. Senior players should practise lineout decisions under fatigue, especially after repeated phases, because set-piece execution often breaks down when communication gets rushed.
For session flow, place lineouts after early handling and movement work, but before full conditioning. Across a training block, build the pattern in pre-season with high repetition and low pressure. In-season, reduce volume and increase specificity. One or two calls, one exit option, and sharper competition usually gives better transfer to matches than long set-piece blocks packed with too many variations.
7. Game-Sense and Decision-Making Touch Rugby Drill
A touch game shows you very quickly whether earlier skill work is starting to hold under pressure. The pass may look sharp in a ladder drill, and support lines may look tidy in a breakdown practice, but once defenders move and space changes, players have to scan, call, choose and act in seconds.
That is why this drill sits late in the pathway. It joins handling, movement, defensive retreat, support play and simple tactical choices in one live picture, without the collision load of full contact.
Set up a small-sided area and give the game one clear match problem to solve. For example, attack must score out wide in one round, then beat a folded defence in the next. After a touch, use the restart that fits your age group and coaching goal, such as an immediate pass, a roll-ball or a short reset. Keep stoppages brief. Let the game teach, then step in with one coaching point players can use on the very next phase.
Change the picture, then watch the decisions
A good touch game works like a driving lesson in a quiet car park before a busy road. Players still need awareness, spacing and timing, but they can learn those habits without the extra stress of contact. England Rugby's Kids First Skills Series follows that same idea for younger players by using age-appropriate game and skill zones that build confidence through purposeful play.
Instead of a long list of rules, use one constraint at a time so the lesson stays clear:
- Two-second release after touch. Trains early scanning and faster support.
- Extra point for a score after two wide passes. Encourages width and patient ball movement.
- Defence must retreat to a marked line before rejoining. Sharpens attack decisions around quick taps and shape.
- Attack loses possession if no one talks on the touch. Builds communication under pressure.
If your half-backs need more reps seeing space before they pass, this scrum-half passing accuracy and decision-making drill fits neatly before the touch game.
Progress by age and level. Under-10s usually get more from 4v4 or 5v5 with simple restarts, lots of touches and visible space to attack. School-age players can add retreat lines, overloads and scoring conditions that reward support on the inside and outside. Senior players can work in theme-based blocks, such as exit from touch, fold and fill in defence, or attacking off two quick phases while fatigued.
A practical session sequence is simple. Use handling and footwork early, then defensive or breakdown drills, then this touch game once players are warm and switched on. In pre-season, keep rounds longer and themes broader so players build understanding. In-season, shorten the games, raise the speed and tie each rule to a specific weekend objective.
The best sign the drill is working is easy to spot. Players start talking earlier, arriving sooner and choosing better options before the coach says a word.
8. Conditioning Game Circuits with Rugby-Specific Movement
Late in a session, a player often has to get off the floor, reload into position, carry hard, then make a clean pass while breathing heavily. That is the moment this circuit should train. Good conditioning here is not extra running added at the end. It is rugby movement repeated with enough pressure to test technique, decisions and talk.
Set up four to six stations and keep each one tied to a match action. A short shuttle can represent a fold around the corner. A carry into place-and-pop teaches body position after contact. A cleanout on a bag rehearses low height and leg drive. Finish each effort with a pass, support line or scan call so players connect fitness to skill instead of treating them as separate jobs.
A simple rule helps. If a station would look out of place in a match clip, change it.
Research in elite English rugby union reported average weekly training exposure of 6 hours 48 minutes per week, with match day creating the highest player loads across tracked measures. Coaches do not need to copy elite volume. The practical lesson is clearer than that. Build enough density to prepare players for repeated efforts, then protect movement quality so players rehearse the actions they need on Saturday.
Keep work periods short and sharp. As noted earlier in the article, short conditioning tests in rugby often sit around the five-minute mark. That makes a useful ceiling for one dense block. If passing accuracy falls apart, cleanout shapes rise too high, or players stop communicating, the circuit is too long or too crowded.
Keep circuits short enough for good technique, but hard enough that players still have to talk and make decisions under fatigue.
For younger players, make the circuit look like a game with clear targets and quick resets. Under-10s can use three stations for 15 to 20 seconds each, with plenty of rest and simple cues such as "bounce up, pass, support." School-age groups can handle five stations and add one decision at the end of each effort, such as passing left or right based on a coach's call. Senior players can use role-specific circuits, with front-rowers repeating short wrestle and reload efforts while backs cover more chase, turn and pass actions.
The pathway across the whole article should show up here too. Early in the season, use these circuits to reinforce handling, footwork and support habits already taught in earlier drills. Next, add breakdown entry, tackle reloads and set-piece movement. Closer to competition, combine everything: floor get-up, fold, cleanout, carry, pass, then defend the next phase. The circuit becomes a summary of your rugby, not a punishment block.
One practical session sequence works well. Start with a skill drill from the first half of the session. Add one contact or defensive drill once players are warm. Finish with this circuit so they must reproduce sound habits while tired. In pre-season, run broader circuits with longer recoveries to build repeatability and confidence. For heavier blocks, coaches and families sometimes use outside reading on preseason supplements for rugby. In-season, shorten the circuit, raise the speed, and tie each station to a weekend theme such as kick chase, first three phases, or red-zone defence.
Keep the atmosphere demanding and positive. Shared effort matters, but clean execution matters more. The drill is working when players finish tired and still organize quickly, hit the right shapes, and help the teammate coming after them.
8-Drill Rugby Training Comparison
| Drill | Implementation Complexity 🔄 | Resource Requirements ⚡ | Expected Outcomes ⭐ | Ideal Use Cases 📊 | Key Advantages 💡 |
|---|---|---|---|---|---|
| Ruck and Maul Simulation Drill | High, requires staged progressions and close supervision | Moderate, space, pads, multiple players, coach oversight | ⭐⭐⭐⭐, improved contest wins, conditioning, contact technique | Contact sessions; forward play; match-pace contest training | Builds match-winning contact skills; direct transfer to games |
| Passing Accuracy and Timing Ladder Drill | Low, straightforward progressions and cues | Low, cones/ladders, balls; easy group scale-up | ⭐⭐⭐⭐, higher completion rates and timing under pressure | Skill sessions, warm-ups, backs play, skill maintenance | Quick setup; measurable accuracy metrics; scalable |
| Defensive Positioning and Read-React Drill | High, complex patterns and coached reads | Moderate, full width space, structured attackers, video useful | ⭐⭐⭐⭐, better line integrity and fewer defensive errors | Team defensive blocks; tactical preparations; match scenarios | Improves communication, assignment clarity, tackle confidence |
| Breakdown Speed and Support Play Drill | High, contact sequencing and timing progression needed | Moderate, tackle area setup, pads, multiple support players | ⭐⭐⭐⭐, increased possession retention and faster continuity | Contact-focused sessions; breakdown dominance training | Enhances turnover defense, support timing, and match continuity |
| Footwork and Evasion Ladder Drill | Low, simple patterns with progressive speed | Low, ladders/cones; minimal equipment | ⭐⭐⭐⭐, improved agility, balance, try-creating evasion | Warm-ups, individual skill work, sevens and backs training | Low injury risk; immediate feedback; boosts individual explosiveness |
| Lineout Throwing and Jumping Drill | Moderate, technical timing and role-specific coaching | Moderate, throw targets, jumpers/lifters, optionally posts | ⭐⭐⭐⭐⭐, strong set-piece success and reliable possession | Set-piece sessions; hooker and jumper development | Directly improves lineout success; highly measurable outcomes |
| Game-Sense and Decision-Making Touch Rugby Drill | Low, simple rules, coach-led pauses for feedback | Low, large open space, balls; large squad friendly | ⭐⭐⭐⭐, faster decision speed and better spatial awareness | Youth development, tactical pattern rehearsal, high-volume work | Safe high-volume play; builds tactical intelligence and positioning |
| Conditioning Game Circuits with Rugby-Specific Movement | Moderate, station design and careful work-rest planning | Moderate, multiple stations, cones, timers, coach rotation | ⭐⭐⭐⭐, match-ready fitness with skill specificity | Preseason, in-season conditioning that mirrors match demands | Time-efficient; combines fitness and rugby skills; trackable progress |
Turn Eight Drills Into a Development System
The value in training drills for rugby isn't the drill list on its own. It's how you connect the drills across a week, a month and a season. Players improve fastest when each session has a clear training story. Start with movement and handling while bodies and minds are fresh. Then add decisions. Then place contact and breakdown work only where players are physically prepared and technically switched on.
A simple weekly pattern works well for many youth teams. Early in the week, or early in the session, use footwork and passing to sharpen mechanics and confidence. Follow that with read-react defence and touch games so players learn to solve problems at speed. Put ruck, maul and breakdown work later in the week or later in the session only when contact readiness is there. Finish selected sessions with rugby-specific circuits so conditioning supports the game rather than sitting beside it as separate running.
The same logic applies inside one training night. Open with a purposeful warm-up, then build skill quality first. A junior session guide from Sportplan recommends a sequence that starts with a 5-minute welcome and head count, a 10-minute fun warm-up game, a 10-minute movement block, a 3-minute water break, a 12-minute handling block and a 15-minute small-sided game in this junior rugby session structure. Even if you adjust the activities, that sequencing idea is excellent. Players move, hydrate, handle and play.
Safety should stay visible in every progression. UK elite contact-training evidence has shown that repetition-based drills can produce head acceleration event incidences about 2 to 3 times higher than game-based drills, and that pad use roughly halved incidence in multiple groups, according to this summary of elite rugby contact training evidence. For youth coaches, that reinforces a simple truth. Drill design is a safety tool. Contact dose, repetition structure and protective equipment choices all matter.
Pre-season planning needs the same care. A 2026 study of three English Premiership clubs found head acceleration events in pre-season training were low overall, but forwards had higher incidence than backs with an IRR of 1.84 in this English Premiership pre-season study, and exposure rose in the final six weeks of pre-season. That's a strong reason not to assume more contact is always better. Build contact deliberately, by role and by training phase.
Adapt everything to the group in front of you. Younger players need more space, lower contact, simpler choices and louder encouragement. Newer players need clear demonstrations and repeatable routines. More advanced players need tighter spaces, faster work-rest shifts, and stronger communication standards. In every case, review attendance, accuracy, participation and progress regularly so development is visible and not guessed at.
That's where organised systems help. A platform such as Vanta Sports can support coaches by keeping drill cards, schedules, attendance records and player feedback in one place, while making it easier to share progress with guardians. The tools matter because consistency matters. Young players don't need perfect sessions. They need purposeful ones, repeated often enough that confidence starts to stick.
Rugby improvement rarely arrives in one dramatic leap. It grows through clear habits, safe progressions and enjoyable repetition. Keep the sessions energetic. Keep the coaching simple. Keep the standards steady. When young players know what good looks like, and get regular chances to practise it under pressure, they grow in skill, confidence and love for the game.
Vanta Sports brings training plans, drill cards, attendance, scheduling and player tracking into one connected system that fits youth rugby well. If you want to organise these training drills for rugby into repeatable sessions, share progress with families and keep development visible across the season, visit Vanta Sports.
Tags