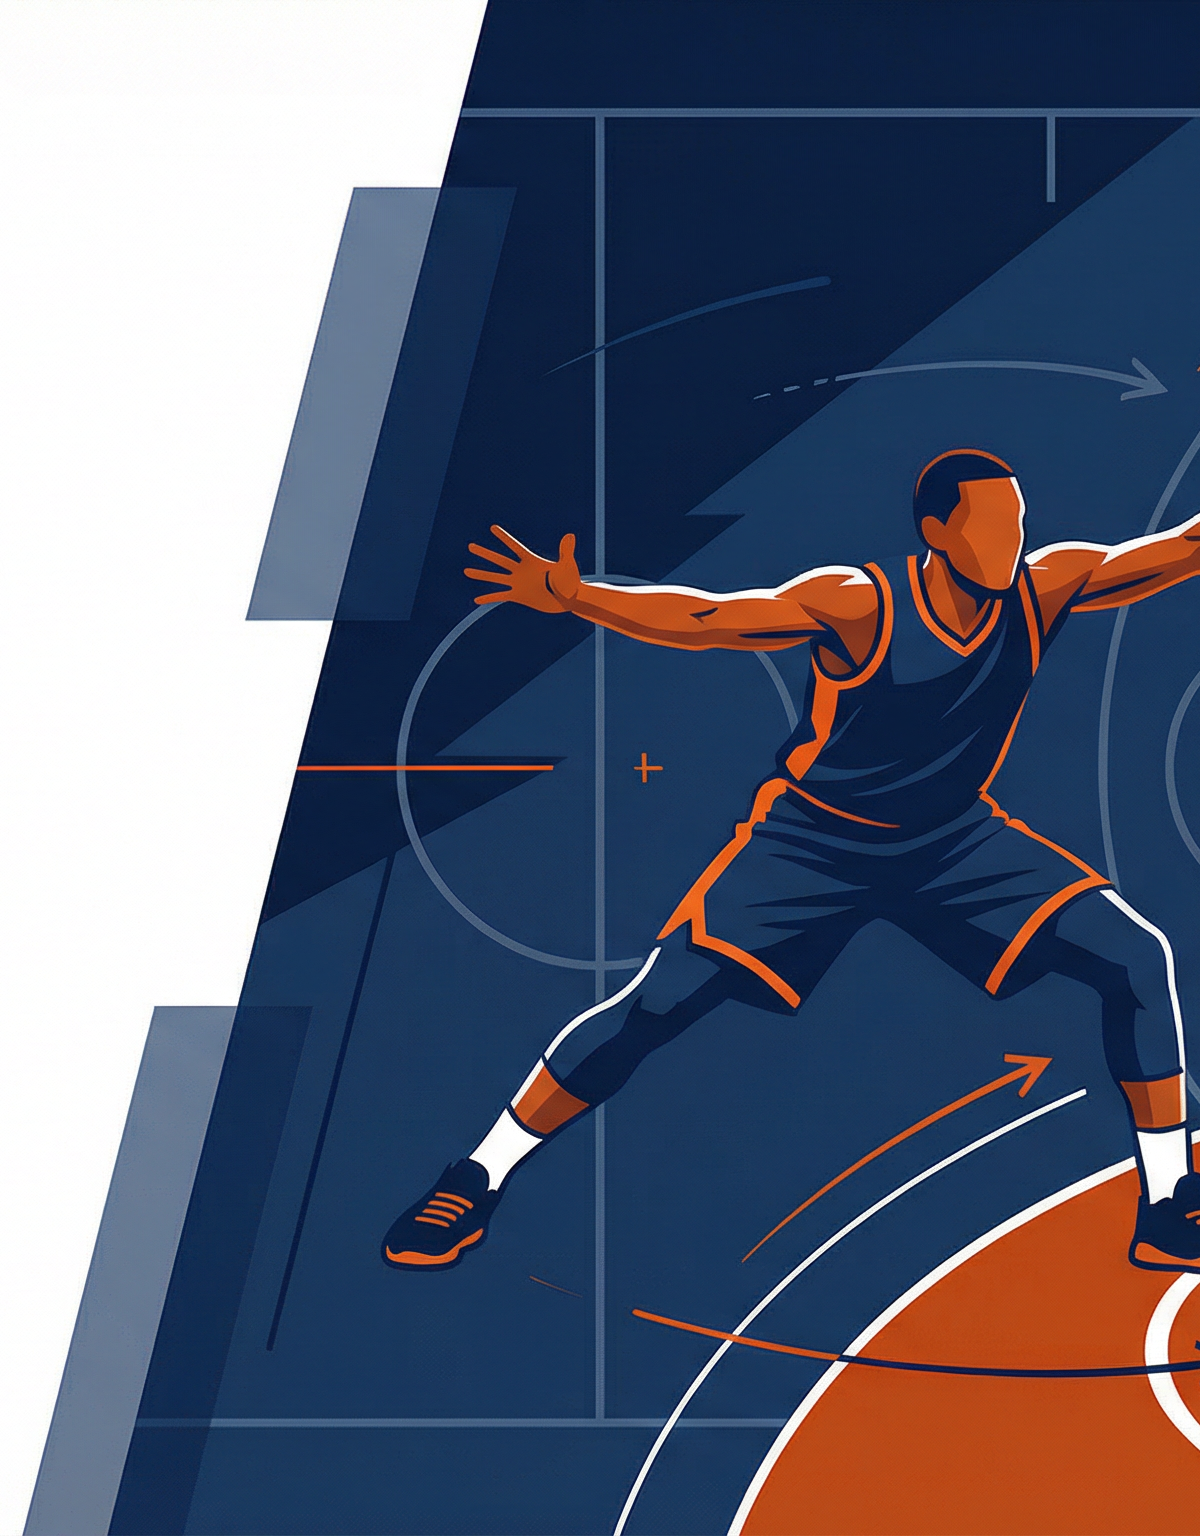
Defensive Closeout and Recovery Drill
Train your defenders to close out under control, absorb the drive, and rotate seamlessly — the three skills that separate elite defensive teams from average ones.
Equipment Needed
Overview
The Defensive Closeout and Recovery Drill is one of the most game-realistic defensive exercises you can run in practice. It directly addresses the two most common breakdowns in perimeter defence: a defender sprinting out of control on a closeout, allowing the offensive player to blow past them, and a defence failing to rotate when the drive penetrates the paint.
This drill teaches defenders to close out with speed under control — high hands, chopped feet, and a low base — before immediately transitioning into a recovery slide or a defensive rotation. It is suitable for use as a warm-up defensive activation, a focused skill block, or as a competitive team drill in the final third of practice. Run it at the start of any session where your defensive scheme is the primary focus, or use it as a daily habit drill to build the muscle memory your perimeter defenders need every game.
The drill is built around the FIBA standard half-court (14m x 15m of the 28m x 15m full court), making it directly transferable to game situations.
Setup
Equipment Required
| Item | Quantity |
|---|---|
| Basketballs | 4–6 |
| Cones | 6 |
| Bibs / Pennies (for defenders) | 4–6 |
| Whiteboard or coaching clipboard | 1 |
Court Setup
Use one half of a FIBA court (14m deep x 15m wide). Place cones at the following positions to mark the starting spots for offensive players:
- Cone A — Top of the key (approximately 6.25m from the basket, directly in front)
- Cone B — Right wing (6.75m three-point line, 45° angle)
- Cone C — Left wing (6.75m three-point line, 45° angle)
- Cone D — Right corner (6.75m three-point line, baseline)
- Cone E — Left corner (6.75m three-point line, baseline)
Player Positions
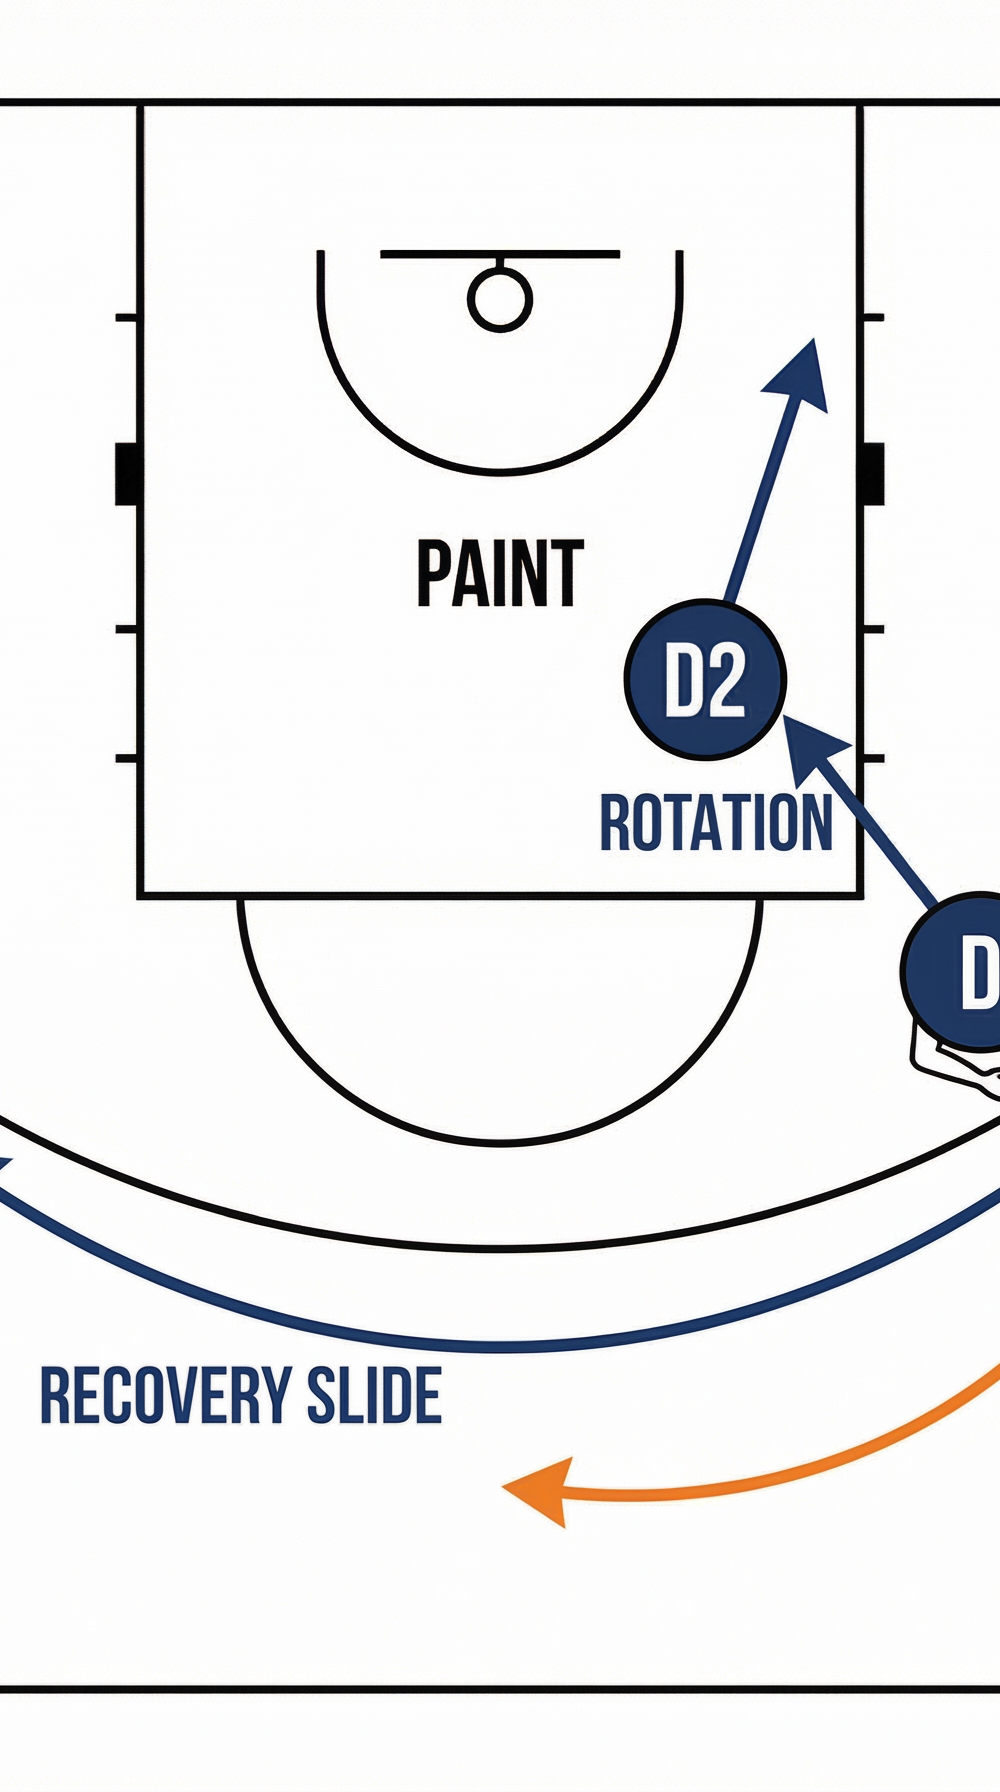
Diagram 1 shows the initial drill setup. Offensive players (1–5) are stationed at the five perimeter spots. The primary defender (D) starts inside the paint, approximately 4–5m from the basket. A second defender (D2) is positioned on the weak-side block as the help defender. The ball begins with Player 2 at the right wing.
- 1 (Point Guard) — Top of key, Cone A
- 2 (Shooting Guard) — Right wing, Cone B — ball starts here
- 3 (Small Forward) — Left wing, Cone C
- 4 (Power Forward) — Right corner, Cone D
- 5 (Centre) — Left corner, Cone E
- D (Primary Defender) — Inside the paint, ball-side elbow
- D2 (Help Defender) — Weak-side block
For a smaller group, reduce to a 3-on-2 format using positions 2, 4, and 1.
Step-by-Step Instructions

Step 1 — Set the starting position. D begins inside the paint in a defensive stance: feet shoulder-width apart, knees bent, weight on the balls of the feet, hands active at hip height. D2 takes a help-side position on the weak-side block, in a stance that allows them to see both the ball and their assigned player.
Step 2 — Initiate the closeout. The coach or a feeder passes the ball to Player 2 at the right wing. On the moment of the pass, D sprints toward Player 2 using short, powerful strides. The sprint covers approximately 4–5m from the paint to the three-point line.
Step 3 — Execute the closeout. At approximately 1.5–2m from Player 2, D chops their feet rapidly (short, quick steps) to decelerate, drops their hips, and extends both hands high — one toward the ball, one toward the shooting lane. The defender should arrive under control, with their momentum stopped before contact distance. Cue: "Sprint, chop, contest."
Step 4 — Read the offensive player. Player 2 now has three options: shoot, drive baseline, or drive middle. D must read the offensive player's hips and first step, not the ball.
Step 5 — Recover on the drive. If Player 2 drives (baseline or middle), D executes a drop step in the direction of the drive and slides to cut off the path to the basket. D must stay between the ball and the basket at all times, maintaining a legal guarding position.

Diagram 2 shows the recovery phase. Player 2 drives the baseline; D executes a recovery slide to cut off the drive. Simultaneously, D2 rotates from the weak-side block toward the paint to provide help-side support. If D2 commits to stopping the drive, Player 2 may kick out to Player 4 in the corner — D2 must then close out on Player 4 using the same technique.
Step 6 — Defensive rotation. When D2 rotates to help on the drive, the remaining defenders (1, 3, 5) must shift one position toward the ball. This teaches the team concept: every drive triggers a rotation.
Step 7 — Complete the repetition. The drill ends when the offence scores, the defence forces a stop (turnover, blocked shot, or forced miss), or the coach blows the whistle after 5 seconds. Rotate defenders after each repetition: D moves to the back of the offensive line, the next player in the defensive queue becomes D, and D2 becomes D.
Step 8 — Repeat from all positions. Run the drill from each of the five perimeter positions (top, right wing, left wing, right corner, left corner) so defenders experience closeouts from every angle.
Key Coaching Points

1. Arrive under control, not at full sprint. The single most important technical point. A defender who arrives at full pace cannot change direction and will be beaten by a simple jab step. Emphasise the "chop" phase: feet must be moving quickly but the body must be decelerating from approximately 1.5–2m out.
2. High hands on the closeout. Both hands must be above shoulder height as the defender arrives. This discourages the shot, forces the offensive player to make a decision, and reduces the risk of a shooting foul caused by a lunging arm.
3. Read the hips, not the ball. Offensive players are trained to use ball fakes. Defenders who watch the ball will be frozen by pump fakes. Teach your players to track the offensive player's hips and lead foot — these cannot lie.
4. Drop step, then slide — never cross your feet. On the drive, the first movement must be a drop step in the direction of the drive. Defenders who cross their feet are immediately beaten. Reinforce lateral slide mechanics: push off the trail foot, step with the lead foot, repeat.
5. Communication is mandatory. D2 must call "Help!" the moment they rotate. The player rotating to cover D2's vacated assignment must call "I've got ball-side corner!" Silence on defence is a coaching red flag.
6. Contest every shot without fouling. On a pull-up jumper, the defender must contest with a vertical jump — arms straight up, body straight, no reach-in. Reinforce the difference between a legal vertical contest and an illegal reach.
Common Mistakes

Mistake 1 — The flying closeout. The defender sprints all the way to the offensive player without chopping their feet, arriving off-balance and unable to react. Correction: Place a cone 1.5m in front of the offensive player's position. The defender must have their feet chopping before they reach the cone. Use verbal cues: "Chop at the cone!"
Mistake 2 — Biting on the pump fake. The defender leaves their feet on a shot fake, landing out of position or committing a foul. Correction: Instruct offensive players to use pump fakes deliberately in this drill. Reward defenders who stay grounded with verbal praise. Cue: "Feet on the floor until the ball goes up for real."
Mistake 3 — Crossing feet on the recovery slide. When recovering on a drive, the defender crosses their feet instead of sliding, causing them to trip or lose their defensive position. Correction: Run a separate 2-minute lateral slide warm-up before the drill. Mark a 3m lane with cones and have defenders slide without crossing feet.
Mistake 4 — D2 failing to rotate. The help defender stands still when the drive occurs, leaving the paint unprotected. Correction: Make D2's rotation a non-negotiable rule. If D2 does not rotate within one second of the drive, stop the drill and reset. Reinforce: "When the ball drives, the paint is everyone's responsibility."
Mistake 5 — Defenders ball-watching instead of player-tracking. Perimeter defenders not involved in the immediate closeout lose track of their assigned offensive players, leaving open shooters. Correction: After each repetition, ask the uninvolved defenders: "Where was your player? Were you one pass away from a closeout?" Build awareness through questioning.
Variations and Progressions

Progression 1 — Live 2-on-2 (Intermediate). After the initial closeout, allow the offence to play live 2-on-2 (Player 2 and Player 4 vs. D and D2). This forces both defenders to communicate, rotate, and make real-time decisions. The drill now includes the kick-out pass scenario shown in Diagram 2, requiring D2 to close out on Player 4 after rotating.
Progression 2 — Live 3-on-3 with skip pass (Advanced). Add Player 1 at the top of the key and a third defender. After the initial closeout on Player 2, the offence is permitted to skip pass to Player 3 on the weak side. This forces the entire defence to rotate simultaneously, testing communication and positioning across the full perimeter. Run for 5-second possessions with a shot clock.
Variation 1 — Closeout only (Beginner / Technique Focus). Remove the drive and recovery phase entirely. The drill becomes a pure closeout repetition: D sprints from the paint, chops, and contests. Player 2 catches, pump fakes once, and returns the ball. This is ideal for introducing the drill to younger or less experienced players, or for use as a warm-up activation.
Age Adaptations

| Age Group | Adaptation |
|---|---|
| Under 10 | Use a smaller court area (half the key to the three-point line). Reduce the closeout distance to 2–3m. Focus only on the chop-and-contest mechanic. No live drive phase. |
| Under 12 | Introduce the drive and recovery slide but do not require D2 rotation. Run 1-on-1 only. Allow offensive players to drive but not shoot — focus is entirely on the defender's footwork. |
| Under 14 | Full drill as described, but use a 3-second possession limit for the offensive player to reduce complexity. Introduce D2 rotation without the kick-out pass. |
| Under 16 | Full drill with all progressions available. Introduce the skip-pass variation. Begin timing closeouts with a stopwatch to build competitive urgency. |
| Open / Senior | Full live 3-on-3 progression. Add a shot clock (5 seconds). Score the drill competitively: defence earns 1 point per stop, offence earns 1 point per score. First to 5 wins. |
This drill is designed to be run in 15–20 minutes as a focused defensive skill block. For best results, run it at least twice per week during the competitive season and three times per week in pre-season when defensive habits are being established.