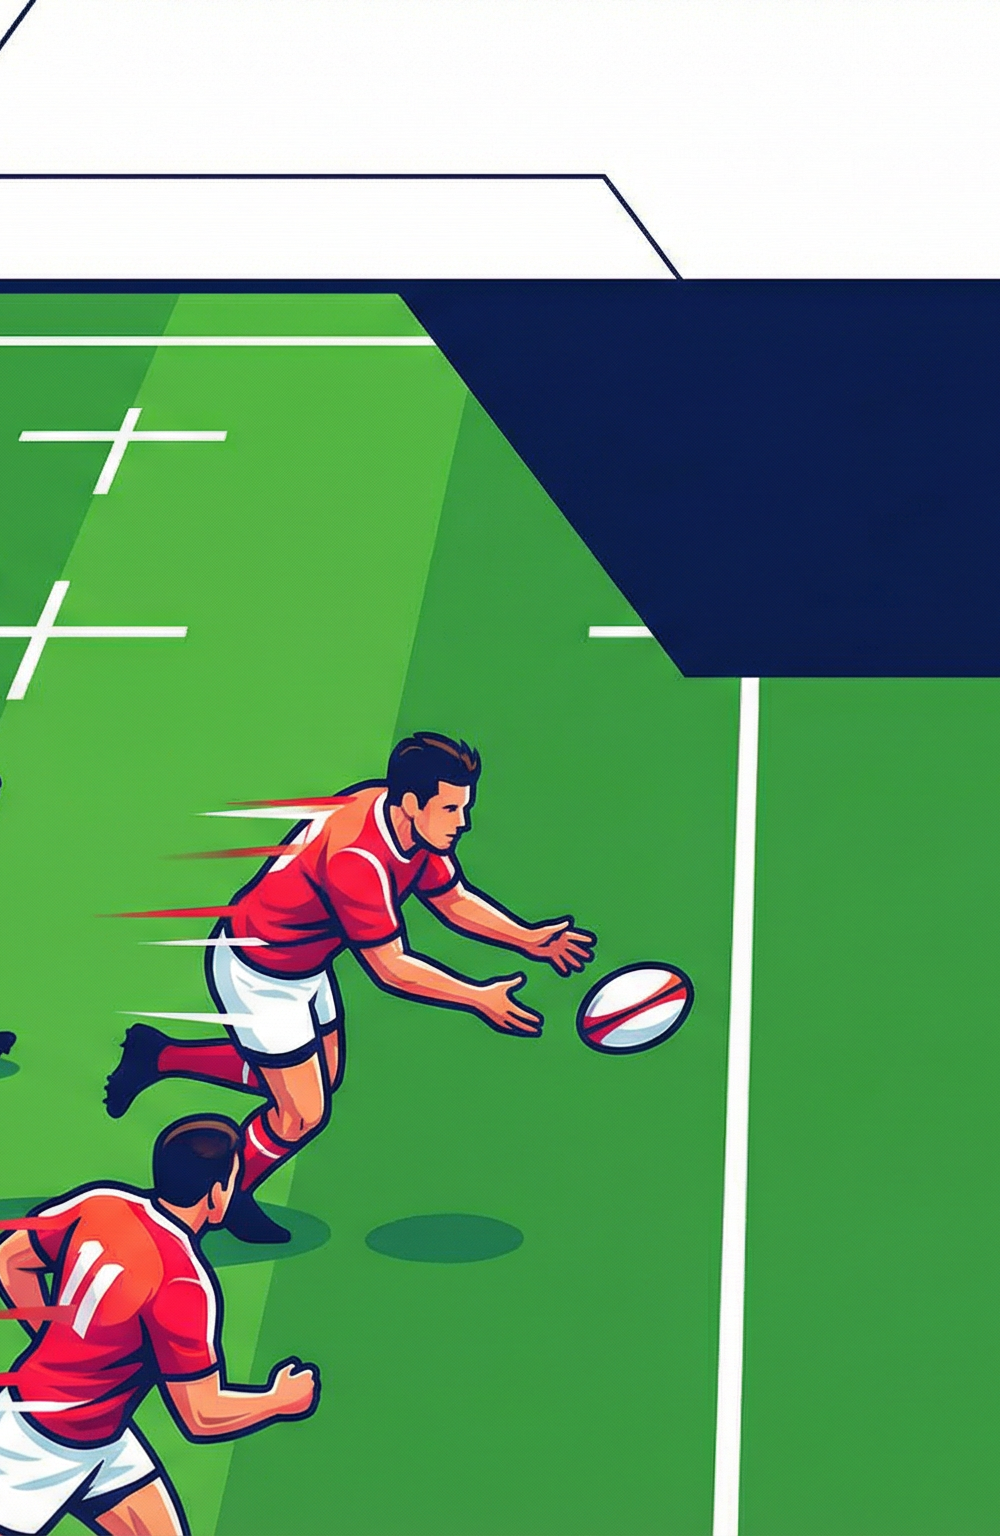
Switch & Go: Attacking Backs Move Off First Phase
Master the 'Switch & Go' — a first-phase backs move that uses a midfield switch between the fly-half and inside centre to commit defenders, create an overlap, and unlock space out wide.

Equipment Needed
1. Overview
The "Switch & Go" is a dynamic first-phase attacking move designed to manipulate the defensive line, create hesitation, and exploit space on the outside. By initiating a hard switch play in the midfield between the Fly-half (#10) and Inside Centre (#12), the attack forces defenders to commit inward. This momentary disruption allows the Outside Centre (#13) and Wingers (#11, #14) to attack a fractured defensive line with an overlap advantage. This play is particularly effective when executed from a stable scrum platform near the middle of the pitch or slightly offset, giving the backline room to operate on the open side. It is best used when the opposition defense is rushing up fast and flat, as the switch uses their momentum against them.
2. Setup
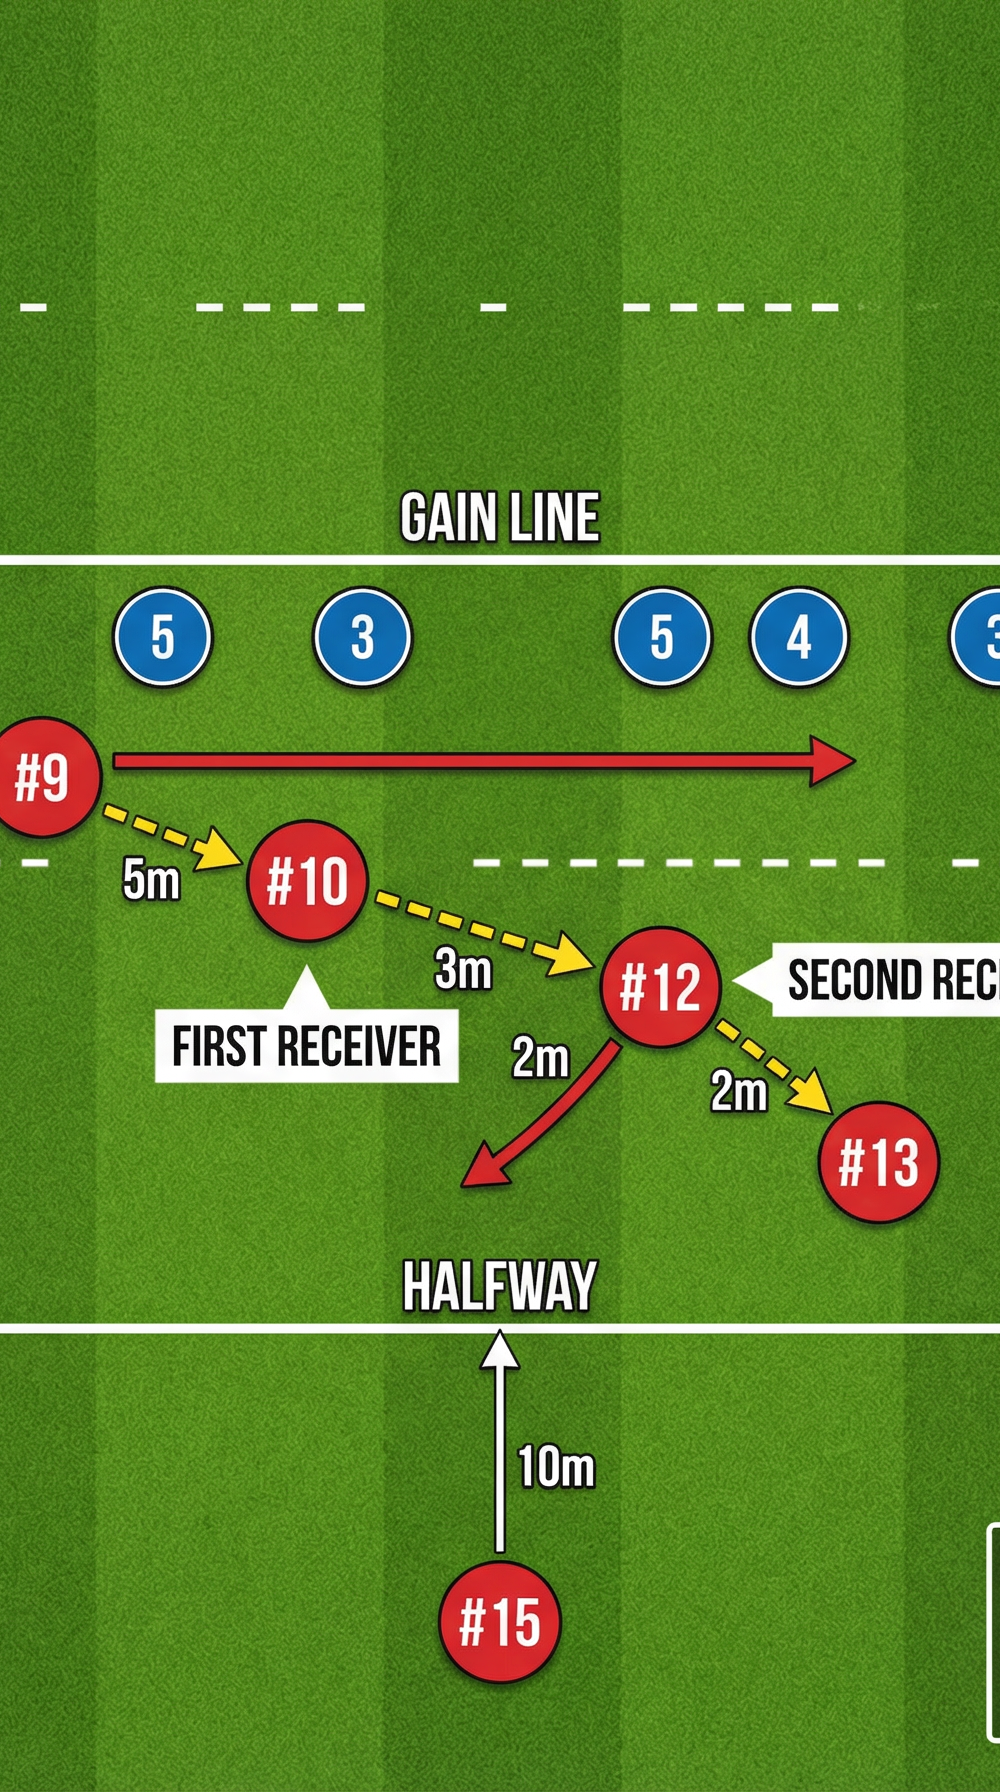
Setting up the "Switch & Go" requires a standard 100m x 70m Rugby pitch and basic equipment including one rugby ball and 8-10 cones to mark starting positions and the gain line. For a full 15-on-15 drill involving forwards, a scrum machine can be optionally used. The attacking team (Red) should start from a scrum or simulated breakdown on the left side of the pitch, near the 15m line, giving a wide open side to the right.

The player positions for the attacking team are crucial for the success of the move. The Scrum-half (#9) is positioned at the base of the scrum, ready to clear the ball. The Fly-half (#10) stands 5m deep and 3m wide of the scrum-half, acting as the primary playmaker and first receiver. The Inside Centre (#12) is positioned 2m outside and slightly flatter than the #10, ready to run a hard unders line (switch). The Outside Centre (#13) holds width initially before running an arcing line, positioned 2m outside the #12. The Left Wing (#11) and Right Wing (#14) maintain maximum width on their respective touchlines. Finally, the Fullback (#15) is positioned 10m deep behind the main attacking line, ready to inject pace into the line as a secondary option or support runner.
3. Step-by-Step Instructions
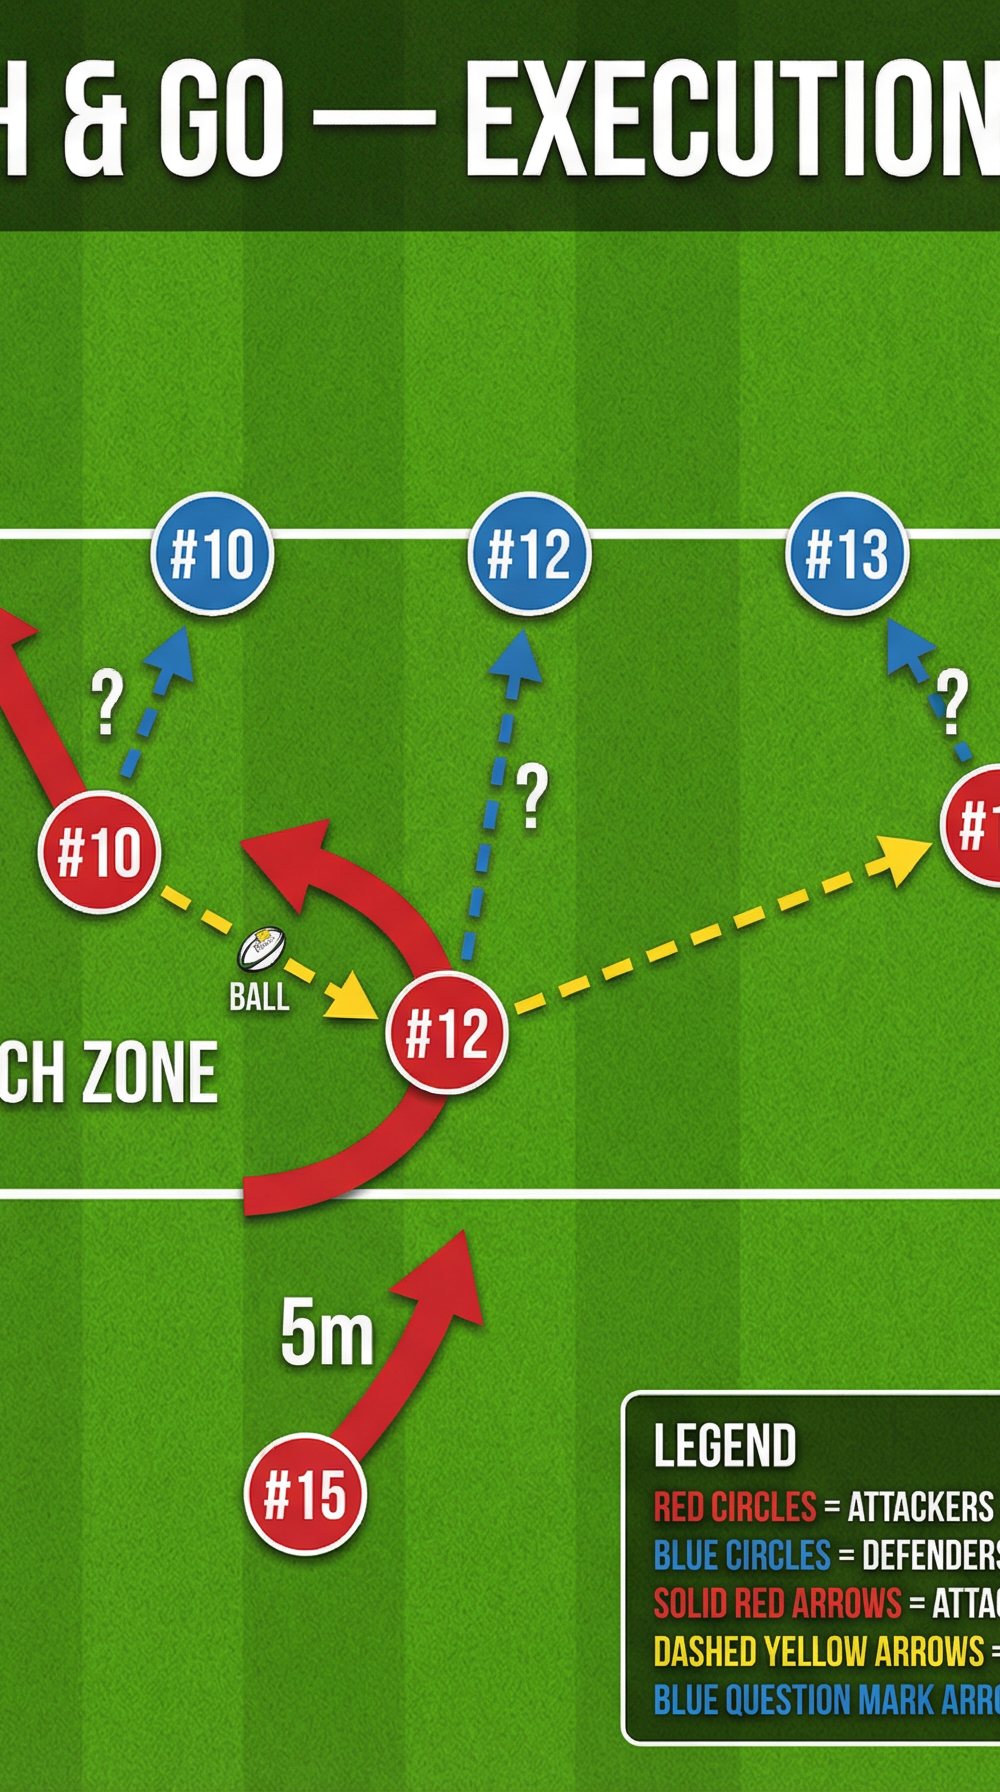
The play begins with the clearance, where the #9 clears the ball rapidly from the base of the scrum with a crisp pass to the #10. The #10 catches the ball on the move, running hard and flat directly at the inside shoulder of the opposing #12 to commit the defense. Simultaneously, the #12 runs a sharp, aggressive angle back inside (an "unders" line), crossing directly behind the #10.

As the #10 and #12 cross paths in the "Switch Zone", the #10 must make a critical decision. Option A involves the #10 faking the switch pass to #12, holding the ball, and continuing their run or passing wide. Option B, the primary move, sees the #10 execute a short, disguised pop pass to the #12 cutting back inside. If Option B is executed, the #12 receives the ball at pace, slicing through the gap created if the defense over-commits to the #10's initial run.
If the defense collapses inward to cover the switch, the #12 immediately fires a long, sweeping pass outward to the #13 or #14, who are running wide, arcing lines into the newly created space. Throughout the play, the #15 trails 5m deep, reading the defensive reaction and providing a crucial support option either on the inside of the #12 or joining the wide attack outside the #13.

4. Key Coaching Points
The success of the switch relies entirely on pace and timing. The #10 and #12 must cross paths at full speed, leaving the defense no time to adjust. Furthermore, the #10 must run a credible attacking line, actively engaging the opposing #12 before initiating the switch. If the #10 drifts sideways, the defense will simply slide with them. Even when executing the switch, the #10 must sell the threat of keeping the ball through body language, eye contact, and carrying the ball in two hands.

The angle of the #12's run must be sharp and aggressive. A shallow angle will not deceive the defense; they must look like a genuine threat cutting back against the grain. Clear, concise communication is also vital. The #10 must dictate the play, calling the switch early enough for the #12 to adjust their line. Finally, ensure the backline maintains adequate depth (5m from the gain line) to allow players to hit the line at pace.
5. Common Mistakes
| Mistake | Description | Correction |

|---|---|---|
| Telegraphing the Pass | The #10 makes it obvious they are going to pass, allowing the defense to drift early. | Emphasize selling the dummy and keeping the ball in two hands until the last moment. |
| Running Sideways | The #10 drifts across the pitch rather than attacking the gain line directly. | Coach the #10 to run a hard, flat line at the inside shoulder of the opposing defender. |
| Poor Timing | The #12 arrives too early or too late, resulting in a poor pass or tackle behind the gain line. | Practice the timing of the switch run at varying speeds before progressing to full pace. |
| Lack of Depth | The backline stands too flat, preventing players from hitting the line at pace. | Ensure players start 5m deep from the gain line and maintain alignment. |
| Ignoring Support | The ball carrier becomes isolated after the break, leading to a turnover. | Emphasize the role of the #15 and other support runners trailing the play. |
6. Variations & Progressions
The "Switch & Go" can be adapted to keep the defense guessing. The Dummy Switch & Go involves the #10 faking the switch to the #12, keeping the ball, and accelerating through the gap created by the hesitating defense. For a more complex variation, the Double Switch sees the #12 immediately execute a second switch with the #13 coming back inside after receiving the initial pass from the #10. This requires exceptional handling and timing but can devastate a drifting defense.
Another effective variation is the Fullback Late Entry. Instead of the #12 passing wide, the #15 enters the line late and at pace between the #10 and #12, acting as the primary strike runner off the switch pass. This adds an extra, unexpected attacker to the midfield and can exploit gaps in a disorganized defensive line.

7. Age Adaptations
For Under 8 to Under 10 age groups, focus on the basic mechanics of the switch pass in a static or slow-moving environment. Emphasize running straight, carrying the ball in two hands, and communicating clearly, simplifying the play to just the #10 and #12.
As players progress to the Under 12 to Under 14 level, introduce the element of pace and timing. Practice the switch against a passive defense (walking or jogging) before progressing to live opposition, emphasizing the importance of the #10 committing the defender.
For Under 16 to Open grades, execute the full play at game speed with live, aggressive defense. Focus on the decision-making aspect (Option A vs. Option B), reading the defensive cues, and executing the wide variations. Incorporate the Fullback's late entry to add complexity and challenge the players.