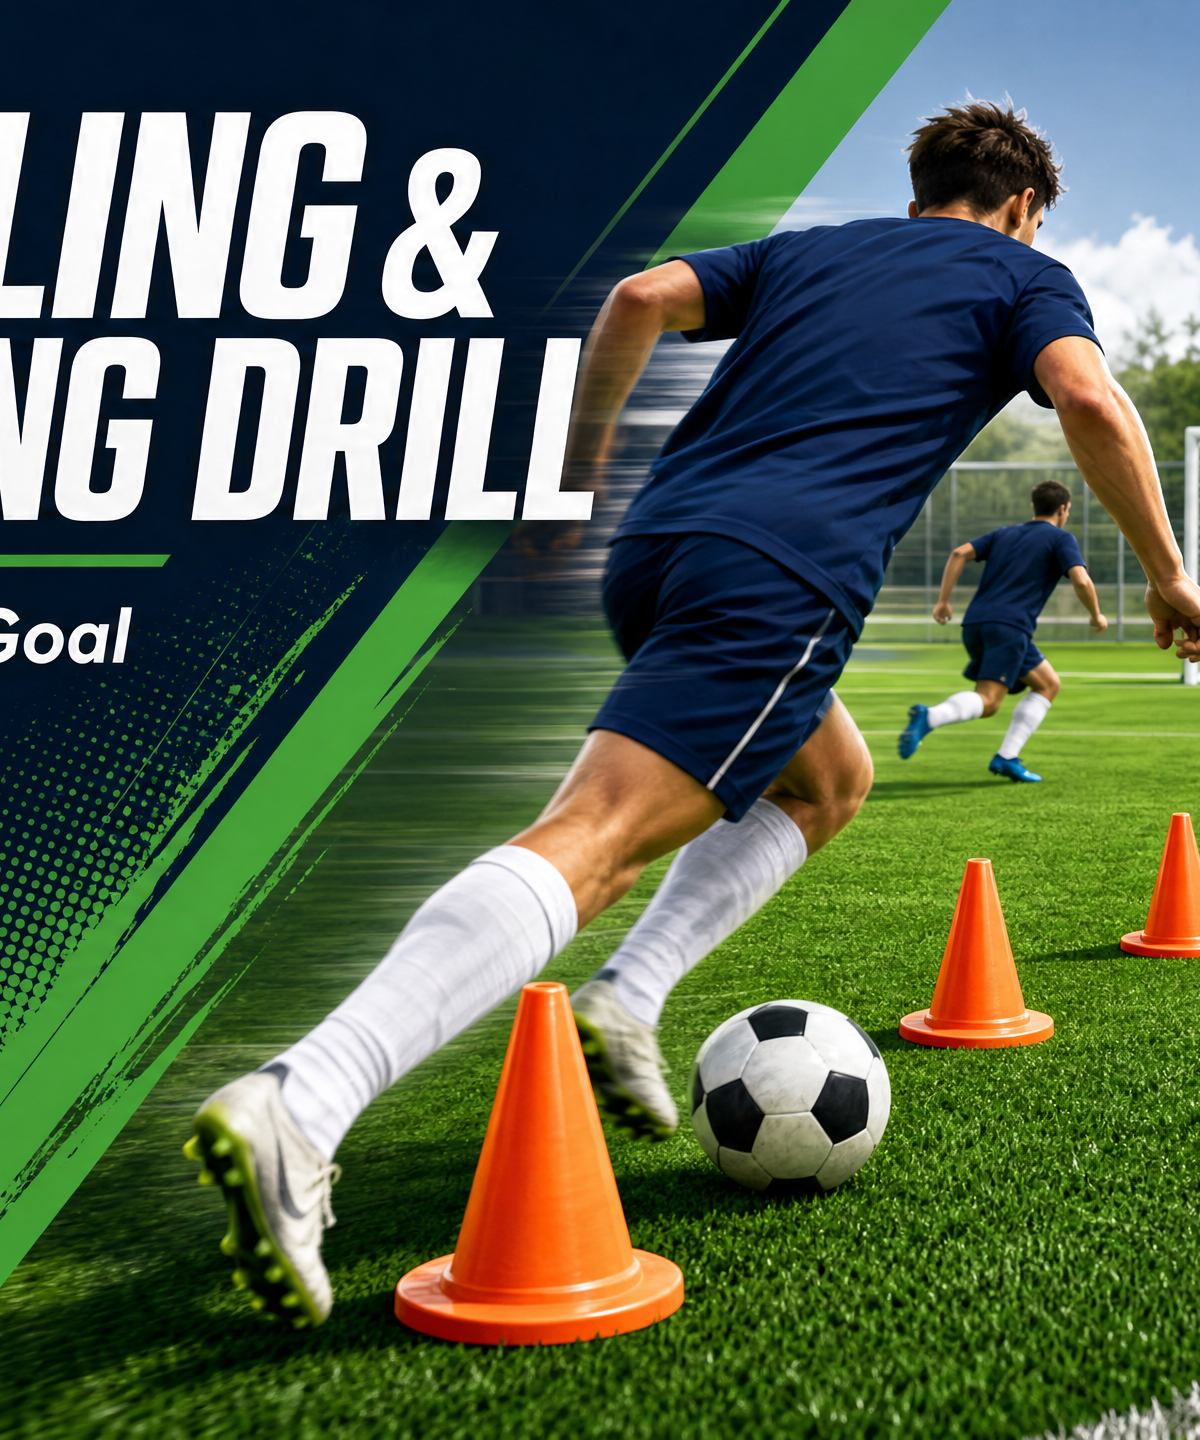
Dribbling Through Cones with Finishing Drill
Improve your players' close ball control, agility, and clinical finishing under pressure with this essential attacking drill.
Equipment Needed
1. Overview
The Dribbling Through Cones with Finishing Drill is a fundamental yet highly effective attacking exercise designed to improve close ball control, agility, and clinical finishing under pressure. This drill simulates match scenarios where an attacking player must navigate through tight defensive structures before executing a precise shot on goal. It is an essential component of any training session focused on attacking play, offering players the opportunity to develop their spatial awareness and technical execution in the final third.
Coaches should use this drill to refine players' ability to maintain control at speed, shift their body weight quickly, and transition seamlessly from dribbling to striking the ball. By repeatedly performing this action, players build the muscle memory and confidence required to perform under the high-pressure environment of a competitive match.
2. Setup
To execute this drill effectively, proper setup is crucial. The exercise takes place in the attacking third of a standard football pitch (approximately 100-110m x 64-75m).
Equipment Needed:
- 6-8 Training cones (preferably bright orange for visibility)
- 1 Full-size goal (7.32m x 2.44m)
- Adequate supply of footballs (minimum 6-10 to maintain flow)
- Bibs (if incorporating defenders later)
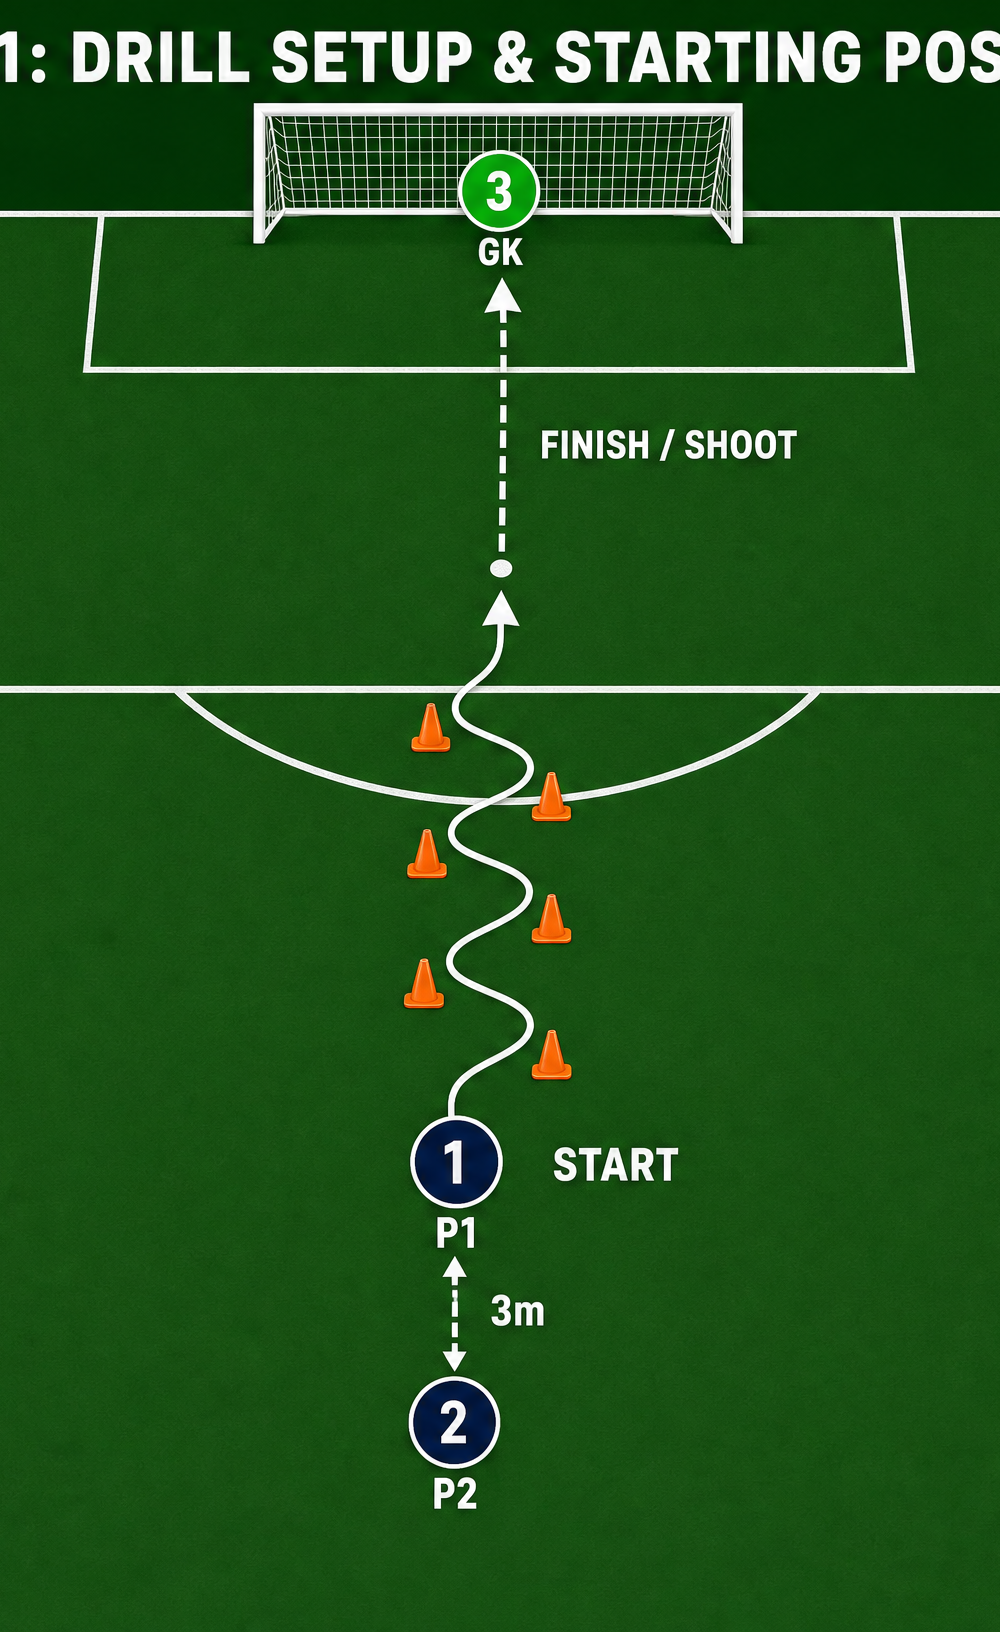
Pitch Setup & Player Positions:
- Place the 6 cones in a staggered, zigzag formation starting roughly 18-20 metres from the goal line, extending backwards.
- Space the cones approximately 2 metres apart, alternating left and right to force sharp changes of direction.
- Position the Goalkeeper (GK) in the goal.
- Position the attacking players (e.g., P1, P2) in a line starting 3 metres behind the first cone.
3. Step-by-Step Instructions
Follow these precise steps to ensure the drill runs smoothly and achieves its intended technical outcomes:
- Initiation: Player 1 (P1) begins with the ball at their feet, positioned 3 metres behind the start of the cone line.
- The Approach: On the coach's whistle or command, P1 drives towards the first cone, maintaining close control.
- The Slalom: P1 weaves through the cones, using both the inside and outside of the foot to shift the ball quickly and maintain a tight dribbling radius.
- The Exit: As P1 clears the final cone, they must take a slightly larger touch out of their feet to set up the shot, transitioning from dribbling speed to shooting posture.
- The Finish: P1 strikes the ball towards the goal, aiming for the corners to beat the goalkeeper.
- Rotation: After the shot, P1 retrieves their ball (if missed) or jogs back to join the end of the queue. Player 2 (P2) immediately begins their repetition.
4. Key Coaching Points
To maximize player development, coaches must emphasize the following technical details during the drill:
- Close Control: Encourage players to keep the ball within a one-metre radius while navigating the cones. This requires soft, frequent touches.
- Head Up: Players should periodically scan the goal and the goalkeeper's position while dribbling, rather than staring exclusively at the ball.
- Change of Pace: Emphasize the importance of accelerating out of the final cone. The transition from the slalom to the shot must be explosive to simulate breaking past a defender.
- Body Shape for Finishing: Ensure players plant their non-kicking foot correctly alongside the ball and keep their chest over the ball to keep the shot low and driven.
- Use Both Feet: Demand that players use both their left and right feet during the slalom to develop bilateral competence.
5. Common Mistakes
Watch for these frequent errors and provide immediate corrective feedback:
- Taking Touches Too Far Ahead: Players often push the ball too far in front during the slalom, losing control and disrupting the rhythm of the drill.
- Looking Down: Staring only at the ball prevents the player from assessing the goalkeeper's positioning, leading to predictable or poorly aimed shots.
- Slowing Down Before the Shot: A common flaw is decelerating significantly after the final cone. Players must learn to shoot in stride or immediately after an explosive touch.
- Leaning Back: Leaning backwards during the strike often results in the ball flying over the crossbar. Remind players to keep their weight forward.
6. Variations & Progressions
To keep the drill challenging and adaptable to different skill levels, introduce these progressions:
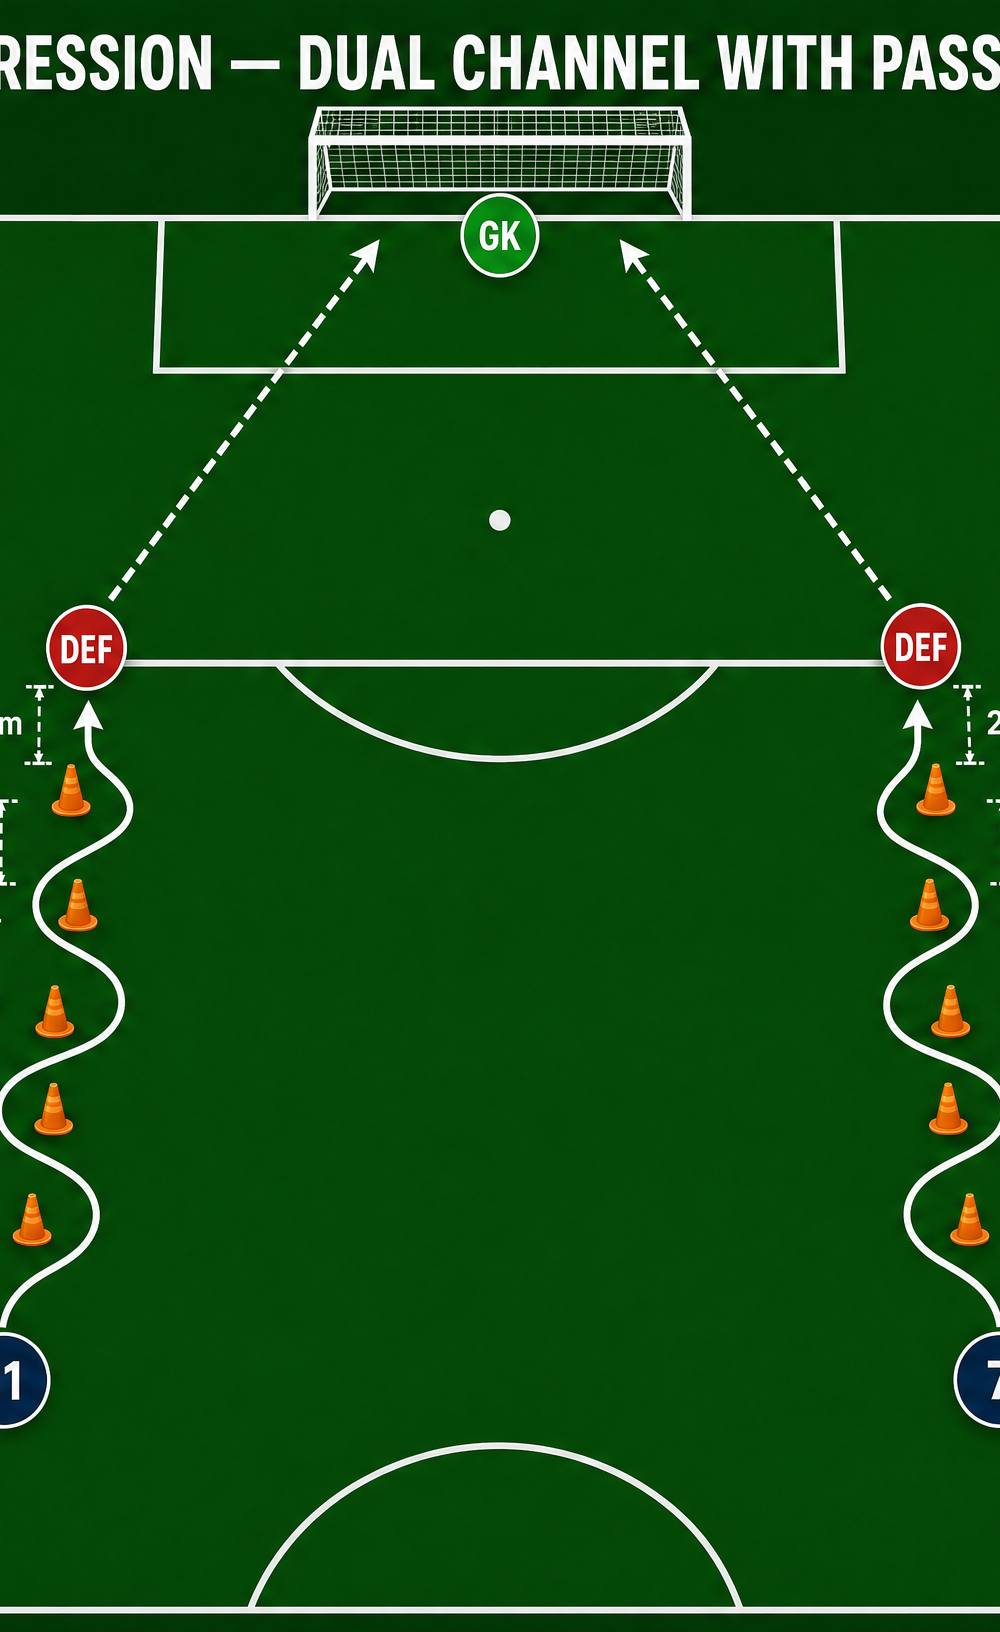
Progression 1: Dual Channel with Passive Defender
Introduce a second line of cones on the opposite side of the pitch to allow two players (e.g., a Right Winger and Left Winger) to perform the drill simultaneously. Add a passive defender (a coach or player) positioned 2 metres beyond the final cone to apply visual pressure before the shot.
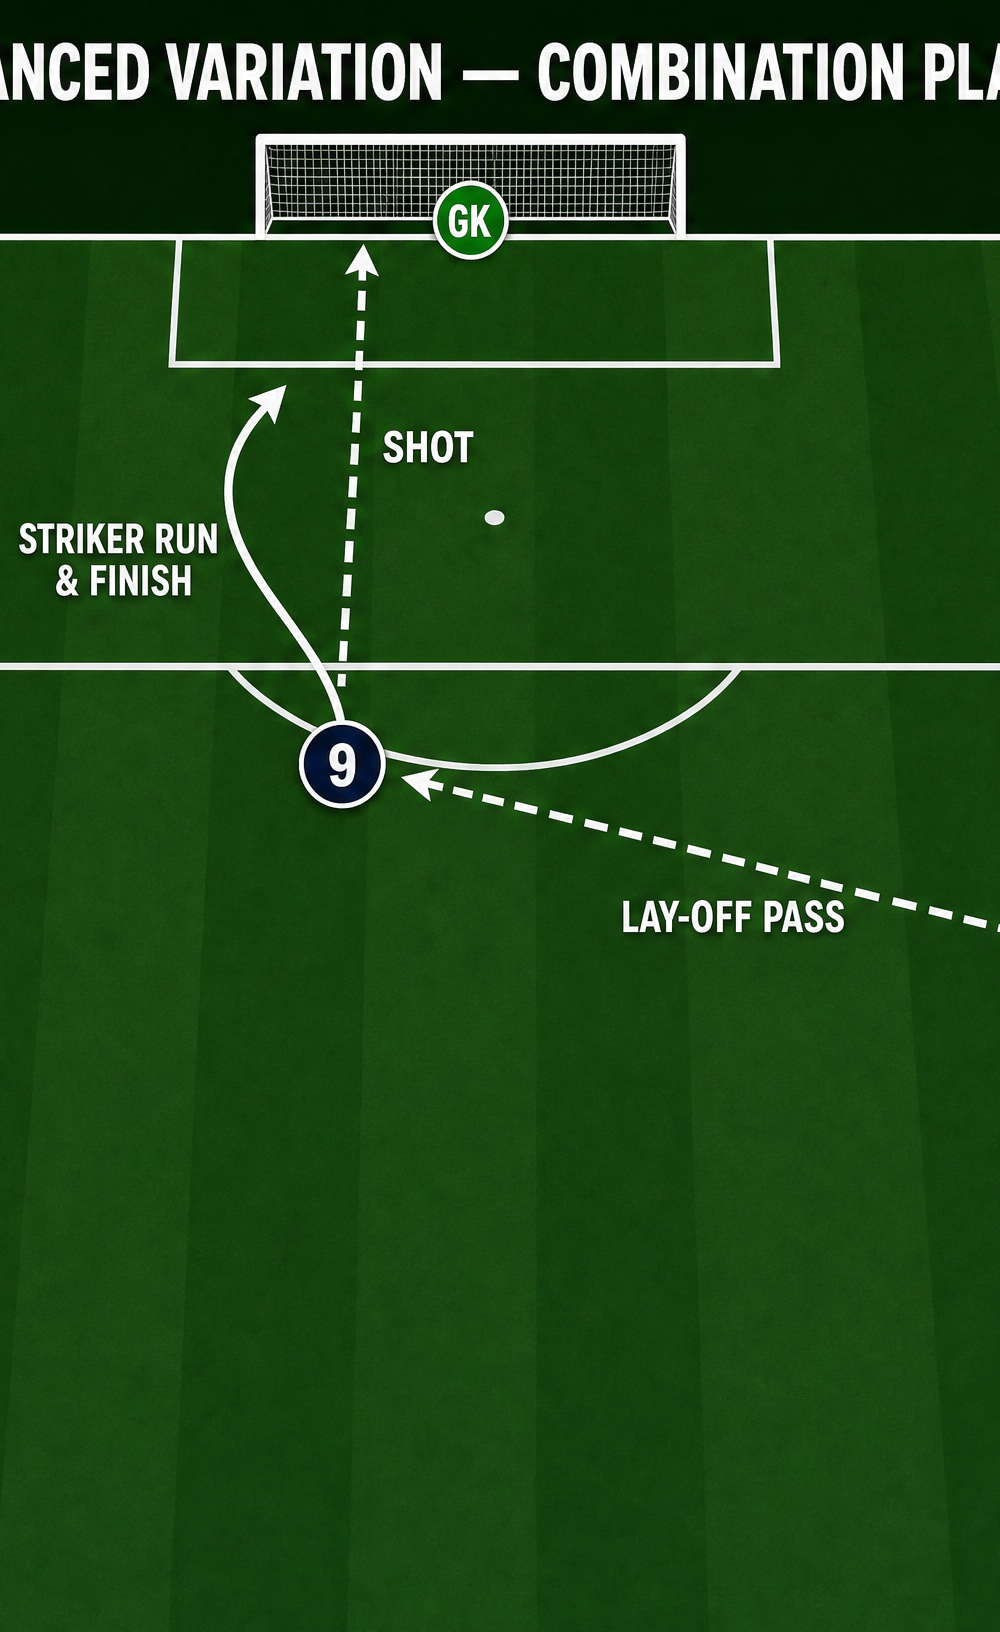
Progression 2: Combination Play & Finishing (Advanced)
Instead of shooting immediately after the slalom, the dribbler (e.g., RW) plays a firm lay-off pass to a central Striker (ST) positioned near the edge of the penalty area. The striker then takes a touch and finishes on goal. This introduces combination play and timing of runs.
7. Age Adaptations
Tailor the drill to suit the developmental stage of your players:
- Under-8 to Under-10: Increase the distance between cones to 3-4 metres to allow for larger touches. Focus purely on the fun of dribbling and shooting rather than strict technical perfection. Use a smaller goal if available.
- Under-12 to Under-14: Implement the standard 2-metre cone spacing. Begin emphasizing the use of both feet and the explosive touch out of the final cone. Introduce the passive defender variation.
- Under-16 to Open (Adult): Decrease cone spacing slightly to increase difficulty. Demand high intensity and match-realistic speed. Implement the advanced combination play variations and enforce strict time limits for the shot after the final cone.