

Football
Near-Post Flick-On Corner: Timing, Screen and Second Ball
Build a repeatable near-post corner that uses a late curved run, a legal screen and a rehearsed far-post finish.
What you need
balls, cones
{{asset:header_image.png}}
Overview
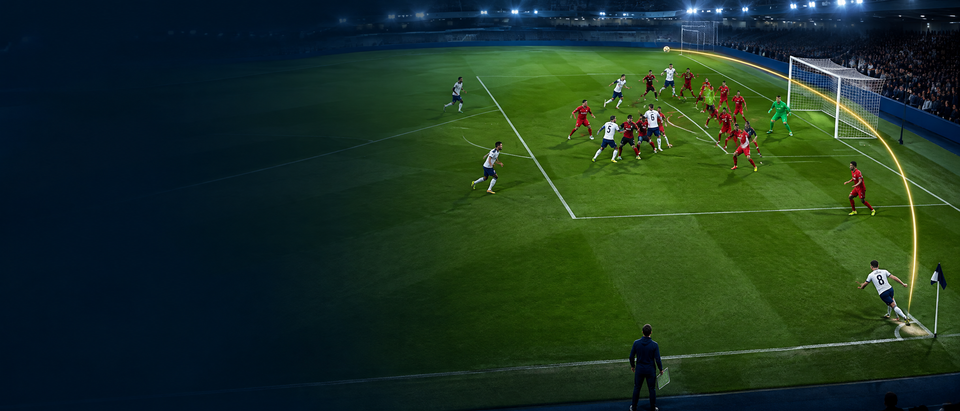
This is a right-sided, inswinging corner designed to win the first contact in the near-post corridor and redirect the ball across the six-yard box. It is not simply a hopeful delivery to the front post. Value comes from disguise, a legal screen, fixed delivery and decisive attacks on the flick-on. The primary target is #2, while #4 holds the far-post defender in place and becomes the finishing runner. #5 protects the transition before stepping into any loose second ball.
Use it when opponents defend zonally or have a static player on the near post. The set play is rehearsed here as a 10-player practice: five attackers, including the taker, against four defenders and a goalkeeper. On a full-size pitch (100–110m x 64–75m), use the right corner; reverse roles on the left.
{{asset:diagram_1.png}}
Setup
Place #1 on the right corner arc as a left-footed inswinger; a right-footed player can take the same ball from the left. Set #2 eight metres from goal and five metres outside the near-post lane, initially appearing to be away from the delivery. Put #3 just inside the penalty spot line, half a metre off the defender’s shoulder, with a side-on stance. #3’s job is to occupy space and delay the marker’s route, never to push, hold or block illegally.
Position #4 two metres inside the far-post line and one metre from the goal line. This high starting position pins a far-post defender and leaves room to attack the redirected ball. #5 starts 18–20 metres from goal, central enough to deal with a cleared ball and wide enough to see the delivery. The defending unit uses a goalkeeper, one near-post defender, two central defenders and one far-post defender. Use three passive repetitions, then live defenders.
The delivery window is precise: aim for a point 1–2m inside the near-post line, around head height, with enough pace that the goalkeeper cannot comfortably claim. Mark the window with two flat cones in early practices.
Step-by-Step Instructions
T−6 to T−3 seconds: scan and show. #1 checks the goalkeeper’s position and gives the agreed signal: a hand to the ball or a single call of “front.” #2 stands relaxed and side-on, not square to the goal. #3 and #4 establish contact distance without wrestling. #5 is already goal-side of any opponent positioned for a counterattack.
T−2 seconds: create uncertainty. #3 takes one small step toward the penalty spot, showing a possible central run. #4 stays high at the far post. #2 takes a short backwards adjustment or walks away from the target line. The defenders should not see an obvious straight run to the near post.
T=0 to T+0.8 seconds: trigger the movement. As #1 begins the run-up, #3 moves across the face of the nearest central defender, keeping arms tucked and contact minimal. At the same moment, #2 accelerates on a curved line into the yellow target zone. The curve matters: it lets #2 arrive facing the ball and avoids running directly into a blocker.
T+0.8 to T+2.5 seconds: deliver through the corridor. #1 strikes with the inside of the left foot, wrapping the ball toward the near-post channel. The ball should arrive in roughly 2–2.5 seconds: firm enough to beat a retreating defender, but not so flat that #2 cannot glance it. #2 attacks the final two steps explosively and arrives 1–2m inside the post rather than underneath the goalkeeper.
T+2.5 to T+3.5 seconds: win the first contact. #2 meets the ball at its highest controllable point, using the forehead and a stable neck. The preferred action is a glancing header across the face of goal, not a desperate downward header from behind the ball. If #2 is free, a direct near-post header on goal is also on. #3 turns immediately after the screen to hunt the rebound.
T+3.5 to T+5 seconds: finish the flick and secure the rest defence. #4 attacks the far-post space on the ball’s line, expecting the flick to travel across the six-yard box. #3 arrives around the goalkeeper’s second movement for a rebound. #5 only enters after a weak clearance or loose ball; otherwise #5 stays balanced and protects the central counterattack lane. If the ball breaks, finish in one or two touches.
{{asset:diagram_2.png}}
Key Coaching Points
Coach the detail before the speed. The taker must strike a repeatable ball into a defined window; “good area” is not a coaching instruction. Demand a late, curved sprint from #2, with the final three steps quick and the body opened toward the ball. #3 must create traffic legally by occupying a line, not by grabbing or extending the arms. Finally, make the second phase non-negotiable: #4 attacks the far post before the flick arrives and #5 prevents the one pass that launches a counterattack.
Use simple cue language: “show, curve, front, flick, finish.” Freeze the practice if the runner leaves before the taker’s approach, if the delivery misses the corridor by more than two metres, or if nobody is set for the clearance. Praise clean timing and decisive movement more than goals in the first block.
Common Mistakes
The most common error is a straight, early run from #2. It is easy to track and usually carries the runner into the goalkeeper’s line. Correct it by insisting on a delayed trigger and a curved approach from outside the defender’s eyeline. A second error is an over-hit ball that travels beyond the far post or rises above the attacker’s heading line. Give #1 a visible target and ask for driven inswing, not maximum power. Third, teams admire the first header and leave the far-post space and edge unoccupied. Rehearse the finish with a three-second countdown after every delivery.
Variations & Progressions
For the first variation, keep the same picture but have #2 make the near-post run as a decoy. #3 spins into the vacated central lane and #1 clips the ball to the penalty spot. This punishes a defender who overcommits to the front zone. For the second variation, use an outswinging ball from the right with a right-footed taker; #2 still attacks near post but heads back across goal for #4.
Progress from unopposed timing to passive defenders, then to live defending with a 10-second transition game if the ball is cleared. In the next progression, allow the defending coach to choose zonal or player-to-player marking without telling the attackers. Players must scan, call the marking picture, and choose either the near-post flick or the central variation before the run-up.
Age Adaptations
For Under-12s, use a smaller area, remove the legal-screen detail, and ask for a simple near-post run plus a low, driven ball or a first-time finish. Keep defenders passive and prioritise safety, spacing and accurate service. For Under-14s, introduce the curved run, a passive marker and the far-post follow-up, but keep the ball at a comfortable heading height. For Under-16s and open age, use live marking, demand the 2–2.5 second delivery, add the counterattack consequence, and rehearse both feet from both corners. Always match heading volume and ball type to your club’s age-group safety policy.
