

Football
High-Intensity Pressing Triggers and Recovery Drill
Master the art of defensive transitions by teaching your players exactly when to press high and how to rapidly recover into a compact shape when the press is broken.
What you need
1 full-size goal, 3 mini-goals, Footballs, Training bibs (2 colors), Flat markers/cones
1. Overview
This drill is designed to develop a team's collective understanding of defensive transitions, focusing heavily on pressing triggers and the subsequent recovery phase. In modern football, applying high pressure is only effective if the entire unit recognizes the specific moments to engage. Equally important is the team's ability to react instantly when the opposition breaks the initial press.
Coaches should use this drill to instill aggressive, coordinated pressing habits while simultaneously training the defensive line to drop and re-establish a compact shape to prevent counter-attacks. It is ideal for teams looking to improve their out-of-possession structure and transition speed.
2. Setup
To ensure realistic game scenarios, this drill requires a substantial playing area.
- Pitch Dimensions: Utilize a 60m x 50m area (roughly half a standard 105m x 68m pitch, adjusted for the number of players).
- Equipment: 1 full-size goal, 3 mini-goals (or target zones marked by cones), a large supply of footballs, training bibs in two distinct colors (e.g., Red for defending/pressing, Blue for attacking/possession), and flat markers to outline the zones.
- Player Positions: The drill involves 14 players plus 1 goalkeeper (8v6 + GK).
- Defending Team (Red - 6 players + GK): Set up in a 4-2 shape (Left Back, 2 Center Backs, Right Back, and 2 Defensive Midfielders). The Goalkeeper defends the full-size goal.
- Attacking Team (Blue - 8 players): Set up in a 2-4-2 shape to simulate building out from the back against a press.
3. Step-by-Step Instructions
This drill operates in two distinct phases: the High Press and the Recovery Block.
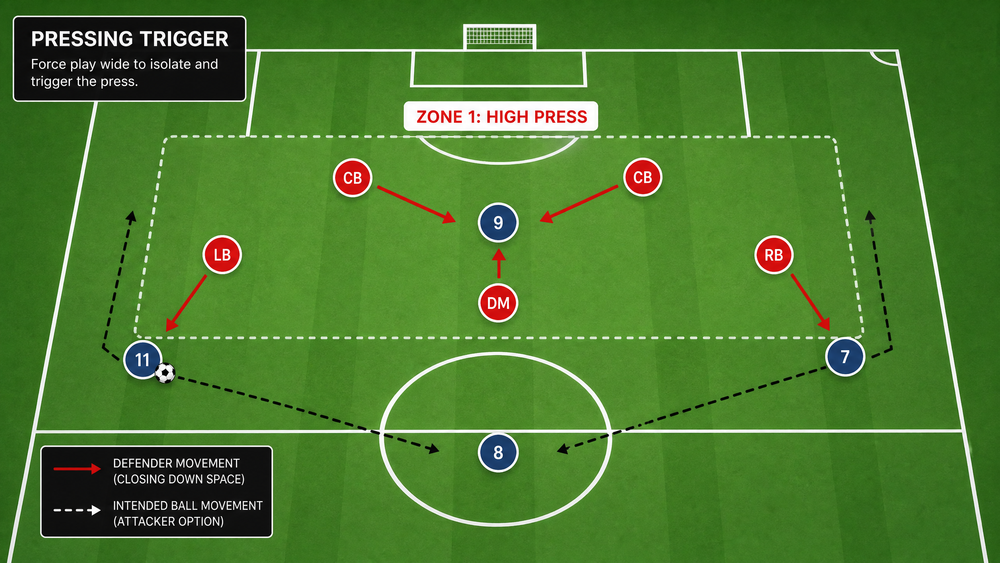
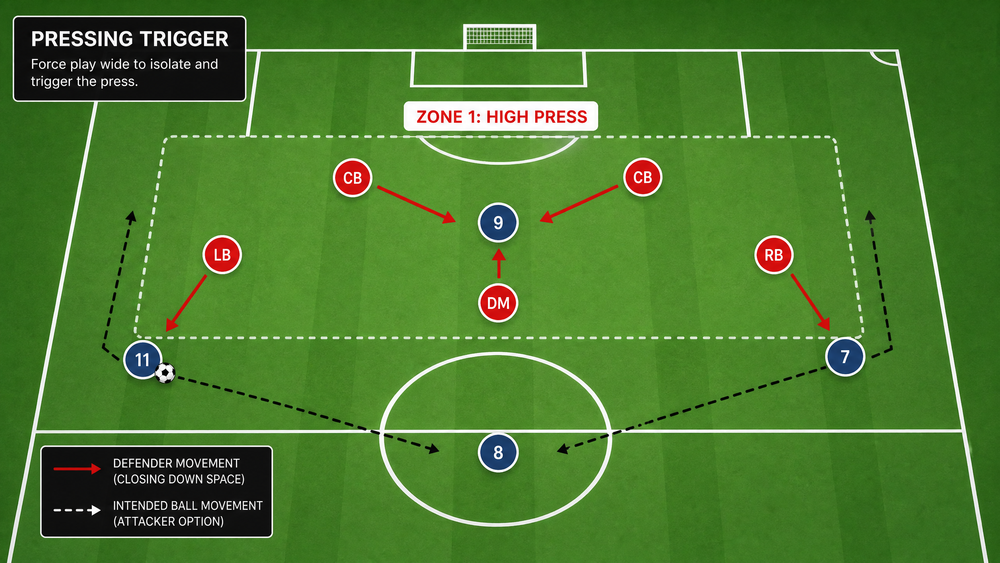
Phase 1: The High Press (Zone 1)
- Starting the Play: The coach serves the ball to the Blue team's center-backs deep in their own half. The Blue team's objective is to build possession and score in the full-size goal.
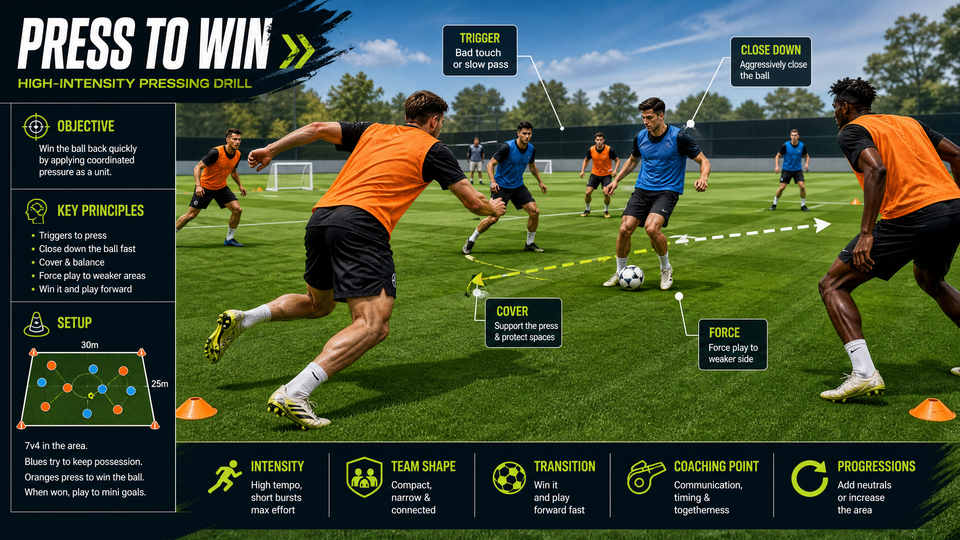
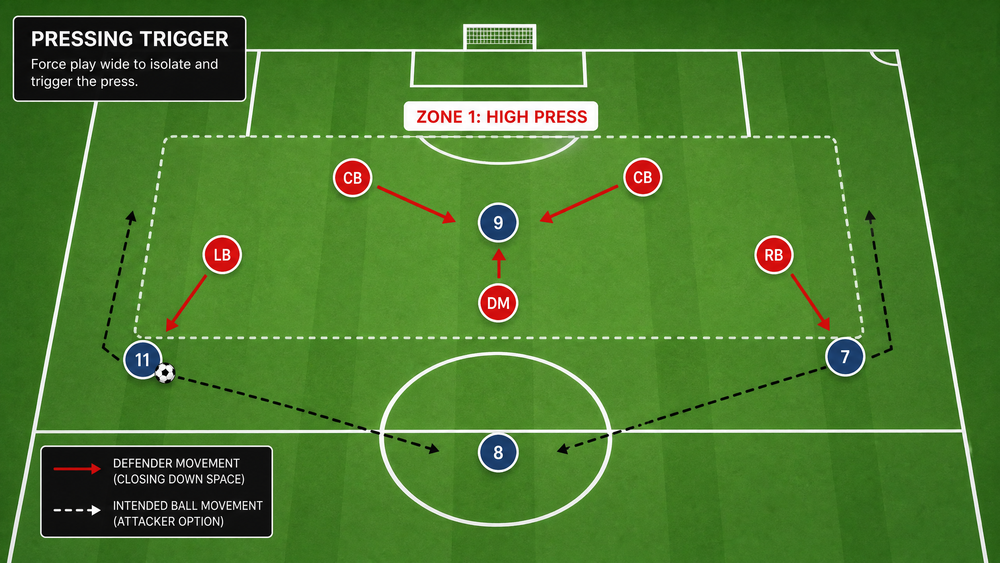
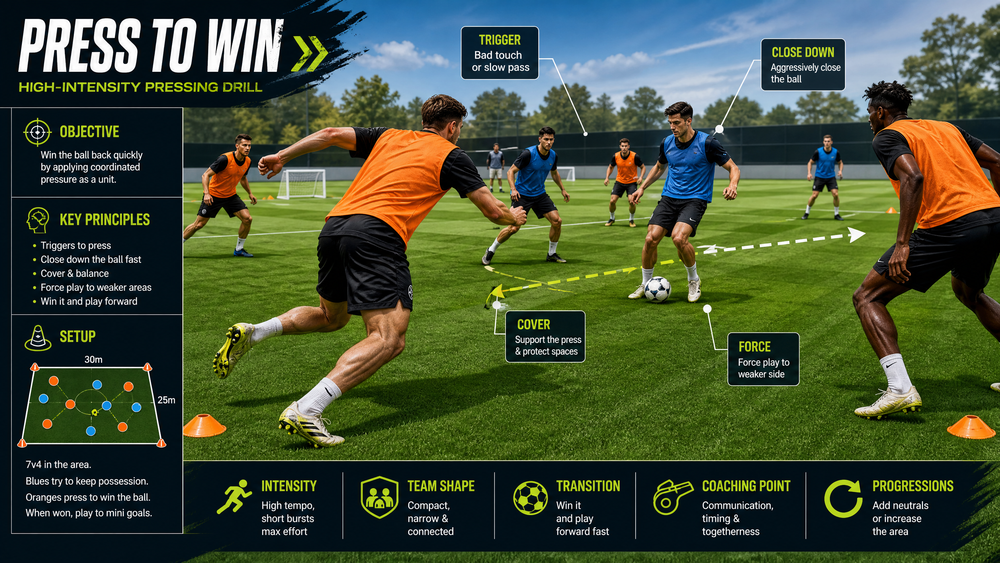
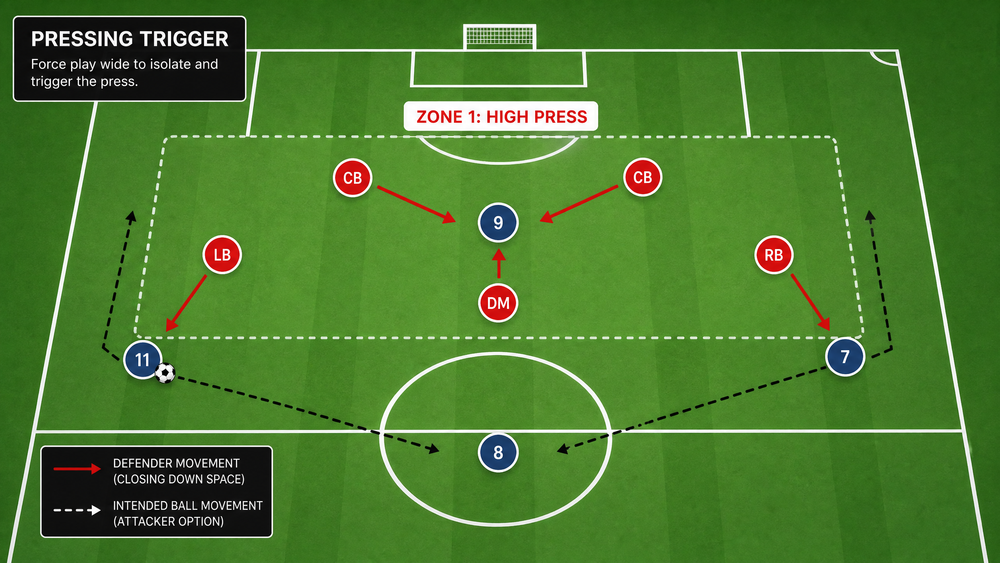
- Identifying the Trigger: The Red team must initially hold their shape and wait for a specific pressing trigger. Triggers include a poor first touch by a Blue player, a slow sideways pass, a pass directed backwards, or a player receiving the ball facing their own goal.
- Engaging the Press: Once a trigger is identified, the nearest Red player (usually a Defensive Midfielder acting as a high presser in this scenario) aggressively closes down the ball carrier.
- Coordinated Movement: As the first defender engages, the rest of the Red team must immediately step up, condensing the space. The fullbacks tuck in, and the center-backs push higher to eliminate gaps between the lines.
- Winning the Ball: If the Red team successfully wins possession in Zone 1, they have 8 seconds to transition quickly and score in any of the 3 mini-goals positioned at the opposite end of the playing area.
Phase 2: The Recovery Block (Zone 2)
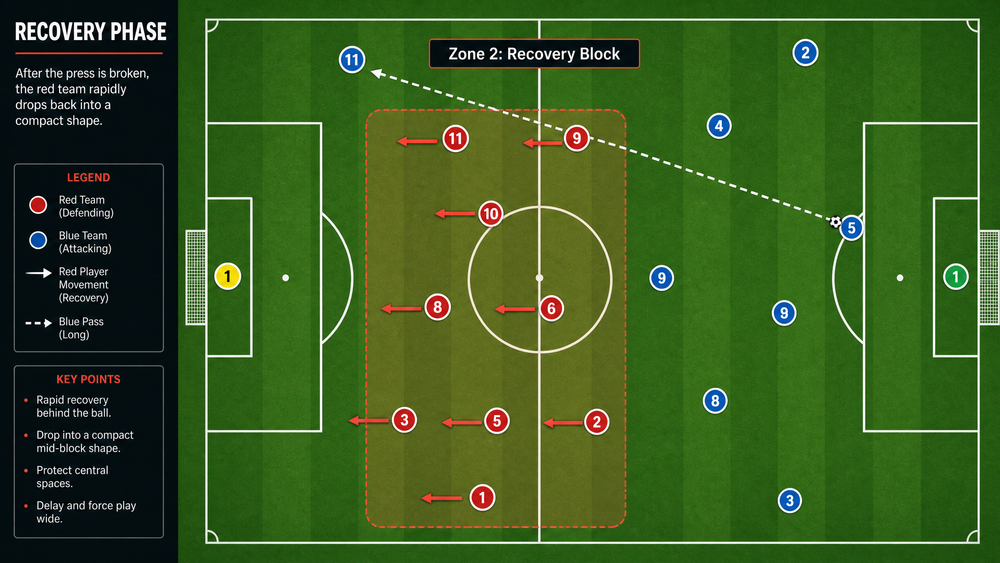
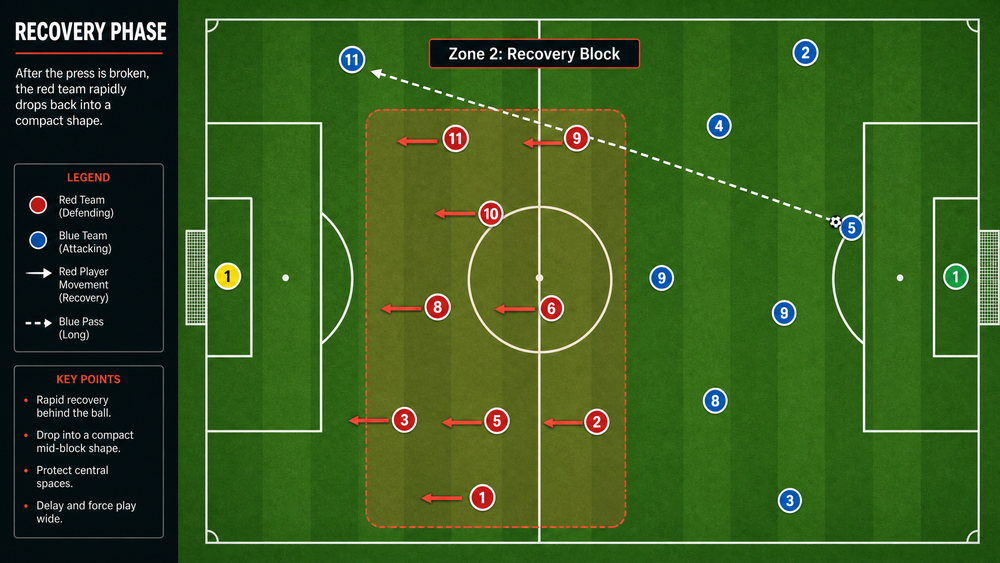
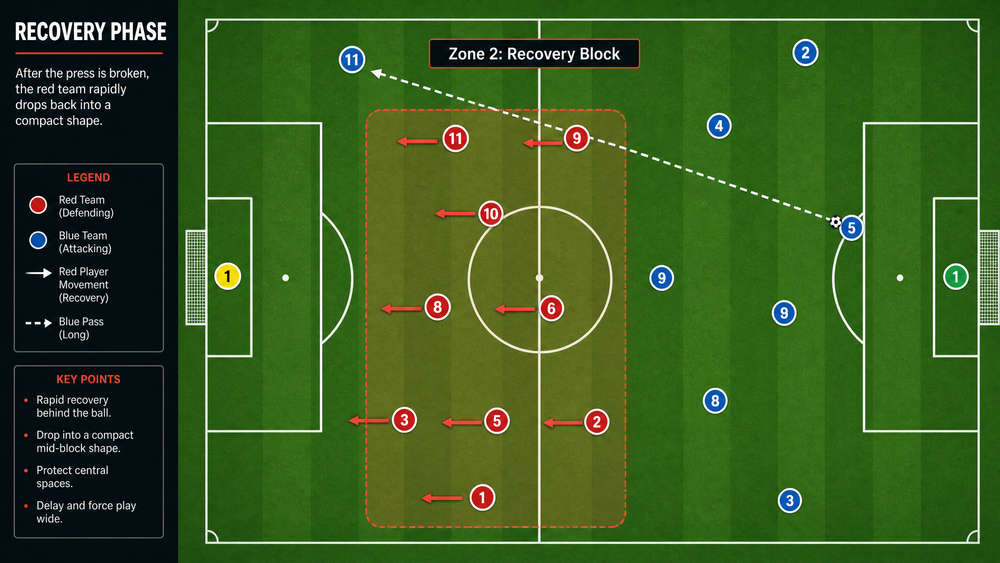
- Breaking the Press: The Blue team attempts to bypass the initial Red press. If they successfully play a forward pass that breaks the Red midfield line, the drill transitions to the recovery phase.
- Instant Reaction: The moment the press is broken, the Red team must abandon the high press and immediately sprint back towards their own goal.
- Establishing the Block: The Red team must drop into "Zone 2" (a designated area 25m from their goal) and rapidly re-establish a compact, narrow defensive block.
- Delay and Deny: The primary objective during recovery is to delay the Blue team's attack, denying central penetration and forcing the play out wide while the rest of the team gets behind the ball.
- Resetting: Once the Red team is set in their block, they defend the full-size goal. If they win the ball, they can counter-attack towards the mini-goals.
4. Key Coaching Points
- Communication is Non-Negotiable: The trigger to press must be accompanied by a loud, clear verbal command (e.g., "GO!" or "PRESS!"). The entire unit must move together; a solitary press is easily bypassed.
- Body Shape on the Press: The first defender must approach the ball carrier at speed but slow down just before engaging, adopting a side-on body shape to force the play in a predictable direction (usually towards the touchline or into a congested midfield area).
- Sprint to Recover: Recovery runs must be made at maximum intensity. Players should run in straight lines towards their own goal to get behind the ball as quickly as possible, rather than chasing the man.
- Compactness over Width: During the recovery phase, emphasize central compactness. It is better to concede space on the wings than to allow a direct pass through the center of the defensive block.
- Transition Mentality: The psychological shift from pressing to recovering, or from defending to attacking upon winning the ball, must be instantaneous.
5. Common Mistakes
- Pressing Without a Trigger: Players pressing individually out of frustration or impatience, breaking the team's shape and opening up passing lanes for the opposition.
- Jogging During Recovery: Players failing to recognize the danger when the press is broken, jogging back instead of sprinting, leaving the defense exposed to a numerical disadvantage.
- Flat Defensive Line: Center-backs failing to provide depth or cover for one another, making them vulnerable to a single through ball.
- Poor First Touch on Turnover: Winning the ball back through a great press, only to immediately give it away due to a lack of composure or a poor initial touch during the attacking transition.
6. Variations & Progressions
- Progression 1: Add a Time Limit. To increase the intensity of the attacking transition, give the defending team only 5 seconds to score in the mini-goals after winning the ball in the high press.
- Progression 2: Introduce a Neutral Player. Add a neutral player (a "Joker") who always plays for the team in possession. This makes it harder for the defending team to press successfully and forces them to work harder on their recovery shape.
- Variation 1: Change the Triggers. Instead of pressing on a bad touch, instruct the team to press specifically when the ball is played to the opposition's fullbacks, using the touchline as an extra defender.
7. Age Adaptations
- Under 10s / Under 12s: Simplify the triggers. Focus on just one trigger, such as "press when the goalkeeper plays a short pass." Reduce the playing area to ensure success and focus heavily on the effort required to recover.
- Under 14s / Under 16s: Introduce more complex triggers and emphasize the tactical understanding of forcing play into specific zones. Demand higher intensity and quicker transition speeds.
- Open / Senior: Execute the drill at full match speed. Focus on the micro-details: the angle of approach, the specific body shape of the covering defenders, and the immediate attacking intent upon winning possession.
