High-Intensity Defensive Shadowing & Marking Pressure Drill
Master the art of tight one-on-one marking and spatial awareness to force turnovers in the defensive third.

Equipment Needed
1. Overview
This high-intensity defensive drill focuses on developing relentless one-on-one marking pressure and shadowing skills. In modern netball, the ability to deny space and force the attacking team into making errors is crucial. This drill teaches defenders how to maintain a tight marking distance, anticipate attacker movements, and adjust their body positioning dynamically to cut off passing lanes. It is particularly effective for goal circle defenders (GD, GK) and mid-court defensive specialists (WD, C) looking to improve their footwork, reaction time, and ability to dictate the attacker's path.
Use this drill during the main body of your training session after a thorough dynamic warm-up. It serves as an excellent progression before moving into full-court match play scenarios, ensuring players are primed to apply intense pressure on the ball.
2. Setup
Equipment Needed:
- 1 Netball
- 4-6 Cones (for marking boundaries if needed)
- Bibs for attackers and defenders
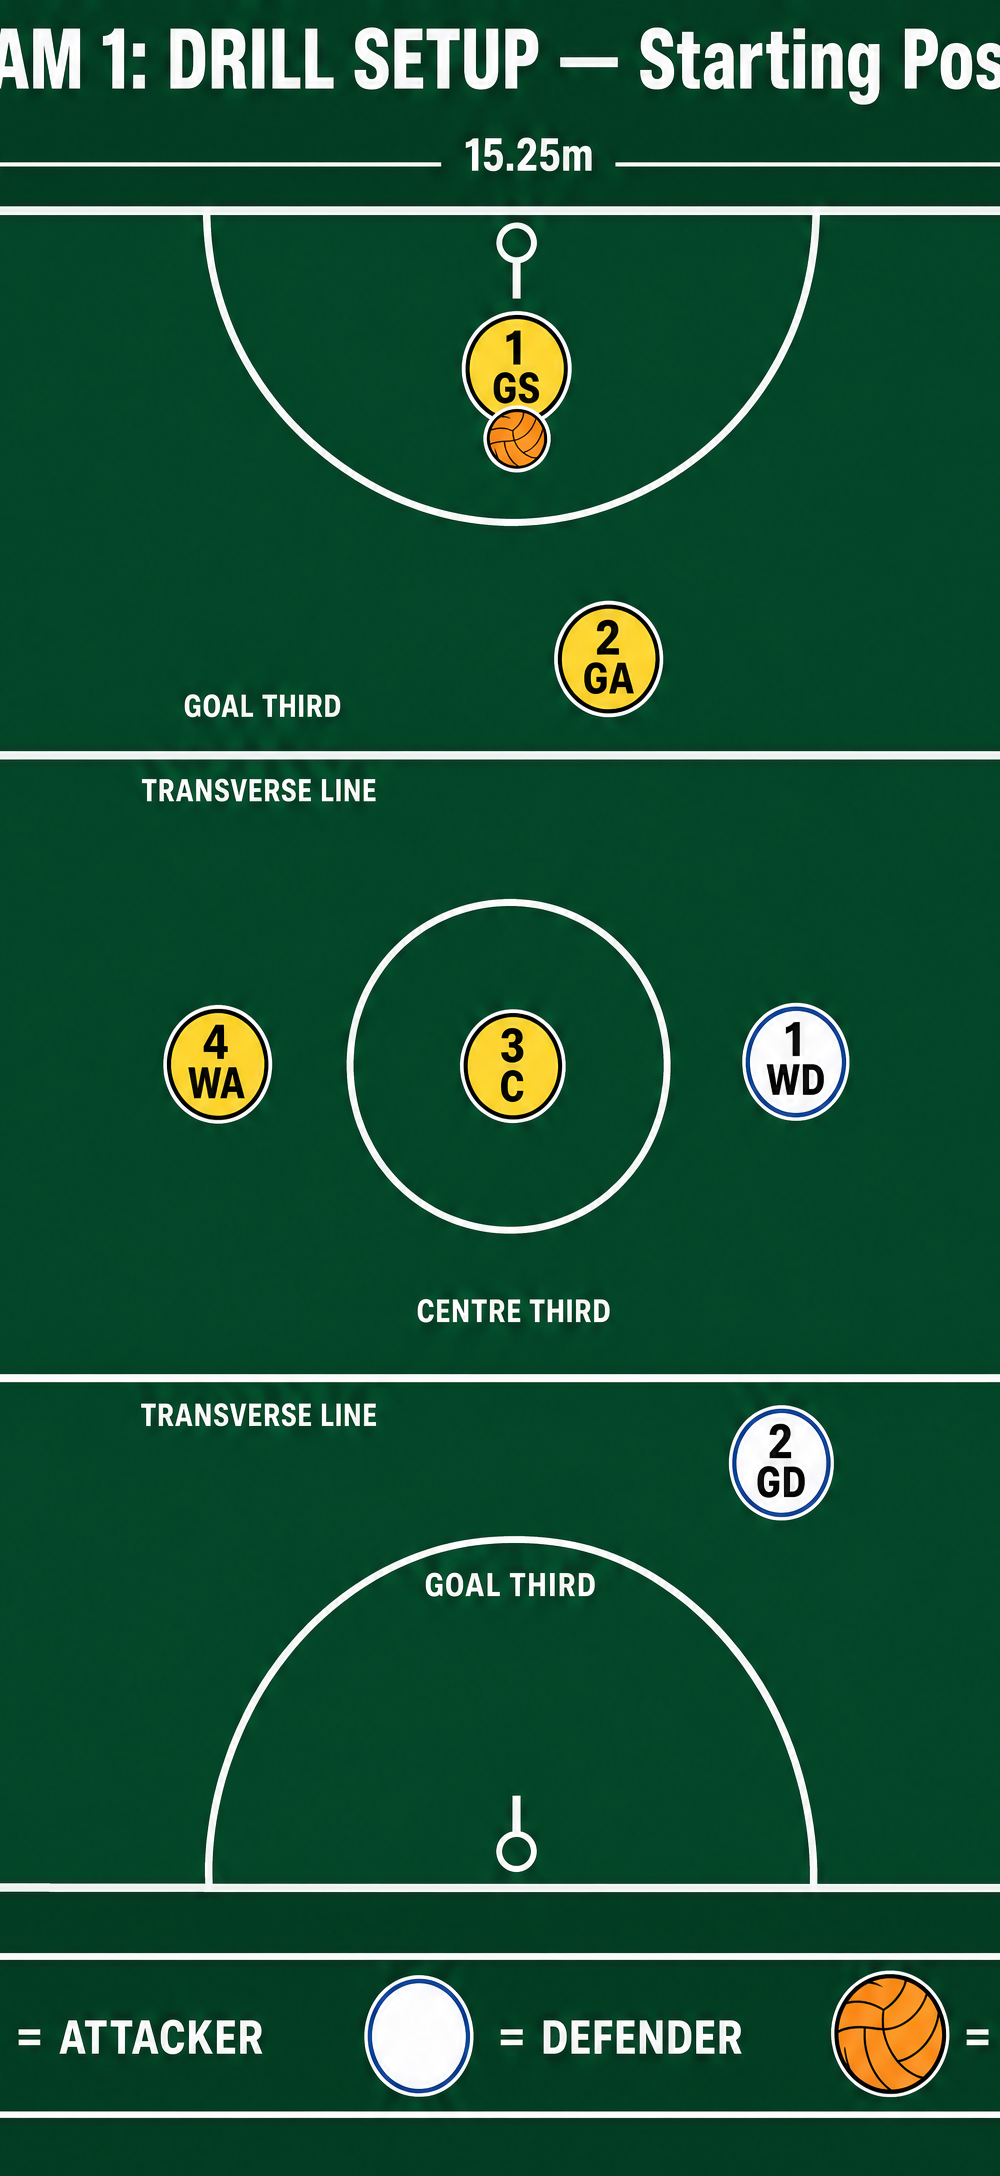
Court Setup:
- Utilize one goal third and the adjacent centre third (approximately 20m x 15.25m total working area).
- Ensure the court surface is clear and safe for rapid changes of direction.
Player Positions:
- Attackers (Yellow): Goal Shooter (GS), Goal Attack (GA), Wing Attack (WA), Centre (C).
- Defenders (Blue): Goal Keeper (GK), Goal Defence (GD), Wing Defence (WD).
3. Step-by-Step Instructions
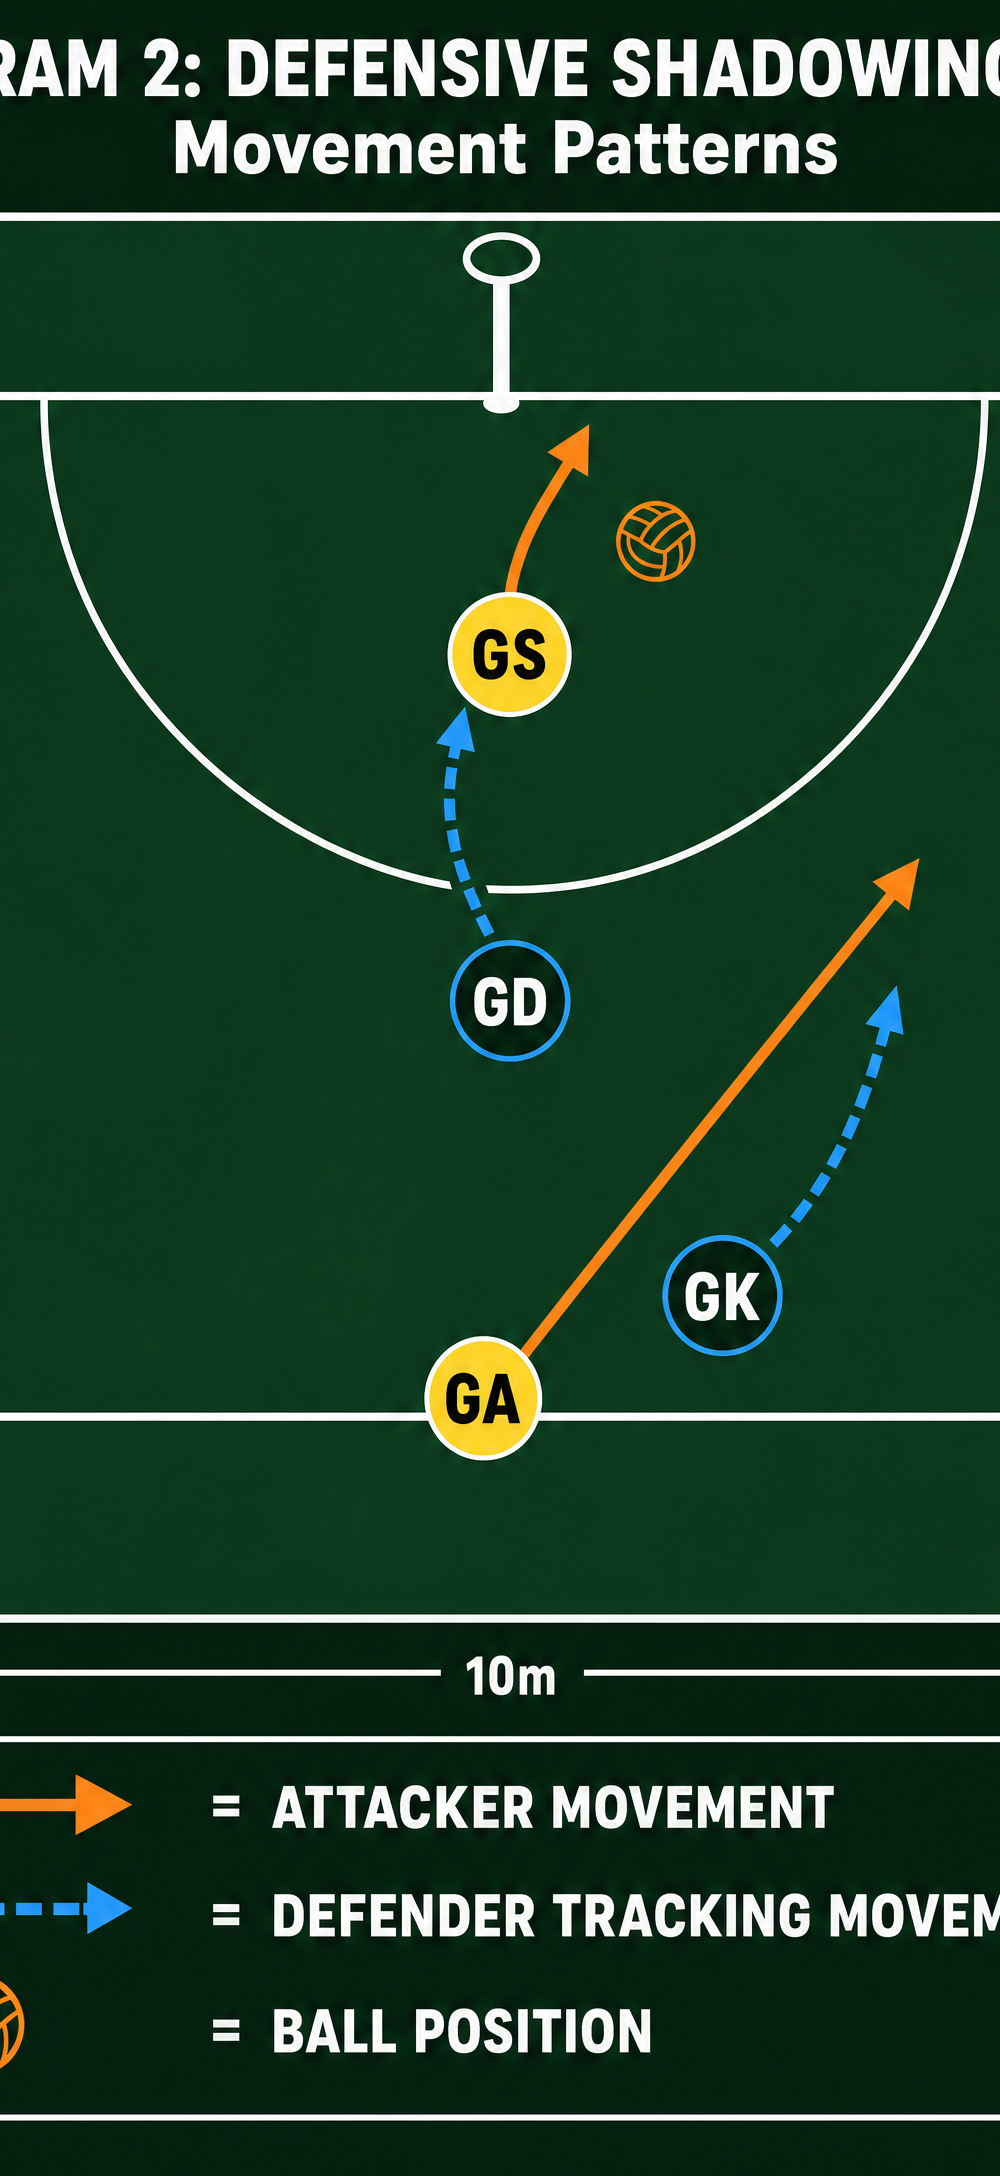
- Initial Positioning: Set up the attackers in their standard starting positions just outside the goal circle or in the goal third. The defenders match up one-on-one against their respective attackers (e.g., GK on GS, GD on GA, WD on WA).
- The Trigger: The coach or a designated feeder starts with the ball on the transverse line.
- Attacking Movement: On the whistle, the attackers initiate movement to get free and receive a pass. They must use varied leads, dodges, and changes of pace.
- Defensive Shadowing: The defenders must immediately apply tight marking pressure. They should shadow their attacker's every move, staying within an arm's length (0.9m) without making contact.
- Dictating Space: Defenders must use their body positioning to dictate where the attacker can go, actively working to push them wide or away from the goal circle.
- The Pass: The feeder attempts to pass the ball to a free attacker. Defenders must read the feeder's eyes and the attacker's body language to anticipate the pass and attempt an interception or deflection.
- Reset and Repeat: If a pass is successfully received, the attacker passes back to the feeder, and the drill resets. If the ball is intercepted or deflected, the defenders are rewarded with a point. Rotate positions every 3-4 minutes.
4. Key Coaching Points
- Footwork and Balance: Emphasize fast, small steps. Defenders should stay on the balls of their feet, keeping their center of gravity low for quick changes of direction.
- Vision: Defenders must maintain 'split vision'—keeping both the attacker and the ball (or feeder) in their peripheral view at all times.
- Body Angle: Angle the body to dictate the attacker's path. Do not stand flat-footed facing the attacker; use a slight angle to encourage them into less dangerous areas of the court.
- Distance: Maintain the crucial 0.9m distance. Getting too close risks a contact penalty, while being too far away allows the attacker an easy pass.
- Active Arms: Keep arms up and active to block passing lanes and distract the feeder, but ensure they are pulled back immediately if the attacker drives forward to avoid contact.
5. Common Mistakes
- Ball Watching: Defenders focus entirely on the ball and lose track of their attacker, allowing them to slip away into open space.
- Flat-Footed Stance: Standing flat-footed makes it impossible to react quickly to an attacker's sudden change of direction or sprint.
- Over-Committing: Lunging for an interception and missing, which takes the defender completely out of the play and leaves the attacker wide open.
- Incorrect Distance: Consistently creeping closer than 0.9m, resulting in unnecessary contact penalties, or dropping too far back, negating the pressure.
6. Variations & Progressions
- Progression 1 (Overload): Introduce an extra attacker (e.g., 4 Attackers vs 3 Defenders) to force the defenders to communicate constantly and switch marking assignments dynamically.
- Progression 2 (Restricted Space): Confine the drill to just the goal circle and a small area outside it. This reduces the space attackers have to work with, intensifying the need for precise defensive footwork.
- Variation 1 (Conditioned Passes): Specify that the feeder can only use certain types of passes (e.g., bounce passes or high lobs) to challenge the defenders to adjust their interception techniques.
7. Age Adaptations
- Under 10s: Focus purely on the concept of staying close to their player (shadowing) without worrying too much about the ball. Keep the area small and movements simple.
- Under 12s - Under 14s: Introduce the 0.9m distance rule strictly. Start emphasizing split vision and body angles to dictate movement.
- Under 16s - Open: Run the drill at match intensity. Demand high-level communication, anticipation, and the ability to seamlessly switch opponents if an attacker sets a screen. Add complex attacking patterns to challenge the defense.