Netball
Dynamic Dodging & Leading Drill: Centre-Court to Circle Edge
A progressive attacking drill that gives coaches a repeatable method for teaching explosive dodges, perfectly timed leads, and firm feeds from the centre third to the goal circle.
What you need
3 netballs, 8 flat cones, 2 sets of bibs, Stopwatch, Regulation netball court (30.5m x 15.25m)
Overview
This Dynamic Dodging & Leading Drill teaches attackers to create a clean passing lane before they ask for the ball. It is built for the moment that decides many centre passes: a Wing Attack must first move a defender, then explode into space; the ball carrier must recognise the lead and release on time; the Goal Attack must repeat the same principle at the circle edge. The drill is highly transferable to match play because it gives the Centre (C), Wing Attack (WA), Goal Attack (GA), and Goal Shooter (GS) a clear, connected sequence rather than isolated running patterns.
Coach's outcome: By the end of the drill, the receiving player should be able to make their defender commit in one direction, drive sharply into the opposite space, and receive the pass while moving forward—not standing and waiting.
| Session snapshot | Coach specification |
|---|---|
| Main objective | Create separation through a sharp dodge, then time a lead to the ball. |
| Recommended group | 8 players: C (1), WA (2), GA (3), GS (4), WD (5), GD (6), plus two rotating players. |
| Duration | 18 minutes: 3-minute explanation, 6-minute technical block, 6-minute contested block, 3-minute competitive finish. |
| Intensity | Moderate to high; aim for 20–25 seconds of work followed by a quick reset. |
| Success measure | The WA receives 4 of 5 passes on the move with at least 1.5m of separation from WD. |
Setup
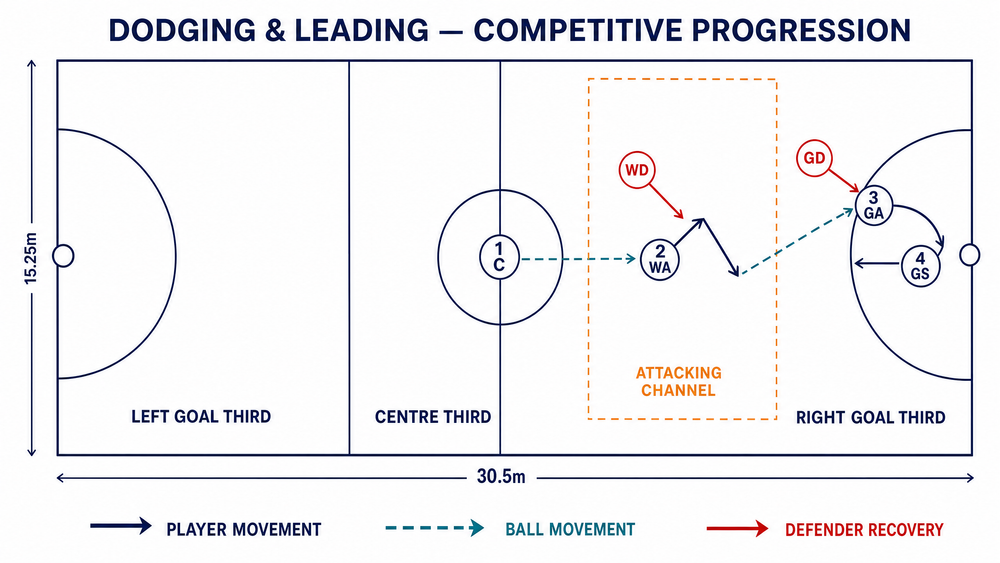
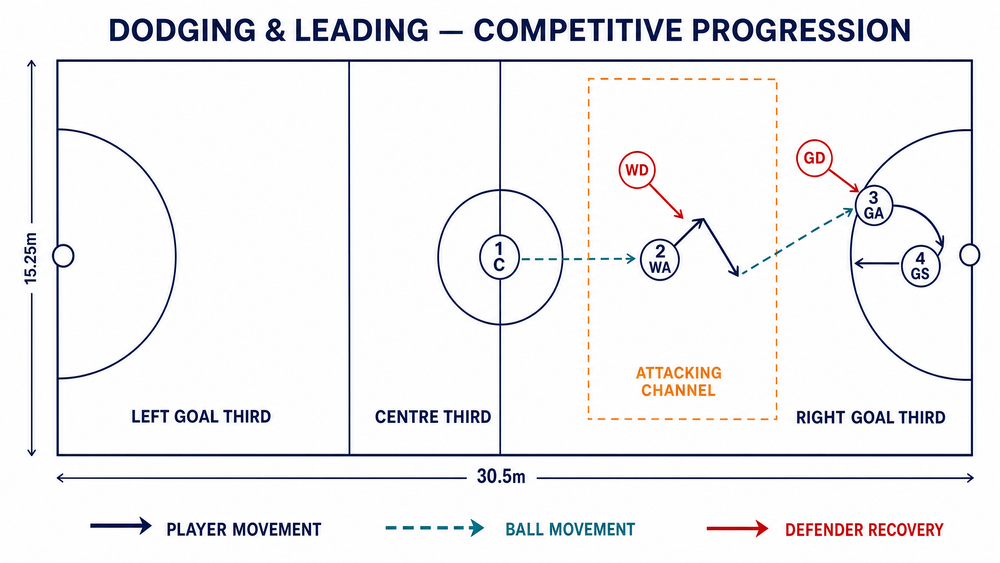
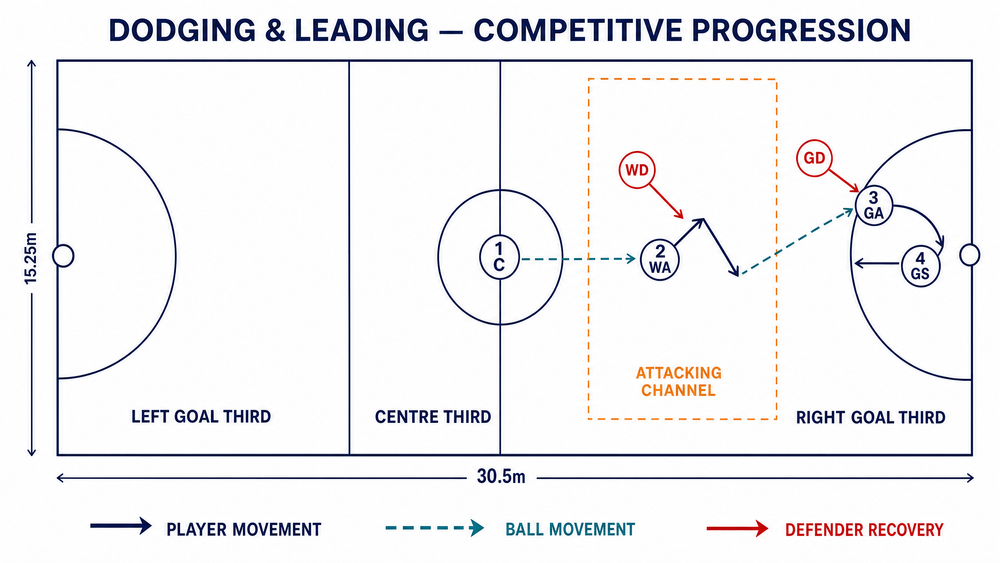
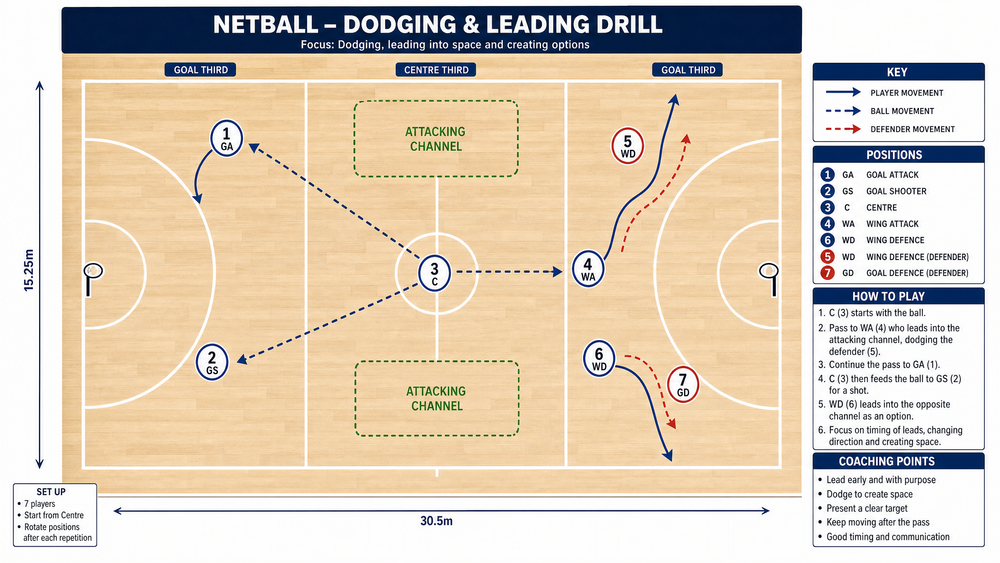
Mark the working area from the centre circle to one goal circle, giving you a 20.34m x 15.25m working rectangle. Place four flat cones to form an attacking channel that is 4m wide and 8m long in the outside half of the centre third. The channel should begin 2m past the centre circle and finish 2m before the transverse line. This gives the WA a visual target for the first lead without teaching them to run on a fixed rail.
Position C (1) with a ball on the centre-circle edge nearest the attacking end. Position WA (2) 2m inside the sideline and 2m behind the attacking transverse line, with WD (5) goal-side and half a step behind. Place GA (3) 1m outside the top of the goal circle with GD (6) in tight marking position. GS (4) begins in the far-side front space of the circle. The two spare players queue behind C and WA, ready to rotate in after each attempt. Keep two further balls with the coach at the centre circle so the next repetition starts immediately.
Step-by-Step Instructions
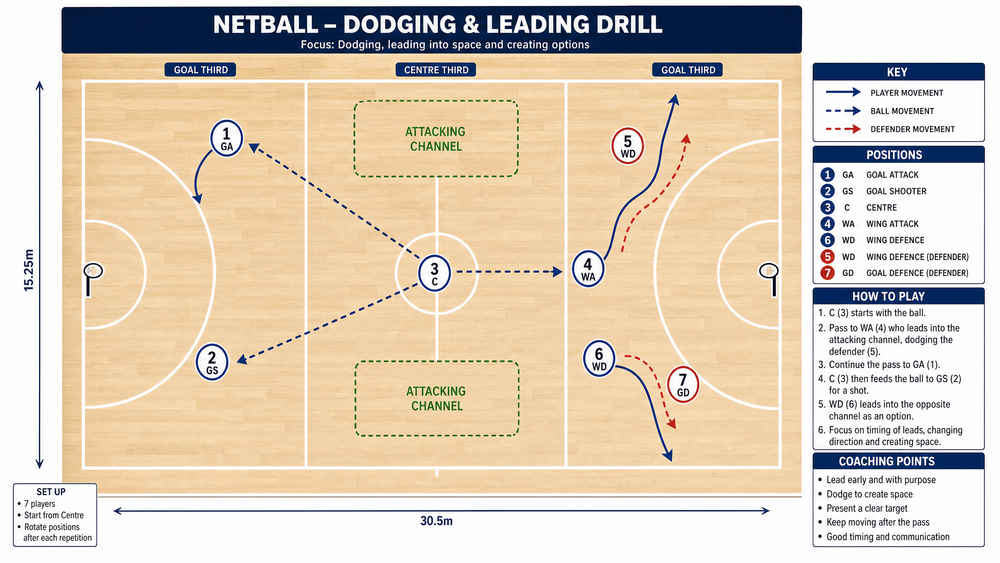
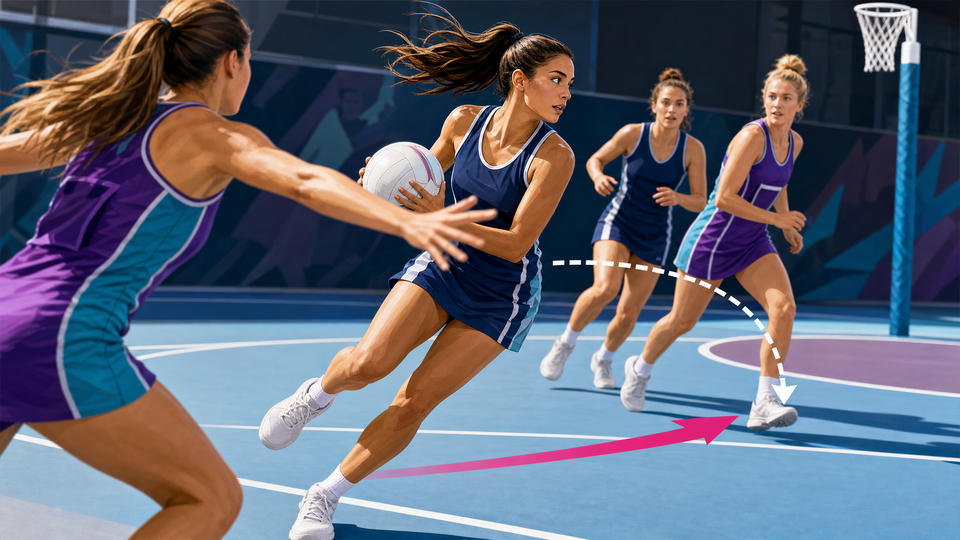
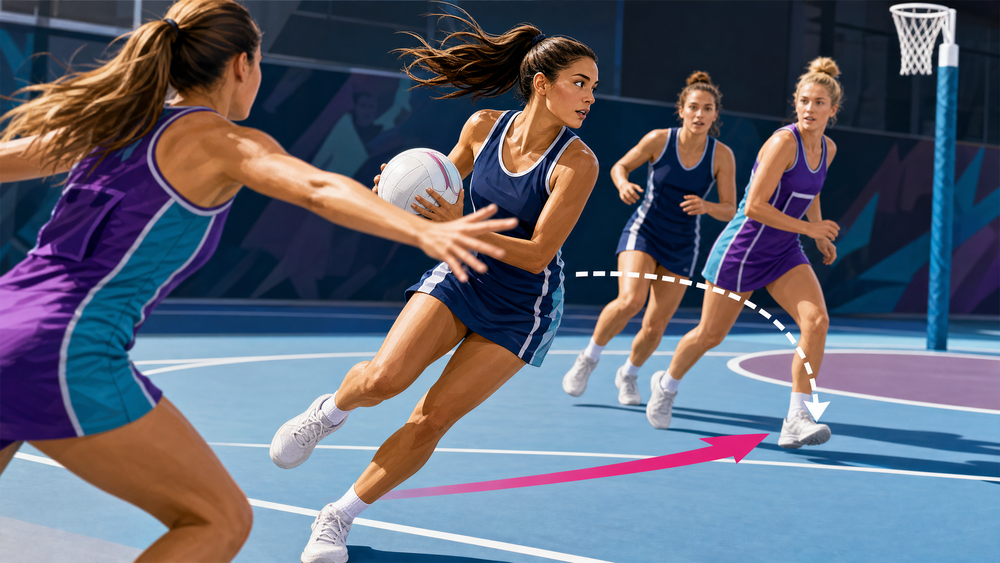
Show the movement before you demand speed. Bring WA and WD into the channel. Demonstrate a short decoy step of 1–2m toward the sideline, followed by a low, explosive push off the outside foot and a 4–6m drive back into the open channel. Use the cue: "Move them—go past them—show hands."
Start the first lead. On the coach's call of "Go," WA takes the decoy step. WD shadows at 70 percent effort in the first two rounds. C holds the ball, stays balanced, and watches the defender's hips rather than staring at WA's hands.
Deliver the first pass. When WA has created at least 1.5m of separation, C drives a firm chest or shoulder pass to the space in front of WA's outside shoulder. The ball must arrive within the receiver's next stride. C releases within three seconds and immediately moves 2–3m to support the return option.
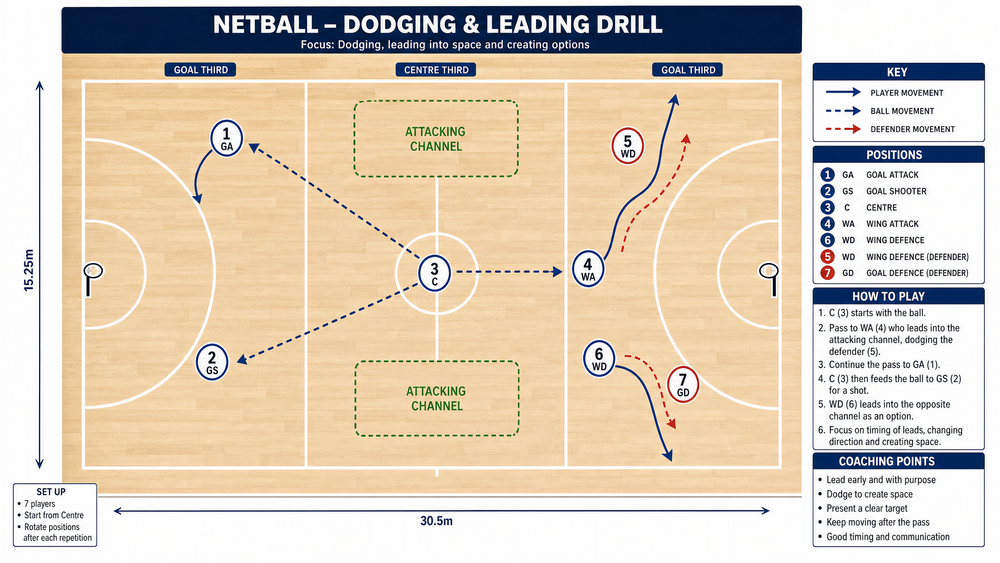
Connect the circle lead. As WA catches, GA uses the same principle against GD: a short move away from the intended space, then an explosive lead to the circle edge. GA should arrive on the 4.9m circle line rather than running deep into it. WA pivots, takes a clear second look, and feeds GA with a flat pass.
Finish the attack. On GA's catch, GS makes a front cut across the face of the post. GA may feed GS for a shot or, if GD has denied the lane, reset through C or WA. Give the attacking unit a maximum of eight seconds from C's first pass to the shot.
Reset and rotate with purpose. Rotate C to the WA queue, WA to GA, GA to GS, GS to the defender queue, and defenders into the attacking line after two repetitions. This means every player experiences both the physical demand of the dodge and the visual challenge of defending it.
Key Coaching Points
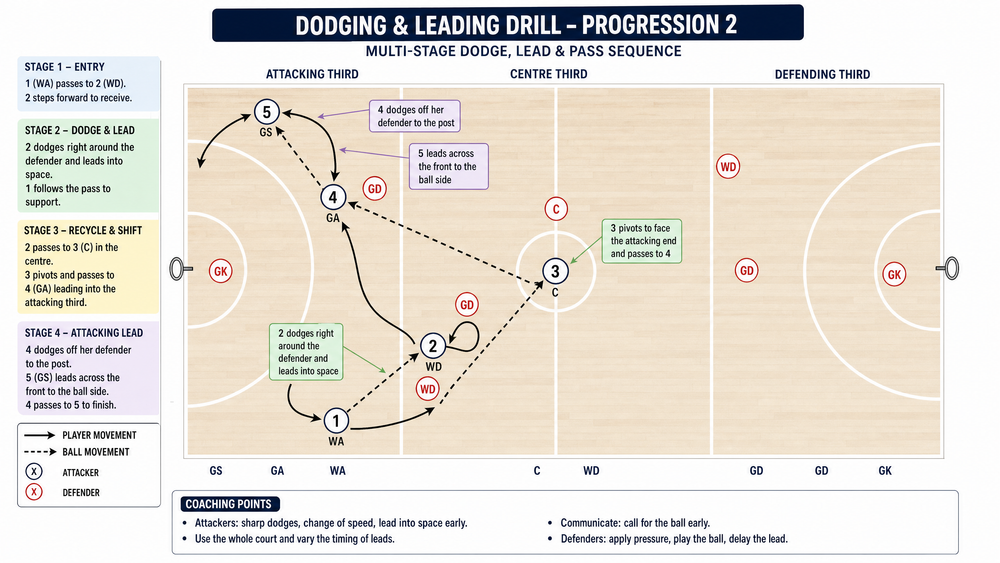
Sell the decoy. A lazy side step does not move a defender. Players need eyes, shoulders, and hips to indicate the first direction before they change it. Ask, "Did your defender have to react?"
Drop before driving. The best dodge begins with a small lowering of the hips. The receiver should load the outside leg, push hard, and take the first two acceleration steps at full intent. Avoid upright, bouncing footwork.
Lead into the ball's space. The receiver does not run to where the ball is now; they lead into the lane the thrower can see and hit. Hands should be shown early and presented as a clear target at chest height.
Pass to the next step. Teach C and WA to release the ball in front of the runner. A pass directly at the body stops the player and gives WD or GD time to recover.
Hold the circle edge. GA should not crowd GS. A disciplined lead to the edge creates the passing angle and leaves GS space to cut. The circle is 4.9m from the goal-line centre, so use that arc as a tactical line, not a place to stand.1
Use a second option. When the first lead is denied, C must keep the ball protected, pivot safely, and find the support player. Praise the reset if it preserves possession; do not reward a forced pass.
Common Mistakes
| Common error | What it usually means | Immediate coach correction |
|---|---|---|
| Curved "banana" run | The player is trying to outrun the defender rather than move them. | Rehearse one sharp decoy and a straight 4m drive through the channel. |
| Dodge happens too soon | The WA is moving before C is balanced to throw. | Have C say "ready" before WA initiates; then remove the cue as timing improves. |
| Receiver waits for the pass | The player has separated but stopped. | Tell the thrower to pass 1m ahead of the runner and require a catch while moving. |
| Floating, high feed | The passer lacks confidence or has not squared their shoulders. | Freeze the feeder, reset the landing foot, and demand a flat pass through the defender's reach. |
| GA runs into GS's space | The shooters are chasing the same line. | Give GA the circle edge and GS the front cut; use cones for two repetitions if necessary. |
Variations & Progressions
1. Guided technical version
Remove WD and GD for the first four minutes. WA and GA perform the exact movement pattern around cones, while C and WA focus on pass timing.
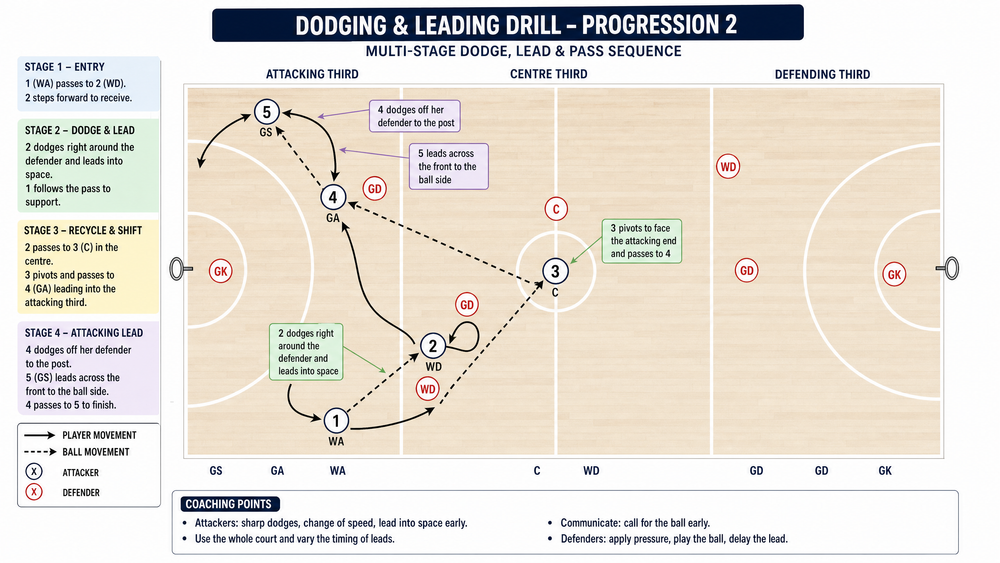
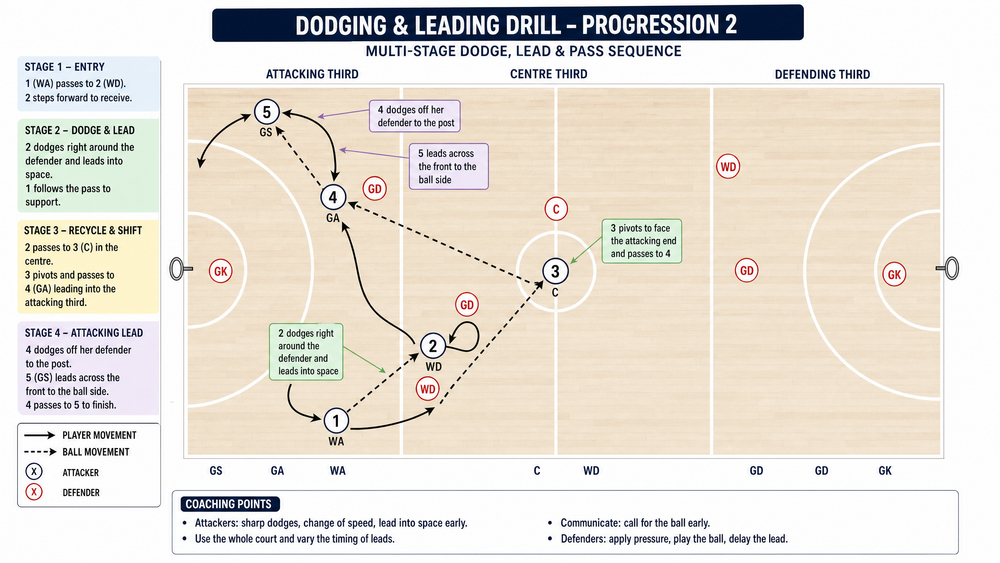
2. Live one-on-one pressure
Make WD and GD fully live. Award the defenders one point for a deflection or an intercepted pass; award attackers one point for a clean catch in the channel and another for a shot. Play first to five, then swap defensive pairs. This ensures the attackers stay accountable for timing rather than merely completing a pre-planned run.
3. Competitive decision-making progression
Allow WD to front WA or play side-on, and allow GD to leave GA to contest the WA feed. C must now decide whether to hit WA, use the return option, or skip a pass to GA. Remove the channel cones after three successful sequences so players learn to identify space rather than rely on markers.
Age Adaptations
| Age group | Adaptation | Coaching emphasis |
|---|---|---|
| Under 8 | Use half pace, no defenders, and a 3m cone channel. Let players catch, stop, and reset before the next pass. | Sharp change of direction and safe landing. |
| Under 10–12 | Add passive WD and GD. Reduce the first lead to 3–4m and allow an extra second for the finish. | Showing hands and passing in front of the runner. |
| Under 14–16 | Use full one-on-one defence and the eight-second attack-to-shot target. | Defender manipulation, speed of release, and circle timing. |
| Open | Add a floating Centre Defence or Goal Keeper as an interceptor and score each possession competitively. | Reading defensive shape and selecting the best option under pressure. |
References