Netball Set Play: The WD to GA Transition
A detailed guide for netball coaches on how to execute a fast and effective transition play from a Wing Defence intercept to a Goal Attack scoring opportunity.
Equipment Needed
1. Overview
The WD to GA Transition Play is a fundamental set piece designed to rapidly convert a defensive turnover in the centre third into a high-percentage scoring opportunity. This play focuses on speed, precise passing, and intelligent off-the-ball movement to exploit the space created immediately following an interception. It's most effective when the opposition is caught pressing high, leaving their attacking players out of position to defend the counter-attack. By executing this play, your team can punish defensive errors and build momentum through swift, decisive attacking phases.
2. Setup

Equipment
- 1 Netball
- Bibs for two teams (e.g., 7 blue, 7 red)
- Cones to mark starting positions (optional)
Court Setup
- Full standard netball court (30.5m x 15.25m).
- Players should be set up as if in a live game scenario, with the play initiating from a simulated opposition pass that is intercepted by your Wing Defence (WD).
Player Positions
- Attacking Team (Blue Bibs): WD, C, WA, GA, GS
- Defending Team (Red Bibs): Positioned as direct opponents (e.g., Red WA marking your WD).
- Starting Point: The play begins the moment the WD intercepts a pass intended for the opposing WA in the centre third.
3. Step-by-Step Instructions

This set play is broken down into three distinct phases, from the initial turnover to the final shot.
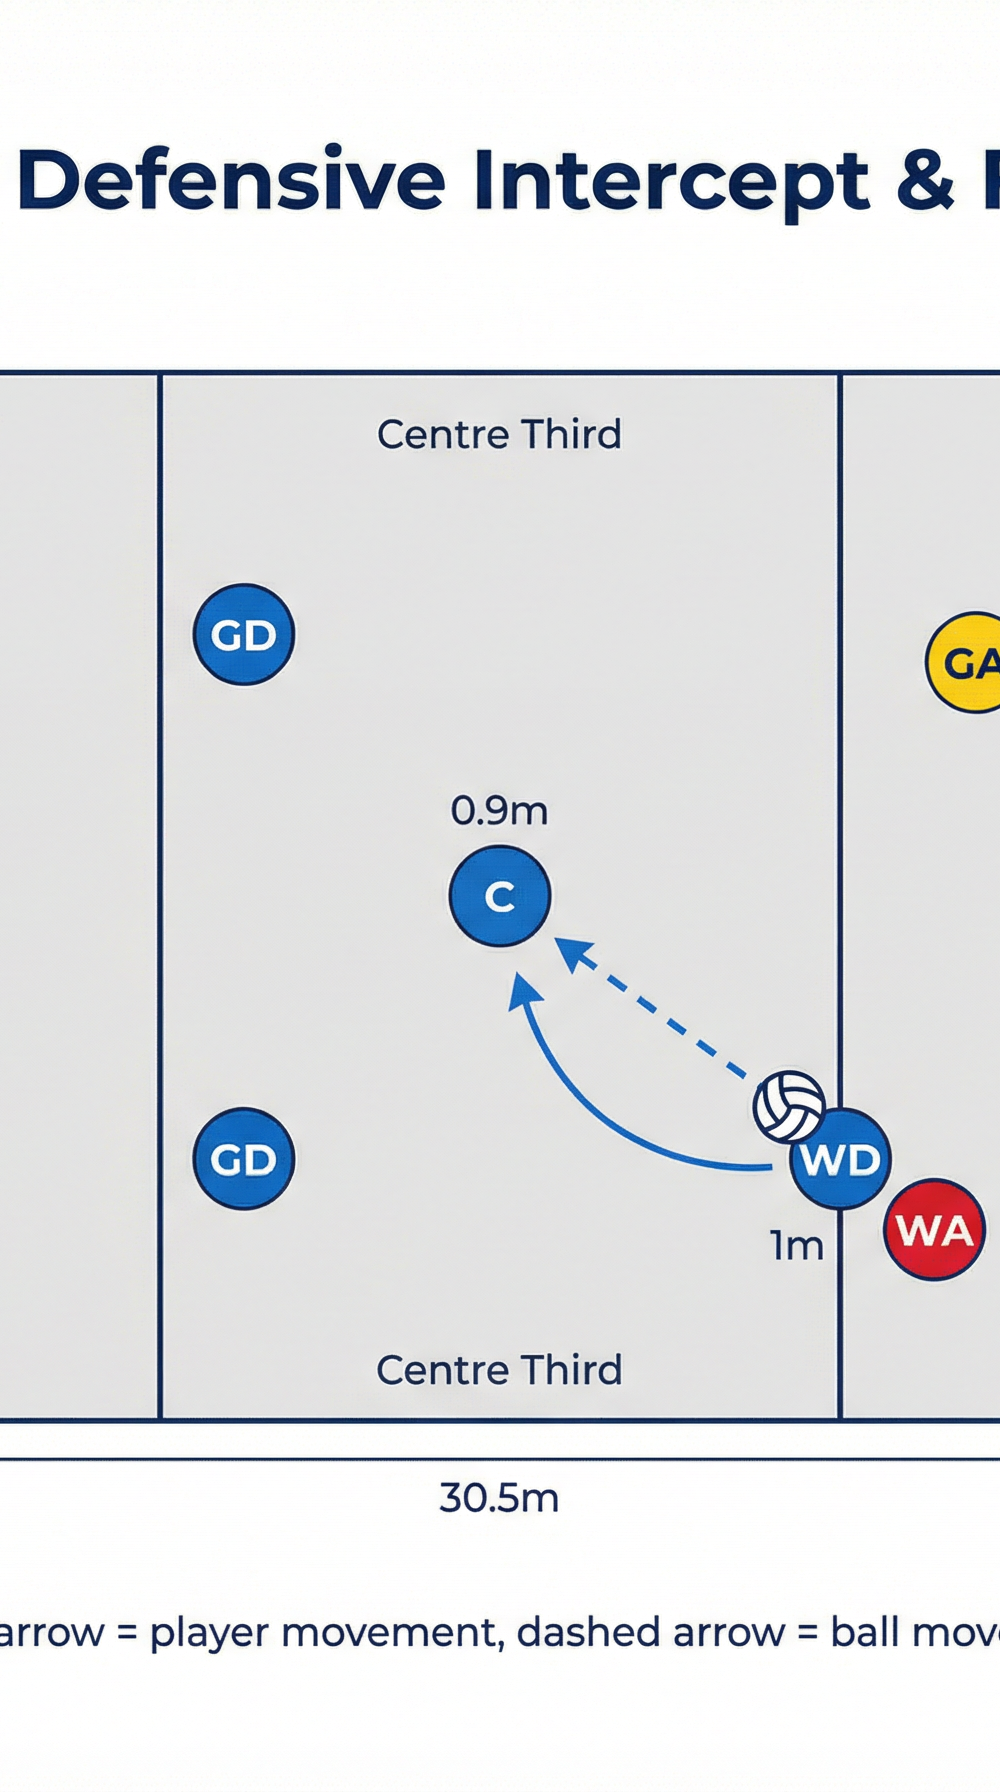
Phase 1: The Intercept and First Pass

- The Intercept: The WD, positioned on the defensive side of the centre third, reads the opponent's pass to their WA. They make a decisive move to intercept the ball cleanly.
- Secure and Turn: Upon securing possession, the WD's first priority is to land with good balance and pivot immediately towards their attacking goal end. This must be done in under one second to initiate a fast break.
- First Pass Option: The Centre (C) makes a sharp, immediate drive into space, presenting a clear and safe passing option. The WD delivers a quick, flat pass to the C, ideally before the opposition can reset their defensive structure. The pass should be aimed in front of the C to allow them to run onto the ball.
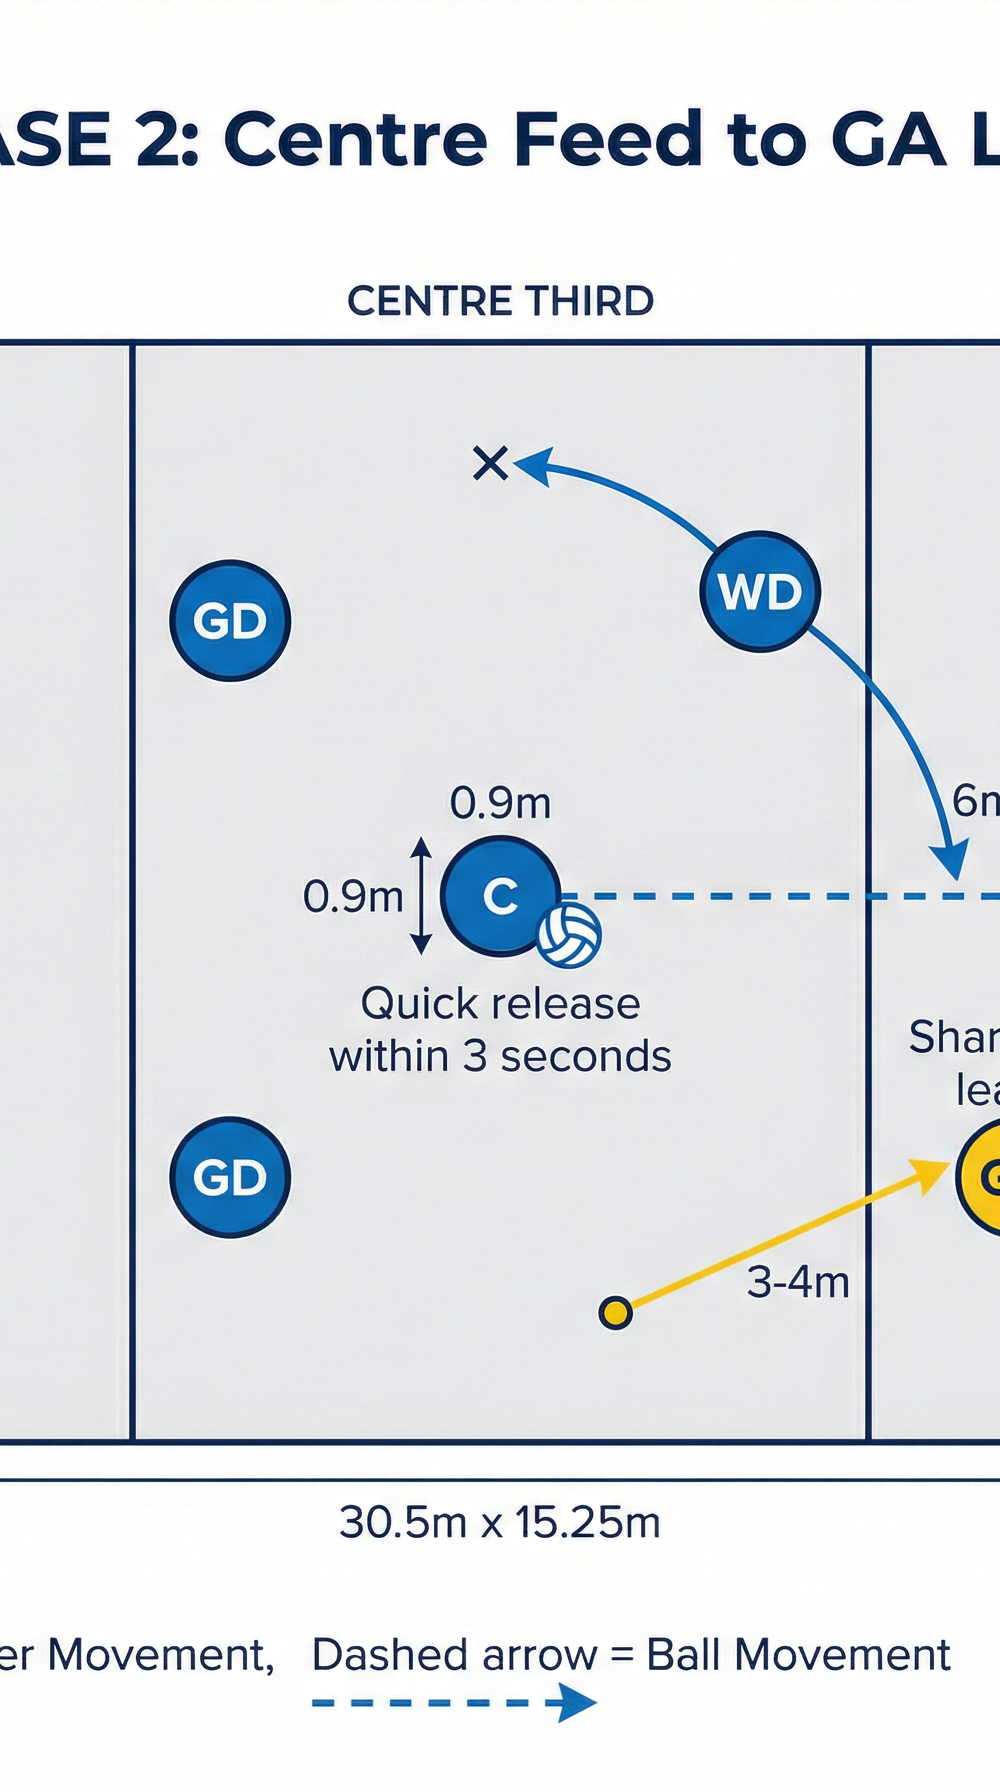
Phase 2: Centre Feed to GA Lead

- Centre Receives and Transitions: The C receives the ball at or near the centre circle. Their vision should be immediately up and looking towards the attacking third.
- GA's Lead: As the C receives the ball, the Goal Attack (GA) initiates a sharp, decisive lead. This should be a diagonal run from the wing towards the centre of the court, aiming for the space just beyond the transverse line. The timing is critical; the GA must move as the ball travels to the C.
- The Feed: The C releases a second pass to the GA, hitting them in the space created by their lead. This pass must be weighted correctly to allow the GA to receive the ball on the move, at speed, and in a strong position to attack the goal circle.
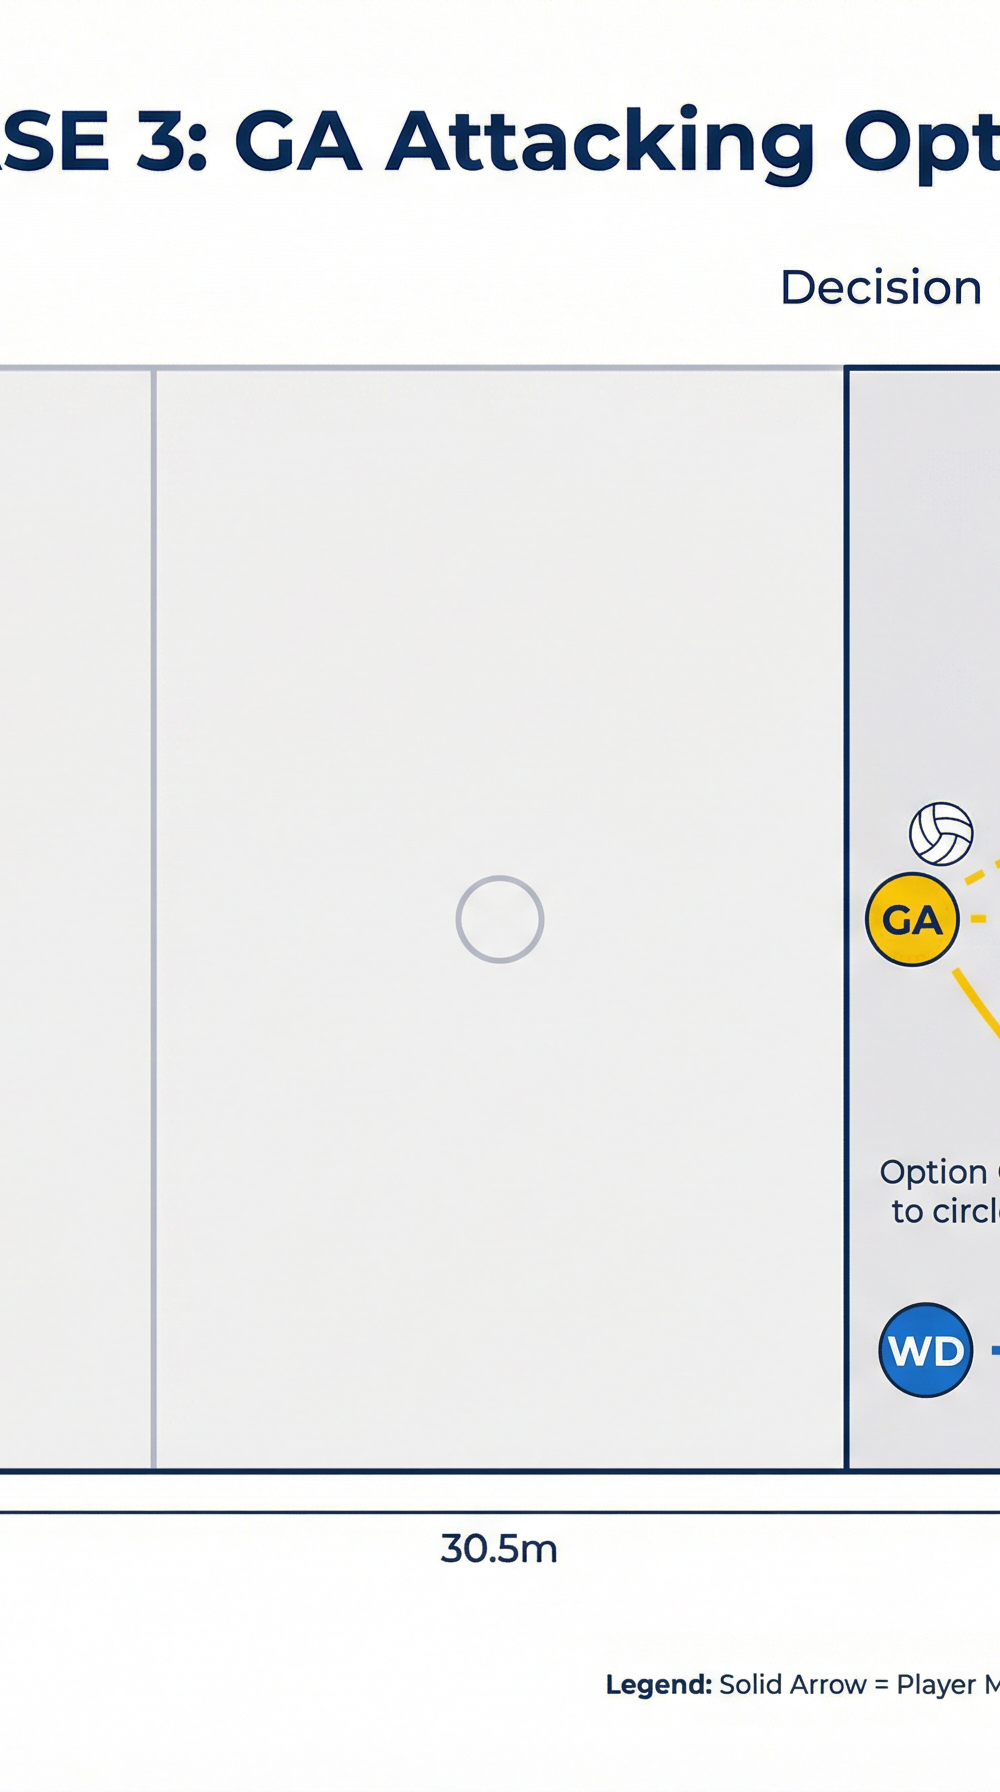
Phase 3: Attacking Options in the Goal Third

- GA Receives and Assesses: The GA secures the ball in the attacking third. They now have several options based on the defensive setup.
- Option A: The Shot: If the GA receives the ball in a comfortable shooting position and the Goal Keeper (GK) is out of position, they should take the immediate shot.
- Option B: Feed the GS: If the Goal Shooter (GS) has established a strong hold close to the post, the GA should execute a quick feed into the GS for a higher-percentage shot.
- Option C: Drive and Dish: If the initial options aren't on, the GA can use their momentum to drive towards the edge of the goal circle, drawing the defender and creating a passing lane to the GS or resetting for another attempt.
4. Key Coaching Points
- Speed of Transition: Emphasize the '3-second rule' from interception to the ball entering the attacking third. This is a counter-attack, and speed is paramount.
- Quality of Pass: Focus on flat, fast, and accurate passes. The ball should be delivered to the player's advantage, leading them into space.
- GA's Timing: The GA's lead must be timed perfectly. Too early, and they will be standing still; too late, and the defensive pressure will reset. Drill the visual cue: the GA drives as the ball is in the air to the C.
- Decision Making in the Circle: The GA must make a quick decision upon receiving the ball: shoot, pass, or drive. Encourage them to read the GK's position and the space available.
- Support Play: The WA and WD must continue to move and offer support as the play develops, providing reset options if the initial attack breaks down.
- Communication: Loud, clear calls (e.g., 'Centre!', 'GA!') are essential to ensure all players are aware of the intended movement and pass.
5. Common Mistakes
- Slow First Pass: The WD holds onto the ball for too long after the intercept, allowing the defence to recover. Correction: Drill the 'catch, land, pivot, pass' sequence to be almost one fluid motion.
- Loopy Passes: Passes are too high and slow, giving defenders time to intercept. Correction: Use drills that focus on powerful chest passes and bounce passes over short-to-medium distances.
- GA's Predictable Lead: The GA runs in a straight line, making them easy to mark. Correction: Encourage a change of pace and a sharp, angled drive to lose the defender.
- Crowding the Space: The WA runs into the same space as the GA, causing congestion. Correction: Define clear running channels and ensure the WA holds their width to draw their defender away.
- Forcing the Final Pass: The GA tries to force a pass to the GS when it isn't a viable option. Correction: Implement drills that reward good decision-making, such as awarding bonus points for a successful reset pass (Option C) that leads to a goal.
6. Variations & Progressions
Progressions (Making it Harder)
- Full Defensive Pressure: Start with passive defence and progress to a fully live 7v7 scenario where defenders are actively trying to intercept every pass.
- Time Constraint: Challenge the team to complete the play from WD intercept to a shot on goal in under 8 seconds. Use a stopwatch for immediate feedback.
Variations (Changing the Play)
- WD to WA Option: If the C is heavily marked, the WD can look for a longer pass to the WA, who makes a similar lead into the attacking third. This requires a more advanced passing skill from the WD.
- Give-and-Go with Centre: The C can pass to the GA and immediately re-offer for a 'one-two' or 'give-and-go' pass at the edge of the circle, creating a different angle of attack.
7. Age Adaptations

- Under-12: Focus only on Phase 1 and 2. Simplify the goal to transitioning the ball from the WD to the GA successfully in the attacking third. Use cones for players to run towards. Don't worry about the final shot initially.
- Under-14: Introduce the full three-phase play but with passive defenders who can only shadow and not intercept. This allows attackers to focus on timing and movement patterns without the pressure of losing the ball.
- Under-16/Open: Run the play at full match intensity. Introduce the variations and challenge players to make the right decisions under fatigue and pressure. Analyze the success rate and time taken for each transition.