Pressure-Cooker Free Throw Routine: Building Late-Game Consistency
Develop unbreakable free throw habits under game-like pressure, teaching players to isolate their routine and block out external distractions.
Equipment Needed
1. Overview
Free throws are often practiced in a vacuum—players casually shooting around after practice with zero stakes and zero pressure. However, in a real game, free throws occur when players are fatigued, the crowd is loud, and the game is on the line. The Pressure-Cooker Free Throw Routine bridges this gap. It forces players to execute their exact pre-shot routine under simulated game conditions, complete with physical fatigue, mental distractions, and structured rebounding rotations.
This drill achieves three primary objectives:
- It ingrains a repeatable, automatic pre-shot routine.
- It conditions players to shoot accurately while physically fatigued.
- It teaches the essential post-shot rebounding and transition habits that are often neglected during free throw practice.
2. Setup
To run this drill effectively, you need a standard FIBA regulation half-court (28m x 15m). The setup requires minimal equipment but demands high focus from all participants.
Equipment Needed:
- 1 Basketball
- 1 Whistle
- Optional: A stopwatch or shot clock
Player Positions:
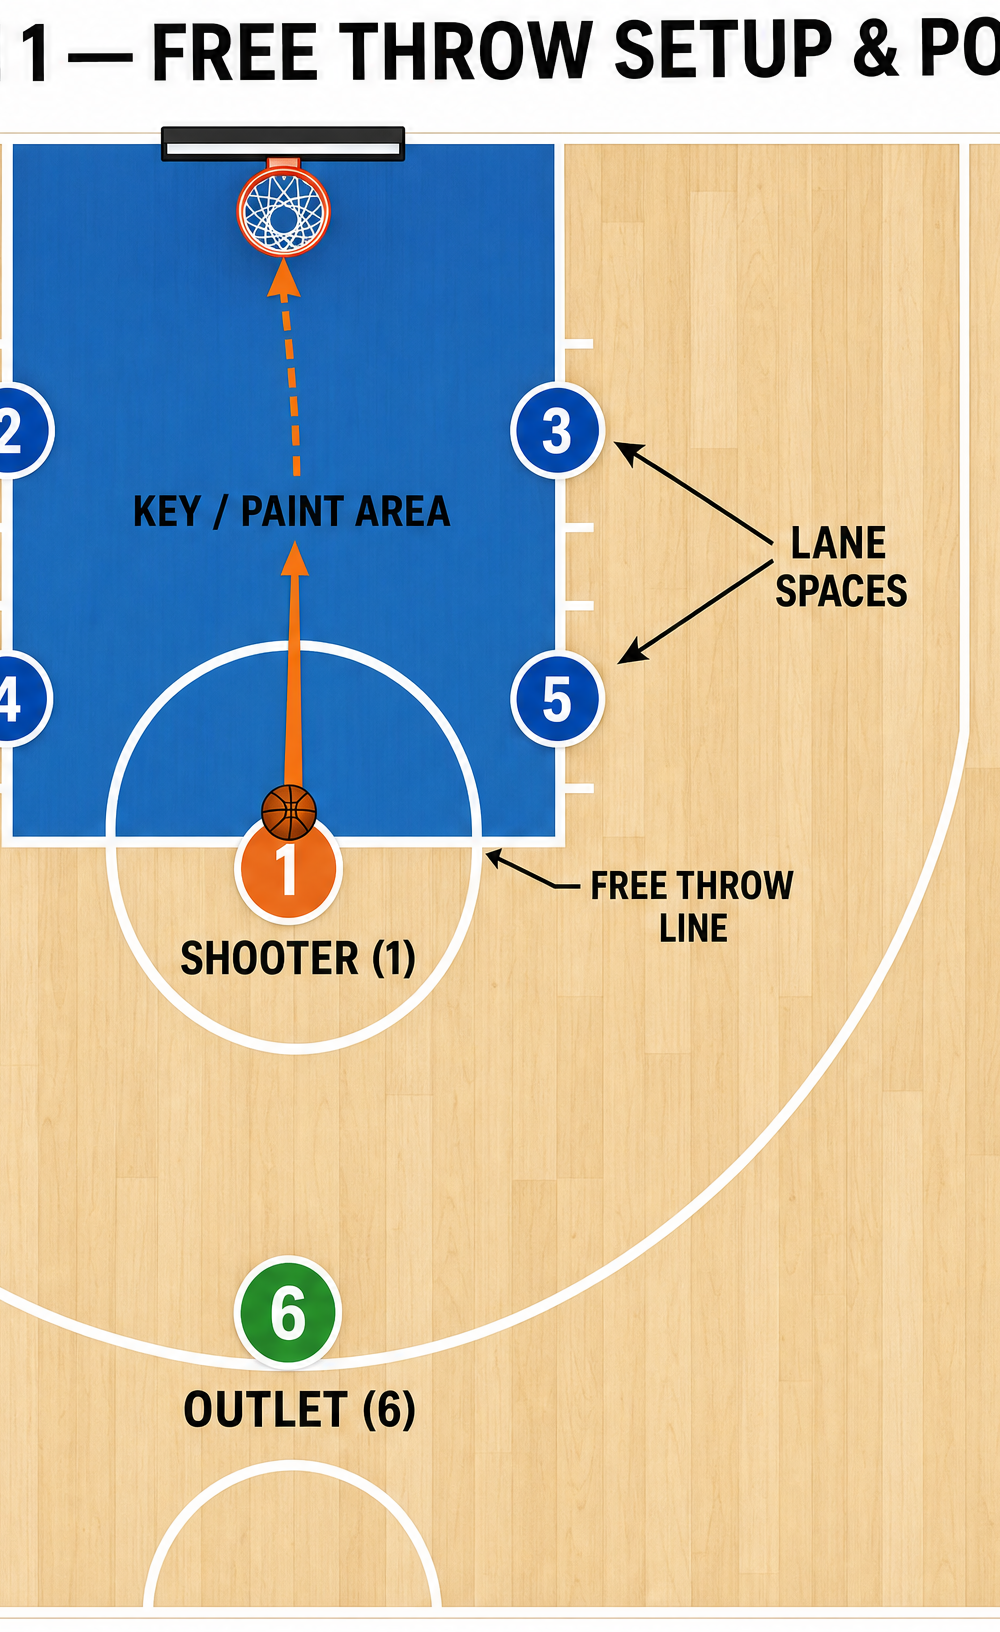
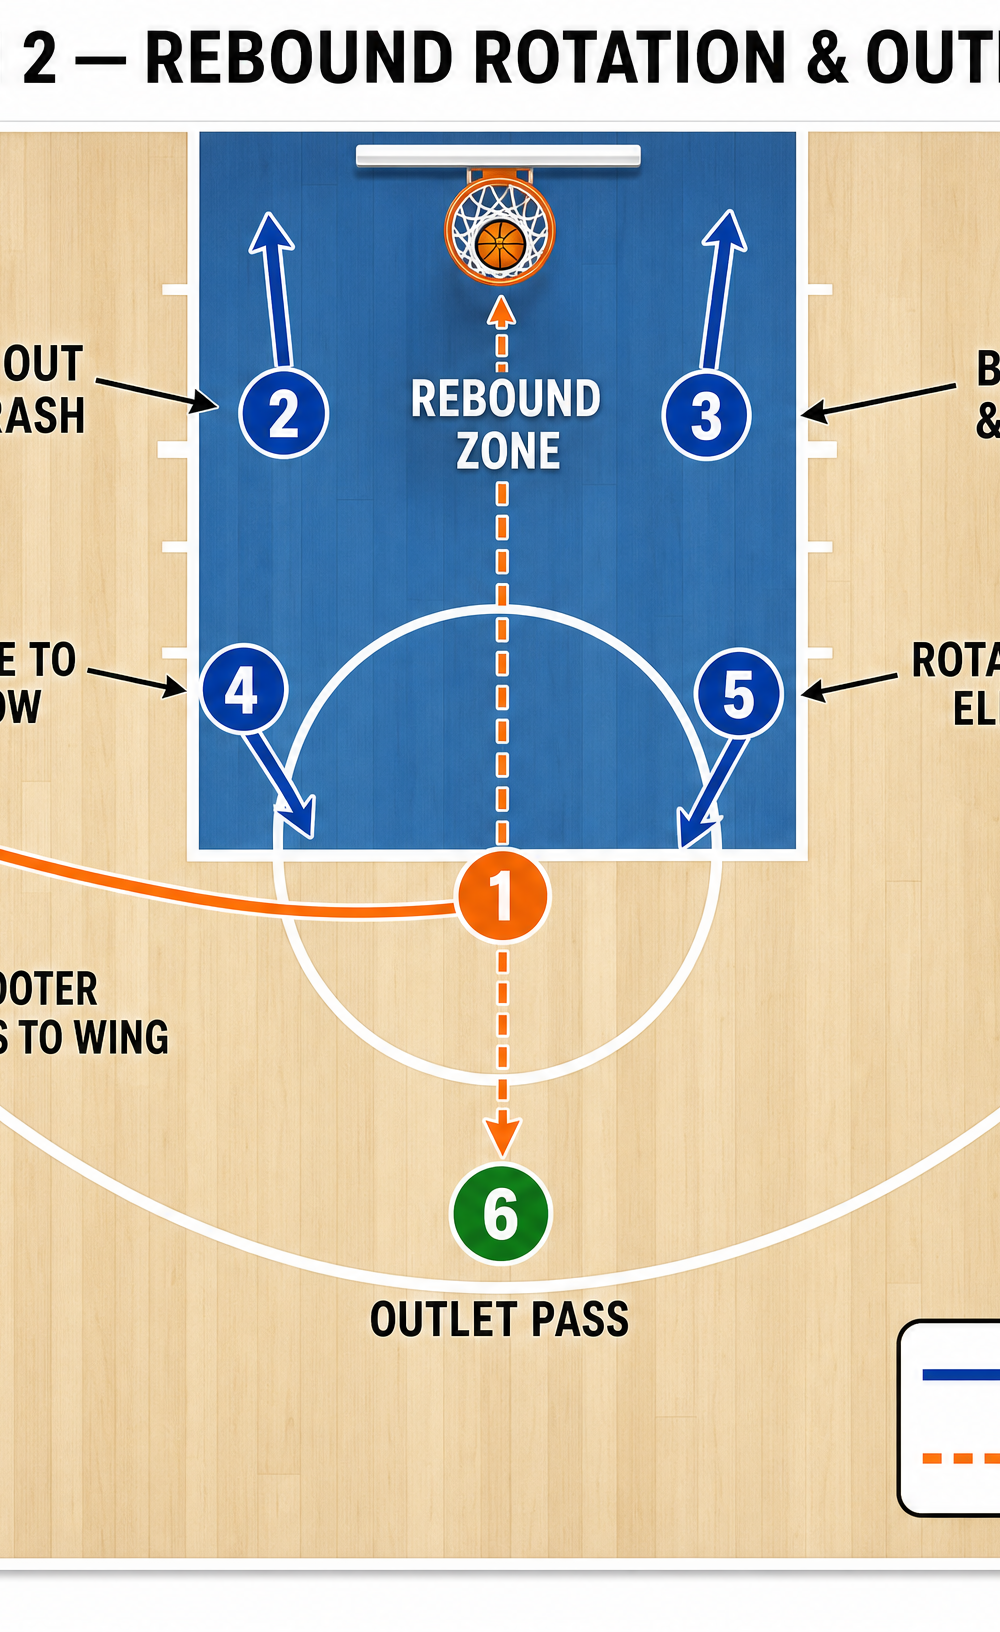
- Player 1 (Shooter): Positioned squarely on the free throw line (4.6m from the backboard).
- Players 2 & 3 (Low Rebounders): Positioned in the first lane spaces nearest the basket on both sides of the 5.8m wide key.
- Players 4 & 5 (High Rebounders): Positioned in the second lane spaces.
- Player 6 (Outlet/Point Guard): Positioned at the top of the key, behind the three-point line.
3. Step-by-Step Instructions
Execution must be crisp. Do not allow players to rush the process.
- The Approach: Player 1 steps to the free throw line. The coach bounces the ball to Player 1, simulating the referee's pass.
- The Routine: Player 1 executes their specific pre-shot routine (e.g., three dribbles, deep breath, spin the ball). They have exactly 10 seconds to shoot.
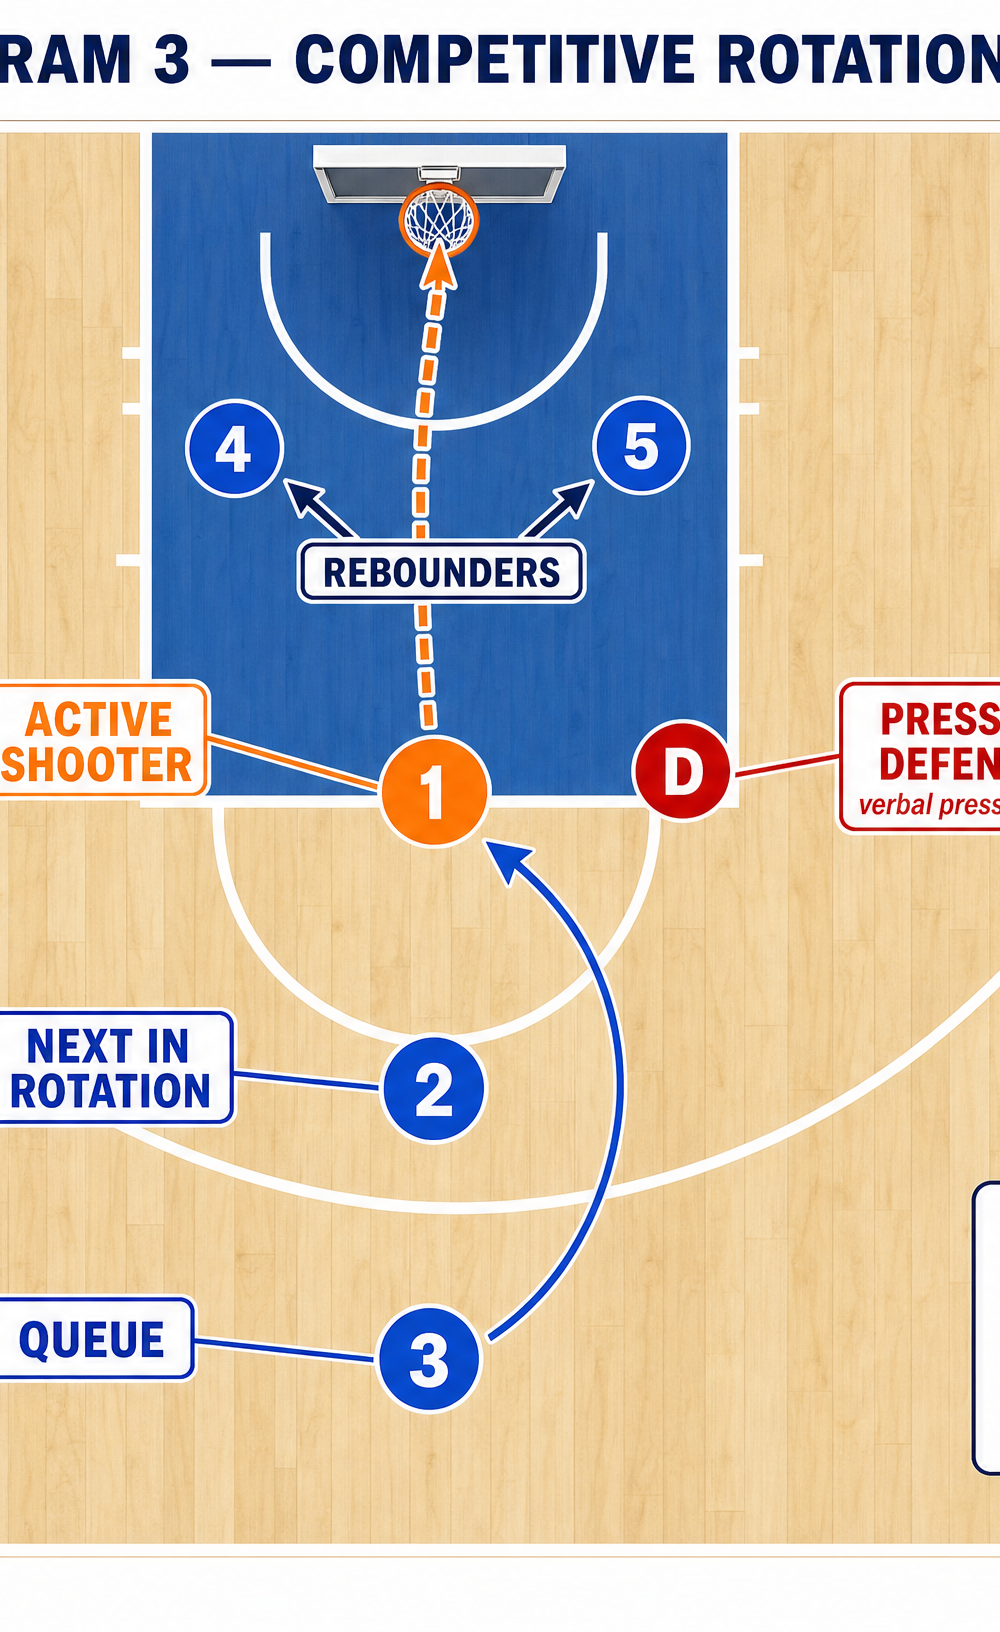
- The Shot & Rotation: Player 1 shoots the free throw. Upon release, Players 2, 3, 4, and 5 must immediately execute proper box-out techniques.
- The Rebound & Outlet: If the shot is missed, the rebounders secure the ball and immediately look for Player 6 at the top of the key for the outlet pass. If the shot is made, the ball is quickly retrieved and passed to Player 6.
- The Transition: After the shot, Player 1 must immediately clear out to the wing, simulating getting back on defense. The rebounders rotate positions, and the next shooter steps up.
4. Key Coaching Points
- Routine Isolation: Demand that every player uses the exact same routine for every single shot. The routine is the anchor that calms the mind.
- Deep Breathing: Instruct players to take a deep, diaphragmatic breath before their first dribble. This lowers the heart rate.
- Target Focus: Players should pick a specific, tiny target (e.g., the front of the rim or a specific net loop) rather than aiming at the whole basket.
- Follow Through: The shooter must hold their follow-through (the "gooseneck") until the ball hits the rim or goes through the net.
- Live Rebounding: Do not let the players on the lane lines stand up straight. They must be in an athletic stance, ready to fight for the rebound the moment the ball leaves the shooter's hands.
5. Common Mistakes
- Rushing the Shot: Players often speed up their routine when they feel pressure. Force them to slow down and use their full 10 seconds.
- Inconsistent Footwork: Shooters must align their dominant foot with the center of the rim every time. Wandering feet lead to wandering shots.
- Dropping the Follow-Through: Pulling the shooting hand back too early often results in short shots.
- Lazy Rebounding: Players in the lane spaces treating the drill as a break. Remind them that a missed free throw is a live ball.
6. Variations & Progressions
To keep the drill challenging and engaging, introduce the following variations:
- The Distraction Drill: Have the players on the lane lines make noise, wave their hands (without crossing the plane), and talk to the shooter. This simulates a hostile away crowd.
- Fatigue Shooting: Before stepping to the line, the shooter must complete a full-court sprint or 10 burpees. This forces them to execute their routine with heavy legs and a high heart rate.
- Consecutive Makes: The team cannot rotate until the current shooter makes two free throws in a row.
7. Age Adaptations
- Under 10s: Focus purely on the mechanics of the shot and establishing a very simple routine (e.g., one dribble, shoot). Move the line closer if necessary.
- Under 14s: Introduce the rebounding rotations and emphasize holding the follow-through. Begin adding mild fatigue elements.
- Under 16s & Open: Run the full "Pressure-Cooker" version with intense physical fatigue, loud verbal distractions, and strict penalties for missing consecutive shots.