

Netball
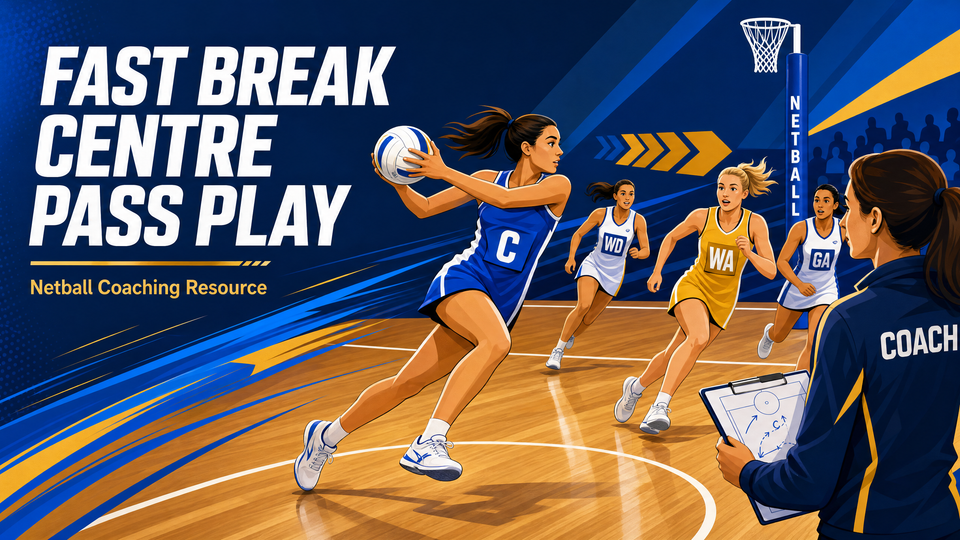
Fast Break Centre Pass Play
Master the fast break centre pass to bypass mid-court defence and transition to the shooting circle in under four seconds.
What you need
1 Netball, Full court, Bibs, Cones
Fast Break Centre Pass Play: The Ultimate Guide
Welcome to the ultimate guide on executing the Fast Break Centre Pass Play. This resource is designed to help coaches at all levels implement a high-tempo, aggressive centre pass strategy that catches the opposition off-guard and transitions the ball from the centre third to the shooting circle in under four seconds.
1. Overview
The Fast Break Centre Pass Play is an aggressive, high-speed attacking strategy designed to penetrate the attacking third immediately after the whistle. By utilizing rapid ball movement and decisive leads, this play aims to bypass the mid-court defensive structures before the opposition has time to set up.
When to use it:
- When you need a quick goal to shift momentum.
- Against teams that employ a slow, structured zone defence.
- Following a turnover or a crucial defensive stop to capitalize on the transition.
- In the final minutes of a quarter when time is of the essence.
2. Setup
To successfully run this set play in practice, ensure you have the correct setup and player positioning.
Equipment Needed:
- 1 Netball
- Full court (30.5m x 15.25m)
- 2 sets of bibs (Attacking and Defending colours)
- Cones (optional, for marking starting positions during drills)
Court Setup & Player Positions:
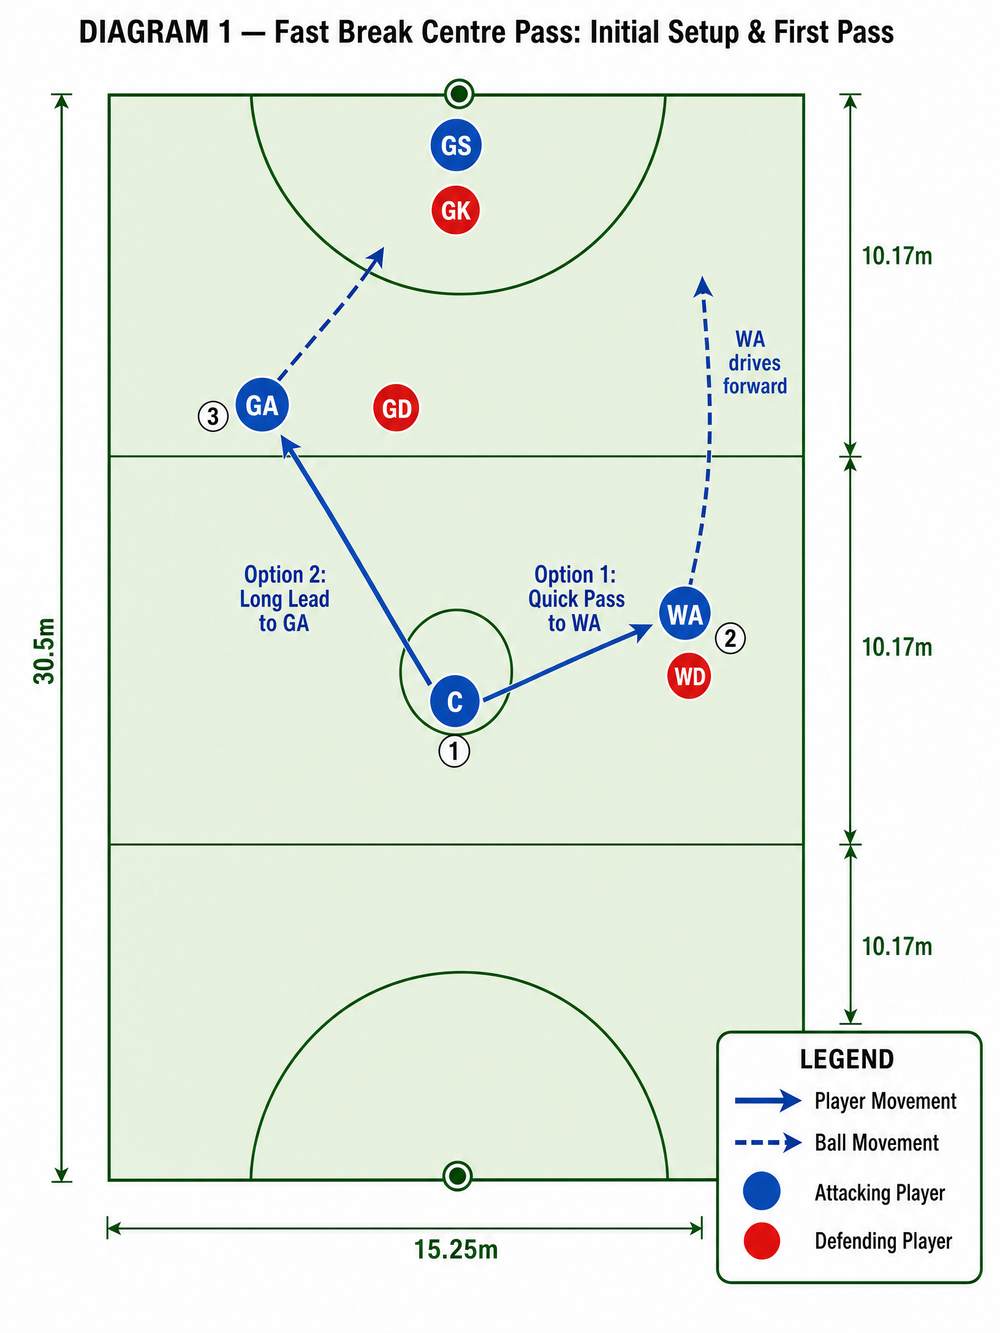
- Centre (C): Starts with the ball inside the centre circle (0.9m radius).
- Wing Attack (WA): Positioned on the transverse line in the left or right channel of the centre third, ready to make a hard drive forward.
- Goal Attack (GA): Positioned near the top of the centre third, anticipating a long lead or a secondary drive.
- Goal Shooter (GS): Positioned at the edge of the shooting circle (4.9m radius), ready to hold space or lead across the circle.
- Defenders (WD, GD, GK): Set up in standard marking positions to simulate match conditions.
3. Step-by-Step Instructions
Follow these steps to execute the play flawlessly.
Phase 1: The Initial Break
- The Whistle: As the umpire blows the whistle, the C steps forward to initiate the play.
- The First Drive: The WA makes a sharp, explosive drive into the centre third to receive the first pass. This is Option 1.
- The Decoy/Alternative: Simultaneously, the GA makes a long, looping lead towards the top of the attacking third. If the WA is heavily defended, the GA becomes Option 2.
- The Pass: The C delivers a flat, hard chest pass to the WA hitting them in stride.
Phase 2: Continuation and Scoring
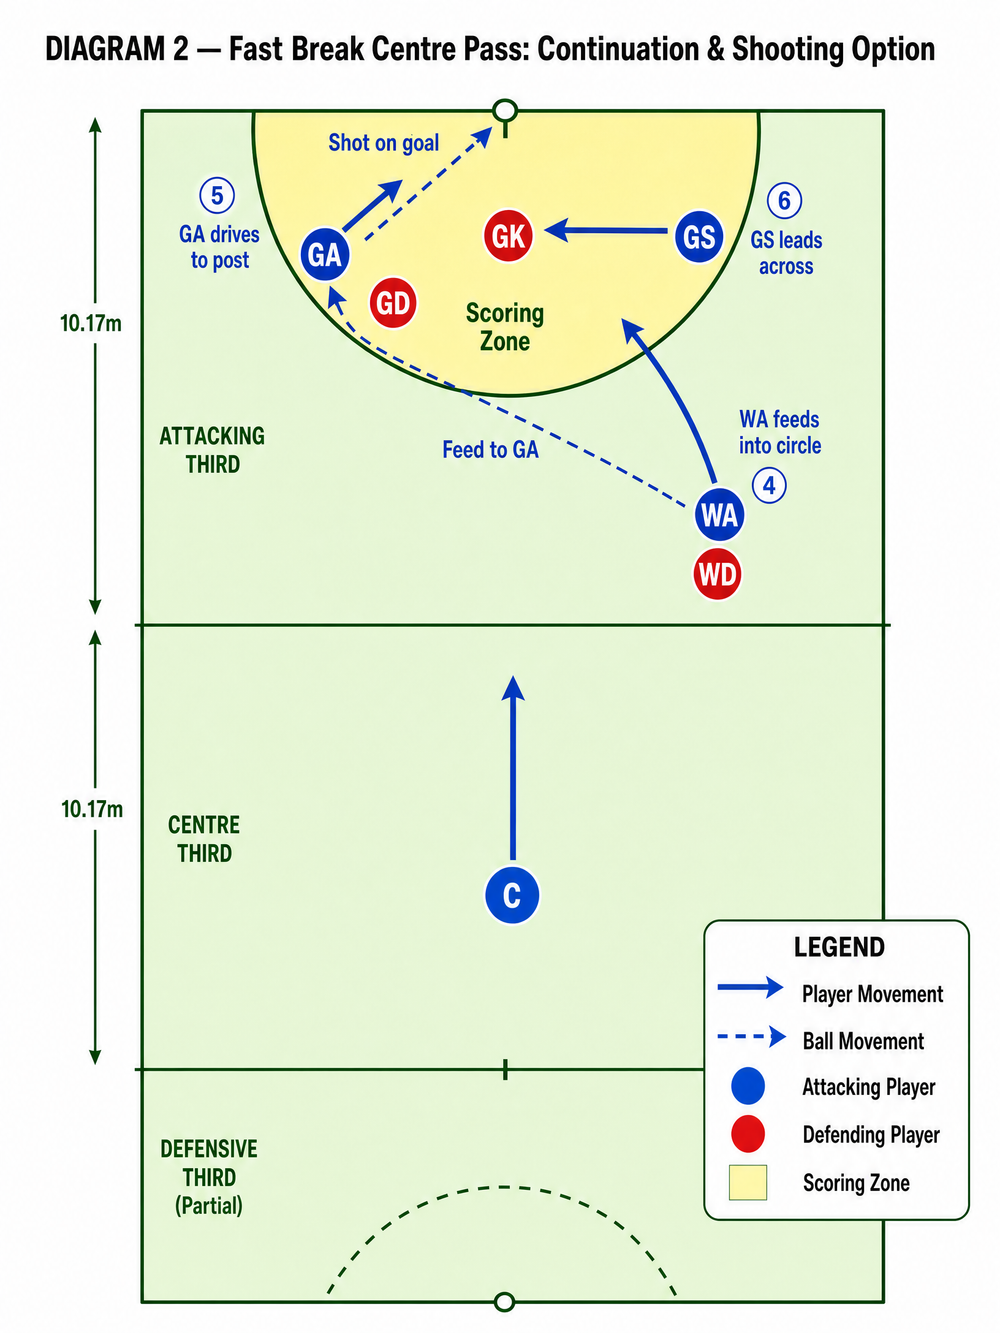
5. The Feed: Upon receiving the ball, the WA immediately turns and looks into the shooting circle.
6. The Circle Entry: The GA drives hard towards the goal post, drawing the GD and potentially the GK.
7. The Hold: The GS holds their ground on the baseline or leads across the circle into the open space created by the GA's drive.
8. The Shot: The WA delivers a precise lob or bounce pass into the GS or GA in the Scoring Zone for an immediate shot on goal.
4. Key Coaching Points
To ensure this play works in a match scenario, focus on these critical teaching elements during practice:
- Timing is Everything: The WA and GA must time their leads perfectly with the umpire's whistle. Early movement results in a penalty; late movement allows the defence to intercept.
- Flat, Hard Passing: Lofted passes give the defence time to recover. Emphasize strong chest passes or flat shoulder passes.
- Vision from the Centre: The C must have their eyes up before the whistle, scanning the court to read the defensive setup.
- Strong Holds in the Circle: The GS must establish a strong physical presence in the circle to provide a reliable target for the final feed.
- Immediate Re-offer: If the first option is covered, players must immediately clear the space and re-offer.
5. Common Mistakes
Watch out for these frequent errors and correct them immediately:
- Crowding the Ball: Both WA and GA driving into the exact same space, bringing their defenders together.
- Hesitation on the Pass: The C holding the ball too long, allowing the defence to set their zone.
- Looking Down: Players looking at the ball rather than scanning the court, missing the open player in the circle.
- Weak First Step: Attackers jogging into their leads rather than exploding off the mark with a strong first step.
6. Variations & Progressions
Adapt the play to suit your team's skill level or to keep the opposition guessing.
Progressions (To make it harder):
- Add a floating defender (WD or C) to try and intercept the first pass, forcing the attackers to adjust their leads.
- Implement a time limit (e.g., 4 seconds from centre pass to shot) to increase pressure and simulate match intensity.
Variations (To keep the defence guessing):
- The Split: Have the WA and GA cross paths during their initial leads to confuse the defenders.
- The Long Bomb: If the GA is tall and athletic, bypass the WA entirely and have the C throw a long, looping pass directly to the GA at the top of the circle.
7. Age Adaptations
Tailor the complexity of the play based on the age group you are coaching.
- Under 10s: Focus primarily on the timing of the first pass to the WA. Keep the continuation simple.
- Under 12s - Under 14s: Introduce the concept of the GA acting as a decoy and the importance of strong holds in the circle.
- Under 16s - Open: Expect perfect timing, high-speed execution, and the ability to read the defence and choose the best option instantly.
