

Football
Elite Slalom Dribble & Box-Edge Finishing
A progressive, high-repetition attacking drill that connects close-control dribbling, awareness, and composed finishing from the edge of the penalty area.
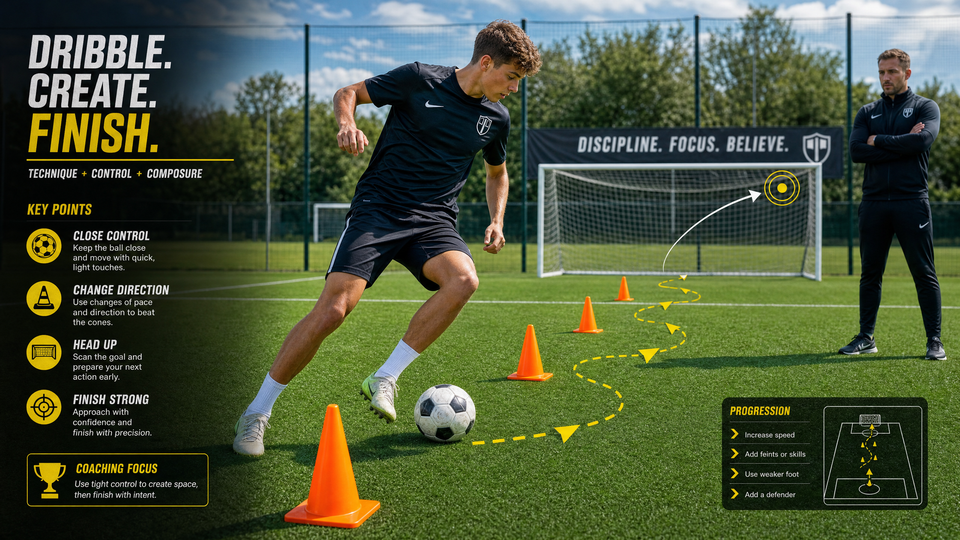
What you need
1 full-size goal, 5-6 tall orange cones or training poles, 8-10 footballs, Flat disc cones, Bibs, Stopwatch or visible timer
Overview
The Elite Slalom Dribble & Box-Edge Finishing drill develops a skill attackers need constantly in the final third: the ability to carry the ball through a congested area, recognise the goal early, and finish without losing balance or tempo. The cones are not the end product; they represent bodies, tackles, and restricted space around the penalty area. Your coaching job is to make every player connect the final dribble touch with a purposeful shooting action.
Use this practice after your technical warm-up or as the first attacking block before a small-sided game. It suits a No. 9 centre-forward, No. 10 attacking midfielder, or an inverted No. 7/No. 11 wide forward. The basic version builds repetition and confidence. The progressed version introduces a defender or combination pass so that players must make a decision before they finish. Demand quality rather than simply counting shots: the player must exit the cones under control, scan the goalkeeper, and strike with intent.
Setup
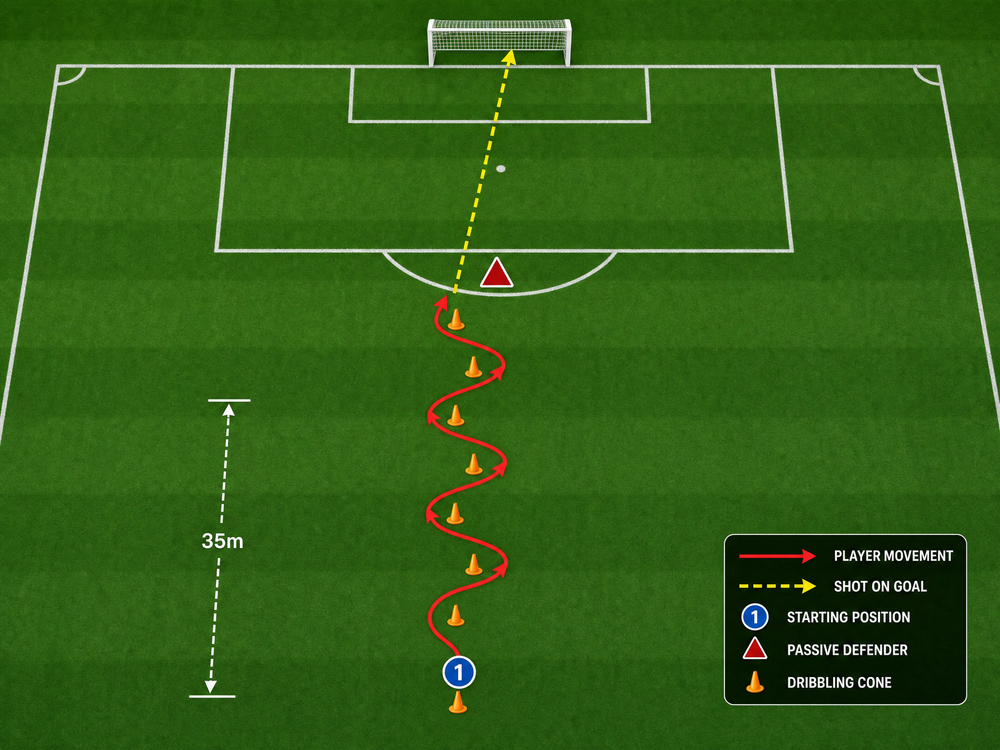
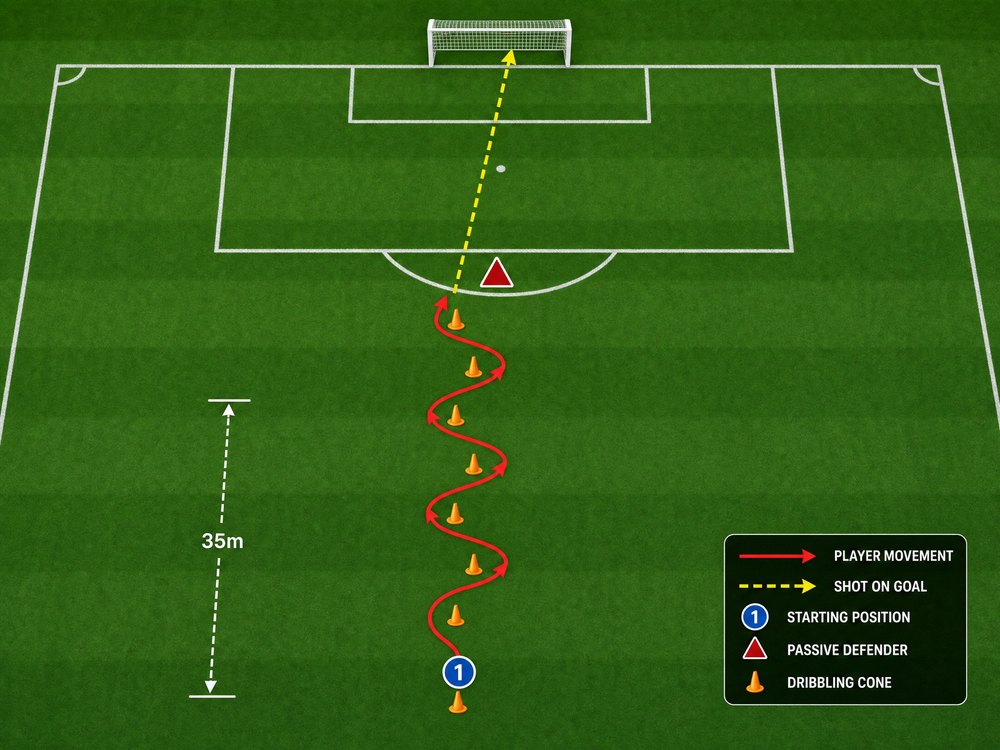
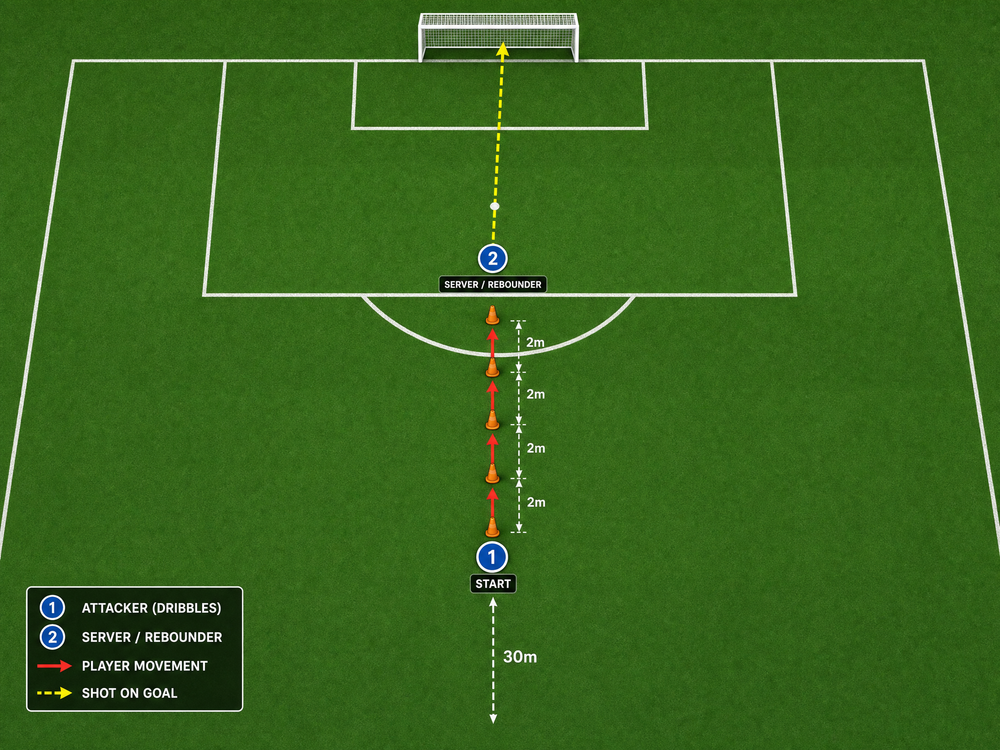
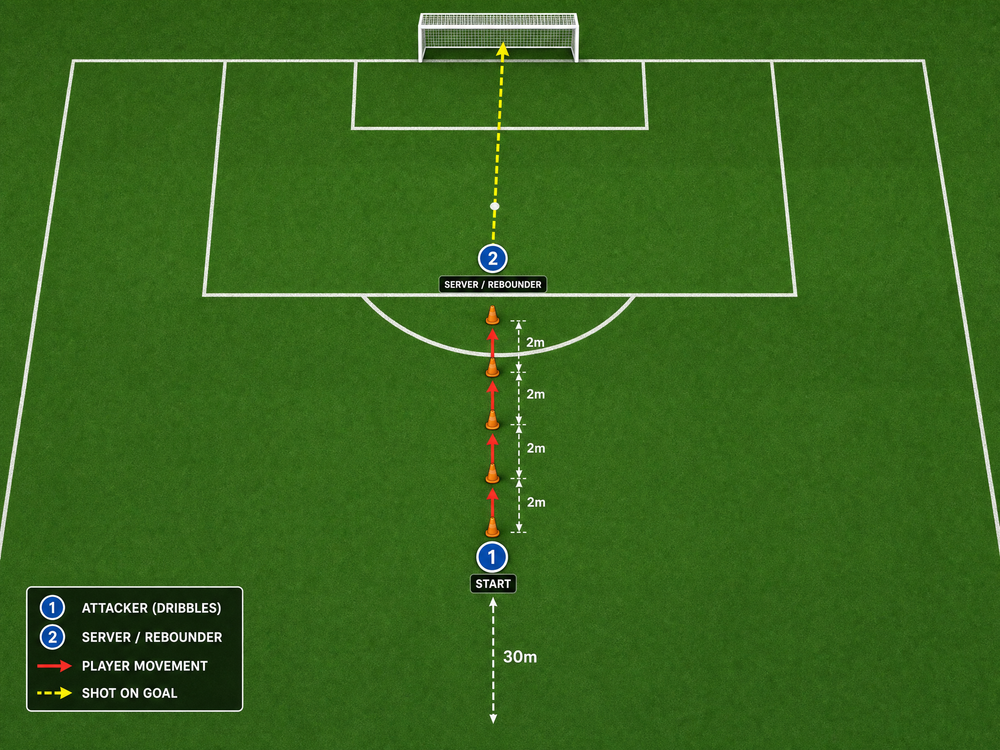
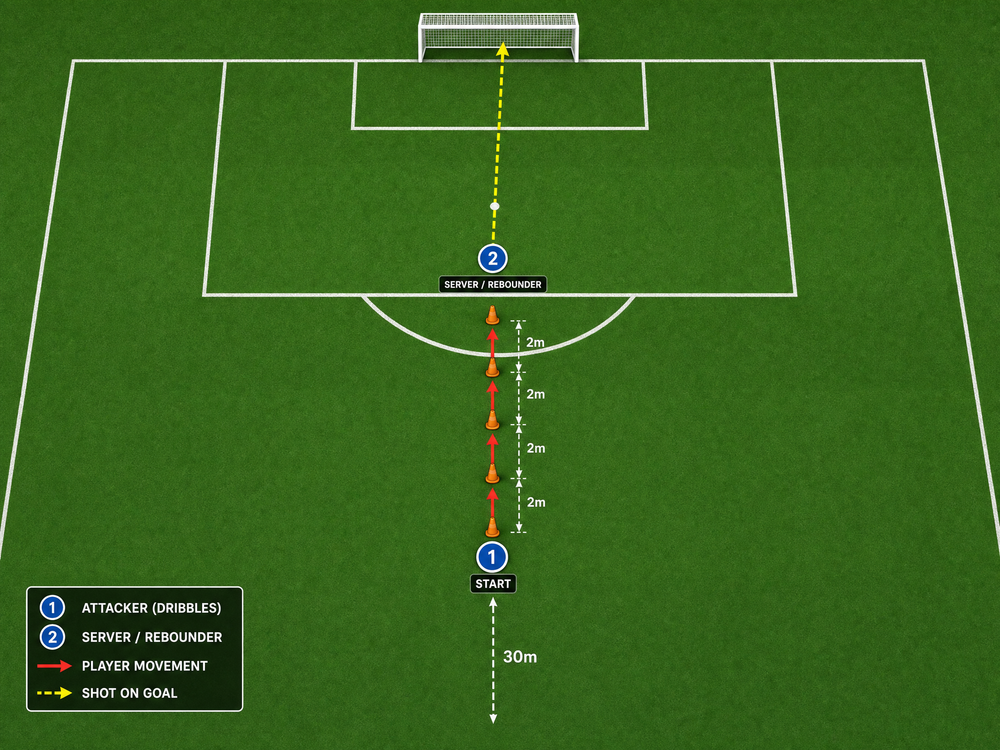
Use the final third of one half of a standard 100-110m x 64-75m pitch. Mark a central working channel that is 35m deep and 18m wide, ensuring the waiting players are protected from rebounds and do not obstruct the shooting line. Place the start cone centrally, 30-35m from goal. Set five or six tall cones in a straight line for the introductory practice, or in a staggered zigzag for greater challenge. Keep each cone 1.5-2m from the next and mark a shooting line 18-20m from goal.
| Element | Detail | Coach's rationale |
|---|---|---|
| Goal and goalkeeper | One full-size goal with a goalkeeper if available | Gives the finish a realistic visual target and consequence. |
| Dribble course | 5-6 cones, 1.5-2m apart | Demands short, frequent touches and changes of body angle. |
| Starting position | 30-35m from goal | Allows enough running distance to build speed before the final-third action. |
| Player roles | Player 1 = attacker; Player 2 = No. 10 server or No. 6 passive defender | Creates clear football-specific roles for each progression. |
| Equipment | 8-10 balls, cones, bibs, flat discs | Keeps the drill moving and permits fast restarts. |
Run three 3-minute blocks, with one minute between blocks for a precise coaching intervention and ball collection. Each action should take 6-8 seconds from first touch to finish. Start the next player when the previous attacker shoots, not when the ball hits the net. With 6-10 outfield players, aim for 6-8 good finishes per player per block. For larger groups, build a mirrored second channel and rotate goalkeepers after each block.
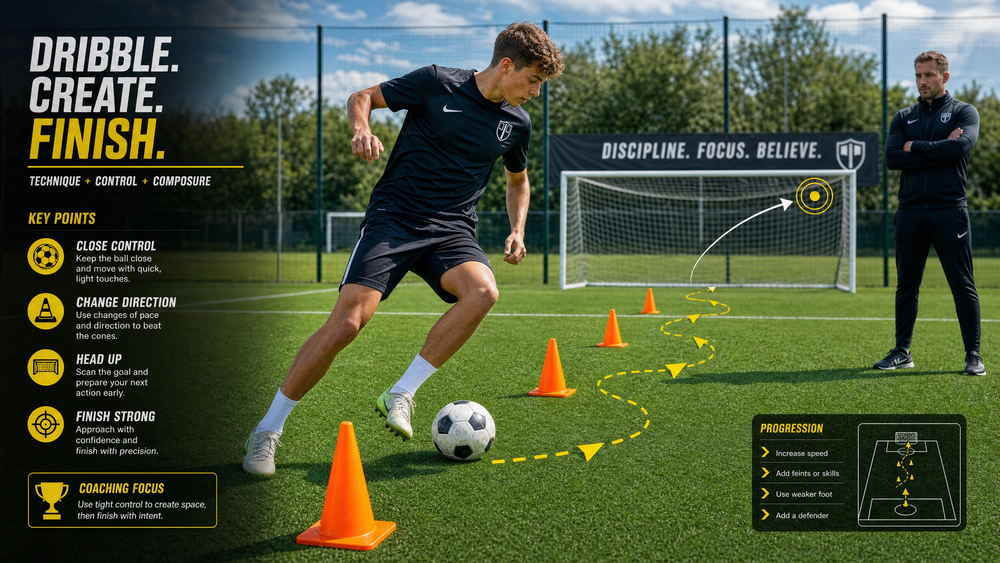
Step-by-Step Instructions
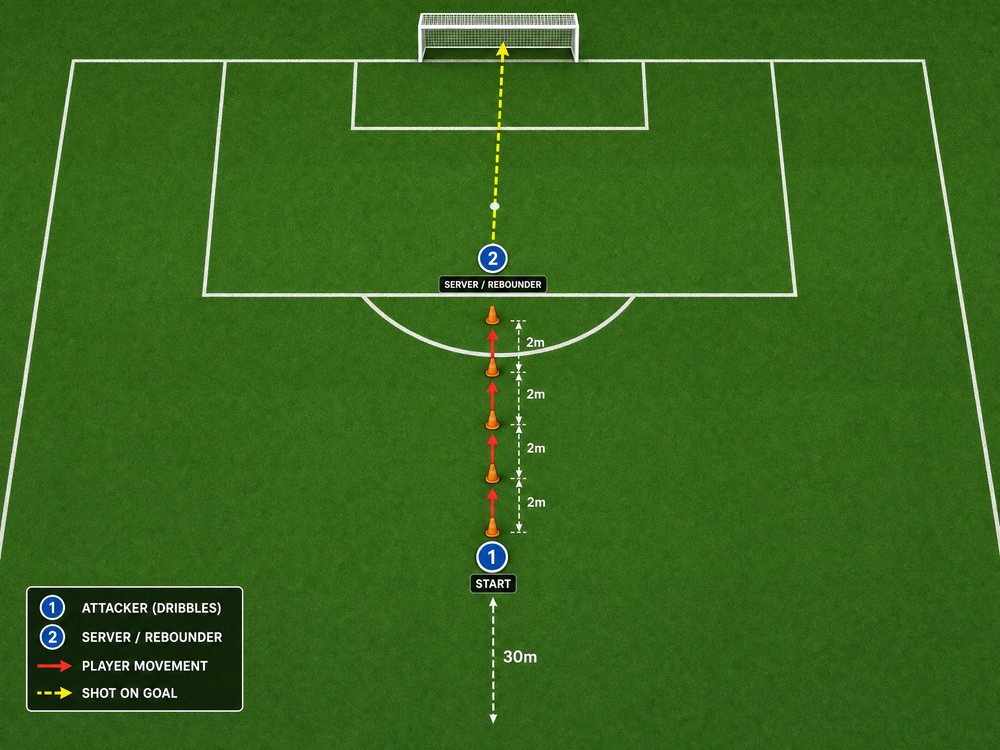
Prepare the line. Put Player 1 at the start cone with a ball. The goalkeeper is set centrally in the goal. If using a server, Player 2 begins 3-5m outside the penalty area and stays clear of the direct shooting lane. Give the group one clear target: enter the box under control and finish into a bottom corner.
Start on the cue. On the coach's whistle or call, Player 1 attacks the first cone with the ball on their preferred side. The first touch should be positive but not heavy; it should take the player into the course rather than across it. The coach watches the player's posture immediately: bent knees, loose arms, and a low centre of gravity.
Dribble the slalom. The attacker uses quick inside-and-outside touches to move around each cone. Encourage the player to shift the ball from one foot to the other where the pattern demands it. There should be no unnecessary trick; the purpose is efficient control and changing direction at speed. Ask players to lift their eyes briefly between touches so they can register the final cone, the goal, and the goalkeeper.
Create the shooting angle. On clearing the last cone, Player 1 takes a firm setup touch into the preferred shooting lane. This touch should travel 1-1.5m ahead, allowing the attacker to step through the ball without stopping. If the ball remains under the player's feet, stop the practice and correct this detail; it is usually the key reason a finish becomes rushed.
Scan and finish. Before the striking foot lands, the attacker makes a final scan of the goalkeeper. The player chooses a low placed finish, a driven shot across the keeper, or a near-post finish based on the goalkeeper's position. For the basic version, permit two touches after the final cone; for advanced players, set a two-second finishing limit.
Recover and reset. The attacker follows the shot for any rebound, then retrieves the ball safely and joins the back of the line. The next player starts as the previous player strikes. The coach should keep spare balls beside the start cone so that a missed target never slows the exercise.
Coach in short blocks. Let the group work for 45-60 seconds before intervening. Use a single cue at a time, such as 'small touches', 'eyes up', or 'set and strike'. Demonstrate the correction at the cone nearest the issue, then restart immediately. Long explanations remove the intensity that makes the practice useful.
Key Coaching Points
- Touch frequency: Demand many small touches through the cones. The ball should remain close enough for the player to change direction with either foot.
- Eyes up in the final action: The player does not need to stare at the ball. A brief scan after the penultimate cone gives information about the goalkeeper and target area.
- Exit touch: The last dribble touch must be deliberately heavier than the previous touches, but still controlled. It creates the distance needed for a balanced shot.
- Body shape: Insist on a low, athletic posture through the slalom. For the finish, the non-kicking foot lands beside the ball and the chest remains slightly over it to keep the shot down.
- Attack the space: The last two actions should be quick: accelerate past the final cone, then set the ball. This represents a No. 9 or No. 10 creating separation from a defender.
- Quality before volume: Celebrate a composed finish into a corner more than a powerful shot at the goalkeeper. Make players explain their target if they rush their decision.
Common Mistakes
- Looking at the ball for the entire run: Players lose their reference to the goal and strike blindly. Correct with the cue, 'scan between touches, then choose the corner.'
- Large touches between cones: The attacker starts chasing the ball rather than manipulating it. Reduce the speed temporarily and require alternating feet until control improves.
- A dead setup touch: The ball stays under the player or runs too far ahead. Demonstrate the 1-1.5m exit touch and use a flat disc as the required landing zone.
- Decelerating before the finish: The player completes the slalom and pauses. Set a two-second shot clock from the final cone to retain match tempo.
Variations & Progressions
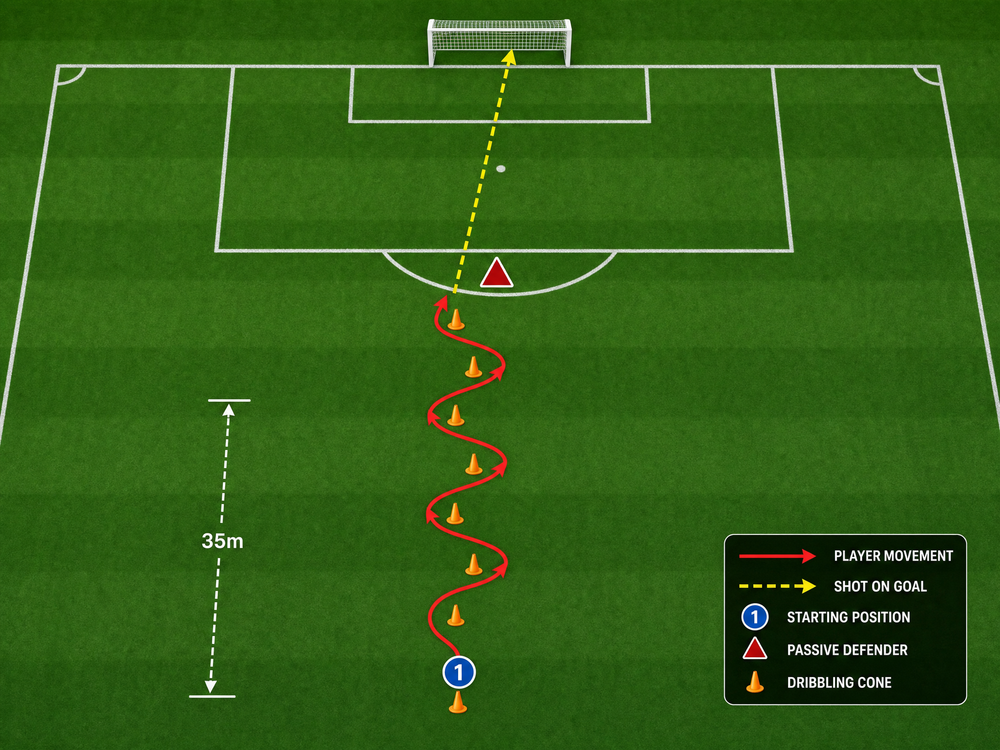
- Passive defender to active defender: Put Player 2, acting as a No. 6 defensive midfielder, just beyond the final cone. First, they show the attacker a side without tackling. Progress to a live 1v1 from the shooting line, where the attacker has four seconds to finish.
- Wall pass progression: Replace the immediate shot with a pass into Player 2, the No. 10 server. Player 1 then makes a curved run around the final cone, receives the return pass, and finishes first time or in two touches. This adds timing, receiving shape, and combination play.
- Weak-foot challenge: Require the entire course and finish to be completed with the weaker foot. Keep the cone spacing at 2m initially, then tighten it to 1.5m only when the technique remains clean.
Age Adaptations
- Under 8 / Under 10: Use a smaller goal if needed, reduce the start distance to 18-22m, and widen the cone spacing to 2.5-3m. Let players take an extra touch before shooting and praise clean contact, controlled dribbling, and the courage to use both feet. Avoid live defenders.
- Under 12 / Under 14: Use five cones at 2m spacing and a full-size goal where appropriate. Introduce the goalkeeper, a target zone in each bottom corner, and a passive defender. Ask players to call their finish before striking, which reinforces scanning and decision-making.
- Under 16 / Open: Use the tight zigzag at 1.5m spacing, a live defender, and a two-second finish limit. Demand match-speed acceleration after the final cone. Rotate players through No. 9, No. 10, No. 6 defender, and goalkeeper roles so each player understands the problem from both attacking and defending perspectives.
