The Pressure Cooker: Make-or-Miss Free Throw Rotation
A high-intensity free throw routine that simulates game pressure and builds a consistent, repeatable shooting stroke under fatigue.

Equipment Needed
1. Overview
Free throws are often practiced in a relaxed, non-competitive environment, which fails to prepare players for the pressure of late-game situations. The Pressure Cooker: Make-or-Miss Free Throw Rotation drill is designed to bridge that gap. By incorporating continuous movement, peer pressure, and a structured rotation, this drill simulates the physical fatigue and mental stress of actual game conditions.
Coaches should use this drill toward the end of practice or immediately following high-intensity conditioning segments. It forces players to settle their breathing, focus on their pre-shot routine, and execute with precision when their legs are heavy.
2. Setup
- Court: Standard FIBA half-court (28m x 15m full court, so 14m x 15m half-court area).
- Equipment: 1 Basketball per group of 4-5 players.
- Players: Groups of 4 to 5 players per basket.
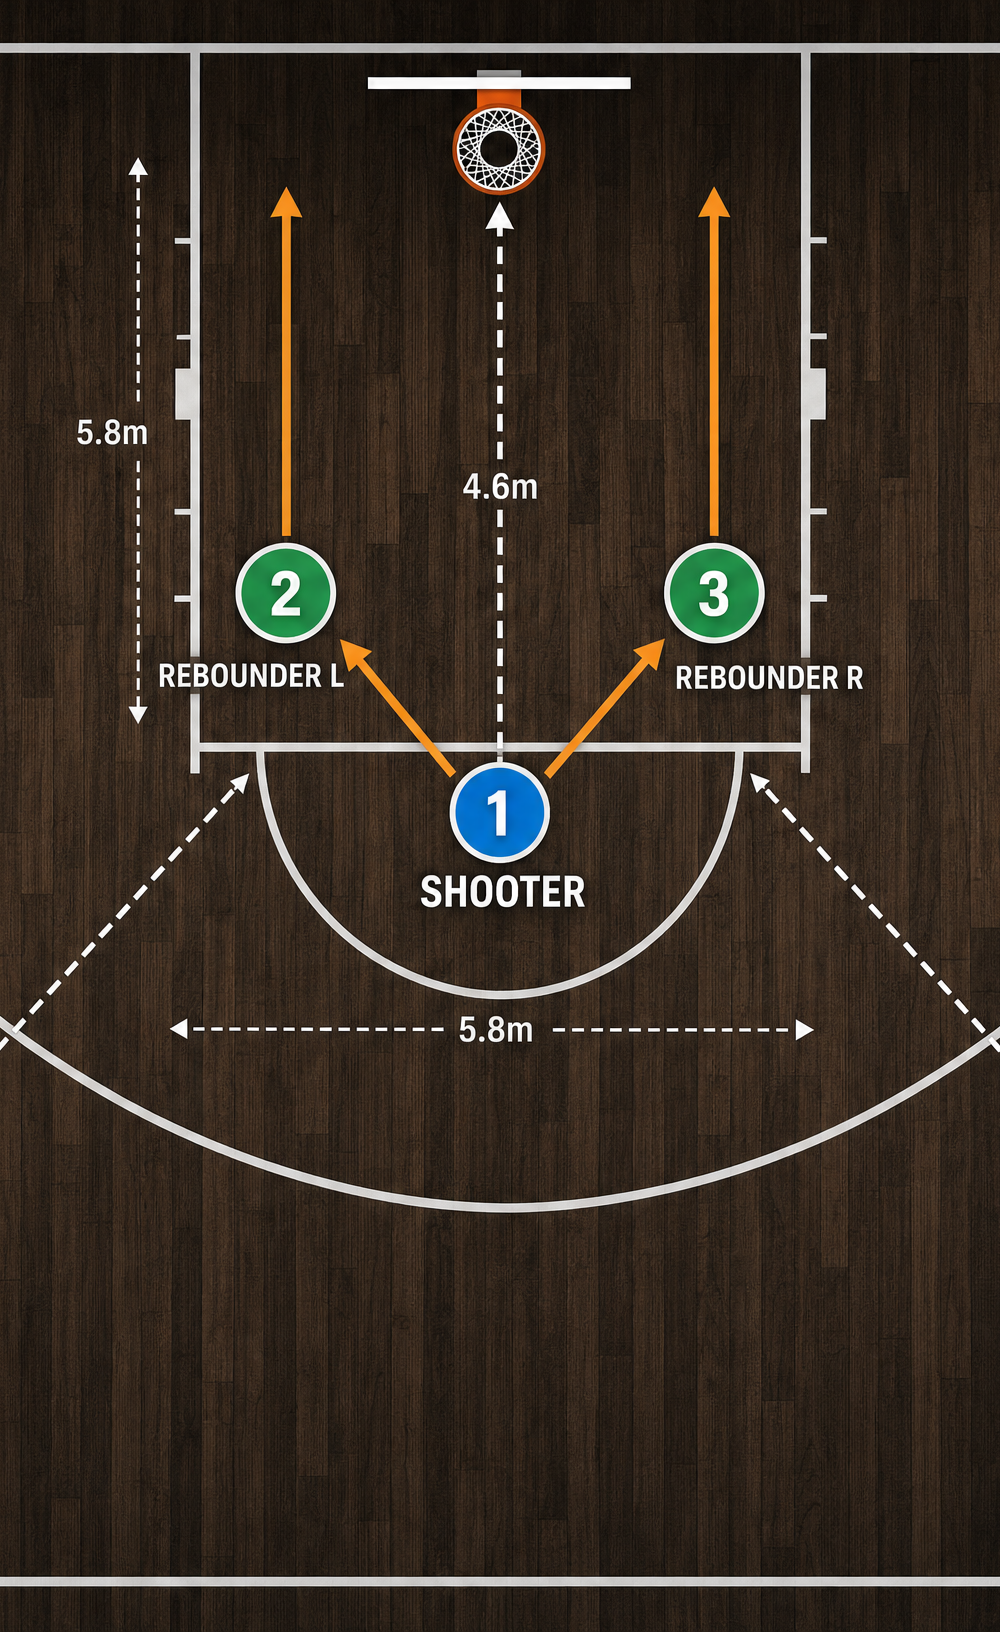
- Positions:
- Player 1 (Shooter): Starts at the center of the free throw line (4.6m from the backboard).
- Player 2 (Rebounder L): Positioned on the left lane spot (block).
- Player 3 (Rebounder R): Positioned on the right lane spot (block).
- Player 4 (Waiting/Outlet): Positioned at the top of the key or just outside the three-point arc.

3. Step-by-Step Instructions
- Initial Alignment: Set up the players according to the positions outlined above. The shooter (Player 1) has the ball at the free throw line.
- The Routine: The shooter executes their strict pre-shot routine (e.g., three dribbles, deep breath, spin the ball) and shoots the free throw.
- The Rebound: Players 2 and 3 box out imaginary defenders and secure the rebound. If the shot is made, they quickly retrieve the ball out of the net. If missed, they secure the live rebound.
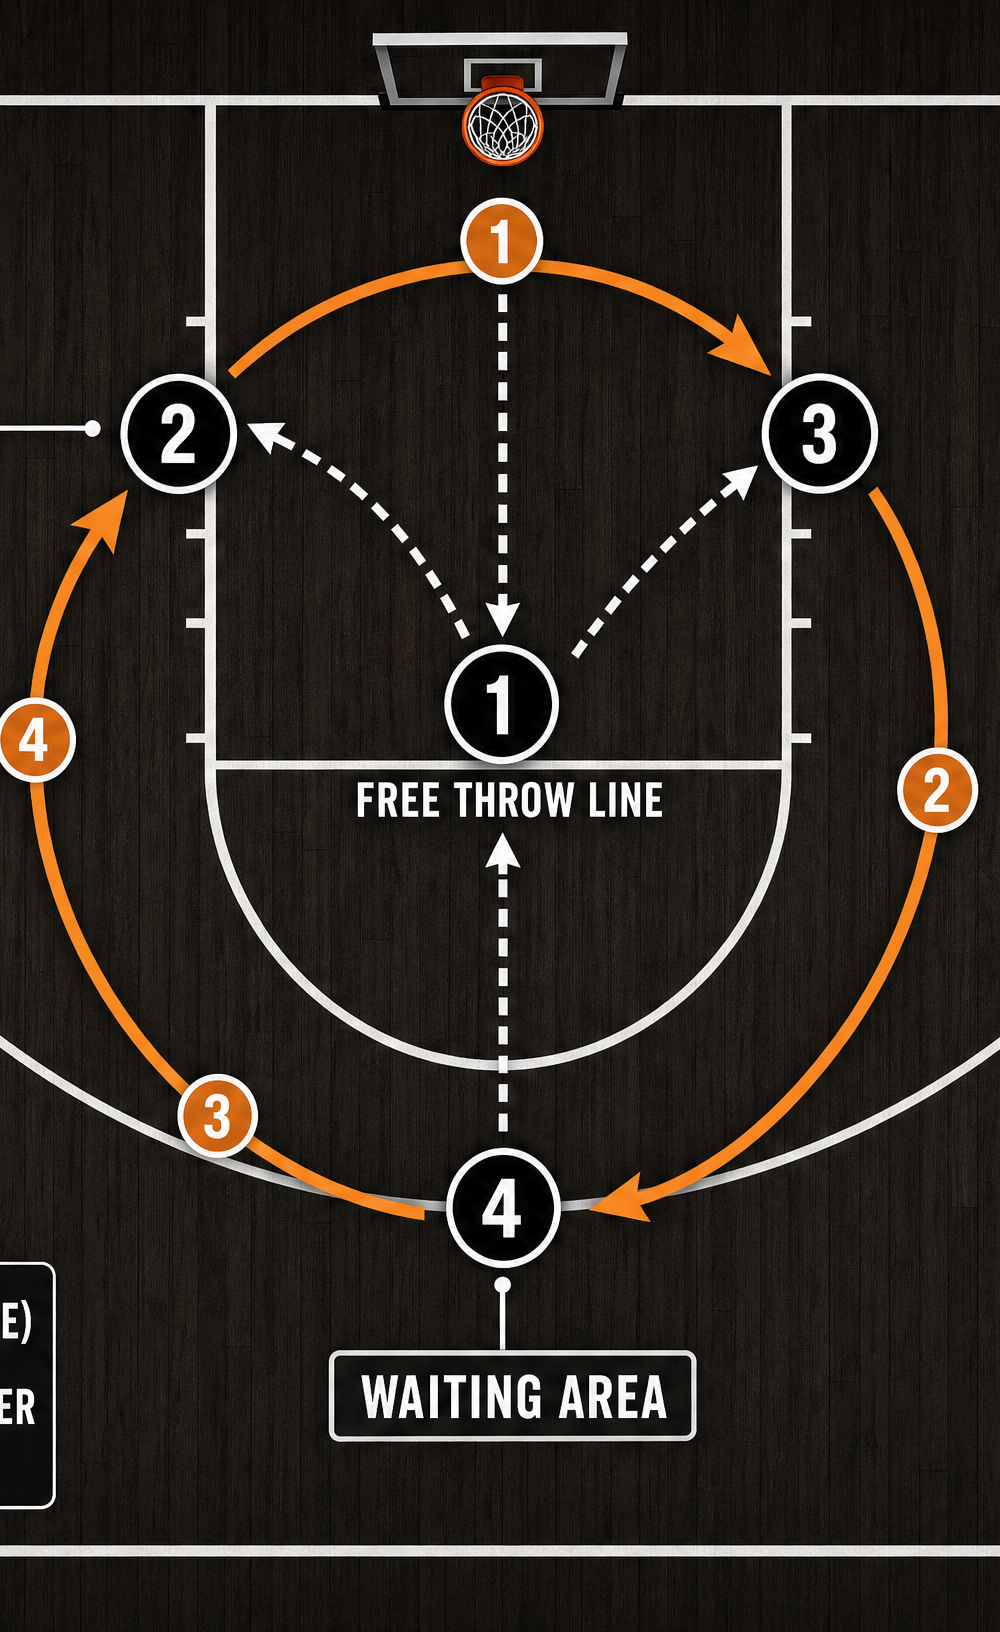
- The Rotation: Immediately after the shot is released, the rotation begins:
- The Shooter (Player 1) rotates down to the right lane spot (Rebounder R).
- The Right Rebounder (Player 3) rotates out to the waiting area at the top of the key.
- The Waiting Player (Player 4) rotates down to the left lane spot (Rebounder L).
- The Left Rebounder (Player 2) flashes to the free throw line to become the new Shooter.
- The Pass: The rebounder who secured the ball delivers a crisp, chest pass to the new shooter stepping to the line.
- Continuous Flow: The new shooter immediately begins their routine. The cycle continues without stopping.
4. Key Coaching Points
- Unwavering Routine: Demand that every player uses the exact same pre-shot routine every single time. Consistency in preparation breeds consistency in execution.
- Breath Control: Teach players to take a deep, diaphragmatic breath before their shooting motion begins. This lowers the heart rate and centers focus.
- Hold the Follow-Through: The shooter must hold their 'gooseneck' follow-through until the ball crosses the rim. No early release or dropping the shooting hand.
- Crisp Passes: The drill loses its rhythm if the passes from the rebounders are sloppy. Demand accurate, game-like chest passes right to the shooter's shooting pocket.
- Game-Speed Rebounding: Rebounders shouldn't just stand there; they must anticipate the miss, step into the lane, and snatch the ball aggressively.
5. Common Mistakes
- Rushing the Shot: Players often hurry their shot to keep the drill moving fast. Remind them: the rotation is fast, but the shot is methodical.
- Sloppy Footwork: Shooters stepping to the line without establishing a strong, balanced base. Toes should be aligned squarely (or slightly turned, depending on shooting style) to the rim.
- Ignoring the Rebounders: Shooters releasing the ball and immediately walking away before seeing the result, breaking the habit of following the shot.
- Inconsistent Routine: Players altering the number of dribbles or the timing of their breath from shot to shot.
6. Variations & Progressions
- Consecutive Makes (Progression): The group must make a certain number of free throws in a row (e.g., 5, 10, or 15) before the drill ends. If a shot is missed, the count resets to zero.
- Swish Only (Progression): Only 'swishes' (shots that don't touch the rim) count as a make. Shots that hit the rim and go in are counted as zero. This forces higher arc and precision.
- Conditioning Penalty (Variation): If a player misses, the entire group must complete a quick sprint (e.g., down and back to the opposite free throw line) before the next shooter steps up.
7. Age Adaptations
- Under 8 / Under 10: Move the shooting line closer (e.g., to the bottom of the free throw circle). Focus entirely on basic form (B.E.E.F. - Balance, Eyes, Elbow, Follow-through) rather than speed of rotation.
- Under 12 / Under 14: Introduce the consecutive makes challenge, but keep the target number low (e.g., 3-5 makes in a row). Emphasize the importance of the pre-shot routine.
- Under 16 / Open: Run the drill with high-intensity conditioning penalties for misses. Introduce crowd noise or verbal distraction from coaches to simulate late-game pressure environments.