

Football
Right-Side Wing Overload: Create, Release and Finish
Build a fast 3v2 on the wing and turn it into a disciplined cut-back finish with exact movements, timings and rest-defence roles.
What you need
balls, cones
{{asset:header_image.png}}
Overview
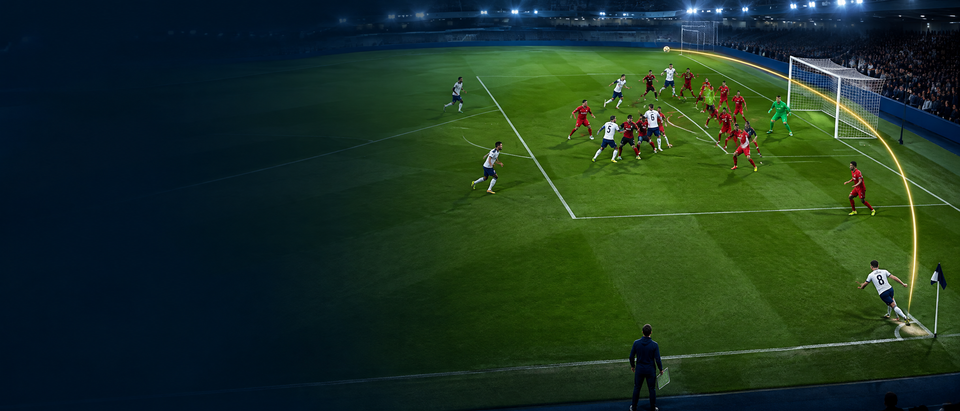
This wing overload attacking play creates a controlled 3v2 on the right flank, then turns the numerical advantage into a low cut-back rather than a hopeful cross. It is designed for a 105 x 68 m pitch and works especially well against a back four when the opposition winger is slow to recover or their full-back is tempted to press early. The principle is simple: fix the opponent inside, switch into the wide player, release the full-back on the outside and attack the box with three different finishing lines.
Keep the pattern adaptable. The trigger is the opponent’s near-side midfielder or winger stepping towards the ball. Once that player is drawn in, the ball should travel forward and wide with pace. From first central touch to shot, aim to complete the action in 8–10 seconds. The right-back (2), winger (7), and No.8 make the overload; No.9 and left winger (11) provide the finishing picture; the holding midfielder (6) protects the counter-attack.
Setup
Use 10 players: six attackers—2, 6, 8, 7, 9 and 11—against four defenders. Mark a 70 x 55 m working area on the right two-thirds of the pitch, using the full right touchline and a full-size goal where available. Begin with 6 central, 8 in the right half-space, 7 five metres inside the touchline, 2 five metres behind 7, 9 between the two centre-backs and 11 on the far side. Defenders set as a compact back four or a full-back, centre-back, recovering winger and midfielder.
The coach serves to 6. Run three repetitions from the same side, then switch the whole picture to the left so players learn the roles rather than a single pattern. Reset quickly: 20–25 seconds of work, 35–40 seconds of feedback and rotation. Use flat cones to show the wide lane, the half-space and a 12 m by 12 m cut-back zone at the edge of the penalty area.
{{asset:diagram_1.png}}
Step-by-Step Instructions
Set the central trigger (0–2 seconds). On the coach’s call, 6 receives on the half-turn and takes one touch forward. 8 moves two to three metres away from the nearest midfielder, presenting at a 45-degree angle. The intention is to make the defensive midfield line choose: press 6 or track 8. If neither steps, 6 can carry; if one jumps, play the next pass immediately.
Fix before switching (2–4 seconds). 6 plays into 8’s back foot. 8 receives side-on, scans the wide lane and uses one touch to hold the inside defender. 7 stays patient, initially four to five metres inside the touchline so the opposition full-back cannot simply screen the pass. On 8’s second touch, 7 darts outside into the channel. Play the switch firmly into 7’s path—not to feet behind the run.
Create the 3v2 (4–6 seconds). The instant 7 receives, 2 accelerates around the outside on an overlapping line, passing 7 at full speed. 8 follows the pass and arrives beneath the ball as the inside support. Their distances matter: 2 should be 3–5 m wider than 7; 8 should be 7–10 m inside and slightly behind. 7’s first touch must travel forwards or inside to attract the full-back. If the defender stays off, 7 drives; if the defender jumps to 7, 2 is released.
Stretch the last line (5–7 seconds). While the overload is developing, 9 starts on the blind side of the near centre-back and curves to the front-post channel. 11 delays, then runs across the far centre-back towards the far post. Do not let both forwards attack the same vertical line. 6 holds a central recovery position, ideally 8–10 m behind 8, ready to stop the first clearance.
{{asset:diagram_2.png}}
- Penetrate and finish (6–10 seconds). If 2 receives beyond the full-back, the next action is a low ball across the six-yard area or, preferably, a cut-back into the marked zone. 8 times the late run to arrive as the ball arrives; this is the highest-value finishing space. If the centre-back jumps to 8, 9 attacks the front post. If both central defenders collapse, 11 attacks the far-post tap-in. Demand a first-time finish whenever the pass enters the cut-back zone. After the shot or clearance, the nearest three players counter-press for five seconds; 6 anchors the rest defence.
Key Coaching Points
- Pass quality sets the tempo. The 6-to-8 pass and 8-to-7 switch must be firm enough to beat a recovering midfielder, but played into the receiver’s forward path.
- Use body shape to disguise. 8 receives with hips open to both the touchline and goal. A square body lets the defender read the switch too early.
- Do not run too soon. 2 begins only as 7’s first touch engages the full-back. An early overlap simply hands the defender a reference point.
- Attack different depths. 9 front post, 8 cut-back zone, 11 far post. Say the three calls aloud in rehearsal: “near, edge, far.”
- Stay connected after the attack. 6 and the far-side player narrow immediately to control the counter-attack rather than watching the cross.
Common Mistakes
- The winger receives static and wide. This lets the full-back face the ball and defend 1v1. Start 7 inside, then sprint outside as 8’s touch commits the defender.
- The full-back overlaps before the ball reaches 7. Delay the run; 2 should appear from the defender’s blind side, not stand in the wide lane.
- The cut-back is delivered behind the runners. 2 must look up around the byline and pass into the edge-of-box zone, not drive the ball into bodies.
- All attackers chase the first post. Freeze the group and re-establish three separate lanes before restarting.
- The team is open after the clearance. Keep 6 central and 3 tucked in; the overload is an attacking tool, not permission to lose balance.
Variations & Progressions
Start unopposed for two minutes, then add a recovering winger so the overload is a live 3v3. Next, award the defending team a point for carrying over the halfway line after a regain; this makes the attackers value their rest defence. For an advanced progression, allow the opposition full-back to stay deep. In that case, 7 drives inside and 2 becomes the decoy, while 8 makes an underlapping run into the channel between centre-back and full-back.
A useful variation is the bounce-and-release: 7 sets back to 8 with one touch, 2 overlaps, and 8 plays the third-man pass into 2. Another is an early diagonal from 6 straight to 11 when the far-side winger is isolated; this prevents opponents overloading the near side every time.
Age Adaptations
For Under-8 and Under-10, use a 40 x 30 m area, a simple 2v1 wide overload and one target player in the middle. Remove the timed rule initially; celebrate a clear wide run and a low pass across goal. For Under-12 and Under-14, use 3v2 with the front-post, cut-back and far-post runs, but give 8 a visible cone target for the late arrival. For Under-16 and open age, use the full 6v4 structure, insist on the 8–10 second finish window, add live transitions and ask players to recognise whether to overlap, underlap or carry based on the full-back’s body position.
