

Basketball
Box Hammer: Sideline Inbound Play Against Man-to-Man
Install a dependable box-set sideline inbound that creates a lay-up first, an inbounder relocation second, and a safe wing release when opponents switch or deny.
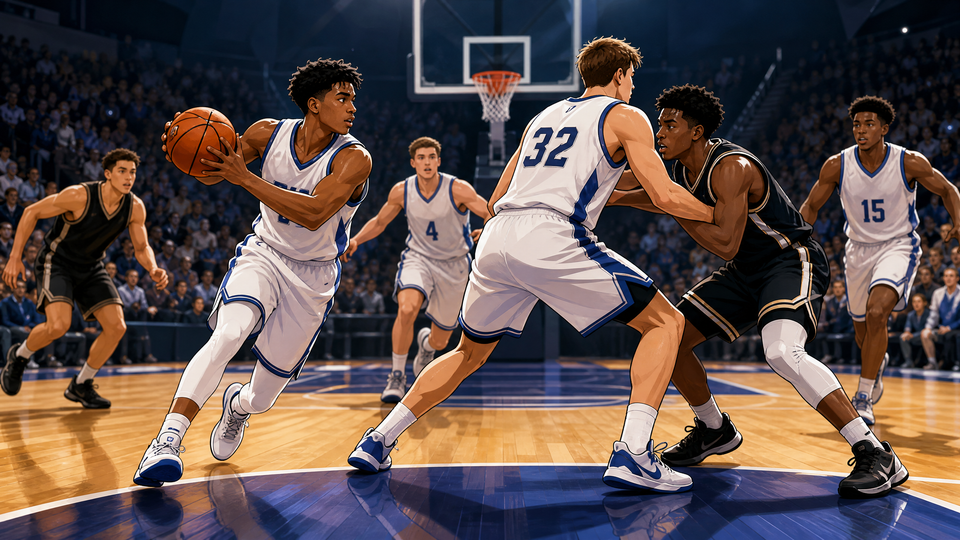
What you need
1 basketball, 4 flat cones, whistle, basketball half-court, practice pinnies
Overview
Box Hammer is a sideline inbound (SLOB) designed for a man-to-man defence when the ball is advanced in the frontcourt, especially inside the final 10 seconds of a quarter or after a timeout. The play uses a compact box around the lane to disguise the initial action, then sends the 2-guard on a hard basket cut behind a back screen. Your first purpose is a direct lay-up; your second is a clean catch for the inbounder, 3, after they step in; your safety valve is a wing release for 1.
The entire pattern should be complete in 3.0–3.5 seconds, not rushed at the expense of contact and spacing. It is built for a regulation FIBA floor measuring 28 m x 15 m 1. Use the half-court landmarks: the block, the elbow, the lane line, and the three-point line. This makes the set transferable even when court logos or bench areas differ.
Roles and first reads
| Player | Standard position | Primary responsibility |
|---|---|---|
| 1 | Point guard | Safety release to the weak-side wing |
| 2 | Shooting guard | First scoring option: hard cut to the rim |
| 3 | Small forward | Inbounder, then relocation shooter |
| 4 | Power forward | Back-screen 2, then pop to the strong-side slot |
| 5 | Centre | Down-screen 1 and seal for the late outlet |
Setup
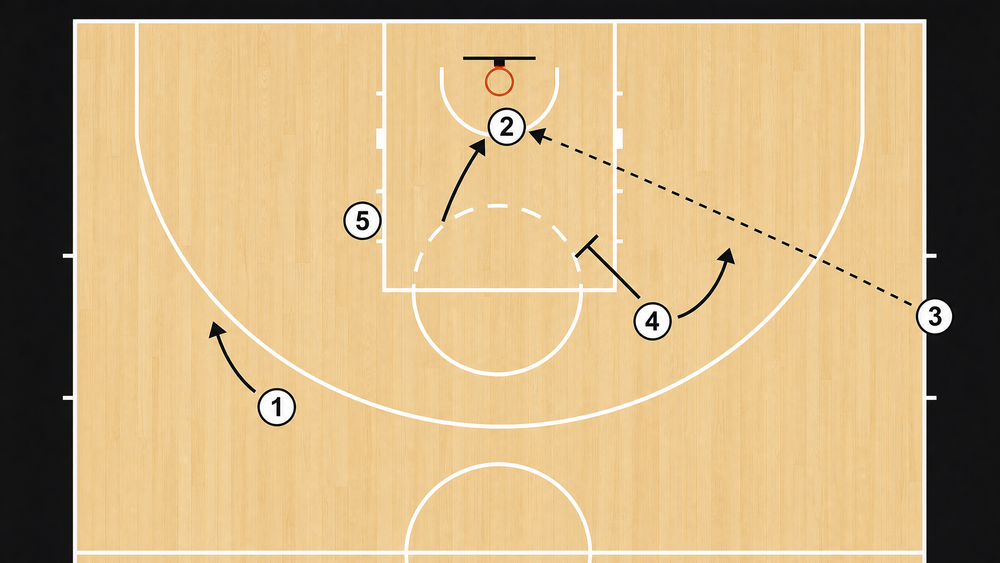
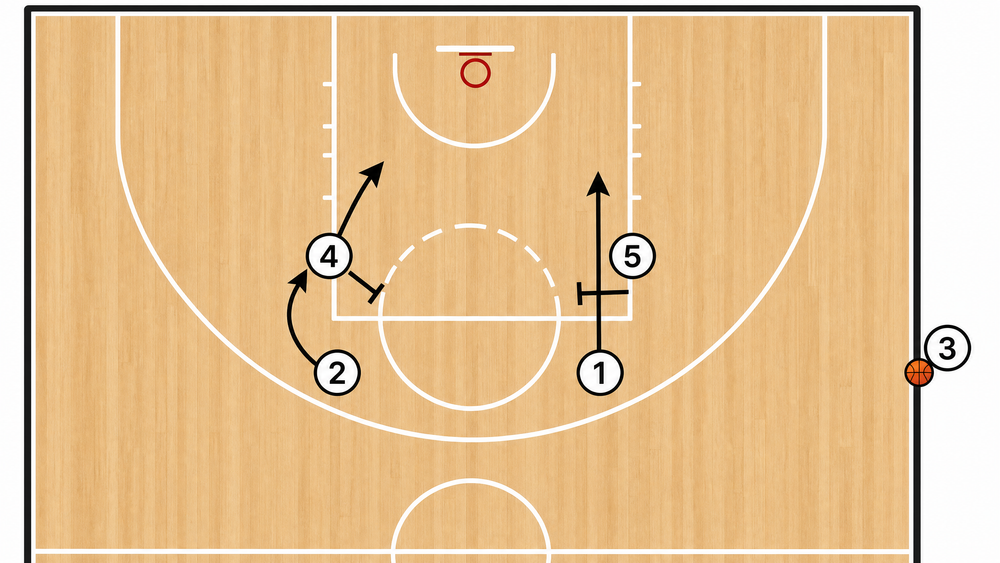
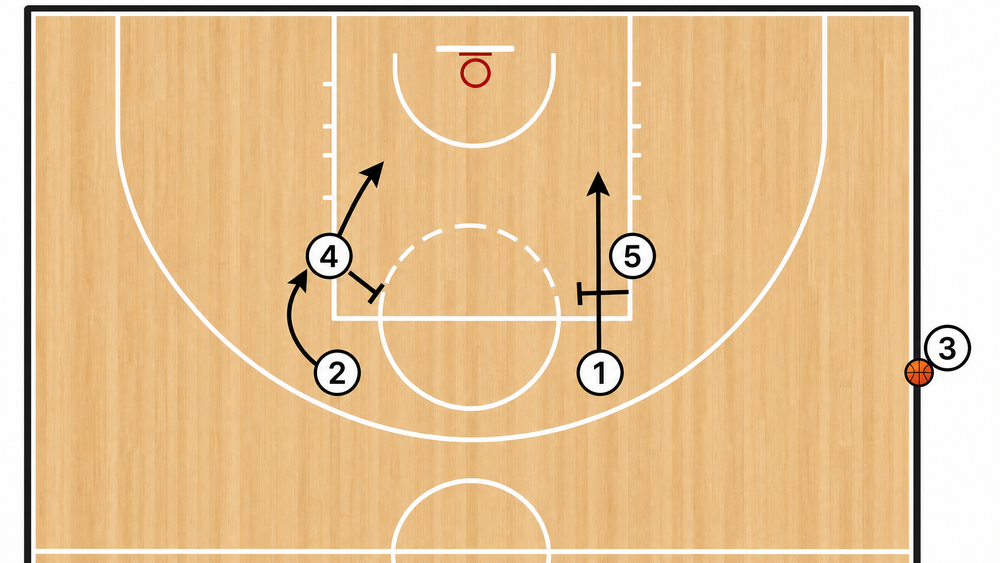
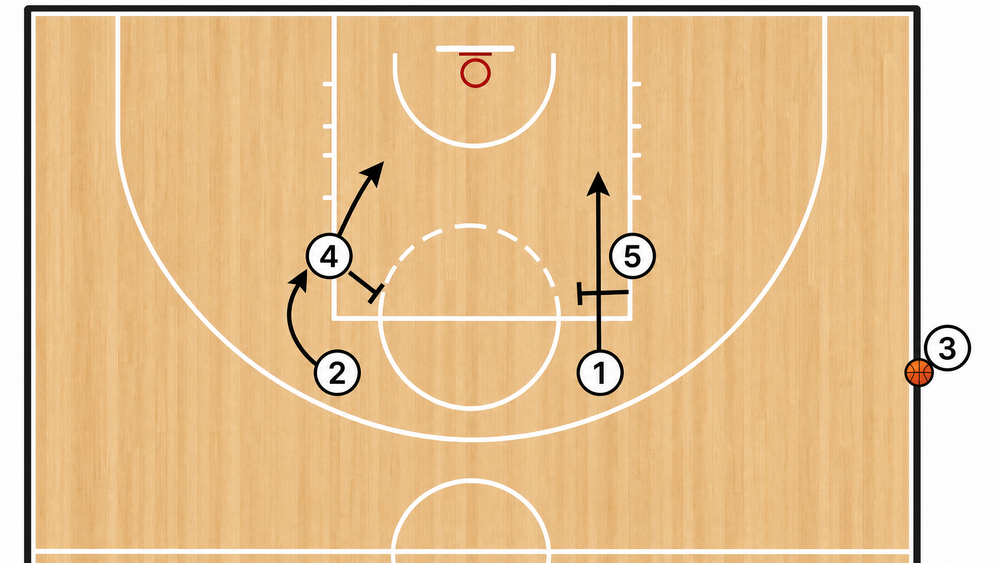
Use one ball, a whistle, five offensive players, five defenders, and four flat cones to mark the two blocks and two elbows during teaching. Start on the right sideline, with 3 standing out of bounds one metre above the extended free-throw line. Put 4 on the strong-side low block and 2 directly above 4 at the strong-side elbow. Put 5 on the weak-side low block and 1 directly above 5 at the weak-side elbow. The box should be tight: each interior player begins about 1.5 m from the nearest lane line or elbow marker, with no player standing on the three-point line.
Have 3 show both hands at chest level and scan from the rim outward. The referee’s hand or your verbal cue, “Go,” starts the action. Defenders play true man-to-man and may top-lock, trail, switch, or deny. In the first installation, tell defenders not to switch the two screens; once the timing is reliable, allow every coverage.
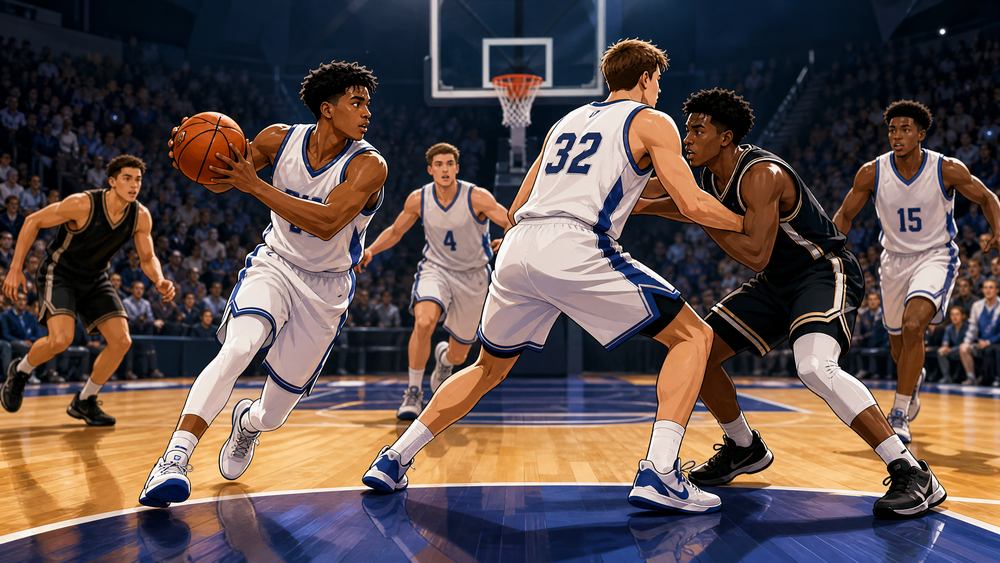
Step-by-Step Instructions
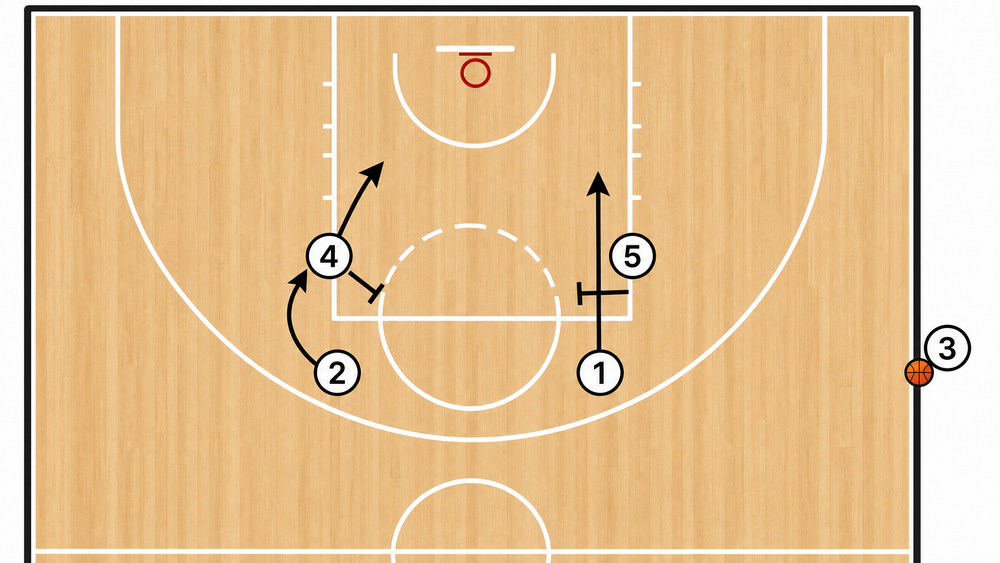
Set the picture. 3 establishes a balanced inbound stance, feet parallel to the sideline, and calls “Box.” The four on-court players show stillness for one beat. That pause is important: it prevents the defence from reading the first mover too early.
Create the back screen. On “Go,” 4 pivots toward the middle and plants a legal back screen on 2’s defender. 4’s chest faces the sideline, feet are outside shoulder width, and the screen is set just below the strong-side elbow. 4 must arrive before 2 leaves; do not allow a moving screen.
Free the safety. At the same instant, 5 steps up from the weak-side block and sets a down screen for 1 at the weak-side elbow. 1 brushes shoulder-to-shoulder off 5’s hip and drifts to the weak-side wing, approximately 6.75 m from the basket on a FIBA court. This action holds 1’s defender and removes help from the paint.
Make the scoring cut. 2 takes one hard jab toward the sideline to move their defender, then sprints shoulder-to-hip off 4’s back screen. The cut is a straight line to the front of the rim, not a loop behind the backboard. 2 shows a target hand early and must be at the restricted area by roughly the 2.0-second mark.
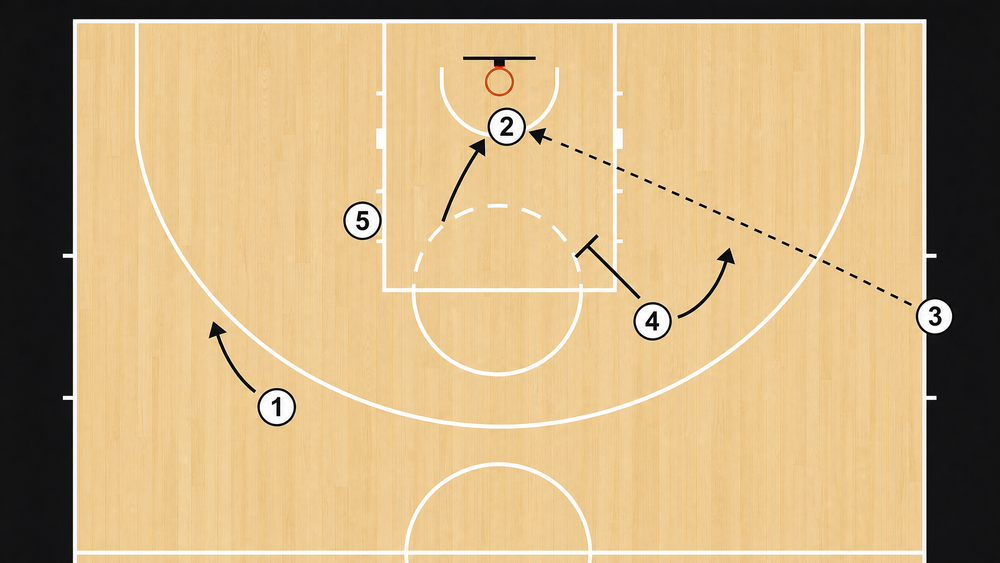
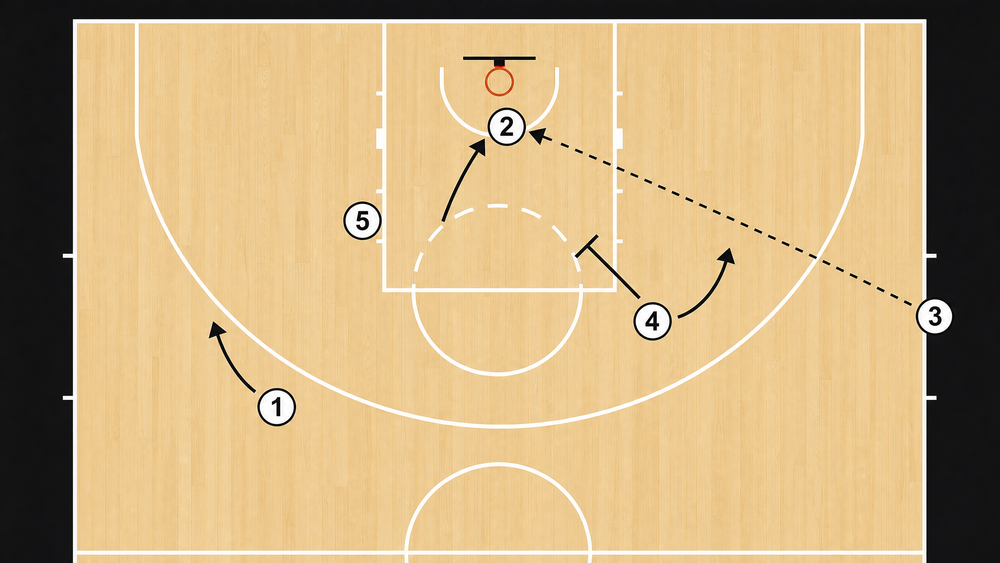
Deliver the first pass. 3 reads 2 first. If 2 has a half-step, 3 throws a firm two-hand chest pass to the outside shoulder, leading 2 away from the trailing defender. 2 catches with two feet when possible and finishes off the glass. Against a late switch, throw the pass higher, toward the near-side of the rim, so only the cutter can reach it.
Flow to the second option. As 2 clears the lane, 4 immediately opens to the ball and pops to the strong-side slot, two steps above the three-point line. 3 steps inbounds after passing, relocates one to two metres toward the strong-side corner, and becomes a return-pass shooter. 1 remains available on the weak-side wing.
Use the safety read. If the lane is crowded or 3 cannot safely hit 2, pass to 1 on the weak-side wing. 1 must meet the pass, catch facing the court, and call “Reset.” From there, enter your normal side pick-and-roll, or reverse through 4 in the slot. Do not force the rim pass through a defender’s chest.
- Finish the possession. If 2 is denied and 1 is covered, 3 uses 4’s slot position as the next read. 4 catches square, looks immediately to 3 relocating to the corner, then to 5 sealing inside. This final sequence converts a dead-ball special into a connected half-court possession rather than a desperate heave.
Key Coaching Points
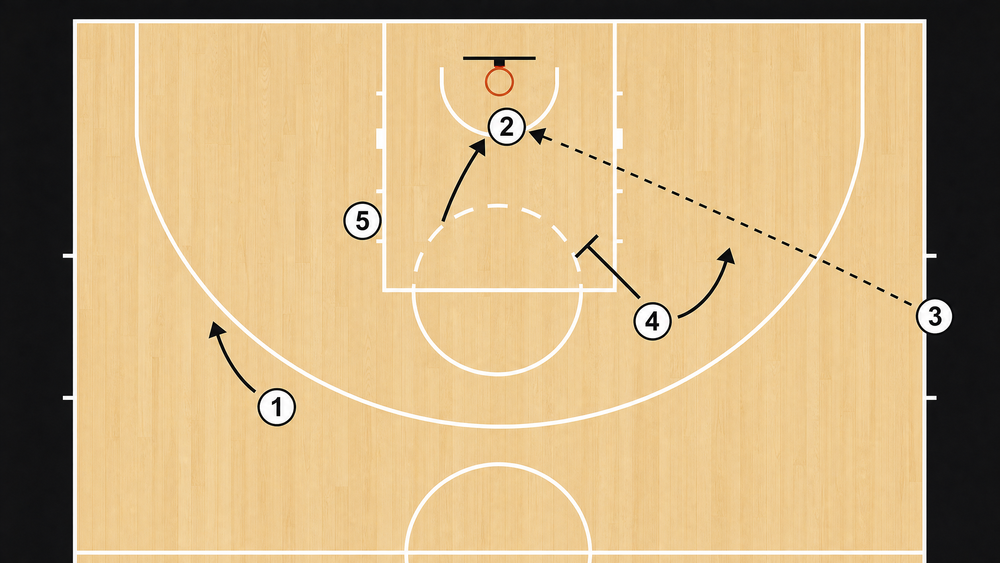
The detail that makes this work is screen angle. 4 must screen the defender’s route to the rim, not simply stand near them; take the inside shoulder away and make the defender choose between trailing under the screen or switching. Coach 2 to sell the initial jab with their eyes and shoulders, then cut at full speed. A casual jog gives the defender time to shoot the gap.
Teach 3 to use a three-read clock: 2 at the rim, 1 on the wing, 4 in the slot. The inbounder should hold the ball above the chin, use a pass fake only if it moves the defender, and release before the five-second count becomes a factor. Stress that 3 must not step onto the court until the ball has left their hands.
Demand purposeful spacing after the first pass. 1 stays wide; 4 pops high; 5 seals the most dangerous helper. If two offensive players occupy the same lane line, the defence gets an easy stunt and recover. Finally, rehearse the play in both directions. A left-sideline call reverses all strong-side and weak-side language.
Common Mistakes
| Mistake | On-court correction |
|---|---|
| 4 arrives late or leans into the defender | Freeze the rep; require 4 to be stationary before 2’s shoulder brushes the screen |
| 2 rounds the cut behind the backboard | Place a cone at the front of the rim and demand a direct sprint through it |
| 3 stares at 2 and misses the safety | Run a three-second read drill: call out 2, 1, or 4 after the ball is handed to 3 |
| 1 cuts too shallow and shrinks the floor | Mark the wing catch spot with a cone two steps outside the arc |
| Players stop after the initial inbound | Score only when the final shot follows the planned second action |
Variations & Progressions
For the switch counter, have 2 stop short and fade to the strong-side corner when the defender switches onto 4. 4 then rolls immediately into the lane, creating a high-low look for 3. Against an aggressive top-lock on 2, remove the jab and send 2 on a backdoor cut while 4 flips the screen angle toward the basket. If teams deny 1’s safety pass, have 5 step out instead of screening down; 5 becomes the middle release at the top of the key.
Progress the teaching from 5-on-0 walk-through, to 5-on-0 at game speed, to 5-on-5 with no switching, and finally to 5-on-5 where defenders can choose any legal man coverage. Award the defence a point for a five-second violation or a deflection; award the offence two points for a rim catch and one point for a clean safety catch. That scoring system makes players value execution, not merely memorising a diagram.
Age Adaptations
For Under-10, use only 1, 2, 3, and 4. Keep the basket cut and one wing safety, allow a bounce pass if needed, and begin 2.5 m wider so young players do not collide. For Under-12, introduce 5’s down screen but use cones or passive defenders first; focus on stopping under control and pivoting before passing. For Under-14, run the complete version with a 5-second count and teach the weak-side safety read. For Under-16 and open age, add switching, top-locking, and late-clock constraints, and require 3 to identify coverage verbally before the referee hands over the ball.
Practice Prescription
Install this play in an 18-minute segment. Spend four minutes on screen angles without a ball, four minutes on timing against air, six minutes on live coverage, and four minutes on special-situation scoring. End with two possessions from each sideline, placing 6 seconds on the clock. The standard is simple: create a rim catch or a controlled wing catch every time. If the first option is not clean, your team should flow into offence with poise rather than forcing the highlight pass.
