

Netball
Netball Dodging and Leading: Create Separation, Then Attack Space
A progressive three-player Netball drill that teaches attackers to sell a dodge, break into space and receive a well-timed pass under realistic defensive pressure.
What you need
1 regulation Netball per group of three, 4 flat cones per working channel, Bibs or position markers for C, WA and GD, Whistle and stopwatch, Optional spare balls for fast resets
Overview
This is a three-player dodging and leading drill that coaches the attacking actions that make a passing option reliable: take the defender off balance, change pace, re-offer on a new line and receive the ball in front of the body. Use it early in a session to sharpen footwork and timing, or in the main block when your WA, C, GA and GS are becoming predictable off the ball. It is particularly useful after a turnover-focused defensive practice, because it gives your attackers a clear response to close checking.
The drill begins in a central channel on the full 30.5 m x 15.25 m court, but its objective is not to cover court length. The objective is to teach the relationship between the feeder, the lead and the defender. A good repetition has a clear first movement, a sharp plant, a second lead into space and a pass released after separation is created. Do not accept a jog into the ball; demand an intentional change of speed and direction.
Setup
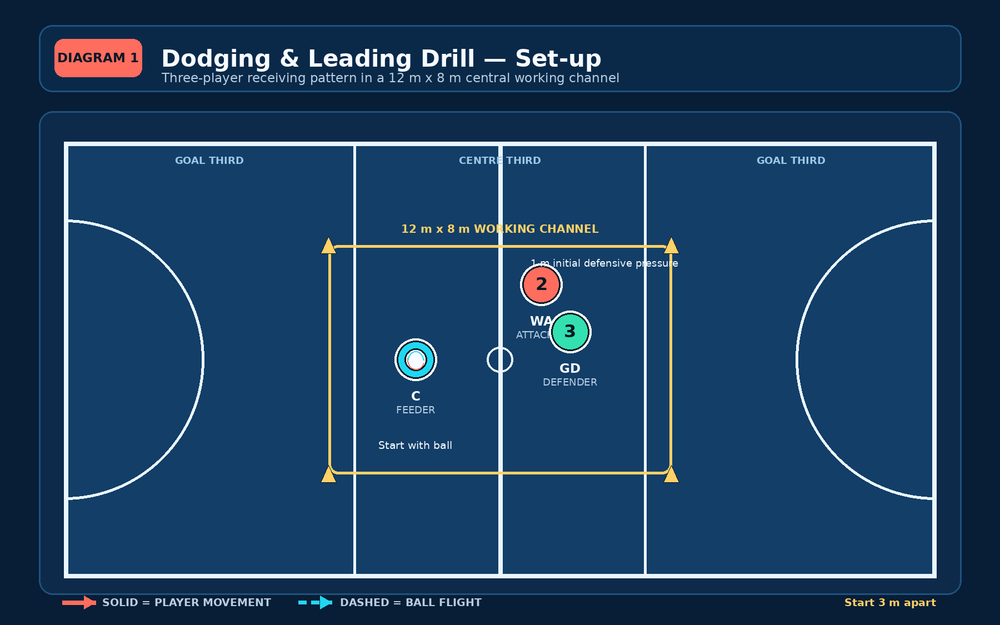
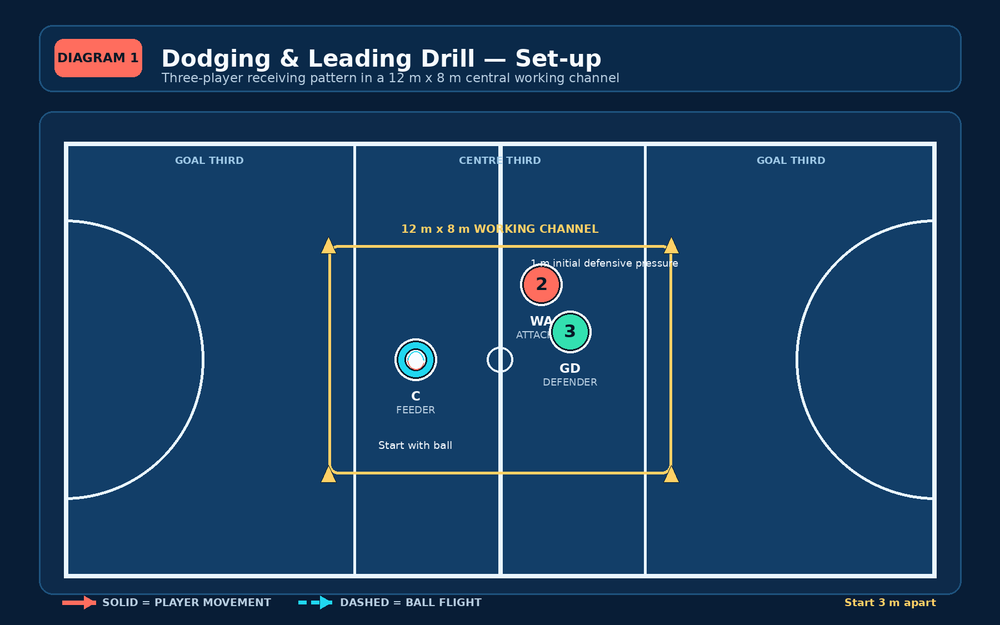
Use one third of the court for a single group, or run three identical groups across the width of a full court. Mark a 12 m x 8 m working channel that straddles the centre third. Place four cones at the corners, with the long sides running parallel to the court length. Player 1 is the C (feeder), Player 2 is the WA (attacker) and Player 3 is the GD (defender). The C begins with a ball, the WA begins roughly 3 m away, and the GD starts 1 m behind or to the side of the WA. These roles can be changed to GA versus WD or GS versus GK when the action is transferred into a goal third.
| Item | Coach set-up | Why it matters |
|---|---|---|
| Working channel | 12 m long x 8 m wide, marked with four cones | It is wide enough to reward a true change of angle but compact enough to keep the feeder's decision realistic. |
| Player 1 | C, with the ball at the back edge of the channel | The feeder practises patience, vision and a pass to space. |
| Player 2 | WA, 3 m in front of C | The attacker has room to drive at the defender before changing line. |
| Player 3 | GD, 1 m from WA | The defender provides honest pressure without grabbing or blocking the route. |
| Rotation | C to WA, WA to GD, GD to C after each completed reception | Every player experiences feeding, leading and defending. |
Give each trio one ball. Plan for 22 minutes in total: 3 minutes to explain and walk it through, 6 minutes of unopposed rehearsal, 8 minutes under active defence, and 5 minutes for the progression challenge. In a larger squad, create three channels and appoint a player in each group to count quality completions.
Step-by-Step Instructions
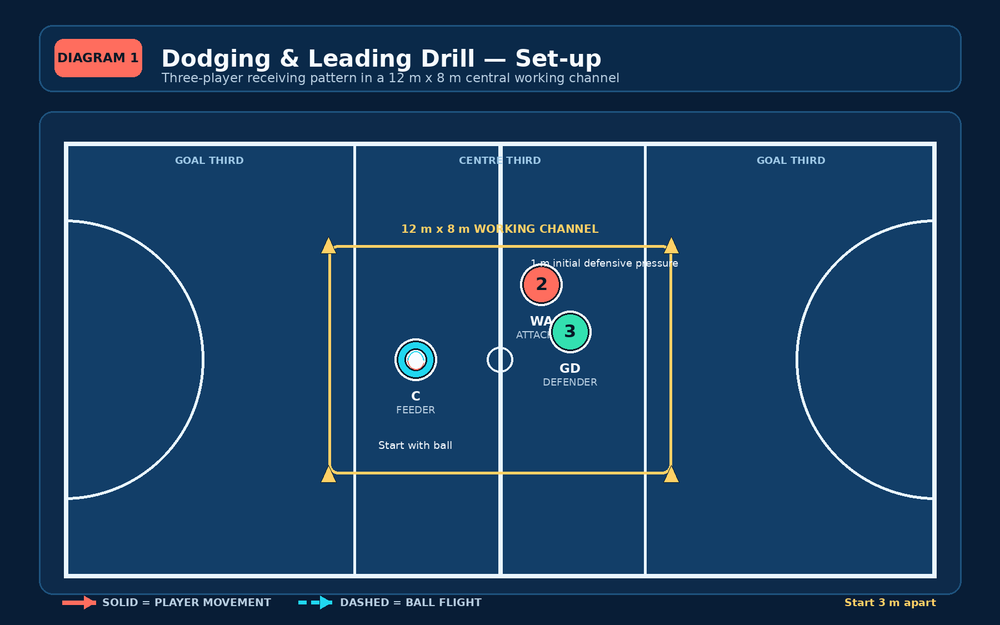
Set the picture. The C stands side-on with the ball at chest height and eyes up. The WA adopts an athletic stance in front of the C; the GD applies pressure from a legal 1 m starting distance. On your call, the WA must make the first movement before the C passes.
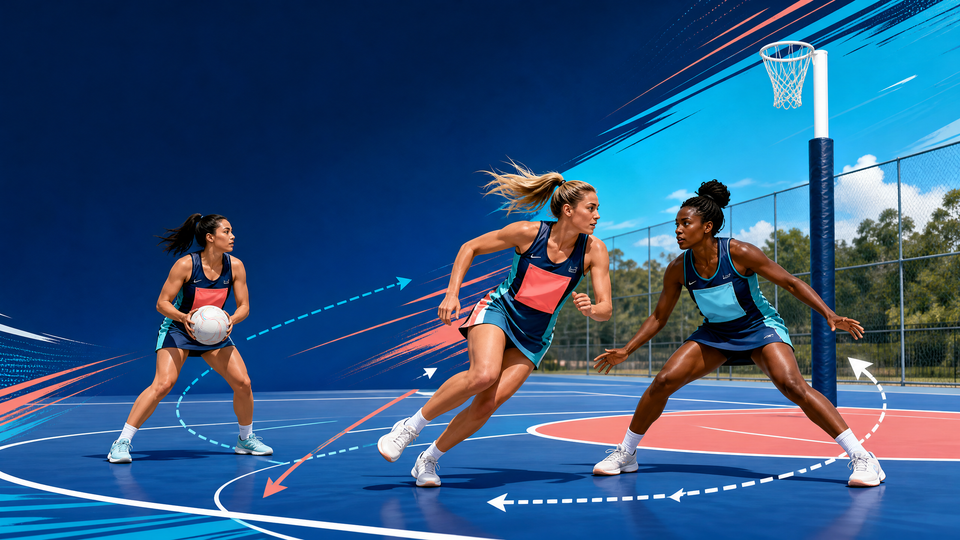
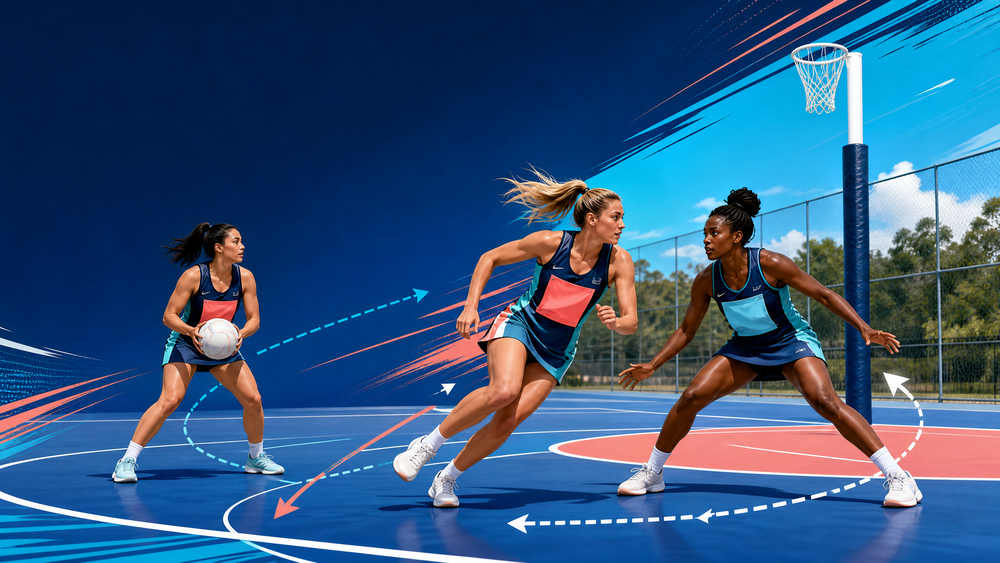
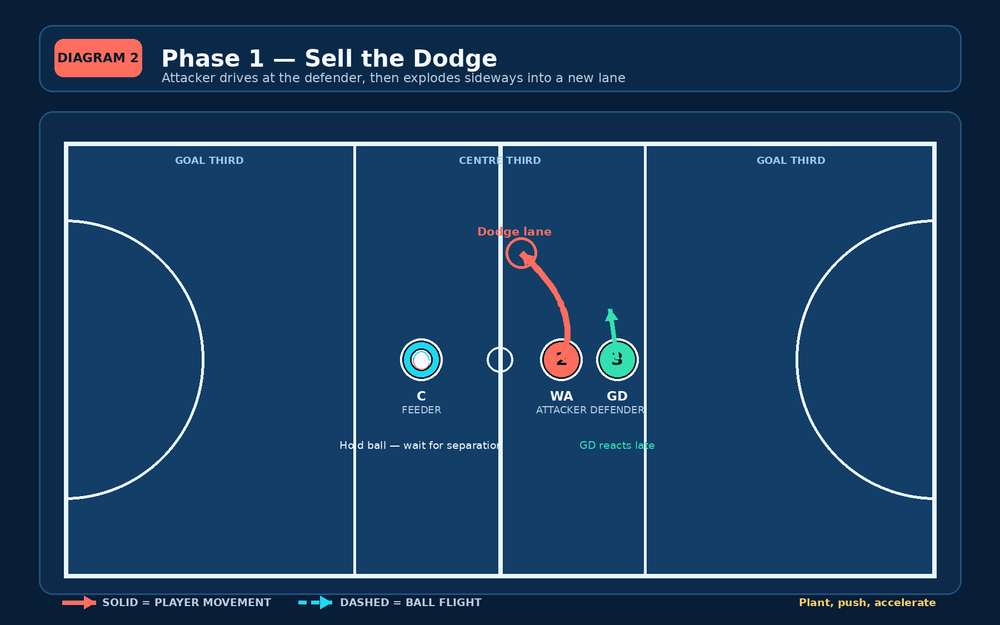
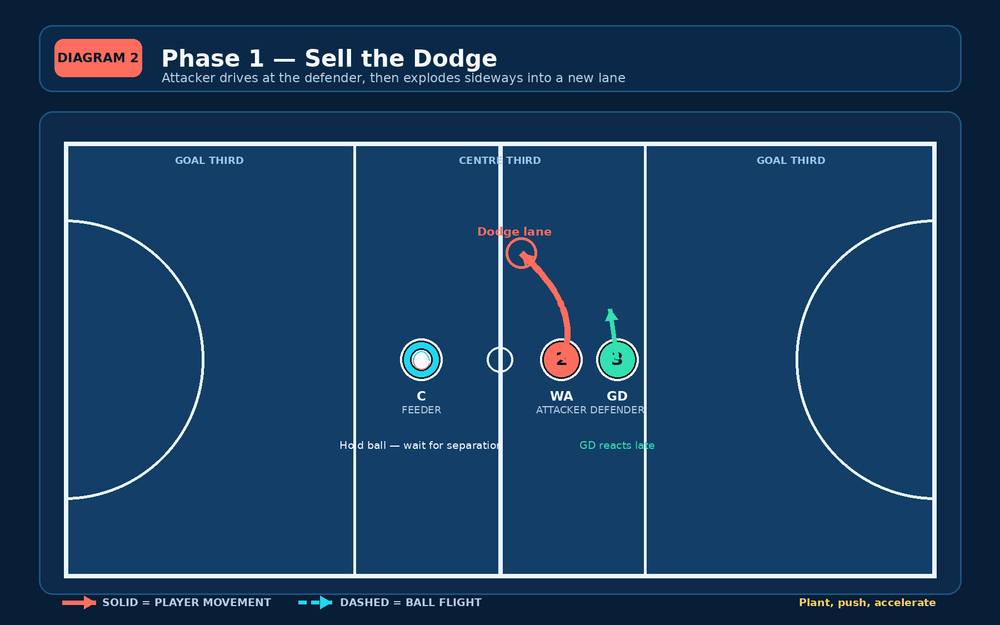
Drive at the defender. The WA takes two purposeful steps toward the GD or slightly across the defender's front. This is the sell. Coach the attacker to lower the hips, keep the chest stable and use the eyes to suggest the first line is genuine. The C holds the ball and watches the defender's response.
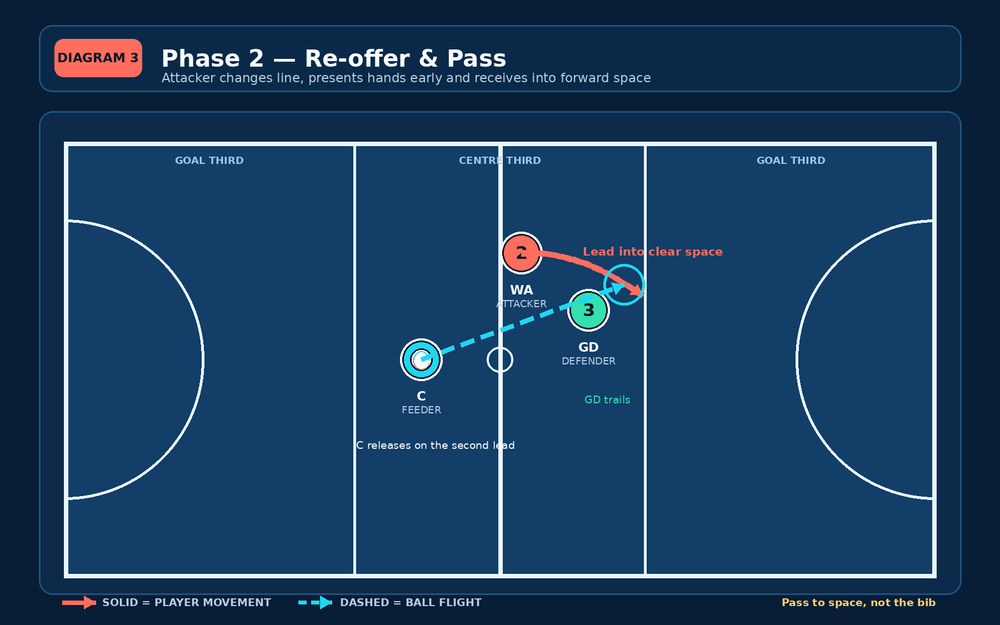
Plant and dodge. On the third step, the WA plants the outside foot, loads that leg and pushes sharply into a different lane. The target is a 2–3 m lateral or diagonal escape, not a curved jog around the defender. The GD should turn and recover rather than simply allowing the attacker through.
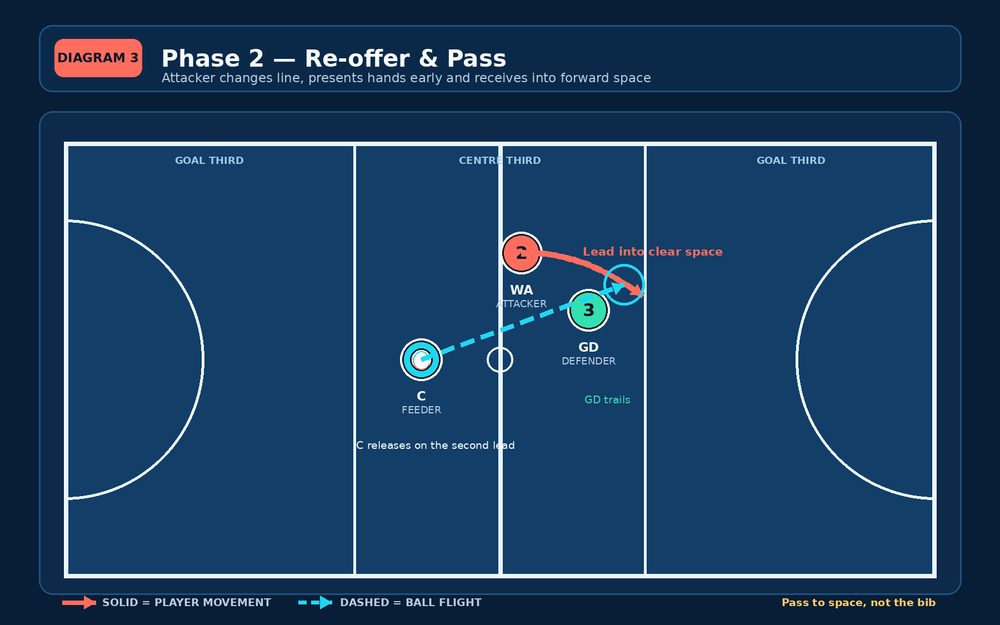
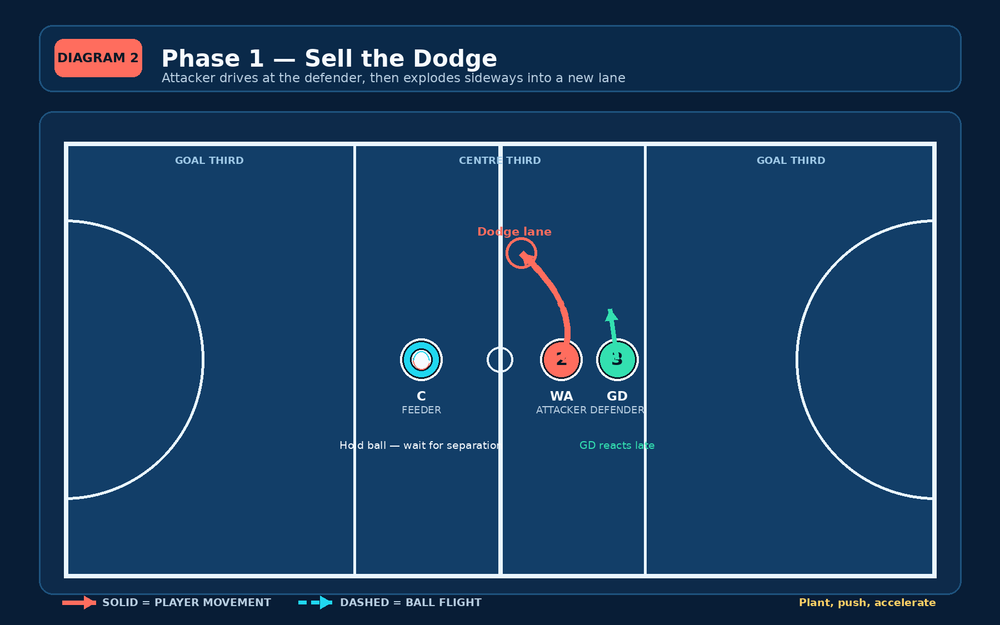
Re-offer immediately. Once the GD has reacted, the WA makes a second lead forward into the clear space. The attacker shows both hands early, turns the outside shoulder toward the ball and calls the feeder's name. The C stays balanced, adjusts the feet if needed, and releases only when the WA is moving into a passing window.
Pass to the run. The C delivers a flat, catchable chest pass to the space in front of the WA—not to the attacker’s starting position and not behind the lead. The WA lands under control, secures the ball and holds a strong pivot. Count one quality repetition only when the receiver catches cleanly with the GD trailing, not level.
Reset and rotate. The WA returns the ball to the C, then all three players rotate roles clockwise. Run six repetitions each before switching the direction of the first dodge. Alternate the side so players learn to plant and push from both feet.
Key Coaching Points
| Focus | What to coach | Coach cue |
|---|---|---|
| First movement | Make the defender believe the first line before changing it. | Sell it, then go. |
| Footwork | Plant on the outside foot with a low hip and a strong push. | Load the leg; win the first two steps. |
| Change of pace | The dodge is ineffective without an acceleration after the plant. | Slow-to-fast, not fast-to-slow. |
| Re-offer | Give the feeder a second, clear target instead of stopping after the dodge. | Dodge, then lead again. |
| Hands and body line | Present hands early and receive in front of the body with the outside shoulder open. | Show hands; catch forward. |
| Feeder timing | Hold the ball until the defender reacts, then pass into space. | Pass to where she is going. |
Stand where you can see the relationship between the attacker and defender side-on. That angle tells you whether the attacker created separation or merely ran away. Correct one thing at a time. For example, spend one block on the plant foot, then another on the feeder’s release point; over-coaching all six details in a single set will slow the drill and reduce repetition quality.
Common Mistakes
The first frequent error is an attacker who starts moving before committing the defender. Correct it by asking the WA to take two deliberate steps toward the defender before the escape. The second is a rounded, drifting dodge. Place a flat marker 2 m to the side of the WA and require the attacker to hit that lane within two steps after the plant.
A third error is the C passing on the first movement. Freeze the group and ask, ‘Has the defender moved yet?’ If not, the ball stays. The fourth is a pass delivered at the attacker’s current location. Remind the feeder that a moving player needs the ball ahead of the line of travel. Finally, watch for the WA stopping to receive. Demand that the receiver travels through the catch, lands balanced and can immediately choose a safe pivot.
Variations & Progressions
Start with a shadow-defence variation for early learning. The GD tracks the WA at 60 percent effort and does not attempt an intercept. This lets the feeder identify the second lead and lets the attacker rehearse the plant without fear of a turnover.
Progress to live intercept defence. The GD may hunt the ball after the WA’s first dodge, while the C is allowed a maximum three-second hold. This adds urgency and makes the feeder judge whether the passing lane is genuinely open. Score one point for every clean reception, one point for a defender deflection and reset immediately; the first trio to eight wins.
For an advanced progression, add a fourth player as a support C or GA 4 m beyond the channel. If the GD blocks the first re-offer, the feeder must use the support player and the WA must make a third lead to receive the return. This mirrors a real midcourt release where the first option is closed and the attack must keep moving.
Age Adaptations
| Age group | Adaptation | Coaching priority |
|---|---|---|
| Under 8–10 | Use a 8 m x 6 m channel, remove live defence and let the attacker take a clear stop before the second lead. | Safe landing, pivoting and looking for the ball. |
| Under 11–12 | Use the standard 12 m x 8 m channel with shadow defence, then short live-defence blocks. | Plant foot, change of pace and hands presented early. |
| Under 13–14 | Keep live defence and introduce the three-second decision challenge for the feeder. | Timing the pass and attacking the defender’s blind side. |
| Under 16 and Open | Add the support player, narrow the channel to 10 m, and reward intercept attempts. | Reading body shape, double movement and passing under pressure. |
Finish by asking players to name the moment when the ball should be released. The answer you want is not ‘when the WA moves’; it is when the WA has created a new lane and is accelerating into space. That shared language will transfer directly to centre passes, circle-edge feeds and transitional attack.
