

Football
Three-Lane Penalty-Box Movement Play for Crosses
Teach your front line to arrive on different lines and attack the near post, far post and cutback zone from one repeatable wide-cross pattern.
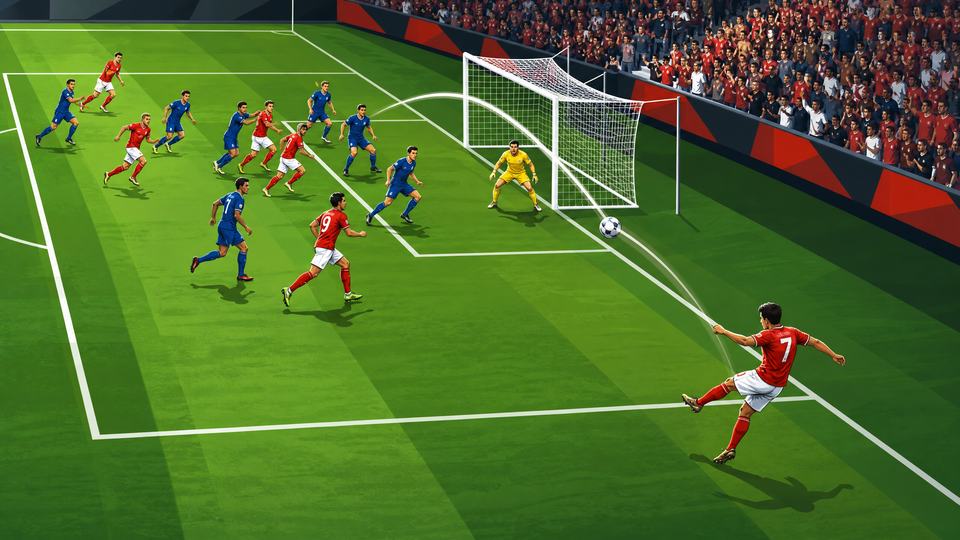
What you need
footballs, full-size goal, cones, bibs, mannequins or poles, mini-goals or target gates, whistle
Overview
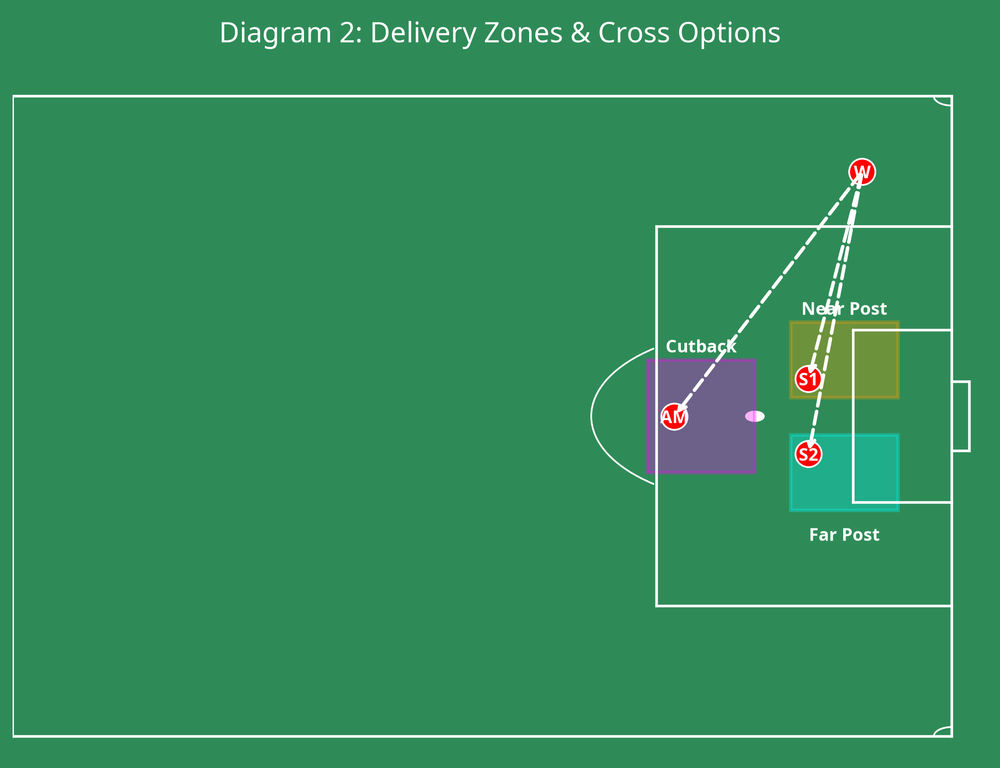
This is a repeatable three-lane crossing pattern that gives the crosser three clear targets and prevents your attackers from arriving on the same line. It is designed for the moment your wide player has secured the ball in the final third and can deliver from the outer channel. The first runner attacks the near-post corridor, the second runner arrives at the far post, and the attacking midfielder holds the cutback zone around the penalty spot. The movement is coordinated, not improvised: the runners begin from different depths, delay until the wide player is balanced, then accelerate as the delivery starts.
Use the play in an 11v11 game on a 105 x 68 m pitch, or rehearse it in a 52.5 x 44 m attacking-half area. The aim is to produce a clean first contact, a second-ball option, and immediate counter-pressing security. The player making the near-post run is the primary target; the far-post runner and the number 10 are live options if the goalkeeper or centre-backs close that lane.
Setup
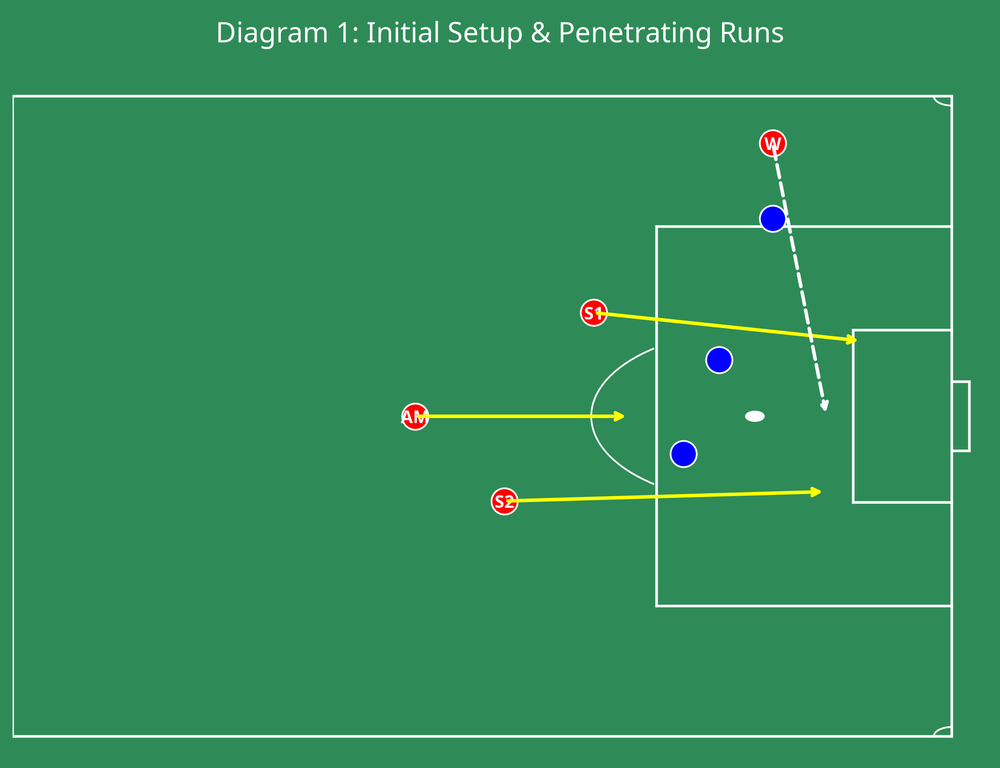
Mark out the attacking half of a 105 x 68 m pitch. Use the full penalty area, goal and a 12 m wide channel along one touchline. Place a cone 6 m outside the corner of the penalty area to establish the winger's crossing line. The ball starts with the 7/11 (right or left winger) near that cone. Position the 9 about 3 m outside the box and 5 m inside the near-post side of the central lane; position the opposite winger, 11/7, 2 m beyond the far-post lane and outside the box; position the 10 4–6 m behind the penalty spot. Add two centre-backs, a goalkeeper and, when ready, a recovering full-back.
| Role | Starting reference | Primary job |
|---|---|---|
| 7 or 11 (crosser) | 6–10 m from the byline in the wide channel | Assess the runners and deliver with disguise |
| 9 (near-post runner) | 3 m outside the box, near-side central lane | Curve across the first defender and attack the front post |
| 11 or 7 (far-post runner) | Outside the far-post lane, 2 m beyond the box | Arrive late for a driven or lofted far-post finish |
| 10 (cutback runner) | 4–6 m behind the penalty spot | Hold for the pull-back and strike or recycle |
| 6 (rest defence) | Central support, 8–10 m outside the box | Protect against clearance and keep the attack alive |

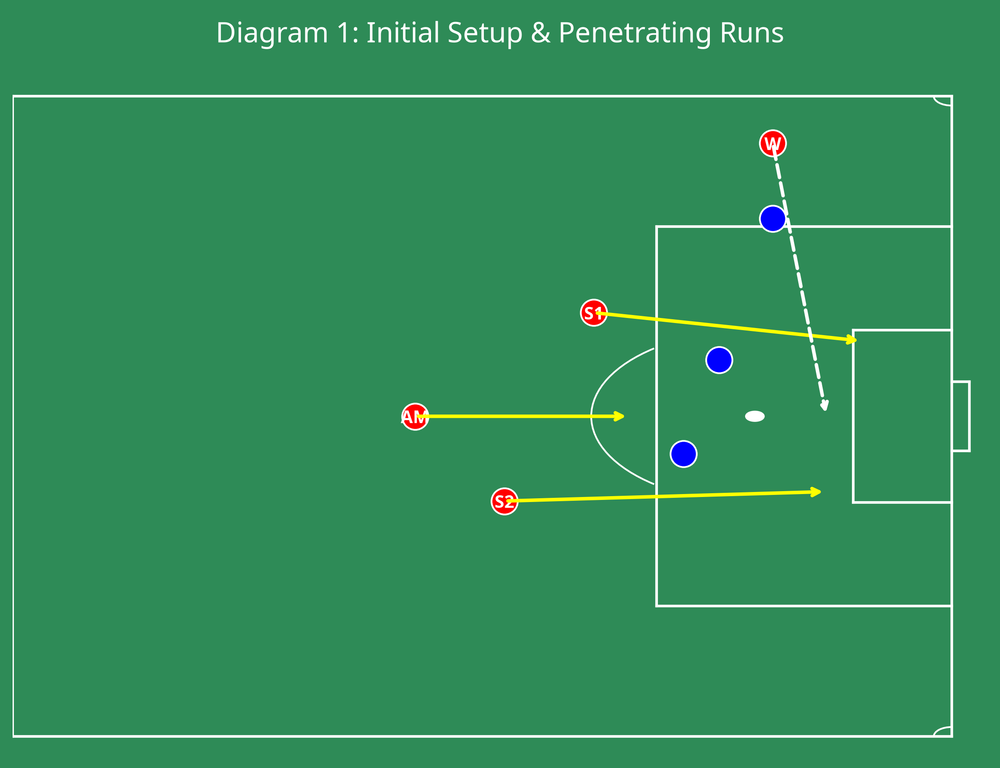
Diagram key: red circles are attackers, blue circles are defenders; solid yellow arrows show player movement and dashed white arrows show the ball path.
Step-by-Step Instructions

Create the wide trigger. The winger receives facing forward in the 12 m channel. The supporting full-back may overlap to fix the opposing full-back, but the play starts only when the winger has a positive first touch or a teammate plays a pass into their path.
Set the starting picture. The 9, far-post runner and 10 must begin on separate vertical lines. Demand at least 4 m between each attacker. If they are flat, the defensive line can mark all three with one step.
Use the crosser's second touch as the cue. When the winger takes the touch that prepares the cross, the 9 makes a curved, explosive run from outside to inside. The curve should take the 9 across the nearest centre-back and into the space between the near post and the six-yard-line corner. The runner must not leave before the crosser can see their movement.
Delay the far-post run. As the 9 goes, the far-post runner checks away from goal for one short step, then accelerates behind the far-side defender. Their arrival point is 1–2 m inside the far post, not on the goalkeeper's line. This delay creates separation and keeps the player onside.
Hold the cutback pocket. The 10 stays balanced around the penalty spot, slightly open to the ball. If both centre-backs follow the 9 and far-post runner, the 10 becomes the free finisher. If the cross is cleared, the 10 plays the next pass quickly or strikes first time.
Deliver to the read, not a pre-called spot. If the near-post defender is square or the goalkeeper is set deep, the winger drives a ball through the front-post corridor. If the back line collapses towards the 9, clip or drive the cross to the far post. If the full-back blocks the line of delivery, pull the ball back along the ground into the 10's zone.
Finish and react. Attack every cross with a finish inside two touches. The 6 and the ball-side full-back lock onto likely clearance routes immediately. If the goalkeeper catches or the defence clears cleanly, reset the starting positions rather than allowing a loose, uncoached second phase.
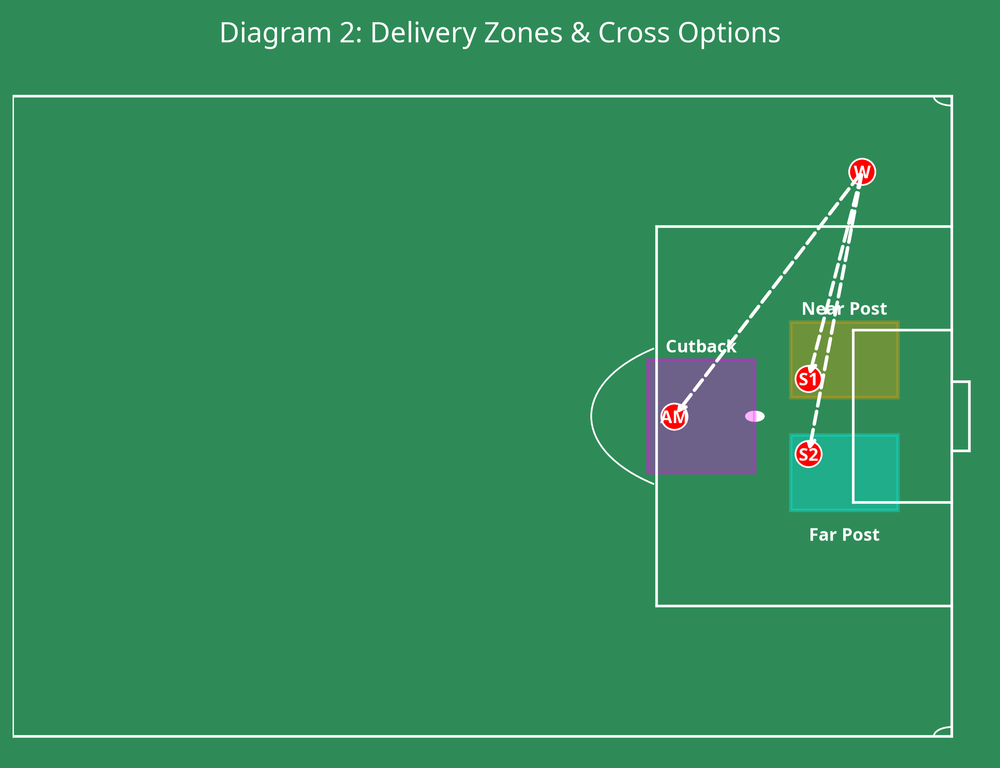
Delivery Zones
| Delivery | Target zone | Finish detail |
|---|---|---|
| Driven near-post cross | 1–3 m in front of the near post | 9 redirects across goal or finishes first time |
| Far-post cross | 1–2 m inside the far post | Far-post runner attacks down and across the goalkeeper |
| Cutback | Penalty spot to the top of the six-yard box | 10 meets the ball with an open body and first-time strike |
Key Coaching Points
First, coach different depths and different speeds. The 9 runs early enough to threaten but not so early that the centre-back simply tracks a straight line. The far-post runner arrives late, while the 10 holds their ground until the ball is released. This stagger makes the goalkeeper and defenders solve three problems at once.
Second, insist that attackers move across defenders, not around them. A curved run across the defender's eyeline forces a decision and creates a finishing angle. The 9 should arrive side-on, with the chest and hips facing the goal rather than the touchline.
Third, coach the winger's final action. A quality cross is a decision made after scanning, not a hopeful delivery. Demand head up before the strike, a ball speed that matches the target's movement, and a delivery line that avoids the first defender. For a cutback, the ball should travel behind the defensive line and in front of the 10.
Fourth, make the finishing language simple: attack, meet, direct. Attack the space with intent, meet the ball at its highest or earliest playable point, and direct it away from the goalkeeper. Do not accept runners waiting under the ball.
Finally, coach the reaction. The two nearest non-finishers hunt rebounds for three seconds; the 6 protects the central exit lane. Good crossing play is not complete at first contact.
Common Mistakes
The most common error is all three attackers beginning their run when the winger receives. Correct it by freezing the picture and making the winger's preparation touch the only trigger. A second error is the 9 running straight at goal, which allows the defender to track comfortably. Rehearse the curved run around a mannequin or cone, then add a live defender.
Coaches should also correct crosses that are struck before the runner has separated, and cutbacks played behind the number 10. Ask the winger to take one extra touch when space permits and call the target only after scanning. Finally, avoid abandoning rest defence: if the 6 chases the cross, the team is exposed to the first clearance.
Variations & Progressions
For an easier progression, work unopposed with the winger calling the intended target before the first touch. This lets players learn the timing, shape and finish without defensive pressure. Then add passive defenders who can shadow but not intercept.
For a more game-real progression, play 6v5 plus a goalkeeper in the attacking half. Award two points for a goal from the far-post or cutback runner and one point for a near-post finish. The defenders score by clearing to a target gate at midfield; this rewards your 6 for protecting the second ball.
For an advanced variation, add an underlapping 8. If the opposition full-back blocks the winger's outside route, the 8 receives inside and delivers the same three-lane pattern from the half-space. Keep the movement rules identical so players recognise the picture rather than memorising a single flank pattern.
Age Adaptations
For Under-8 and Under-10, use a 30 x 24 m box with small goals, no offside and only two attacking lanes: a near-post runner and a cutback player. Use soft, low crosses and praise arriving in space rather than demanding complex finishing.
For Under-12 and Under-14, introduce the full three-lane picture in a 44 x 36 m area. Begin with one defender and a goalkeeper, then progress to two defenders. Teach the offside line by using a flat cone line 5 m from goal and asking the far-post runner to delay.
For Under-16 and open age, train it at match speed on the full 105 x 68 m pitch with live transitions. Require the crosser to read the goalkeeper's starting position and the 9 to choose between a near-post touch, dummy or screen. Video the phase where possible and review whether the runners were separated at the exact moment of delivery.
